
To make close-up portraits pop on your phone, focus on lighting, composition, and technique. Use soft, diffused light to enhance skin tones, and position subjects near windows or in open shade. Apply the rule of thirds for framing, and tap on the subject's eyes for sharp focus. Choose simple backgrounds or blur them using portrait mode to make your subject stand out. Experiment with angles and side-profile shots for dynamic perspectives. Capture authentic expressions by creating a comfortable atmosphere. Don't forget to enhance skin tones and edit carefully for a polished look. These tips are just the beginning of your journey to stunning smartphone portraits.
Lighting Techniques for Smartphone Portraits
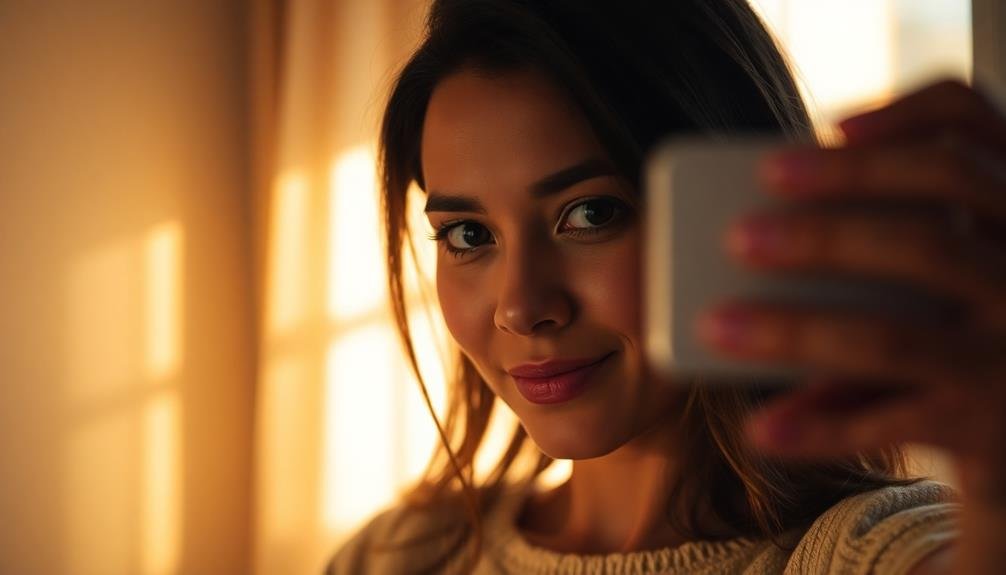
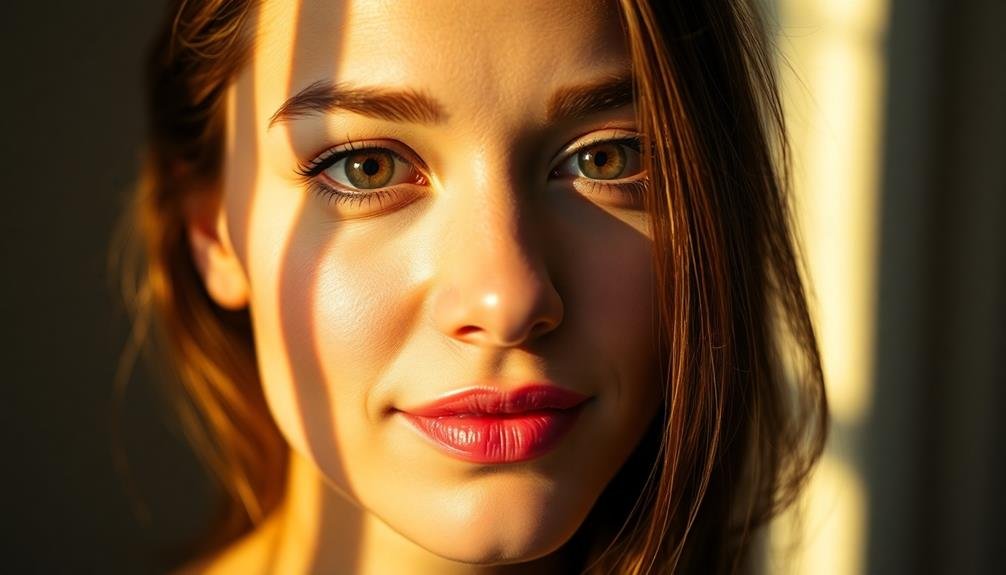
When shooting close-up portraits on your smartphone, lighting can make or break your image. To achieve stunning results, start by finding soft, diffused light. Natural light from a window or outdoors on an overcast day works wonders.
Position your subject facing the light source to illuminate their features evenly. Avoid harsh midday sun, which creates unflattering shadows. Instead, opt for the golden hour just after sunrise or before sunset for a warm, flattering glow.
If you're indoors, use a white reflector or bounce card to fill in shadows and add a catchlight to the eyes. For more dramatic portraits, experiment with side lighting to create depth and dimension.
You can also try backlighting for an ethereal effect, but be sure to expose for the face to avoid silhouettes. Don't forget about your phone's built-in flash. While it's often harsh, you can soften it by covering it with a piece of tissue paper or using a small diffuser attachment.
Alternatively, invest in a portable LED light panel for more control over your lighting setup.
Composition Rules for Close-Up Shots
How can you make your close-up portraits truly stand out? Master these composition rules for eye-catching results.
First, embrace the rule of thirds. Imagine your screen divided into a 3×3 grid and place your subject's eyes along these lines for a balanced shot. Don't center your subject; instead, position them slightly off-center to create visual interest.
Focus on the eyes. They're the windows to the soul and should be sharp and clear. Place the focus point on the eye closest to the camera for maximum impact.
Experiment with negative space to draw attention to your subject. Leave room around them to create a sense of context and depth.
Consider your background carefully. A simple, uncluttered backdrop will keep the focus on your subject. If possible, use a shallow depth of field to blur the background, making your subject pop.
Play with angles to add dynamism to your shots. Shoot from slightly above or below eye level for unique perspectives.
Lastly, pay attention to leading lines. Use natural lines in the environment to guide the viewer's eye toward your subject, creating a more engaging composition.
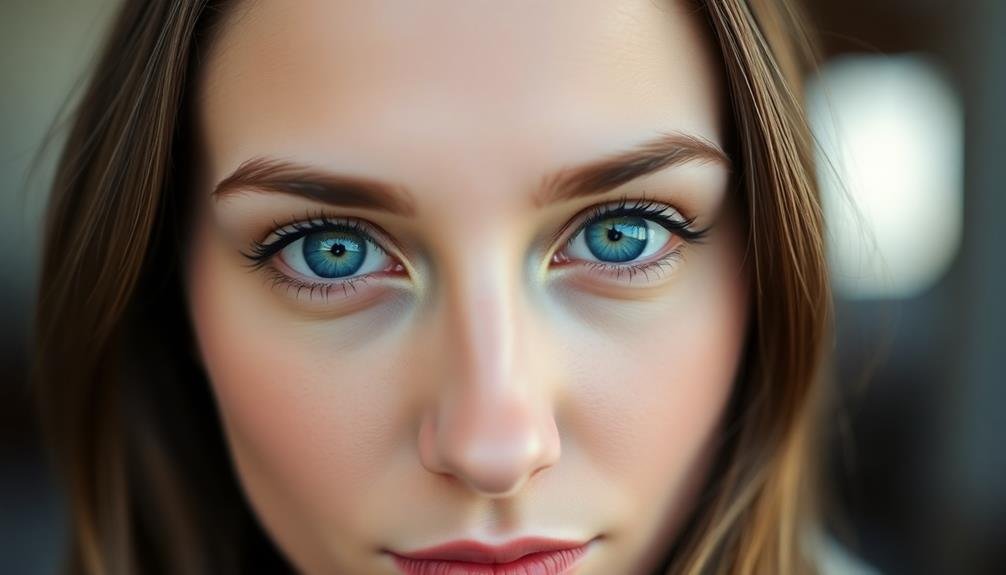
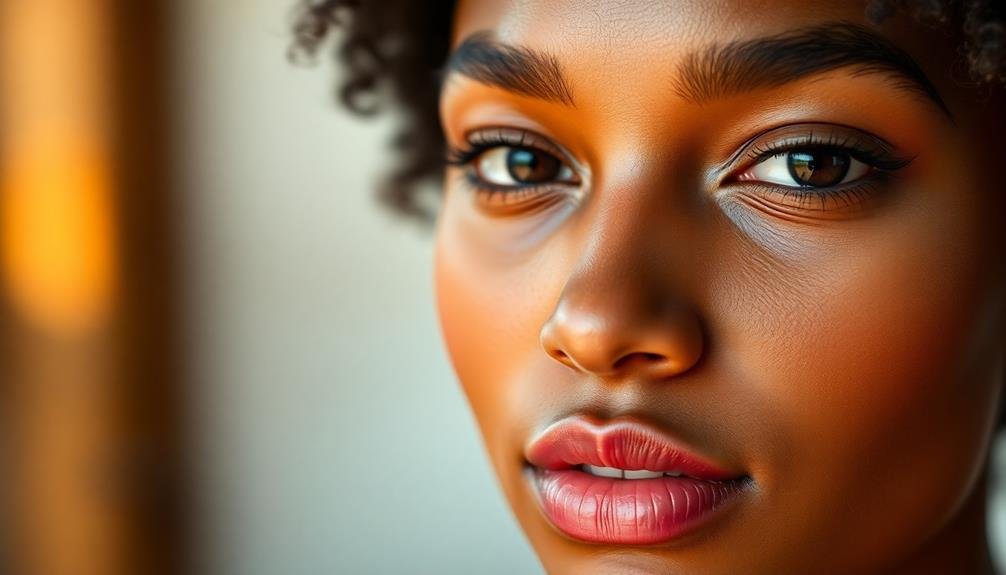
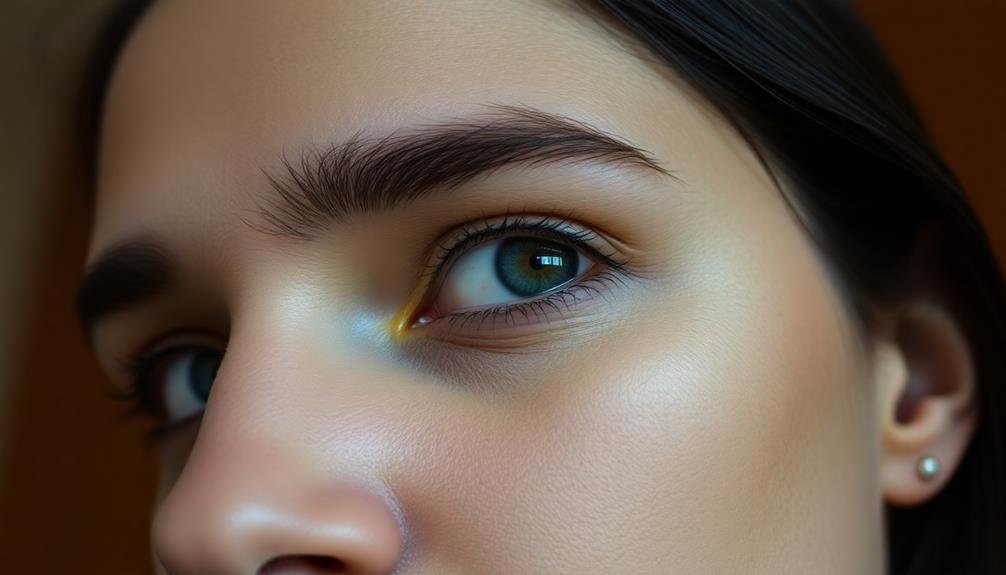
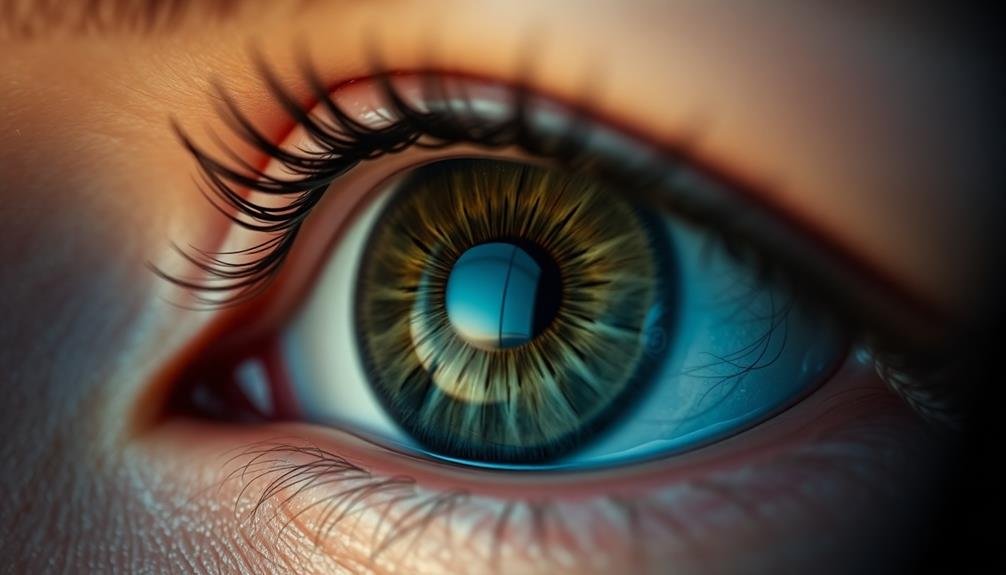
Focusing on the Eyes
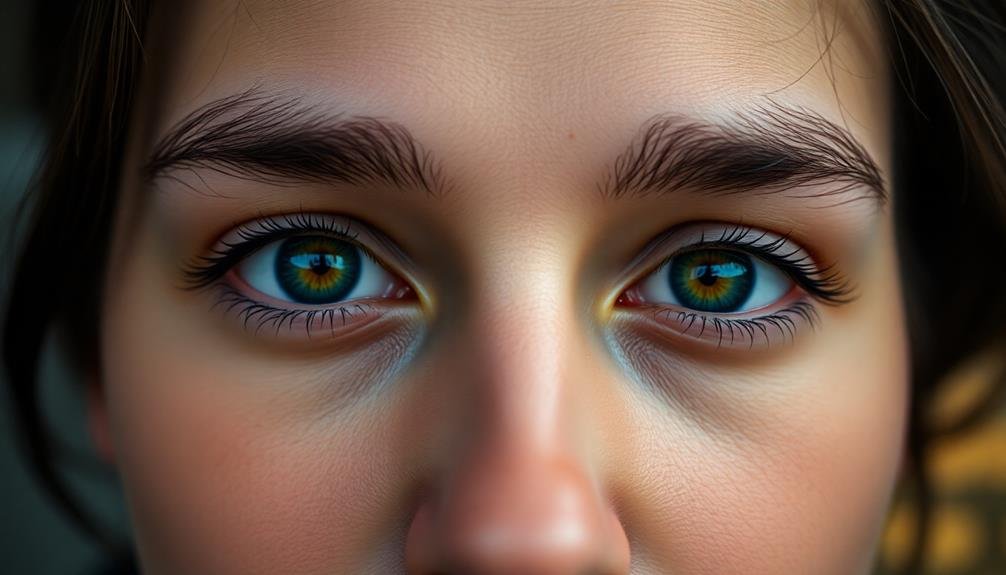
The eyes are the focal point of any close-up portrait, and mastering their capture will elevate your photography. When shooting with your phone, tap on the subject's eyes on your screen to set the focus point. This guarantees the eyes remain sharp and clear, drawing the viewer's attention.
For single-subject portraits, aim to focus on the eye closest to the camera. In group shots, try to position subjects so their eyes are on the same plane, making it easier to keep everyone in focus. If your phone has a manual focus option, use it for precise control.
Pay attention to catchlights – the small reflections in the eyes that add life to the portrait. Position your subject near a light source or use a reflector to create these highlights. Avoid using your phone's flash, as it can create harsh shadows and red-eye effects.
When editing, enhance the eyes by slightly increasing their sharpness and brightness. Be careful not to overdo it, as this can look unnatural.
Choosing the Right Background
When selecting a background for your close-up portrait, consider using contrasting colors to make your subject stand out.
You'll want to blur the background to keep the focus on your subject, which you can achieve by adjusting your phone's aperture settings or using portrait mode.
Contrasting Colors Matter
Your subject's background can make or break a close-up portrait. When it comes to creating visually striking images, contrasting colors play an essential role. You'll want to choose a background that complements your subject's skin tone, hair color, and clothing while providing enough contrast to make them stand out.
Consider using the color wheel to find complementary colors that will create a dynamic visual impact. For example, if your subject is wearing warm tones, opt for a cooler background color to create tension and interest.
Pay attention to the intensity of colors as well; a vibrant background can overwhelm your subject, while a muted one mightn't provide enough contrast.
Don't be afraid to experiment with different color combinations. You can use solid-colored backgrounds or even natural settings that offer contrasting hues.
Remember that lighting can greatly affect how colors appear in your photos, so adjust your camera settings or use editing tools to fine-tune the contrast. By mastering the art of color contrast, you'll elevate your close-up portraits from ordinary to extraordinary, making them truly pop on your phone screen.
Blur for Focus
While color contrast can make your subject pop, background blur takes your close-up portraits to the next level. This technique, also known as bokeh, helps isolate your subject and create a more professional-looking image. Most modern smartphones offer a portrait mode that automatically blurs the background, but you can also achieve this effect manually.
To maximize the blur effect, choose a background that's further away from your subject. The greater the distance between your subject and the background, the more pronounced the blur will be. Opt for simple, uncluttered backgrounds to avoid distracting elements. Solid-colored walls, foliage, or distant landscapes work well.
When using portrait mode, verify your subject is within the recommended distance from your phone. This varies by device but is typically 2-8 feet. Experiment with different angles and distances to find the sweet spot for ideal blur.
If your phone allows it, adjust the blur intensity to suit your preferences. Remember, the goal is to draw attention to your subject, not to create an overly artificial look.
With practice, you'll master the art of using blur to create stunning close-up portraits on your phone.
Simplicity Enhances Subject
A simple background can make all the difference in close-up portrait photography. When you're shooting with your phone, it's essential to choose a background that doesn't compete with your subject. Look for clean, uncluttered spaces that won't distract from your subject's features. Solid-colored walls, plain fabric backdrops, or even a clear sky can work wonders.
Pay attention to the colors in your background. Opt for neutral tones or complementary hues that enhance your subject's skin tone and clothing. If you're outdoors, position your subject in front of a distant, out-of-focus backdrop like trees or buildings. This creates depth and separation.
Don't be afraid to move around and experiment with different angles. Sometimes, shifting a few steps to the left or right can dramatically improve your composition.
If you can't find a suitable background, try using portrait mode to blur the surroundings artificially.
Utilizing Portrait Mode Features

Portrait mode features have revolutionized smartphone photography, allowing users to capture stunning close-up shots with a professional-looking depth effect. These features use advanced algorithms and multiple camera lenses to separate the subject from the background, creating a shallow depth of field that draws attention to your subject.
To make the most of portrait mode, follow these tips:
- Position your subject 2-8 feet away from the camera.
- Verify there's adequate lighting on your subject's face.
- Experiment with different background distances for varied blur effects.
When using portrait mode, you'll often see on-screen guides to help you frame your shot perfectly. Pay attention to these prompts, as they'll confirm you're at the ideal distance for the best results.
Many phones also offer additional portrait lighting effects, allowing you to simulate studio lighting conditions. Don't be afraid to try different options to find the look that best suits your subject.
Enhancing Skin Tones
When capturing close-up portraits on your phone, enhancing skin tones is essential for a flattering result.
You'll want to pay attention to the white balance settings, adjusting them to accurately represent the subject's natural skin color.
Additionally, fine-tuning the color temperature can help you achieve warmer or cooler skin tones, depending on the desired effect.
Adjusting White Balance
Have you ever wondered why some portraits look more natural and flattering than others? The secret often lies in properly adjusting the white balance.
White balance guarantees that colors in your photo appear as they do in real life, particularly vital for skin tones in close-up portraits.
To adjust white balance on your phone, you'll need to familiarize yourself with your camera app's settings. Most smartphones offer preset white balance options like daylight, cloudy, or tungsten.
Experiment with these to find the most accurate color representation for your lighting conditions.
For more precise control, consider using a manual white balance feature if your phone offers it.
Here's a quick guide:
- Use a white or gray card as a reference point
- Place the card in the same light as your subject
- Select the manual white balance option and focus on the card
Color Temperature Tweaks
Once you've set the white balance, fine-tuning color temperature can take your close-up portraits to the next level.
Color temperature adjustments allow you to enhance skin tones and create a more flattering appearance for your subject. Most smartphone cameras offer this feature in their advanced settings or through third-party apps.
To warm up skin tones, slightly increase the color temperature. This adds a golden hue that can make your subject appear healthier and more vibrant. For a cooler look, decrease the temperature to introduce subtle blue tones.
Be careful not to overdo it, as extreme adjustments can make skin appear unnatural. Experiment with small increments, typically in the range of 100-200 Kelvin.
Pay attention to how these changes affect other elements in your frame, such as clothing or background. You'll want to strike a balance that enhances the subject's skin without compromising the overall image quality.
For portraits of people with different skin tones, you may need to adjust your approach. Darker skin often benefits from slightly warmer tones, while fairer skin might look best with cooler temperatures.
Always consider the individual's unique complexion and the lighting conditions when making these tweaks.
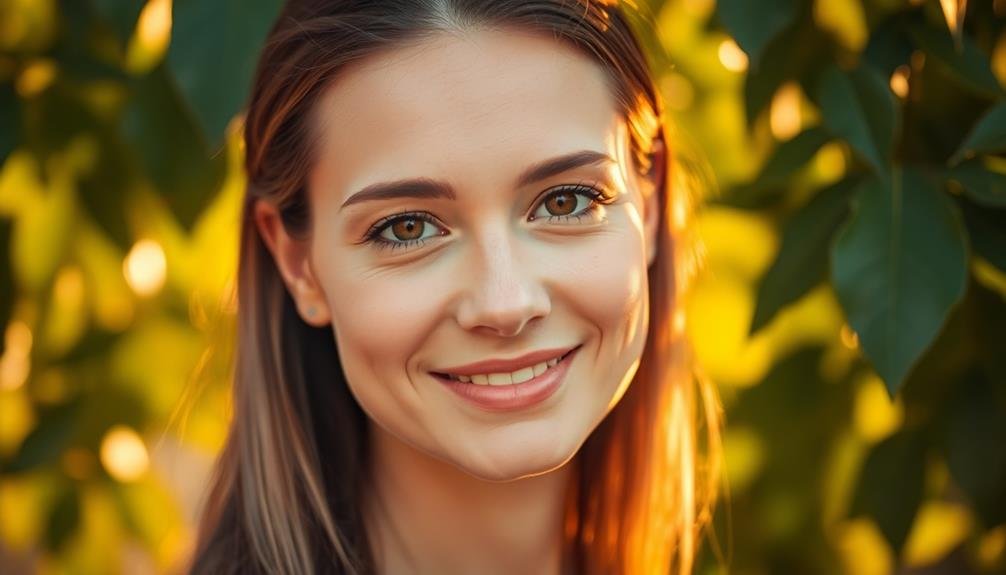
Capturing Authentic Expressions
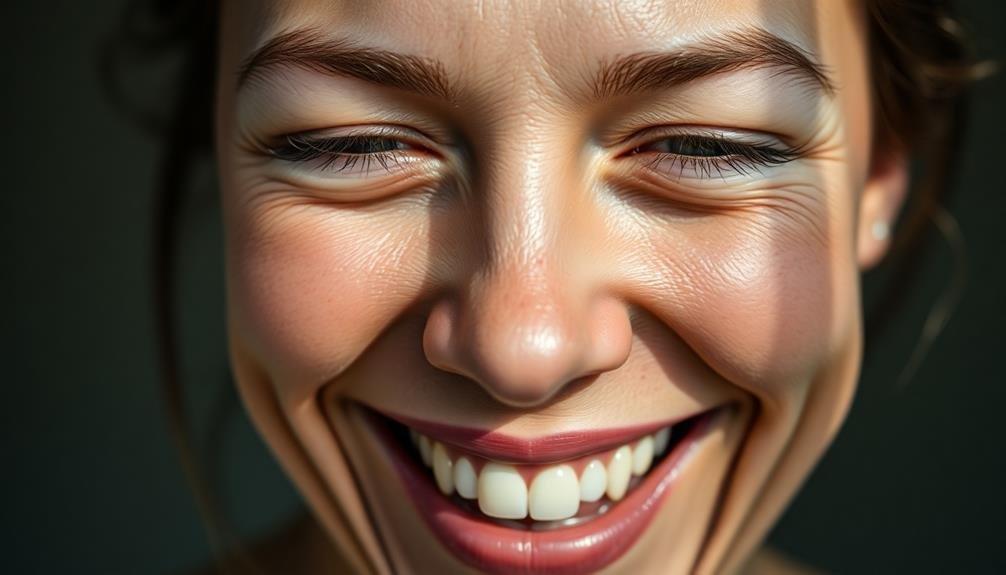
The key to compelling close-up portraits lies in capturing authentic expressions. To achieve this, you'll need to make your subject feel comfortable and relaxed. Start by engaging in casual conversation to help them loosen up. Pay attention to their natural mannerisms and encourage them to be themselves.
When you're ready to shoot, avoid asking your subject to "smile for the camera." Instead, try to evoke genuine emotions through prompts or questions. For example, ask them to recall a funny memory or think about someone they love. These triggers can lead to more natural and expressive shots.
To capture authentic expressions effectively:
- Be patient and observant, waiting for those fleeting moments of genuine emotion.
- Use burst mode to capture a series of quick shots, increasing your chances of catching the perfect expression.
- Experiment with different angles and compositions to find the most flattering and expressive view of your subject.
Experimenting With Angles
Explore the power of angles in your close-up portraits by experimenting with low and high camera positions.
You'll find that tilting your phone can create dynamic perspectives that add intrigue to your shots.
Don't forget to try side-profile techniques, which can highlight unique features and create a sense of mystery in your portraits.
Low vs. High Angles
Experimenting with camera angles can greatly transform your close-up portraits. When it comes to low vs. high angles, each approach offers unique advantages and effects on your subject's appearance.
Low angles, where you position the camera below eye level, can make your subject appear more powerful and dominant. This technique is often used to create a sense of authority or to emphasize certain facial features. It's particularly effective for highlighting the jawline and creating a more dramatic look.
High angles, on the other hand, involve shooting from above eye level. This approach can make your subject appear smaller, more vulnerable, or youthful. It's great for emphasizing eyes and creating a softer, more approachable portrait.
When choosing between low and high angles, consider:
- Your subject's facial features
- The mood you want to convey
- The story you're trying to tell
Don't be afraid to experiment with extreme angles for more creative and unconventional portraits.
Tilted Camera Perspectives
Tilting your camera adds a dynamic twist to close-up portraits, offering a fresh perspective that can captivate viewers. By slightly angling your phone, you'll create a sense of movement and energy in your shots. Try tilting the camera 10-15 degrees to one side for a subtle effect that draws attention to your subject's features.
Experiment with more dramatic tilts to convey different moods. A steep tilt can create tension or unease, while a gentle angle might suggest playfulness. When tilting, pay attention to the background elements and how they interact with your subject. You can use diagonal lines created by the tilt to lead the viewer's eye to specific points of interest.
Don't forget to evaluate your subject's comfort when using tilted perspectives. Some angles might feel awkward or unflattering, so communicate with your model and adjust accordingly.
Side-Profile Shot Techniques
Side-profile portraits offer a unique canvas for capturing your subject's distinctive features. When shooting these angles, focus on highlighting the natural contours of the face, from the forehead to the jawline. Position your subject so that their best side faces the camera, and experiment with different head tilts to find the most flattering angle.
Lighting plays an essential role in side-profile shots. Opt for soft, diffused light to minimize harsh shadows and accentuate the subject's features. You can achieve this by using natural light from a window or a portable softbox. Position the light source at a 45-degree angle to the subject's face for ideal results.
To create compelling side-profile portraits, consider these techniques:
- Frame the shot tightly, focusing on the face and neck
- Use a shallow depth of field to blur the background
- Incorporate negative space to draw attention to the profile
Don't be afraid to direct your subject. Guide them to slightly turn their chin up or down, adjust their gaze, or change their expression. These subtle adjustments can dramatically impact the final image, adding depth and emotion to your side-profile portraits.
Editing Apps for Portrait Enhancement
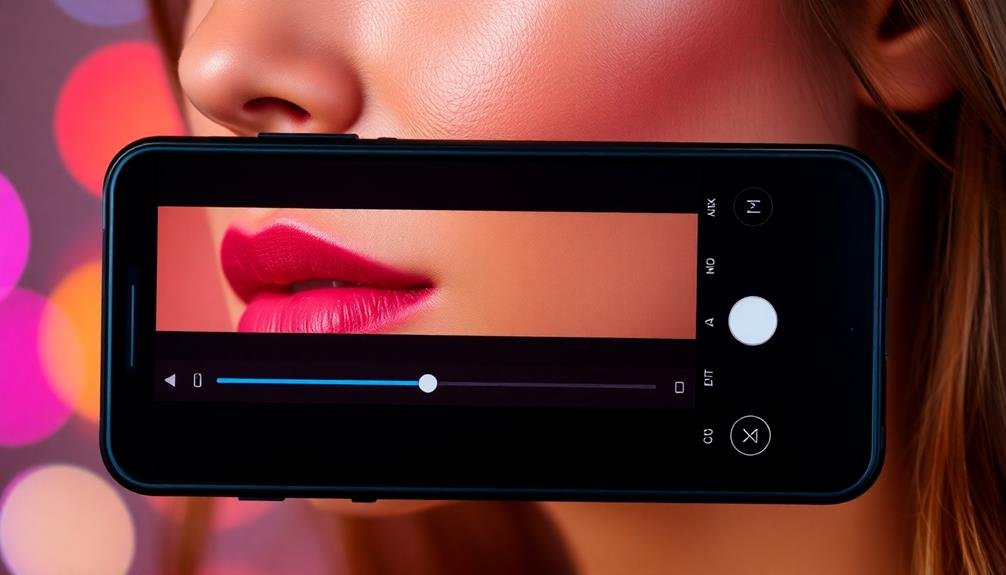
Once you've captured your close-up portrait, editing apps can take your image to the next level. Popular options like Snapseed, VSCO, and Lightroom Mobile offer powerful tools for enhancing your portraits.
Start by adjusting basic elements such as brightness, contrast, and saturation to improve overall image quality.
Next, focus on skin smoothing and blemish removal. Apps like Facetune and AirBrush provide advanced retouching features, but use them sparingly to maintain a natural look.
To enhance eyes, try increasing their clarity and brightness slightly.
For a polished finish, experiment with color grading. VSCO's film emulation presets can add a cinematic feel, while Lightroom's color mixer allows for precise adjustments.
Don't forget about selective editing – use masking tools to apply effects only to specific areas of your portrait.
Utilizing Natural Light Effectively
While editing can enhance your portraits, mastering natural light is the foundation of a great close-up shot. Natural light provides a soft, flattering glow that's difficult to replicate with artificial lighting. To harness its power, position your subject near a window or in open shade outdoors. Avoid harsh midday sun, which creates unflattering shadows and squinting.
The direction of light matters considerably. Side lighting can create depth and dimension, while front lighting minimizes shadows but may appear flat. Experiment with different angles to find what works best for your subject's features.
Don't forget to take into account the background; verify it complements rather than distracts from your subject.
When utilizing natural light, keep these tips in mind:
- Golden hour (just after sunrise or before sunset) offers warm, soft light that's ideal for portraits.
- Overcast days provide diffused light, perfect for even skin tones and reducing harsh shadows.
- Use reflectors or white surfaces to bounce light and fill in shadows on your subject's face.
Mastering Depth of Field
Depth of field is a powerful tool in your smartphone photography arsenal.
It's the range of distance in your image that appears acceptably sharp, and it can dramatically impact the look of your close-up portraits. To master depth of field on your phone, you'll need to understand how to manipulate it.
Most smartphones now offer portrait mode, which simulates a shallow depth of field. This feature blurs the background, making your subject pop.
To use it effectively, verify your subject is within 2-8 feet of your phone. Experiment with different distances to see how it affects the blur intensity.
You can also create depth of field manually by adjusting your phone's focus. Tap on your subject's face to focus, then slide the exposure bar to fine-tune.
For a shallower depth of field, get closer to your subject. This technique works well for highlighting facial features.
Incorporating Textures and Details
Textures and details can breathe life into your close-up portraits, adding depth and visual interest. When shooting with your phone, pay attention to the subtle nuances of your subject's skin, hair, and eyes. Look for freckles, fine lines, or unique features that tell a story.
You'll want to capture these elements without overdoing it, striking a balance between realism and flattery.
To enhance textures and details in your close-ups:
- Use natural light whenever possible, positioning your subject near a window or in soft outdoor lighting.
- Experiment with different angles to highlight specific features.
- Adjust your phone's exposure and contrast settings to bring out subtle textures.
Don't be afraid to get close to your subject, but remember to maintain focus. Many phone cameras have a portrait or macro mode that can help you achieve sharp, detailed images.
After taking the photo, use editing apps to fine-tune the highlights and shadows, emphasizing the textures you want to showcase. Be careful not to over-edit, as this can result in an unnatural appearance.
The goal is to enhance, not fabricate, the beautiful details that make your subject unique.
Balancing Subject and Negative Space
After capturing the intricate details of your subject, it's time to reflect on the overall composition of your close-up portrait. Balancing the subject and negative space is essential for creating a visually striking image. Negative space, the area surrounding your subject, plays an important role in framing and highlighting the focal point.
To achieve balance, consider the rule of thirds. Place your subject off-center, occupying about two-thirds of the frame. This creates a more dynamic composition and allows the viewer's eye to move naturally through the image. Experiment with different angles and positions to find the most appealing arrangement.
Don't be afraid to embrace empty space. It can add depth, create a sense of scale, and evoke emotions. Use negative space to guide the viewer's attention to specific features or expressions.
If your background is cluttered, try using portrait mode or adjusting your aperture to blur it, effectively creating more negative space.
Frequently Asked Questions
How Can I Minimize Camera Shake When Taking Close-Up Portraits?
To minimize camera shake for close-up portraits, brace your elbows against your body, hold your breath while shooting, and use a faster shutter speed. You can also try using a tripod or enabling your phone's image stabilization feature.
What's the Ideal Distance Between the Subject and Smartphone for Portraits?
For smartphone portraits, you'll want to keep about 3-6 feet between you and your subject. This distance allows for a flattering perspective while capturing facial details. You can adjust based on your phone's specific lens capabilities.
How Do I Handle Unflattering Facial Features in Close-Up Shots?
You can minimize unflattering features by adjusting your camera angle, using flattering lighting, and guiding your subject's pose. Don't be afraid to experiment with different angles and compositions to highlight their best features.
Are There Specific Accessories That Enhance Smartphone Portrait Photography?
You'll find several accessories to boost your smartphone portraits. Try clip-on lenses for wider angles or macro shots. Use a portable light or ring light for better illumination. Don't forget a tripod for stability and selfie sticks for group shots.
How Can I Create Dramatic Shadows in Close-Up Portraits?
To create dramatic shadows in close-up portraits, you'll want to use directional lighting. Position your subject near a window or use a single light source. Experiment with angles and distance to achieve the desired shadow intensity and placement.
In Summary
You've now got the tools to make your close-up portraits pop on your phone. Remember, it's all about mastering light, composition, and focus. Don't forget to experiment with your phone's portrait mode and depth of field. Pay attention to backgrounds and use natural light when possible. By incorporating textures and balancing your subject with negative space, you'll create stunning, eye-catching portraits that stand out in any feed.


Leave a Reply