
To capture steady phone shots, master these three essential grip techniques. First, use the Two-Handed Landscape Grip for wide-angle shots, holding your phone horizontally with both hands and elbows tucked in. Second, try the Single-Hand Portrait Hold for vertical compositions, supporting the phone's bottom corners with your thumb and index finger. Finally, practice Bracing Against Stable Objects by using your environment for added support. Press your phone against walls, tables, or tree trunks to minimize shake. Remember to exhale slowly when pressing the shutter button and maintain a stable stance. These techniques will elevate your smartphone photography to new heights.
Two-Handed Landscape Grip
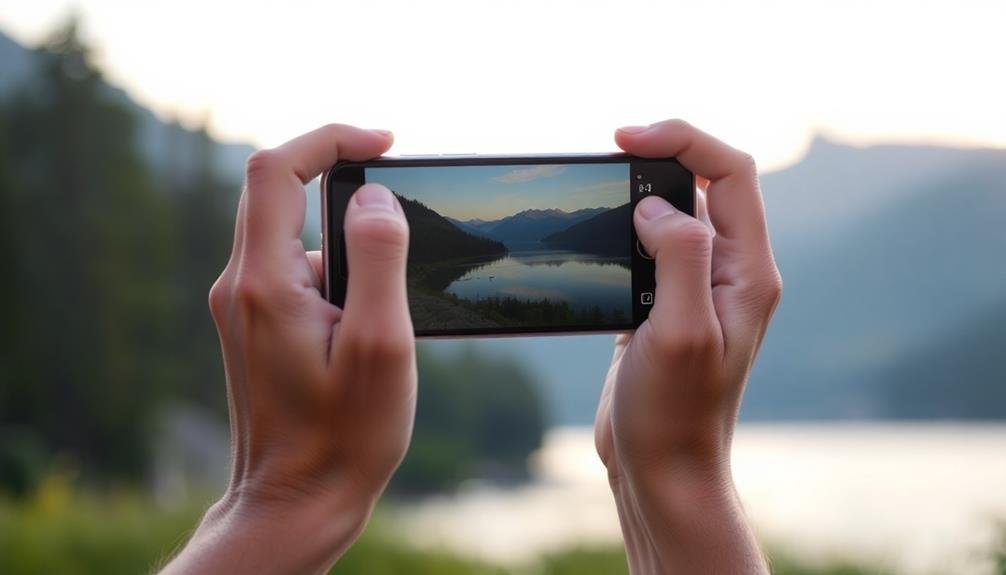
The classic two-handed landscape grip is your go-to technique for capturing steady, wide-angle shots. Hold your phone horizontally with both hands, gripping the edges firmly. Position your thumbs on the screen's sides and wrap your fingers around the back for maximum stability.
Keep your elbows tucked close to your body to create a stable triangle between your arms and torso. This grip allows you to use your body as a natural stabilizer. Spread your feet shoulder-width apart and bend your knees slightly for a solid stance.
When taking the shot, exhale slowly and press the shutter button gently to avoid introducing shake. For even more stability, lean against a wall or solid object if available. If you're shooting in low light or using slow shutter speeds, this technique becomes essential.
Remember to keep your movements minimal and deliberate. Practice this grip regularly to make it second nature. You'll find it especially useful for landscape photography, group shots, and architectural images.
Single-Hand Portrait Hold
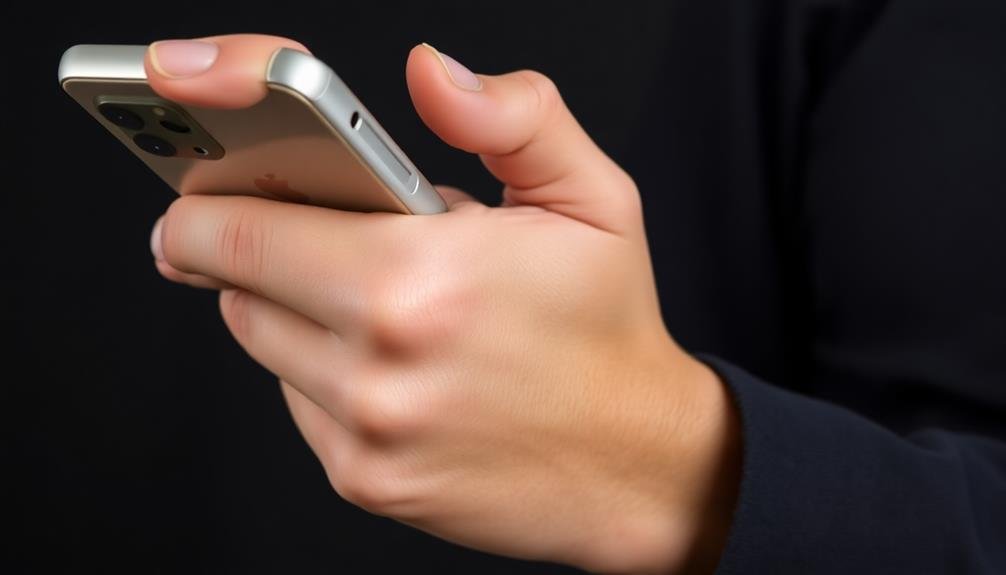
While the two-handed landscape grip excels for wide shots, you'll often need a different approach for portrait-oriented photos. The single-hand portrait hold offers a stable yet flexible solution for vertical compositions.
Start by holding your phone in your dominant hand, with your thumb and index finger supporting the bottom corners. Wrap your remaining fingers around the side for added stability. Keep your elbow tucked close to your body to create a natural tripod effect.
Position your thumb near the shutter button or volume control, depending on your phone's settings. This allows for quick, smooth captures without disrupting your grip. For extra stability, use your other hand to brace your shooting arm or gently cup the bottom of the phone.
When framing your shot, keep your movements slow and deliberate. Breathe steadily and squeeze the shutter gently to minimize camera shake. If your phone has optical image stabilization, engage it for even smoother results.
Practice this grip in various scenarios to find the most comfortable position for your hand size and phone model. With time, you'll develop muscle memory that'll help you capture crisp, shake-free portrait shots effortlessly.
Bracing Against Stable Objects
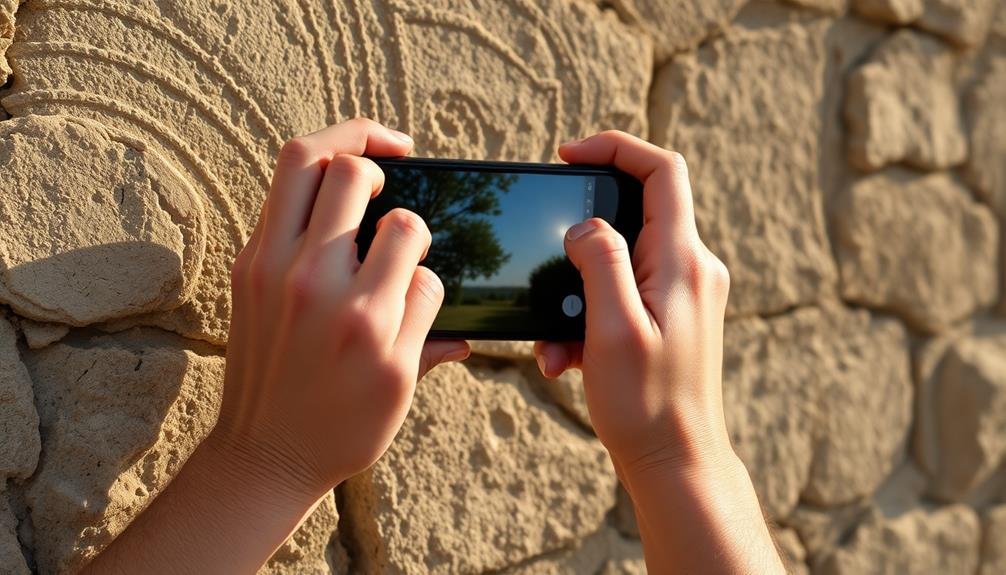
Leveraging your environment can greatly enhance photo stability. When you're looking to capture steady shots with your phone, don't overlook the objects around you. Walls, tables, lamp posts, and even trees can serve as impromptu stabilizers for your device.
To brace against a stable object, press your phone firmly against the surface while maintaining a good grip. If you're using a wall, lean your body into it for added support. For horizontal surfaces like tables, rest your elbows on the edge to create a stable triangle with your arms and body.
When outdoors, look for sturdy structures like fences or benches. Place your phone against these objects, ensuring it's secure but not obstructing the lens.
For nature shots, tree trunks can provide excellent stability. Press your back against the trunk and hold your phone with both hands for a steady landscape capture.
Frequently Asked Questions
How Can I Reduce Camera Shake When Using Digital Zoom?
You can reduce camera shake when using digital zoom by stabilizing your device. Use both hands, tuck your elbows in, and hold your breath while shooting. Consider using a tripod or gimbal for even steadier shots.
What's the Best Grip Technique for Capturing Fast-Moving Subjects?
To capture fast-moving subjects, you'll want to use a firm two-handed grip. Keep your elbows tucked in, feet shoulder-width apart, and track the subject smoothly. Don't forget to anticipate their movement and adjust accordingly.
Are There Specific Grip Techniques for Underwater Phone Photography?
For underwater phone photography, you'll want to use a two-handed grip. Hold your phone horizontally, keeping your elbows close to your body. Use your thumbs to operate the screen and squeeze your device gently to maintain control.
How Should I Adjust My Grip When Using Add-On Lenses?
When using add-on lenses, you'll need to adjust your grip. Hold your phone with both hands, supporting the lens with your fingers. Don't cover the lens or block light. Keep your elbows tucked for extra stability.
What's the Ideal Grip for Taking Low-Angle or Ground-Level Shots?
For low-angle shots, you'll want to hold your phone close to the ground. Grip it firmly with both hands, elbows tucked in for stability. Use your body as a tripod, crouching or lying down if necessary.
In Summary
You've now learned three essential camera grip techniques to elevate your phone photography. Whether you're using the two-handed landscape grip, single-hand portrait hold, or bracing against stable objects, you'll see a marked improvement in your shot stability. Remember, practice makes perfect. Keep experimenting with these methods to find what works best for you. Soon, you'll be capturing crisp, professional-looking images with ease, right from your smartphone.


Leave a Reply