To elevate your Instagram food pics, start with natural lighting near a window or use artificial light for control. Apply composition techniques like the rule of thirds and experiment with angles. Choose backgrounds that complement your dish and use color theory for eye-catching contrasts. Perfect your plating skills and invest time in thoughtful presentation. Explore different camera perspectives to showcase your food's best features. Don't forget to edit your photos using apps like VSCO or Snapseed. Craft engaging captions and use strategic hashtags to boost visibility. These pro tips will transform your food photography from amateur to mouthwatering masterpieces. Hungry for more? There's a feast of advanced techniques waiting to be discovered.
Lighting: Natural vs. Artificial

Nearly every successful Instagram food photo relies on great lighting. When it comes to food photography, you'll need to decide between natural and artificial light sources. Natural light, especially during the "golden hour" just after sunrise or before sunset, can give your dishes a warm, inviting glow. It's ideal for capturing the true colors and textures of your food.
To use natural light effectively, position your plate near a window, but avoid direct sunlight, which can create harsh shadows. Cloudy days provide excellent diffused light for even illumination. If you're shooting indoors, consider using a reflector or white board to bounce light and fill in shadows.
Artificial lighting offers more control and consistency, especially when natural light is scarce. Invest in a ring light or softbox to create even, flattering illumination. LED panels allow you to adjust color temperature, mimicking natural daylight or creating a specific mood.
When using artificial light, experiment with angles to highlight your food's best features and create appealing shadows. Remember, the key is to make your food look appetizing and true-to-life, regardless of your light source.
Composition Techniques for Food
The art of composition can make or break your Instagram food photos. To elevate your shots, start by applying the rule of thirds. Imagine a 3×3 grid over your image and place key elements along these lines or at their intersections. This creates a more balanced and visually appealing composition.
Don't be afraid to experiment with negative space. Leaving empty areas around your dish can draw attention to the food and create a sense of elegance. For a more dynamic shot, try shooting from different angles. Overhead shots work well for flat lays, while a 45-degree angle can highlight textures and layers.
Consider these composition techniques to evoke specific emotions:
| Technique | Effect | Emotion |
|---|---|---|
| Close-up | Highlights details | Intimacy |
| Symmetry | Creates order | Calm |
| Diagonal lines | Adds movement | Excitement |
Remember to use props and garnishes strategically. They should complement, not overshadow, your main dish. Finally, pay attention to color contrast. Pairing complementary colors or using a monochromatic palette can make your food pop and create a cohesive look for your Instagram feed.
Color Theory in Food Styling

With color theory, you can transform your food photos from ordinary to extraordinary. Understanding how colors interact and evoke emotions is essential for creating visually appealing Instagram food pics.
Start by considering complementary colors, which are opposite each other on the color wheel. Pairing orange carrots with a blue plate, for example, creates a striking contrast that catches the eye.
Analogous colors, which sit next to each other on the color wheel, can create a harmonious and soothing effect. Think of a salad with various shades of green vegetables.
To add depth and interest to your food styling, consider using a triadic color scheme, which involves three equally spaced colors on the wheel.
When applying color theory to your food photos, keep these tips in mind:
- Use vibrant, saturated colors to make your food pop
- Incorporate white space to balance intense colors and prevent visual overwhelm
- Experiment with monochromatic color schemes for a sophisticated, minimalist look
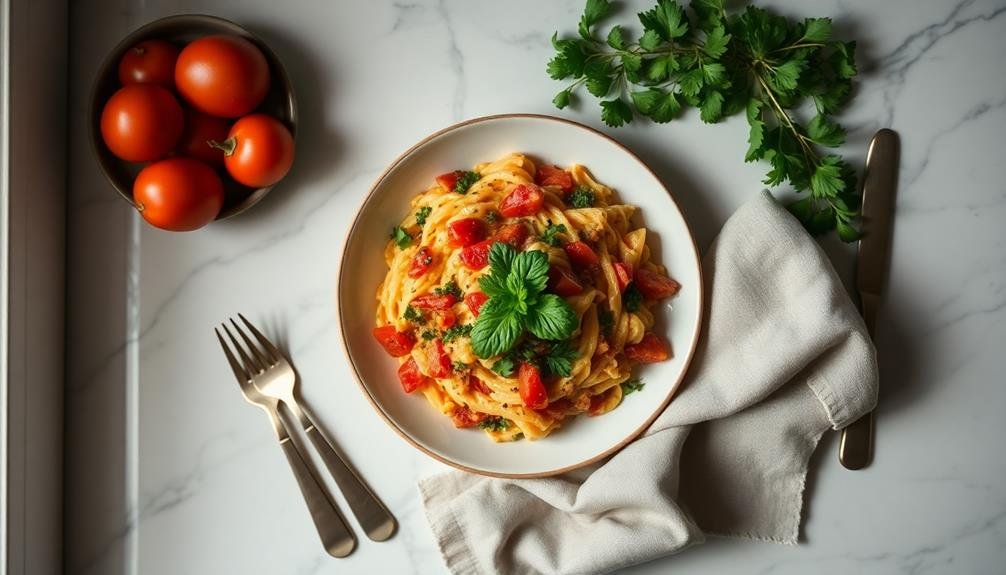
Choosing the Right Background
Selecting an appropriate background is essential for creating stunning Instagram food pics. It can make or break your shot, so choose wisely. Consider the food's colors and textures when deciding on a backdrop. Neutral backgrounds like white, gray, or black often work well, allowing the food to take center stage. However, don't be afraid to experiment with contrasting colors or textures for added visual interest.
When choosing a background, think about the mood you want to convey. Here's a quick guide to help you:
| Background | Mood | Best For |
|---|---|---|
| White | Clean, fresh | Light dishes, desserts |
| Black | Dramatic, luxurious | Rich, colorful foods |
| Wood | Rustic, homey | Comfort food, baked goods |
| Marble | Elegant, sophisticated | High-end cuisine |
| Tile | Playful, eclectic | Casual dishes, snacks |
| Fabric | Soft, inviting | Breakfast, tea time |
Plating and Presentation Tips

Once you've chosen the perfect background, it's time to focus on plating and presentation. Your food's arrangement can make or break your Instagram photo. Start by selecting an appropriate plate or bowl that complements your dish without overshadowing it. White plates are often a safe choice, as they allow the food's colors to pop.
When plating, consider the rule of thirds and create visual interest through asymmetry. Don't overcrowd the plate; instead, leave some negative space to draw attention to the main elements. Use garnishes sparingly to add pops of color and texture.
To elevate your plating game, try these pro tips:
- Use tweezers for precise placement of small ingredients
- Experiment with height by stacking elements or using props
- Create contrast through color combinations and textures
Remember to keep your presentation clean and intentional. Wipe away any smudges or spills on the plate's rim before shooting.
If you're featuring multiple dishes, arrange them in a visually pleasing composition that tells a story. With practice, you'll develop an eye for creating Instagram-worthy food presentations that will wow your followers.
Camera Angles and Perspectives

Now that you've mastered plating, it's time to capture your culinary creation from the right angle. Your camera perspective can make or break your Instagram food pic, so it's vital to experiment with different angles. The classic overhead shot works well for flat dishes, while a 45-degree angle can add depth to layered foods.
Don't be afraid to get up close and personal with your food. Macro shots can highlight textures and details that might be missed in wider shots. For drinks, try shooting from eye level to showcase the glass shape and any garnishes.
Here's a quick guide to popular angles and their best uses:
| Angle | Best for | Tips | Example Dishes |
|---|---|---|---|
| Overhead | Flat dishes, table spreads | Use natural light from the side | Pizza, charcuterie |
| 45-degree | Layered foods, tall dishes | Focus on the front of the plate | Burgers, cakes |
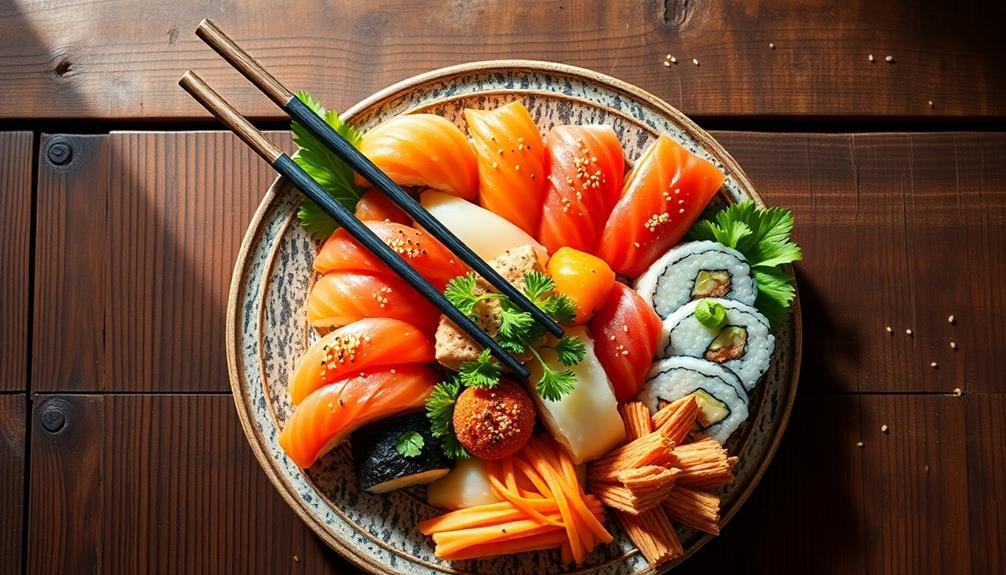
| Eye-level | Drinks, stacked items | Blur the background | Cocktails, ice cream |
| Macro | Textures, details | Use a phone lens attachment | Pasta, sushi |
Editing Apps for Food Photos

After you've captured the perfect shot, it's time to enhance your food photos with editing apps. These tools can transform your images from good to great, making your food look even more appetizing.
VSCO is a popular choice among food photographers, offering a wide range of filters and editing tools to fine-tune your photos. Snapseed, another powerful app, provides more advanced features like selective adjustments and healing tools to remove imperfections.
For a professional touch, consider using Foodie, an app specifically designed for food photography. It offers custom filters and a top-down camera mode that's perfect for flat-lay shots.
When editing your food photos, focus on these key aspects:
- Adjust brightness and contrast to make colors pop
- Enhance saturation to make the food look more vibrant
- Use selective editing to highlight specific elements of the dish
Storytelling Through Food Images
To tell a compelling story through your food images, you'll want to focus on three key elements.
Start by setting the scene, which includes the environment and atmosphere surrounding your dish.
Next, capture the process, showing steps of preparation or consumption to add depth to your narrative.
Set the Scene
Food photography isn't just about showcasing a dish; it's about telling a story. When you set the scene for your Instagram food pics, you're creating a narrative that engages your audience. Consider the mood you want to convey and the elements that will support your food's story.
Start by choosing a background that complements your dish without overshadowing it. Use props thoughtfully to add context and depth to your image. A vintage spoon, a rustic cutting board, or fresh ingredients can enhance the overall composition.
Don't forget about lighting – natural light often works best, but experiment with different angles and sources to create the desired ambiance.
To elevate your food photography, focus on these key aspects:
- Composition: Use the rule of thirds or create visual balance with strategically placed elements
- Texture: Highlight contrasting textures in your food and props to add visual interest
- Color: Create harmony or intentional contrast with your color choices in both food and setting
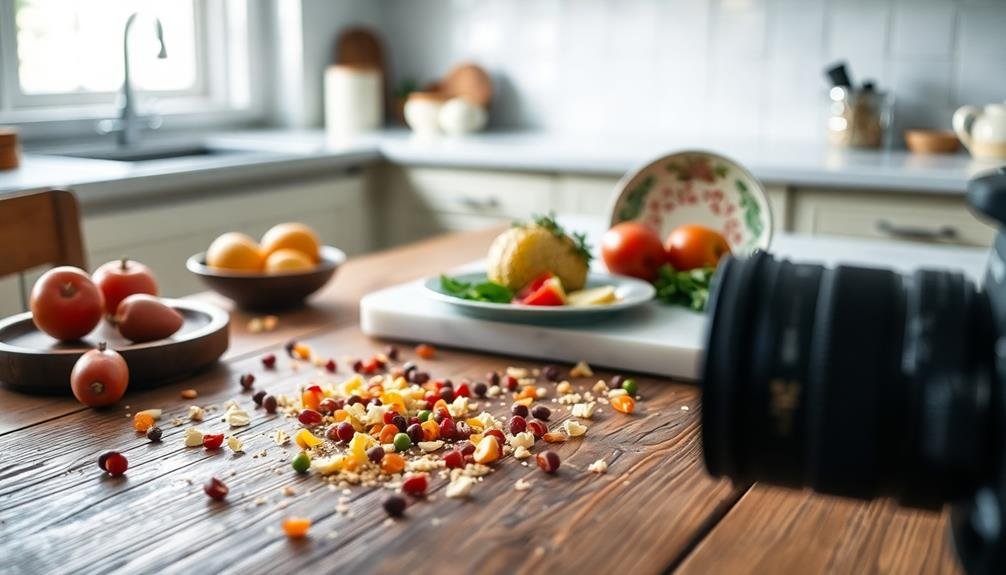
Capture the Process
A journey of flavors unfolds with every dish, and capturing that process can elevate your Instagram food photos from mere snapshots to engaging visual stories.
Start by documenting the raw ingredients, showcasing their vibrant colors and textures. Snap a quick shot of your mise en place to highlight the preparation stage.
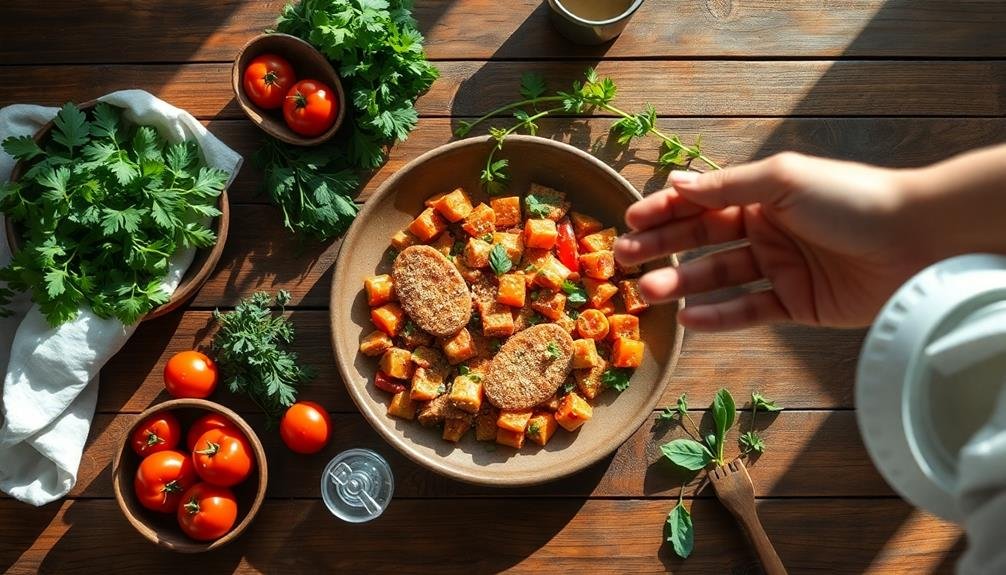
As you cook, capture key moments like the sizzle of ingredients hitting a hot pan or the transformation of dough as it's kneaded.
Don't shy away from action shots – your hands sprinkling herbs or stirring a sauce can add a personal touch. For baked goods, a before-and-after comparison of unbaked and golden-brown results can be visually striking.
Evoke Emotional Connections
Beyond documenting the cooking process, your Instagram food photos can tell powerful stories that resonate with viewers on an emotional level. By evoking emotional connections, you'll transform your food pics from mere snapshots to enchanting visual narratives. Consider the context, memories, and feelings associated with your dishes.
To create emotionally engaging food photos:
- Highlight family traditions: Showcase recipes passed down through generations, capturing the essence of cherished family moments.
- Celebrate cultural heritage: Present dishes that reflect your cultural background, sharing the story behind each unique ingredient or preparation method.
- Connect with seasons and occasions: Align your food pics with holidays, seasonal changes, or special events to tap into shared experiences.
Use props and backgrounds that complement your story. A weathered cookbook, heirloom utensils, or a nostalgic tablecloth can add depth to your image.
Don't forget to craft thoughtful captions that elaborate on the emotional significance of your dish. Share personal anecdotes, explain the inspiration behind your creation, or describe the memories it evokes.
Hashtags and Captions Strategy

When it comes to Instagram food pics, your hashtags and captions are essential for gaining visibility and engagement.
You'll want to strategically select hashtags that are relevant, popular, and specific to your food content.
Craft compelling captions that tell a story, ask questions, or provide context to your culinary creations, enticing viewers to interact with your post.
Strategic Hashtag Selection
To maximize your Instagram food post's reach and engagement, strategic hashtag selection is essential. Start by researching popular food-related hashtags, but don't just use the most common ones. Blend general tags with specific, niche-focused hashtags to target your ideal audience. For instance, combine #foodporn with #vegancomfortfood or #glutenfreebaking.
Consider creating a unique branded hashtag for your food content, encouraging followers to use it when sharing similar dishes. This builds community and makes it easier to track user-generated content. Keep your hashtag list fresh by regularly updating it based on trending topics and seasonal themes.
When selecting hashtags, follow these guidelines:
- Use a mix of popular (100k-500k posts) and moderately popular (10k-100k posts) hashtags
- Include location-based tags to attract local foodies
- Limit your hashtags to 5-15 per post for peak engagement
Don't forget to place your hashtags in the first comment rather than the caption to keep your post looking clean and professional.
Crafting Compelling Captions
Crafting compelling captions is just as essential as selecting the right hashtags for your Instagram food posts. Your caption is your chance to tell a story, evoke emotions, and connect with your audience. Start by considering the mood you want to convey. Is it playful, informative, or nostalgic? Use this tone to guide your writing.
Keep your captions concise and easy to read. Break longer text into shorter paragraphs or use emojis to add visual interest.
Don't forget to include a call-to-action, encouraging followers to engage with your post. Ask questions, invite opinions, or suggest they tag a friend.
Incorporate relevant keywords naturally to improve discoverability. However, don't sacrifice readability for SEO. Balance is key.
Consider using puns, wordplay, or food-related quotes to add personality to your captions. If you're sharing a recipe or restaurant experience, provide valuable information like ingredients, cooking tips, or location details.
Lastly, proofread your caption before posting. Typos and grammatical errors can distract from your message and appear unprofessional.
With practice, you'll develop your unique caption style that resonates with your audience and enhances your food photography.
Frequently Asked Questions
How Do I Deal With Melting or Time-Sensitive Foods?
You'll want to work quickly with melting or time-sensitive foods. Set up your shot beforehand, use a cooled plate, and have props ready. Shoot from multiple angles rapidly, and consider using a mini-freezer between shots.
What's the Best Way to Photograph Drinks and Beverages?
To photograph drinks, you'll want to capture their clarity and allure. Use a clean glass, shoot in natural light, and focus on unique details. Don't forget garnishes! Experiment with angles and backgrounds to make your beverage shine.
How Can I Make My Food Photos Stand Out in a Crowded Feed?
To make your food photos stand out, you'll want to focus on unique angles, vibrant colors, and interesting compositions. Use natural light, play with textures, and add props to create a story. Don't forget to edit for consistency.
Are There Any Legal Considerations When Photographing Food in Restaurants?
When photographing food in restaurants, you'll want to respect the establishment's policies. Some eateries prohibit photography, so always ask for permission first. Be mindful of other diners' privacy and avoid using flash that might disrupt their experience.
How Do I Create a Cohesive Aesthetic for My Food-Focused Instagram Account?
To create a cohesive aesthetic for your food-focused Instagram, you'll want to stick to a consistent color palette, lighting style, and plating technique. Use similar filters, maintain a regular posting schedule, and develop a unique visual signature for your content.
In Summary
You've now got the tools to take your Instagram food pics to the next level. Remember, it's all about lighting, composition, and styling. Don't forget to experiment with angles and backgrounds. Use editing apps wisely, and tell a story with your images. Craft engaging captions and use relevant hashtags to boost visibility. With practice, you'll soon be capturing drool-worthy shots that'll make your followers' mouths water. Keep shooting, keep learning, and watch your food photography skills soar!


Leave a Reply