To craft photo sequences that tell compelling stories, you'll need to define a clear narrative arc with a strong opening and closing image. Choose a cohesive visual theme by maintaining consistent color palettes and lighting techniques. Establish your setting and capture key characters to provide context and emotional depth. Sequence your images for maximum emotional impact, building tension and revelation. Leverage your smartphone's features like burst mode and time-lapse to capture dynamic moments. Edit for consistency in color grading and exposure to maintain a unified look. By mastering these elements, you'll create powerful visual narratives that captivate your audience. The journey to becoming a skilled visual storyteller is just beginning.
Defining Your Narrative Arc
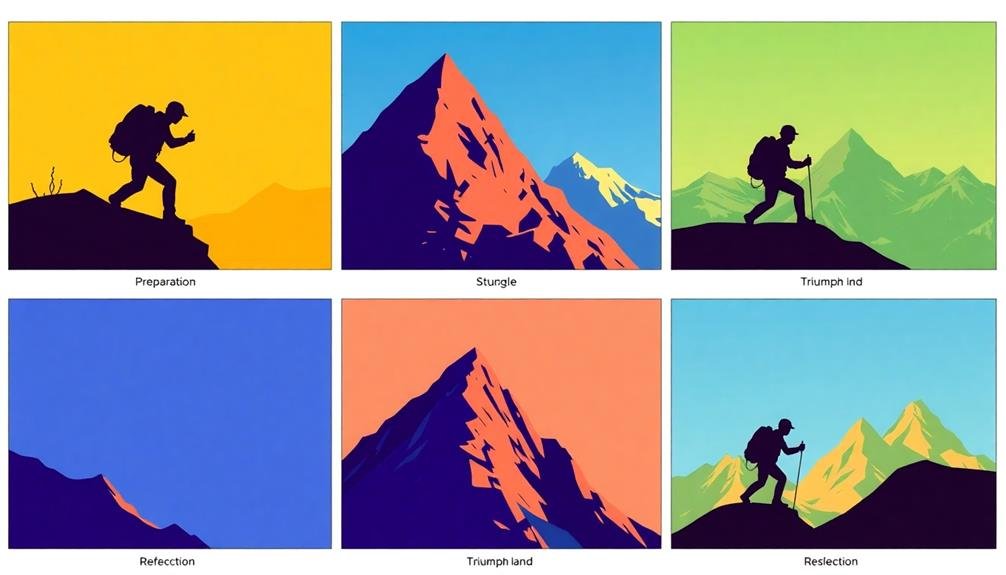
In crafting a compelling photo sequence, defining your narrative arc is essential. Begin by identifying the story you want to tell and its key elements. Consider the beginning, middle, and end of your narrative, and how each image will contribute to the overall story progression.
Start by selecting a strong opening image that sets the scene and captures the viewer's attention. This initial photo should introduce your subject or theme and provide context for what follows.
As you move through your sequence, choose images that build upon one another, revealing new information or perspectives with each frame.
Think about the emotional journey you want your viewers to experience. Plan for moments of tension, revelation, or contemplation within your sequence. Use visual cues, such as changes in composition, lighting, or subject matter, to signal shifts and developments in your story.
Conclude your narrative arc with a powerful closing image that leaves a lasting impression or provides resolution to the story. This final photo should bring your sequence full circle, tying back to your opening while reflecting the journey you've taken your viewers on.
Choosing a Cohesive Visual Theme

When creating a photo sequence, you'll need to establish a cohesive visual theme to tie your images together.
Start by selecting a consistent color palette that runs through your entire series, then focus on maintaining uniform lighting techniques across all shots.
Color Palette Selection
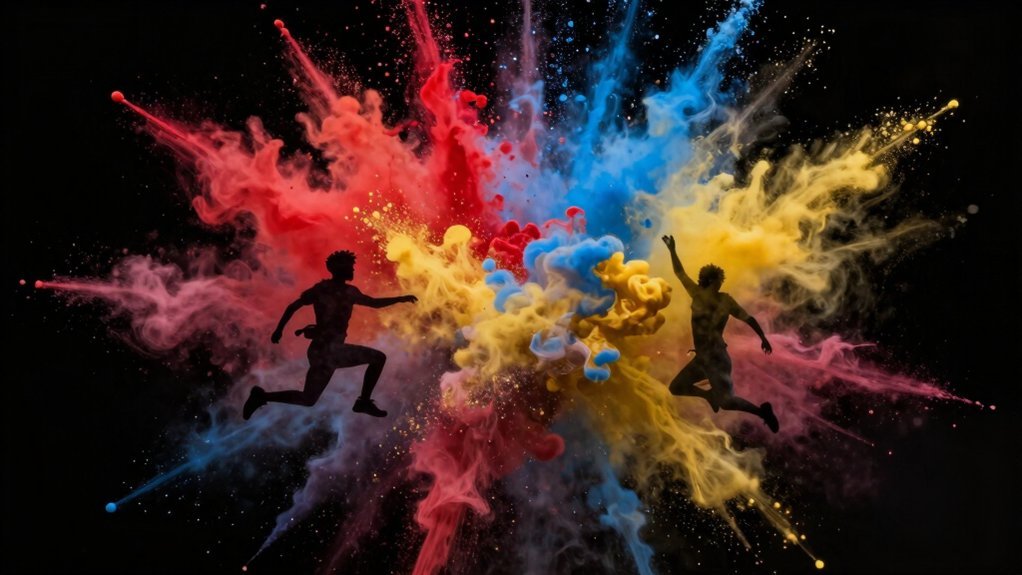
Three key elements define a cohesive visual theme in photo sequences: color palette, composition, and subject matter. When it comes to color palette selection, you'll want to choose hues that complement each other and evoke the desired emotional response from your audience.
Start by identifying the dominant colors in your main subject or setting, then build your palette around those shades. Consider using a color wheel to find harmonious combinations, such as analogous or complementary colors. You can also opt for a monochromatic scheme for a more subdued effect.
Remember that your chosen palette should align with the story you're telling and the mood you want to convey. To evoke specific emotions through your color choices, consider the following associations:
- Red: passion, energy, urgency
- Blue: calmness, trust, stability
- Green: growth, nature, harmony
- Yellow: happiness, optimism, warmth
- Purple: luxury, creativity, mystery
As you select your palette, maintain consistency throughout the sequence. This doesn't mean every photo must have identical colors, but rather that they should share a common thread.
You can achieve this by using similar tones, saturation levels, or color temperatures across your images.
Consistent Lighting Techniques
Maintaining consistent lighting techniques is essential for creating a cohesive visual theme in your photo sequence. To achieve this, choose a lighting style that complements your story and stick with it throughout the series. Whether you opt for natural light, studio lighting, or a mix of both, make sure that the quality and direction of light remain uniform across all images.
Consider the time of day you're shooting and how it affects the light. If you're working with natural light, try to capture all photos during the same period, such as the golden hour, to maintain a consistent mood. For indoor shoots, set up your artificial lighting to mimic your chosen style and replicate it for each shot.
Pay attention to shadows and highlights, as they can dramatically impact the visual continuity of your sequence. Use light modifiers like diffusers or reflectors to control contrast and maintain a consistent look.
Don't forget about color temperature; keep it uniform by adjusting your white balance settings or using gels on your light sources. By mastering these lighting techniques, you'll create a visually cohesive photo sequence that enhances your storytelling and captivates your audience.
Repeated Visual Motifs
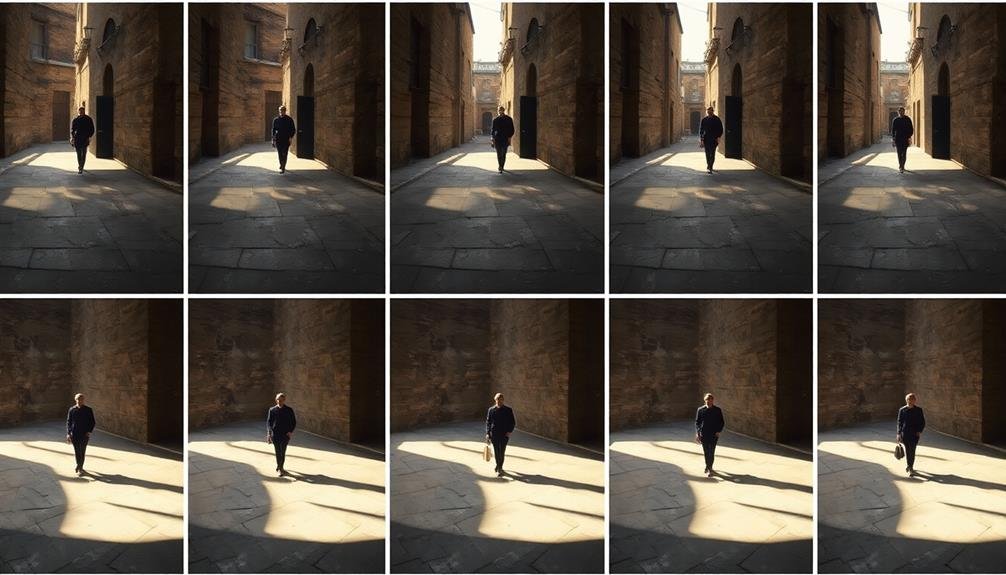
Repeated visual motifs tie your photo sequence together, creating a cohesive theme that resonates with viewers. Choose a visual element that appears throughout your series, such as a specific color, shape, or object. This consistent thread helps guide the viewer's eye and reinforces your narrative.
Consider using recurring symbols or patterns that align with your story's message. For example, if you're documenting urban growth, incorporate architectural elements like windows or doorways in each shot. You can also play with composition, using similar framing techniques across images to create a sense of continuity.
To evoke emotion in your audience, try incorporating these repeated motifs:
- A solitary figure in vast landscapes
- Hands performing various actions
- Reflections in water or mirrors
- Natural elements like trees or flowers
- Contrasting textures or materials
Remember to balance repetition with variety. While motifs should be recognizable, avoid making them too obvious or forced. Subtle connections often have a more powerful impact.
Establishing Setting and Context
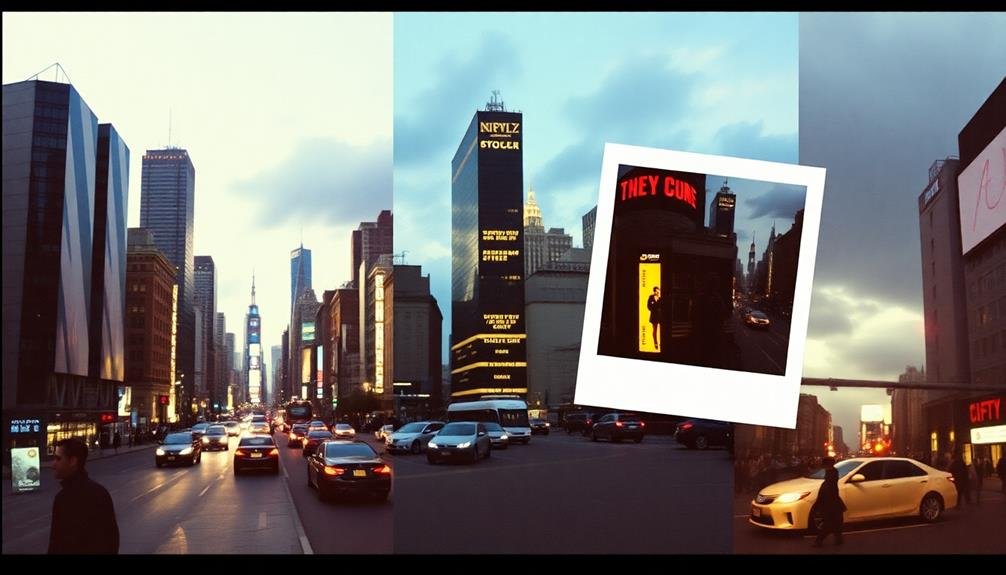
Setting the stage for your photo sequence kicks off with establishing the overall context and environment. You'll want to capture images that give viewers a clear sense of where and when your story unfolds. Start with wide-angle shots that showcase the landscape, cityscape, or interior setting. These establishing shots help orient your audience and provide a visual anchor for the narrative.
Next, focus on key details that define the setting. Capture elements like signage, architectural features, or natural landmarks that are unique to the location. Don't forget to reflect on the time of day, weather conditions, and seasonal indicators, as these factors contribute to the overall atmosphere. You can also include shots of people interacting with the environment to add a human element and convey the setting's scale.
Remember to balance your establishing shots with more intimate details. Close-ups of textures, colors, or small objects can provide valuable context and help viewers feel immersed in the scene.
Capturing Key Characters or Subjects

When capturing key characters or subjects in your photo sequence, you'll want to establish visual character archetypes that viewers can easily recognize and relate to.
As your story unfolds, highlight emotional transformations in your subjects, allowing the audience to connect with their journey.
Don't forget to showcase defining interactions between characters, as these moments often drive the narrative and reveal essential relationships.
Establish Visual Character Archetypes
To establish visual character archetypes, focus on capturing key subjects that will recur throughout your photo sequence. These characters should embody distinct roles or personalities that viewers can easily recognize and connect with.
Think about the story you're telling and identify the essential players who'll drive the narrative forward.
When photographing your character archetypes, pay attention to their unique attributes, expressions, and body language. Aim to capture their essence in a way that clearly communicates their role in the story. Use consistent visual cues, such as clothing, props, or settings, to help reinforce each character's identity across multiple images.
To evoke emotion in your audience through character archetypes, consider incorporating these elements:
- A vulnerable moment that reveals a character's humanity
- A triumphant pose that inspires hope or admiration
- A close-up of expressive eyes that convey deep emotion
- An interaction between characters that highlights relationships
- A silhouette that creates mystery or intrigue
Highlight Emotional Transformations
How can you capture the emotional journey of your subjects through a photo sequence? Focus on documenting key moments that reveal changes in their feelings or state of mind. Start by identifying the emotional arc you want to portray, then plan shots that showcase this transformation.
Begin with images that establish your subject's initial emotional state. Capture their facial expressions, body language, and interactions with their environment. As the sequence progresses, look for subtle shifts in their demeanor. These might include changes in posture, eye contact, or gestures that hint at internal developments.
Use composition and lighting to emphasize emotional turning points. Tight close-ups can reveal micro-expressions, while wider shots can show how your subject relates to others or their surroundings. Consider using contrasting settings or props to underscore the emotional journey.
Don't shy away from capturing vulnerable or intense moments. These often provide the most compelling insights into your subject's transformation. Remember to respect your subject's boundaries and obtain consent when photographing sensitive situations.
Showcase Defining Interactions
A few key interactions can define an entire story in a photo sequence. When crafting your narrative, focus on capturing those pivotal moments that shape relationships and drive the plot forward. Look for instances where characters connect, clash, or experience significant change through their interactions with others or their environment.
To showcase defining interactions effectively, consider these emotional elements:
- Tension between characters
- Unexpected alliances forming
- Moments of vulnerability or trust
- Power dynamics shifting
- Transformative realizations
As you compose your shots, pay attention to body language, facial expressions, and physical proximity between subjects. These subtle cues can speak volumes about the nature of their interactions.
Use framing techniques to emphasize the connection or disconnect between characters, such as placing them in opposite corners of the frame or bringing them close together.
Don't forget to capture the before and after of essential interactions. This approach allows viewers to see the impact of these defining moments on your subjects.
Sequencing for Emotional Impact

Photographers often overlook the emotional power of image sequencing. By carefully arranging your photos, you can guide viewers through a range of emotions, intensifying the impact of your story. Start by identifying the key emotional beats you want to convey. Then, order your images to create a natural progression that builds tension, elicits empathy, or sparks joy.
Consider using contrast to heighten emotional impact. Juxtapose images with different moods or subjects to create a sense of conflict or resolution. For example, follow a somber image with an uplifting one to create a feeling of hope. Alternatively, use repetition to reinforce emotions. A series of similarly composed images can create a sense of rhythm and emphasize a particular feeling.
Pay attention to pacing. Intersperse high-impact images with quieter moments to give viewers time to process their emotions. Use close-ups to draw viewers in and wide shots to provide context.
Balancing Wide Shots and Details
When crafting photo sequences, you'll need to strike a balance between wide shots and details to effectively tell your visual story.
Start with a wide shot to establish context and atmosphere, allowing viewers to grasp the overall setting. As you progress through the sequence, incorporate closer shots and details to reveal narrative progression and draw attention to specific elements that advance your story.
Establishing Context and Atmosphere
To establish context and atmosphere in a photo sequence, striking the right balance between wide shots and details is essential. Begin with a wide shot that sets the scene, giving viewers a sense of place and time. This establishes the overall mood and environment of your story.
Follow up with medium shots that introduce key elements or subjects, allowing the audience to connect with specific characters or objects. Intersperse close-up shots throughout your sequence to highlight important details that contribute to the narrative. These intimate views can reveal emotions, textures, or subtle nuances that might be missed in wider frames.
As you craft your sequence, consider how each image builds upon the previous one, creating a cohesive atmosphere that draws viewers deeper into your story.
To evoke emotion in your audience, focus on:
- Lighting that sets the mood (e.g., warm sunlight or moody shadows)
- Color palettes that reinforce the atmosphere
- Composition that guides the viewer's eye
- Body language and facial expressions of subjects
- Environmental elements that enhance the narrative
Revealing Narrative Progression
Three key elements form the foundation of revealing narrative progression in photo sequences: pacing, visual variety, and thematic continuity.
To master pacing, you'll need to carefully consider the rhythm of your images. Alternate between wide shots that establish the scene and close-ups that highlight vital details. This balance creates a dynamic flow that keeps viewers engaged.
Visual variety is essential for maintaining interest. Mix up your compositions, angles, and focal lengths to provide a fresh perspective with each image. Don't be afraid to experiment with unconventional shots that add intrigue to your narrative.
Thematic continuity ties your sequence together. Use recurring visual motifs, color schemes, or subjects to create a cohesive story. This doesn't mean every shot should look the same; rather, subtle connections should guide viewers through your narrative.
As you craft your sequence, think about how each image builds upon the last. Consider the emotional journey you want your audience to experience.
Using Repetition and Patterns
Repetition and patterns can transform ordinary photo sequences into visually stunning narratives. By carefully incorporating recurring elements or visual motifs, you'll create a cohesive story that captivates your audience.
Start by identifying a theme or subject that appears throughout your sequence. This could be a color, shape, or even a specific object.
As you arrange your photos, consider how repetition can emphasize key ideas or emotions. Use patterns to guide the viewer's eye through the sequence, creating a sense of rhythm and flow.
Don't be afraid to experiment with different arrangements to find the most impactful combination.
To evoke emotion in your audience, consider incorporating these elements:
- A recurring symbol that gains meaning throughout the sequence
- Gradual color shifts to reflect changing moods
- Repeating gestures or expressions across different subjects
- Rhythmic patterns in architecture or nature
- Consistent framing techniques to unify diverse scenes
Creating Visual Flow Between Images

Seamlessly connecting images in a photo sequence requires careful consideration of visual elements and composition. To create visual flow, you'll want to focus on color, shape, and direction within each frame. Start by identifying dominant colors or tones in one image and look for ways to echo them in the next. This color continuity helps guide the viewer's eye from one photo to another.
Pay attention to shapes and forms in your images. You can create a sense of progression by repeating similar shapes or gradually transforming them across the sequence. Use leading lines and directional elements to direct the viewer's gaze through the series. For instance, a line or curve in one image can lead into the next, creating a natural visual path.
Consider the overall composition of each image and how it relates to the others. Alternating between wide shots and close-ups can provide rhythm and variety while maintaining flow. You can also use framing techniques to create visual links between photos.
Experimenting With Chronological Order
While traditional photo sequences often follow a linear timeline, experimenting with chronological order can add depth and intrigue to your visual storytelling. Consider rearranging your images to create tension, suspense, or reveal information gradually. You might start with the end result and work backward, or alternate between past and present moments to draw connections between different time periods.
Try these techniques to evoke emotion in your audience:
- Juxtapose contrasting moments for dramatic effect
- Use flashbacks to provide context or backstory
- Create a non-linear narrative that mirrors memory or dreams
- Reveal key information gradually to build suspense
- Incorporate cyclical patterns to emphasize themes or repetition
When experimenting with chronological order, pay attention to visual cues that indicate time passing. These can include changes in lighting, seasons, or a subject's appearance.
You'll need to balance creativity with clarity, ensuring your audience can follow the story's progression. Consider adding subtle hints or captions if the timeline becomes too complex.
Incorporating Contrast and Juxtaposition

Contrast and juxtaposition are powerful tools in crafting compelling photo sequences. They create visual interest and evoke emotions by highlighting differences between images. You can use contrast in various elements such as color, composition, subject matter, or mood. For example, pair a vibrant, colorful image with a monochrome one to emphasize the stark difference between them.
Juxtaposition involves placing contrasting elements side by side to create a thought-provoking narrative. You might combine images of wealth and poverty, youth and old age, or nature and industry. This technique challenges viewers to reflect on the relationship between seemingly unrelated subjects.
To effectively incorporate contrast and juxtaposition, contemplate the following table:
| Element | Contrast Example | Juxtaposition Example |
|---|---|---|
| Color | Bright vs. Muted | Red vs. Green |
| Composition | Busy vs. Minimalist | Symmetry vs. Chaos |
| Subject | Human vs. Nature | Modern vs. Ancient |
| Mood | Joy vs. Sadness | Calm vs. Tension |
Leveraging Smartphone Camera Features

Your smartphone's camera features offer powerful tools for creating compelling photo sequences.
You'll master burst mode to capture fast-moving subjects, use time-lapse techniques to show gradual changes over time, and harness portrait mode for storytelling through depth and focus.
These features enable you to craft unique narratives and visual progressions that were once only possible with professional equipment.
Burst Mode Mastery
Mastering burst mode on your smartphone camera opens up a world of creative possibilities for capturing dynamic photo sequences. This rapid-fire shooting technique allows you to freeze motion and select the perfect moment from a series of images.
To use burst mode effectively, hold down the shutter button or volume key while your subject is in motion. Most smartphones can capture up to 10 frames per second, giving you plenty of options to choose from.
When editing your burst shots, look for subtle changes in expression, body position, or background elements that tell a compelling story. You can create a sense of movement by selecting a series of images that show progression or change over time.
Don't be afraid to experiment with different angles and compositions during your burst shooting sessions.
Burst mode is particularly useful for:
- Capturing fast-paced sports action
- Photographing unpredictable wildlife
- Documenting fleeting emotions in portraits
- Freezing splashing water or other liquid movements
- Catching perfect timing in group photos
Time-Lapse Techniques
Time-lapse photography transforms the ordinary into the extraordinary by compressing hours or days into mere seconds of mesmerizing footage. Your smartphone's time-lapse feature makes this technique accessible, allowing you to capture stunning sequences with minimal equipment.
To create compelling time-lapses, start by selecting a subject with visible change over time, such as a bustling cityscape or a blooming flower. Choose a stable position for your phone, using a tripod or improvised support to minimize shake.
Enable your camera's time-lapse mode and adjust settings like interval and duration to suit your subject. Consider the lighting conditions throughout your shoot. For longer sequences, anticipate changes in natural light and adjust exposure accordingly.
Use manual focus to maintain consistency across frames, preventing unwanted shifts in your final video. Experiment with different angles and compositions to add visual interest. Try incorporating foreground elements or leading lines to guide the viewer's eye through the scene.
After capturing your sequence, use editing apps to fine-tune colors, contrast, and pacing for maximum impact. With practice, you'll master the art of condensing time, creating enchanting visual stories that reveal hidden patterns and transformations in the world around you.
Portrait Mode Storytelling
While time-lapse photography captures change over time, portrait mode lets you tell a different kind of story through depth and focus. This smartphone feature simulates the shallow depth of field typically achieved with professional cameras, allowing you to create striking portraits and emphasize specific elements in your sequences.
To craft compelling stories using portrait mode:
- Choose a strong subject that stands out against the background
- Experiment with different distances between subject and background
- Use leading lines to draw attention to your focal point
- Play with lighting to enhance the mood and depth
- Incorporate props or environmental elements to add context
Start your sequence with a wide shot to establish the scene, then move in closer to highlight details. Vary your angles and compositions to add visual interest.
Consider using portrait mode for both people and objects to create a sense of intimacy and importance. Remember that the blurred background can be just as essential to your story as the subject in focus. Use this effect to guide the viewer's eye and create a narrative flow between images.
Editing for Consistency and Mood

Every great photo sequence relies on cohesive editing to create a unified visual story. When you're editing your sequence, focus on maintaining consistency in color grading, exposure, and contrast across all images. This doesn't mean every photo should look identical, but they should feel like they belong together.
Start by selecting a color palette that complements your story's mood. For a warm, nostalgic feel, lean towards golden hues and soft contrasts. For a more dramatic narrative, experiment with deeper shadows and cooler tones. Apply these adjustments consistently across your sequence, making subtle variations to highlight key moments.
Pay attention to the overall exposure balance. While individual photos may have different lighting conditions, aim for a harmonious flow from one image to the next. Use tools like curves and levels to fine-tune brightness and contrast.
Don't forget about cropping and composition. Ascertain that your framing remains consistent throughout the sequence, maintaining a similar aspect ratio and visual balance. This will help guide the viewer's eye smoothly from one image to the next, enhancing the storytelling experience.
Exploring Different Storytelling Structures

With your images edited for consistency, it's time to contemplate how you'll structure your visual narrative. Different storytelling structures can evoke various emotions and guide your audience through your intended journey. Consider these popular approaches:
- Chronological: Present events in the order they occurred, creating a natural flow.
- Thematic: Group images by subject or concept, emphasizing connections.
- Contrast: Juxtapose opposing elements to highlight differences or transformations.
- Circular: Begin and end with similar images, creating a sense of completion.
- Climactic: Build tension towards a powerful final image or reveal.
Choose a structure that best serves your story's purpose and emotional impact. You can also combine multiple approaches for a more complex narrative. Experiment with different arrangements to see how they affect the viewer's experience.
Pay attention to the shifts between images, ensuring each photo leads naturally to the next. Consider using establishing shots to set the scene, close-ups for intimate moments, and wide-angle shots for context.
Presenting Your Photo Sequence

Once you've crafted your photo sequence, it's time to contemplate presentation options. Consider the medium that best showcases your narrative. For physical displays, photo books offer an intimate viewing experience, while gallery walls create a more immersive environment.
Digital platforms like websites or social media allow for wider distribution and interactive elements.
Choose a layout that enhances your story's flow. For linear narratives, a straightforward left-to-right or top-to-bottom arrangement works well. Non-linear stories might benefit from a grid or mosaic layout.
Pay attention to spacing and sizing; give important images more prominence.
Consider accompanying text carefully. Captions can provide context, but don't overexplain. Let viewers interpret the visual story. If using titles, make certain they complement rather than overshadow the images.
Think about the viewing environment. For physical displays, lighting and room layout are vital. Online, make certain your sequence is mobile-friendly and loads quickly.
Consider how changes between images affect pacing and mood.
Frequently Asked Questions
How Many Photos Are Typically Needed for an Effective Storytelling Sequence?
You'll typically need 3-7 photos for an effective storytelling sequence. Start with an establishing shot, include key moments or details, and end with a strong closing image. Adjust based on your story's complexity and pacing.
Can I Mix Color and Black-And-White Images in a Photo Sequence?
You can absolutely mix color and black-and-white images in a photo sequence. It's a creative choice that can add depth and contrast to your story. Just make sure there's a purpose behind it, enhancing the narrative rather than distracting from it.
What's the Best Way to Handle Text Captions in a Photo Story?
You'll want to keep text captions brief and impactful. Place them consistently, either below or beside images. Use a legible font and consider color contrast. Don't overuse captions; let some photos speak for themselves.
How Do I Incorporate Audio Elements Into My Photo Sequence Presentation?
To incorporate audio into your photo sequence, you can add background music, narration, or ambient sounds. You'll want to sync these elements with your images, ensuring they enhance rather than distract from your visual story. Consider using audio editing software for precise timing.
Are There Specific File Formats Best Suited for Sharing Photo Sequences Online?
For sharing photo sequences online, you'll want to use popular formats like JPEG for images and MP4 for video. Consider using GIF for short animations. Make certain your files are optimized for web to improve loading times.
In Summary
You've now got the tools to craft compelling photo sequences that tell powerful stories. Remember to define your narrative, choose a cohesive theme, and sequence for emotional impact. Don't forget to leverage your smartphone's features and edit for consistency. Experiment with different storytelling structures and presentation methods. With practice, you'll master the art of visual storytelling, creating sequences that captivate and move your audience. Keep shooting, keep refining, and let your creativity shine through your photos.


Leave a Reply