
Natural framing is a pro technique that'll transform your photos. You'll use elements in the scene, like trees, doorways, or arches, to create a frame around your subject. This adds depth, context, and visual interest to your images. Look for opportunities in both foreground and background elements. Experiment with different angles and distances to find the perfect composition. Consider how aperture affects the framing, and don't forget to use symmetry, reflections, and negative space to enhance your shots. With practice, you'll master this skill and take your photography to the next level. The world of natural framing has even more secrets waiting to be uncovered.
Understanding Natural Framing

While many photographers focus on composition rules like the rule of thirds, natural framing is often overlooked as a powerful technique to enhance your images. Natural framing involves using elements in your scene to create a frame around your main subject, drawing the viewer's eye to the focal point and adding depth to your composition.
You'll find natural frames everywhere once you start looking for them. Trees, doorways, windows, arches, and even people can serve as frames. The key is to position your subject within these elements to create a visually appealing composition.
Natural framing doesn't just improve aesthetics; it can also convey a sense of place, add context, or create a sense of mystery.
To effectively use natural framing, you'll need to evaluate your perspective and positioning. Move around your subject to find the best angle that incorporates the frame. Pay attention to the frame's shape, size, and how it relates to your subject.
You can use partial frames or even multiple frames within a single image for added interest. Remember, the frame should enhance your subject, not overpower it.
Identifying Frame Elements
When you're looking for natural frames, consider both foreground and background elements that can encapsulate your subject.
You'll often find effective frames in arches and doorways, which can add depth and context to your composition.
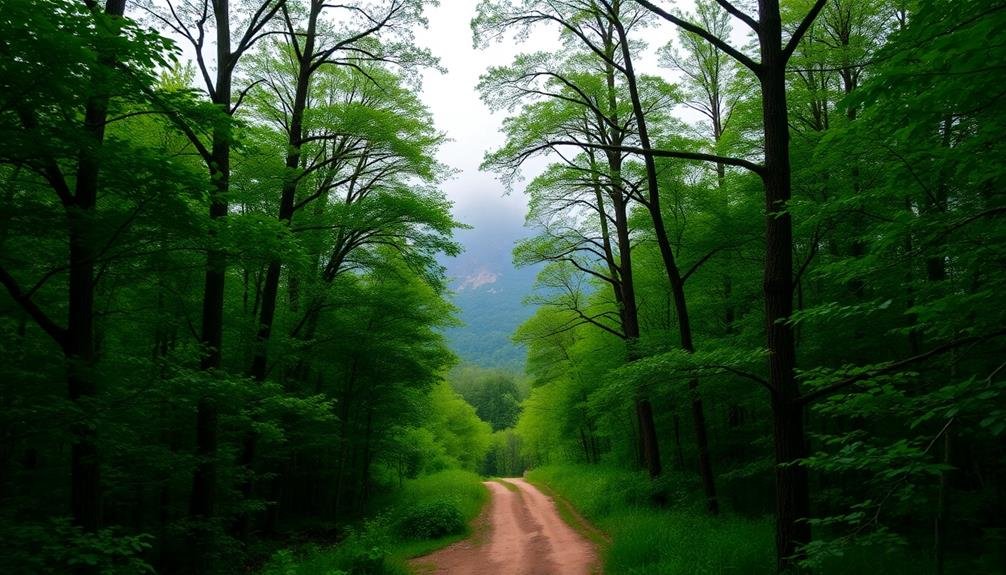
Don't overlook the potential of trees and branches, which can create organic borders and lead the viewer's eye to your focal point.
Foreground vs. Background Elements
Photographers face an essential decision when selecting natural framing elements: should they use foreground or background objects? Both options offer unique advantages and can dramatically enhance your composition.
Foreground elements, such as tree branches, archways, or window frames, create depth and draw the viewer's eye into the scene. They're particularly effective when you want to add context or create a sense of intimacy. Position yourself close to these objects and use a wide-angle lens to emphasize their framing effect.
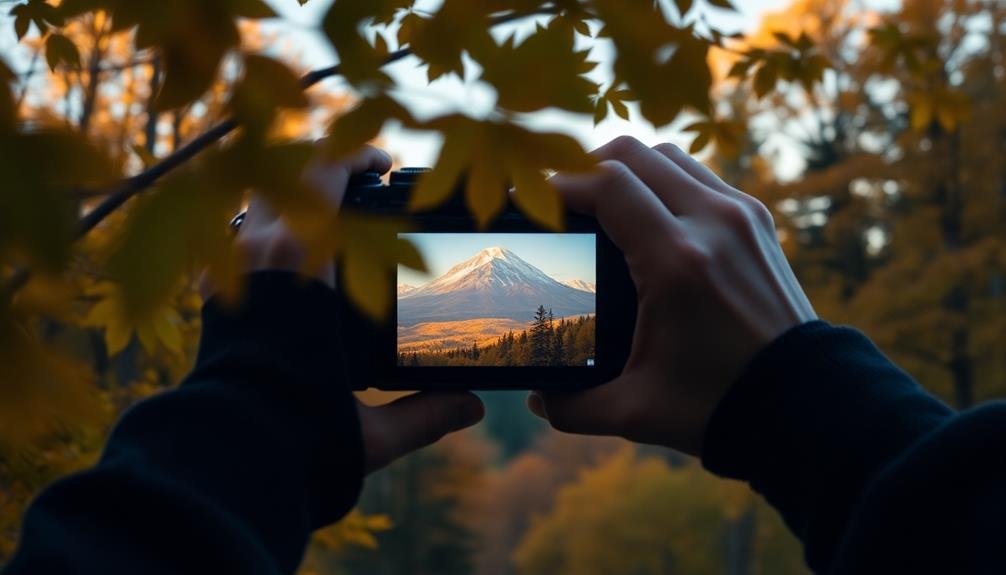
Background elements, like distant mountains, clouds, or architectural features, can provide a subtle, enveloping frame that doesn't compete with your main subject. They're ideal for creating a sense of scale or highlighting the environment surrounding your focal point. Use a telephoto lens to compress the scene and bring these background frames closer to your subject.
Consider the story you're trying to tell when choosing between foreground and background framing. Experiment with both to see which best complements your subject and overall composition.
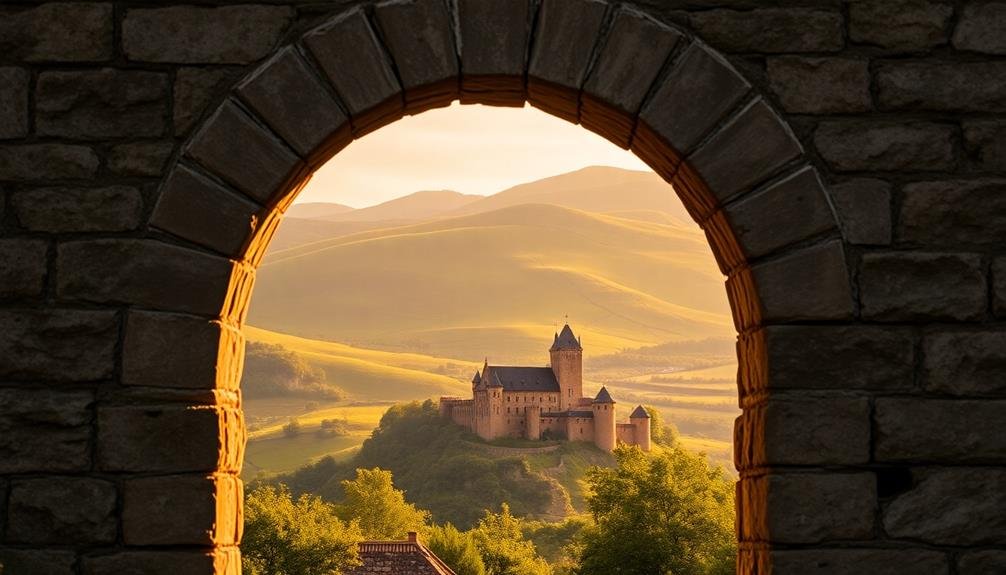
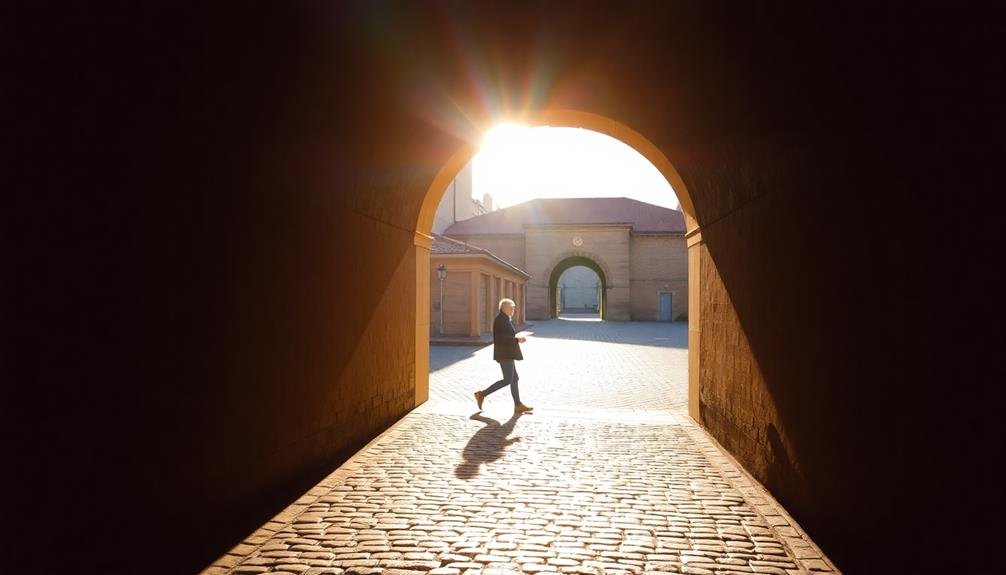
Arches and Doorways
Countless arches and doorways offer photographers ideal natural framing elements. These architectural features create ready-made frames that draw the viewer's eye to the main subject.
When you're out shooting, keep an eye out for arches in bridges, buildings, and natural rock formations. Doorways, whether in modern structures or ancient ruins, can also serve as powerful framing devices.
To use arches and doorways effectively, position your subject within or just beyond the opening. This technique creates depth and context, leading the viewer's gaze through the frame.
Experiment with different angles and distances to find the most compelling composition. You can shoot straight through the center or use off-center framing for a more dynamic effect.
Consider the shape and style of the arch or doorway. Gothic arches add a sense of height and grandeur, while rustic wooden doorways lend a cozy, intimate feel.
Pay attention to the interplay of light and shadow within these structures, as it can enhance the framing effect and add drama to your image.
Trees and Branches
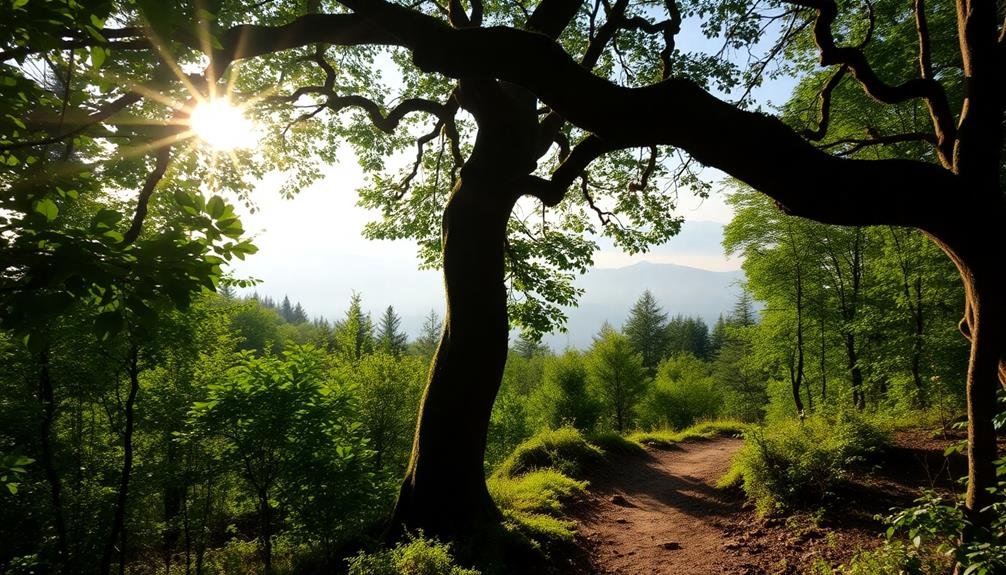
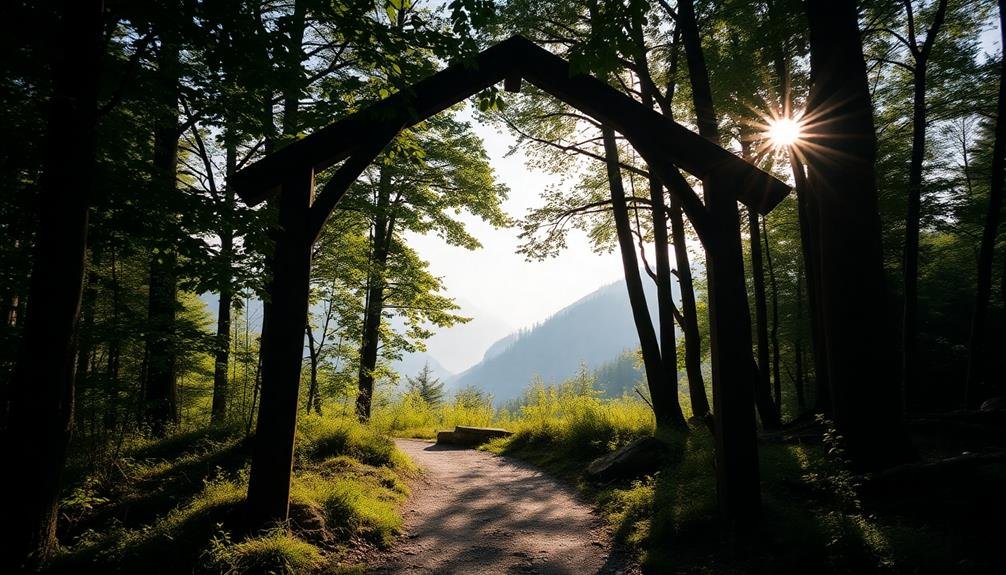
In addition to architectural elements, nature provides abundant framing opportunities through trees and branches. You'll find these versatile framing elements in various settings, from urban parks to dense forests. Look for overhanging branches that create a natural arch or canopy, framing your subject beneath. Leafy trees can form a lush border around your composition, drawing the viewer's eye to the center.
When using trees as frames, consider the season. In spring and summer, dense foliage creates a solid frame, while autumn leaves add vibrant colors. Winter's bare branches offer a more delicate, intricate framing effect. Pay attention to the interplay of light and shadow through the leaves and branches, as this can add depth and interest to your frame.
Don't limit yourself to fully surrounding your subject. Sometimes, a single tree trunk on one side of the frame can provide balance and context. Experiment with different angles and distances to find the most effective framing composition.
Using Archways and Doorways
Archways and doorways offer powerful natural framing elements in photography.
You'll find they're excellent for creating depth and perspective, drawing the viewer's eye to your intended focal point.
These architectural features can also add visual interest to your composition, providing a sense of place and context within your images.
Creating Depth and Perspective
Photographers can harness the power of archways and doorways to add depth and perspective to their images. When you frame your subject through these architectural elements, you're creating layers that guide the viewer's eye into the scene. This technique not only adds visual interest but also creates a sense of three-dimensionality in your two-dimensional photograph.
To maximize depth, position yourself so that the archway or doorway is in the foreground, with your main subject visible through the opening. The closer you're to the framing element, the more pronounced the effect will be. You can experiment with different angles to find the most compelling composition.
Try shooting from slightly off-center or at an angle to create a more dynamic image. Pay attention to the light as well. If the area beyond the archway or doorway is brighter than the foreground, you'll create a natural vignette effect that further enhances depth.
You can also use the frame to obscure distracting elements in the background, focusing the viewer's attention on your subject and creating a more impactful image.
Highlighting Focal Points
One of the most effective ways to draw attention to your subject is by using archways and doorways as natural frames. These architectural elements create a window-like effect, guiding the viewer's eye directly to your focal point. When you're composing your shot, look for opportunities to position your subject within or behind these structures.
Archways and doorways come in various shapes and sizes, each offering unique framing possibilities. Ornate stone arches can add a sense of grandeur, while simple wooden doorframes can create a more rustic or intimate feel.
As you frame your subject, consider how the shape and texture of the archway or doorway complement or contrast with your main subject. You can experiment with different positions relative to the frame. Place your subject dead center for a symmetrical composition, or offset them for a more dynamic feel.
Don't forget to pay attention to the background visible through the frame. Ideally, it should enhance your subject without competing for attention. By mastering this technique, you'll create images with clear focal points that instantly captivate your audience.
Adding Architectural Interest
Beyond their role in highlighting focal points, archways and doorways can infuse your photographs with intriguing architectural interest. These structural elements offer a unique way to frame your subjects while adding depth and character to your images.
When you're shooting in urban or historical settings, keep an eye out for ornate entrances, grand arches, or even simple doorways that can serve as natural frames.
To make the most of architectural framing, position your subject within or just beyond the opening. This technique creates a sense of discovery, as if you're inviting viewers to peek through the frame.
Experiment with different angles and distances to find the perfect balance between the framing element and your subject. Don't hesitate to play with symmetry or asymmetry in your composition.
Consider the style and era of the architecture you're using as a frame. Gothic arches, modern doorways, or rustic barn entrances each bring their own flavor to your image.
Pay attention to the textures, patterns, and colors of these architectural elements, as they can complement or contrast with your subject, adding visual interest to your composition.
Framing With Trees
Nature's sentinels, trees offer a versatile and readily available framing element in outdoor photography. When you're composing your shot, look for branches, leaves, or entire tree trunks that can create a natural border around your subject. You'll find that trees can add depth, context, and visual interest to your images.
To frame with trees effectively, position yourself so that branches or foliage partially obscure the edges of your frame. This technique draws the viewer's eye to the center of the image where your main subject should be. You can use a single tree to create a one-sided frame or multiple trees to enclose your subject on all sides.
Consider the season when framing with trees. In spring and summer, lush foliage can create soft, dappled frames. Autumn offers vibrant colors, while winter's bare branches provide stark, dramatic framing.
Experiment with different apertures to control the amount of blur in your tree frame. A wide aperture will create a softer, more ethereal frame, while a narrow aperture will keep both the frame and subject in sharp focus.
Window Framing Techniques
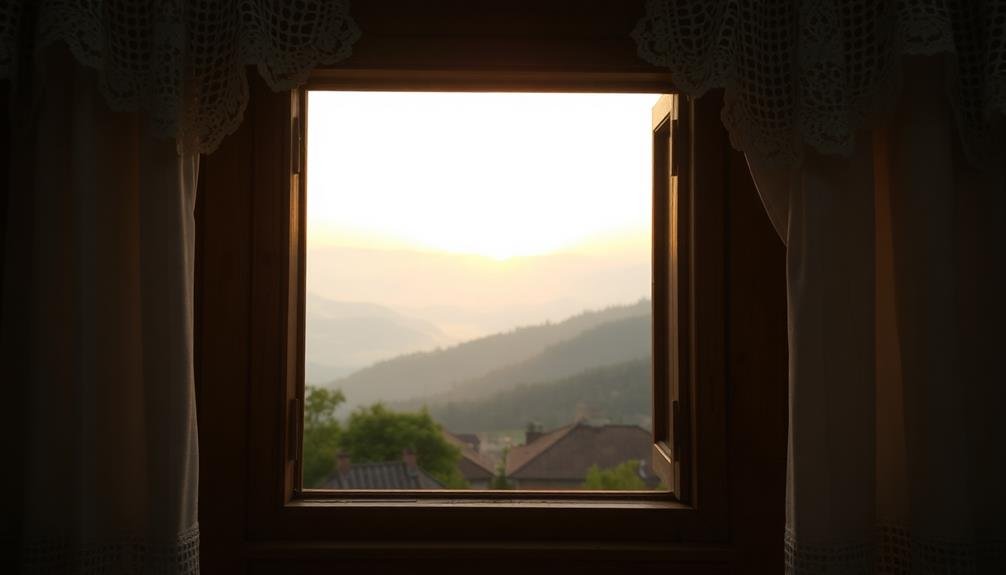
Peering through windows offers photographers a unique framing opportunity that can add depth and context to their images. When using window framing techniques, contemplate the shape and style of the window itself. Arched windows can create a romantic or nostalgic feel, while modern, geometric windows can add a contemporary edge to your shot.
Position your subject within the window frame, using the edges to draw the viewer's eye inward. You can create interesting compositions by placing your subject off-center or using the rule of thirds.
Pay attention to reflections in the glass, as they can either enhance or detract from your image. To minimize unwanted reflections, try shooting at an angle or using a polarizing filter.
Experiment with focusing techniques. You can focus on the subject beyond the window for a sense of depth, or focus on the window itself to emphasize its framing effect.
Don't forget to contemplate the lighting. Windows can create dramatic light and shadow patterns, adding another layer of interest to your composition.
Incorporating Shadows as Frames
Shadows offer a unique way to frame your subjects in photography.
You'll find that using shadows as frames can create dramatic contrast, drawing attention to your main subject while adding depth to your composition.
For a softer approach, try incorporating diffused shadows, which can provide subtle edge framing and add a sense of mystery to your images.
Dramatic Contrast Creation
Photographers can harness the power of shadows to create dramatic contrast and natural frames within their compositions. By carefully positioning your subject in relation to light sources, you'll create striking silhouettes and deep shadows that draw attention to the main focal point. Look for areas where light and dark meet, such as doorways, windows, or the edge of a building, to frame your subject in a pool of light surrounded by shadow.
To achieve dramatic contrast, expose for the highlights and let the shadows fall into darkness. This technique works particularly well in high-contrast scenes, like bright sunlight or artificial lighting at night. You can also use backlighting to create a halo effect around your subject, separating them from the background.
| Technique | Effect | Best Used For |
|---|---|---|
| Silhouette | Strong outline | Recognizable shapes |
| Chiaroscuro | Light/dark interplay | Moody portraits |
| Rim lighting | Glowing edges | Separating subject |
Experiment with different angles and times of day to find the most engaging shadow patterns. Remember, the interplay between light and shadow can create depth, dimension, and mystery in your images, turning an ordinary scene into a fascinating photograph.
Soft Edge Framing
While dramatic contrast can create striking images, soft edge framing offers a subtler approach to natural framing. This technique uses shadows to gently define the borders of your subject, creating a more nuanced composition.
You'll often find soft edge framing opportunities during the golden hours of sunrise and sunset when shadows are longer and softer.
To incorporate shadows as frames, look for areas where light is partially blocked, creating soft-edged shadows. These can be cast by trees, buildings, or even people. Position your subject within these shadowy areas, allowing the lighter edges to naturally draw attention to your focal point.
You can also use dappled light filtering through leaves or lattices to create a delicate framing effect.
When shooting indoors, utilize window light to create soft edge frames. Place your subject near a window, allowing the light to illuminate them while casting subtle shadows around the edges.
Experiment with different angles and distances from the light source to adjust the intensity and direction of your soft edge frame. This technique works particularly well for portraits, still life, and detail shots, adding depth and dimension to your images.
Utilizing Foreground Objects
Foreground objects are powerful tools in a photographer's arsenal for creating natural frames. When you're composing your shot, look for elements in the foreground that can add depth and context to your main subject. Trees, archways, windows, and even people can serve as effective framing devices. By positioning these objects in the foreground, you'll create a sense of depth and guide the viewer's eye to the focal point of your image.
To utilize foreground objects effectively, you'll need to take into account their placement carefully. Try positioning them off-center to create a more dynamic composition. Experiment with different angles and perspectives to find the most interesting way to incorporate these elements. You can also use foreground objects to add color, texture, or contrast to your image.
When using foreground objects, pay attention to your camera's aperture settings. A wide aperture will create a shallow depth of field, blurring the foreground and drawing more attention to your subject. Conversely, a narrower aperture will keep both the foreground and background in focus, creating a more thorough scene.
Remember to adjust your focus point accordingly to make sure your main subject remains sharp.
Creating Depth With Frames
Through the strategic use of natural frames, you can add a remarkable sense of depth to your photographs. When you position a frame in the foreground, it creates a visual pathway that draws the viewer's eye into the scene. This technique effectively separates the foreground from the background, enhancing the perception of three-dimensional space within your two-dimensional image.
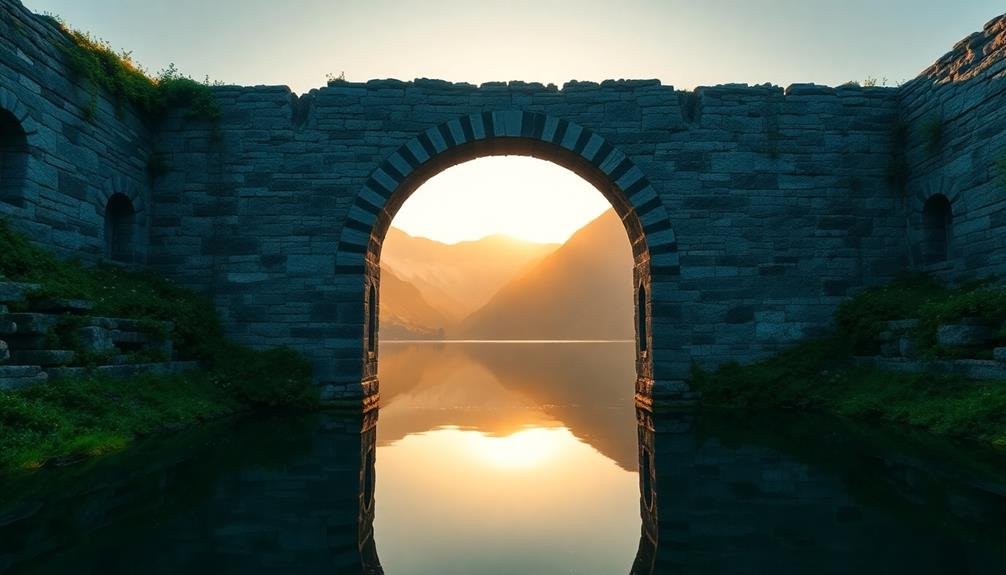
To maximize depth, choose frames that contrast with your main subject. Dark frames around bright subjects or vice versa can create a striking effect. You'll also want to weigh the shape of your frame. Arches, doorways, and windows naturally guide the eye, while organic shapes like tree branches can add a softer, more subtle depth.
Experiment with your camera's aperture to control the frame's focus. A wide aperture will blur the frame, creating a dreamy effect and emphasizing your subject. Conversely, a narrow aperture keeps both frame and subject sharp, ideal for architectural or landscape shots.
Symmetry in Natural Framing
Symmetry seekers in photography often find natural framing to be a goldmine of opportunities. When you're composing your shot, look for elements in nature that create a balanced, mirror-like effect around your subject. Trees, archways, or rock formations can serve as perfect symmetrical frames, drawing the viewer's eye directly to the center of the image.
To achieve symmetry in natural framing, position your subject in the middle of the frame and make certain that the framing elements on both sides are equally balanced. You'll want to pay close attention to the lines and shapes created by these natural frames, making sure they're as identical as possible on each side.
Don't limit yourself to horizontal symmetry; vertical symmetry can be just as striking. Look for reflections in water or glass to create a perfect mirror image of your subject and its frame. Remember that symmetry doesn't always have to be perfect to be effective. Slight imperfections can add character and intrigue to your composition.
When using symmetry in natural framing, experiment with different angles and perspectives. Sometimes, a slight shift in your position can dramatically improve the symmetrical balance of your shot.
Framing With Reflections
Reflections offer a unique way to create natural frames in your photography. They can add depth, symmetry, and intrigue to your images. When using reflections as frames, you'll often find them in water, glass, or other reflective surfaces. Look for opportunities to position your main subject within the reflection, creating a natural border around it.
To effectively use reflections as frames, consider these techniques:
| Technique | Description |
|---|---|
| Water Reflections | Use calm lakes or puddles to frame landscapes |
| Mirror Images | Capture symmetrical reflections in still water |
| Urban Reflections | Utilize glass buildings or car windows in cities |
| Abstract Frames | Create unique compositions with distorted reflections |
When shooting with reflections, pay attention to the angle of your camera. Slight adjustments can dramatically change the composition. You'll often need to get low to capture the full reflection, so don't be afraid to crouch or even lie down. Experiment with different times of day, as lighting can greatly affect the quality of reflections. Remember, the reflection doesn't always have to be perfect – sometimes, a partially distorted reflection can create a more interesting frame for your subject.
Negative Space and Framing

Harnessing the power of negative space, photographers can create compelling natural frames that draw attention to their subjects. Negative space refers to the empty areas surrounding your main subject, and when used effectively, it can enhance your composition and create a sense of balance.
To incorporate negative space into your framing, look for opportunities to place your subject off-center. This technique allows you to use the surrounding emptiness as a frame, guiding the viewer's eye to the focal point. You'll often find negative space in the sky, open water, or expansive landscapes.
When framing with negative space, consider the following:
- Use contrasting colors or tones to emphasize the subject.
- Experiment with different aspect ratios to maximize the impact of negative space.
- Pay attention to the edges of your frame to guarantee clean, uncluttered borders.
- Incorporate leading lines within the negative space to direct attention.
Editing for Enhanced Framing

While capturing natural frames in-camera is ideal, post-processing techniques can greatly enhance your framing efforts.
Start by cropping your image to refine the frame's position and emphasize its impact. You can adjust the aspect ratio to better suit the framing elements, ensuring they don't overpower the main subject.
Use selective adjustments to draw attention to your framed subject. Increase contrast and clarity within the frame while slightly reducing these elements in the surrounding areas. Vignetting can also help direct the viewer's eye inward.
For more subtle framing, try dodging (lightening) the subject and burning (darkening) the frame.
Color adjustments can strengthen your frame. Desaturate the framing elements while boosting the subject's colors, or create a complementary color scheme between the frame and subject.
You can also experiment with black and white conversions, leaving only the subject in color for a dramatic effect.
Frequently Asked Questions
How Does Natural Framing Differ From Artificial Framing in Photography?
Natural framing uses existing elements in the scene to frame your subject, while artificial framing involves adding props or objects. You'll find natural frames in doorways, arches, or foliage, whereas you'd deliberately place items for artificial framing.
Can Natural Framing Be Effectively Used in Portrait Photography?
You can definitely use natural framing in portrait photography. It'll add depth and context to your shots. Look for elements like trees, doorways, or arches to frame your subject. It's a great way to enhance your portraits.
What Camera Settings Are Best for Capturing Natural Frames?
You'll want to use a smaller aperture (f/8-f/16) for greater depth of field. Set a slower shutter speed if needed, and adjust ISO accordingly. Use manual focus to guarantee both frame and subject are sharp.
How Can I Practice Natural Framing Techniques Without Expensive Equipment?
You don't need expensive gear to practice natural framing. Use your smartphone or any camera you have. Look for doorways, windows, or tree branches to frame subjects. Experiment with different angles and compositions in everyday settings.
Are There Cultural or Regional Differences in Natural Framing Preferences?
Yes, there are cultural and regional differences in natural framing preferences. You'll find that some cultures favor symmetry, while others prefer asymmetry. Urban areas might lean towards architectural frames, while rural regions often use natural elements.
In Summary
You've now got the tools to elevate your photography with natural framing. Remember, it's all about seeing potential frames in your surroundings. Look for archways, trees, windows, and reflections. Don't forget to play with symmetry and negative space. As you practice, you'll develop an eye for these opportunities. Keep experimenting, and soon you'll be framing your shots like a pro, creating depth and drawing viewers into your images.


Leave a Reply