To capture stunning symmetrical reflection photos, start by finding perfect reflective surfaces like calm water or glass buildings. Position your camera low and level with the surface for dramatic effects. Experiment with different angles to add depth and dynamism. Adjust your shutter speed and exposure for ideal results, using slower speeds for silky water effects. Utilize gridlines to guarantee perfect alignment and composition. During editing, fine-tune symmetry and remove distractions. Finally, explore creative techniques like partial reflections to add intrigue. By mastering these tips, you'll transform ordinary scenes into extraordinary visual art that captivates viewers.
Find Perfect Reflective Surfaces
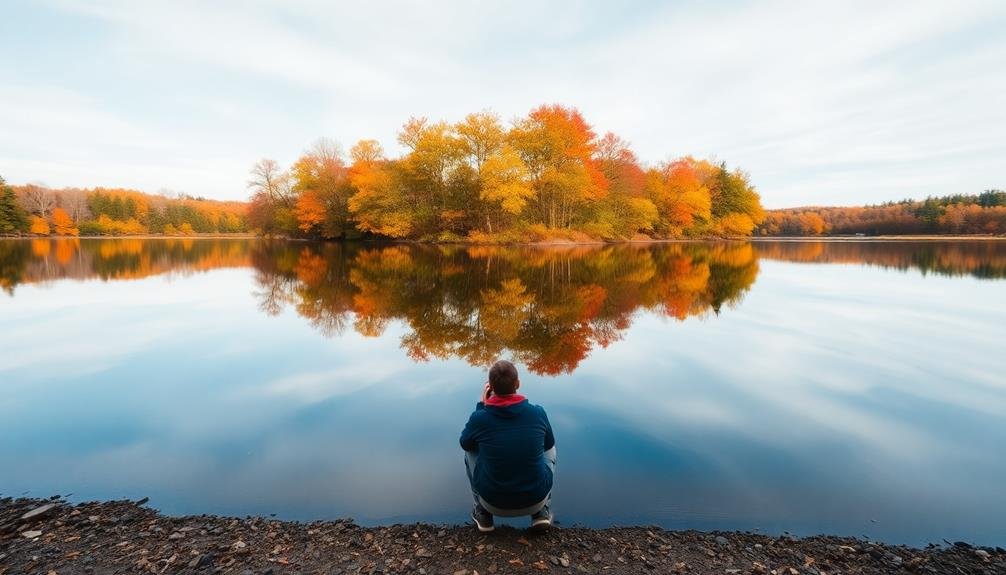
When searching for perfect reflective surfaces, you'll want to keep an eye out for calm bodies of water like lakes, ponds, and puddles. These natural mirrors provide excellent opportunities for symmetrical reflection photos. Look for still water early in the morning or during windless evenings when the surface is most likely to be undisturbed.
Don't limit yourself to just water, though. Glass buildings, polished floors, and even wet streets after rain can offer unique reflective surfaces. Experiment with different angles and perspectives to find the most striking symmetry.
Metal surfaces, such as chrome or stainless steel, can also create interesting reflections, especially in urban environments.
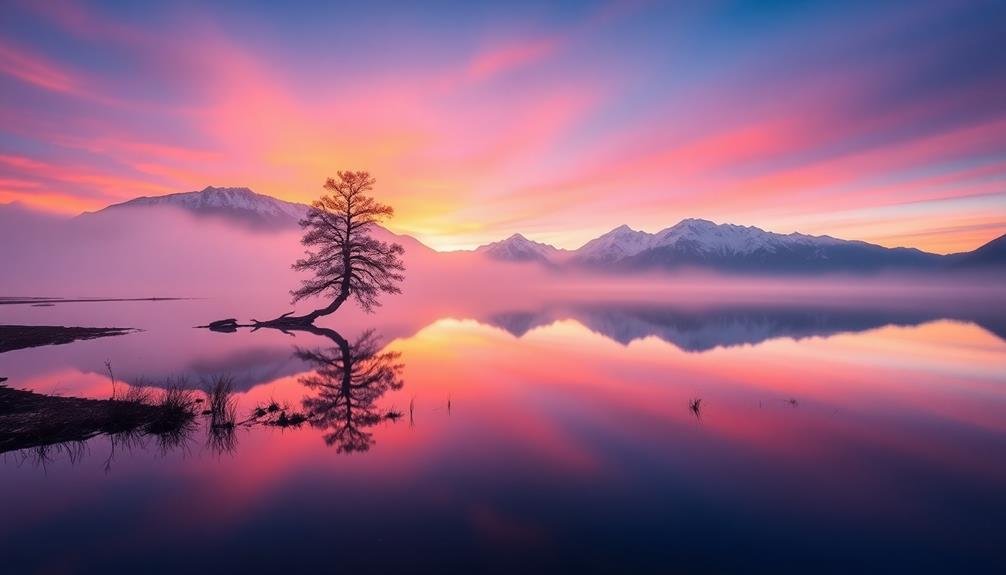
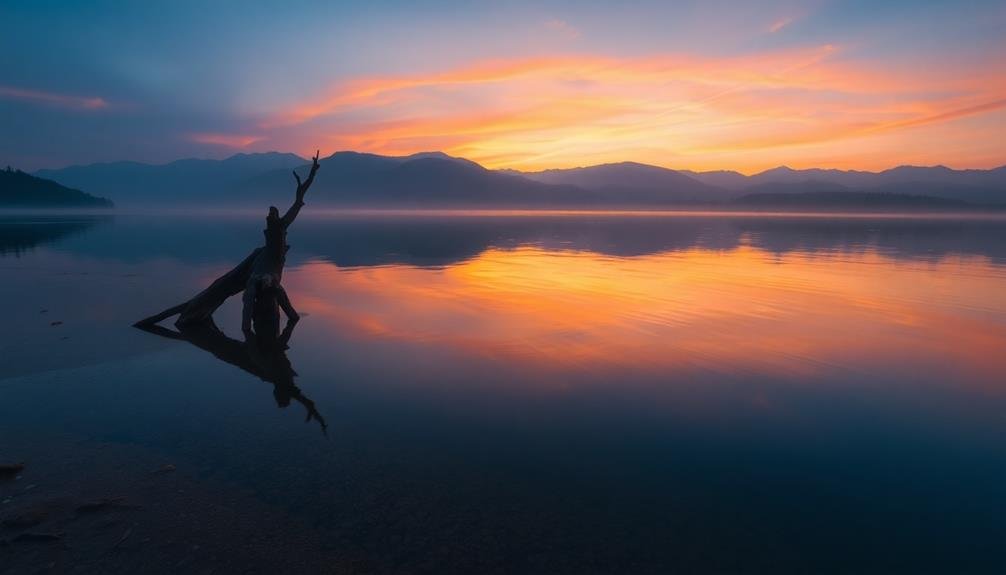
Consider the surrounding environment when choosing your reflective surface. A clear sky or colorful sunset can dramatically enhance the reflection's visual impact. Pay attention to objects near the surface that might create interesting shapes or patterns in the reflection.
Remember that the smoother and more uniform the surface, the clearer and more defined your reflection will be. If you're struggling to find a perfectly still surface, try using a longer exposure to smooth out any minor disturbances in the water or reflective material.
Use Water for Mirror-Like Effects
Water can be your best ally in creating mirror-like reflections for symmetrical photos.
You'll want to seek out calm bodies of water, like still lakes or placid ponds, to achieve the smoothest surface possible.
Position your camera low and level with the water's surface, and experiment with slower shutter speeds to capture the most detailed reflections.
Find Calm Water Sources
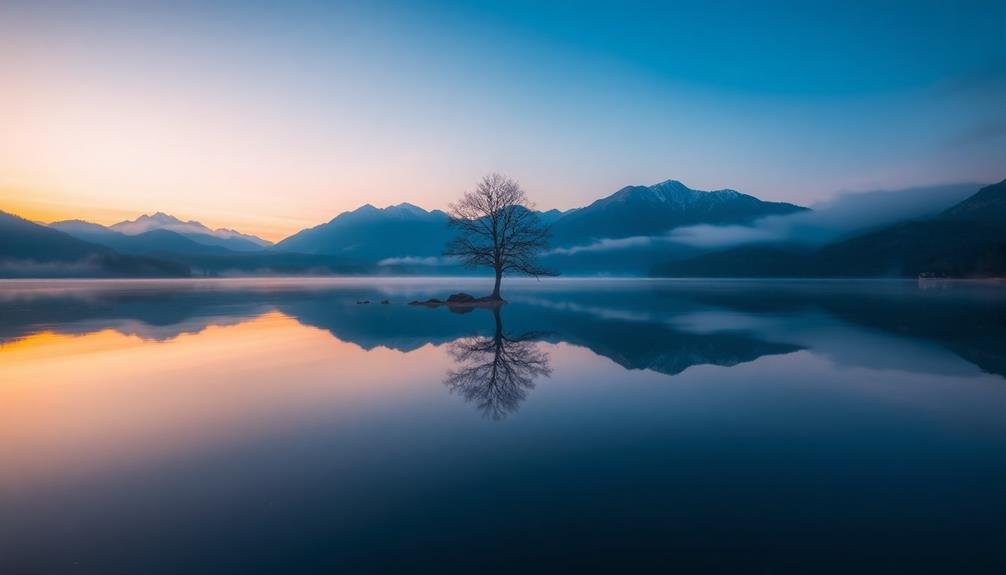
Tranquility is key when seeking the perfect canvas for symmetrical reflection photography. You'll want to find calm water sources that act as nature's mirror, providing a smooth surface to capture stunning reflections. Look for bodies of water that are sheltered from wind and other disturbances. Lakes, ponds, and slow-moving rivers are excellent options, especially during early morning or late evening when the air is often still.
Consider these additional water sources for your symmetrical shots:
- Puddles after rain, offering unique urban reflections
- Flooded fields or rice paddies in rural areas
- Man-made fountains or pools in parks and gardens
Don't limit yourself to natural settings. Urban environments can provide unexpected opportunities for reflection photography. Glass buildings, polished surfaces, and even wet sidewalks can create intriguing symmetrical compositions.
Remember to scout locations in advance and be patient. The perfect conditions for mirror-like reflections may require waiting for the right moment when the water settles. By finding calm water sources, you'll set the foundation for capturing breathtaking symmetrical reflection photos that will captivate viewers and showcase your artistic vision.
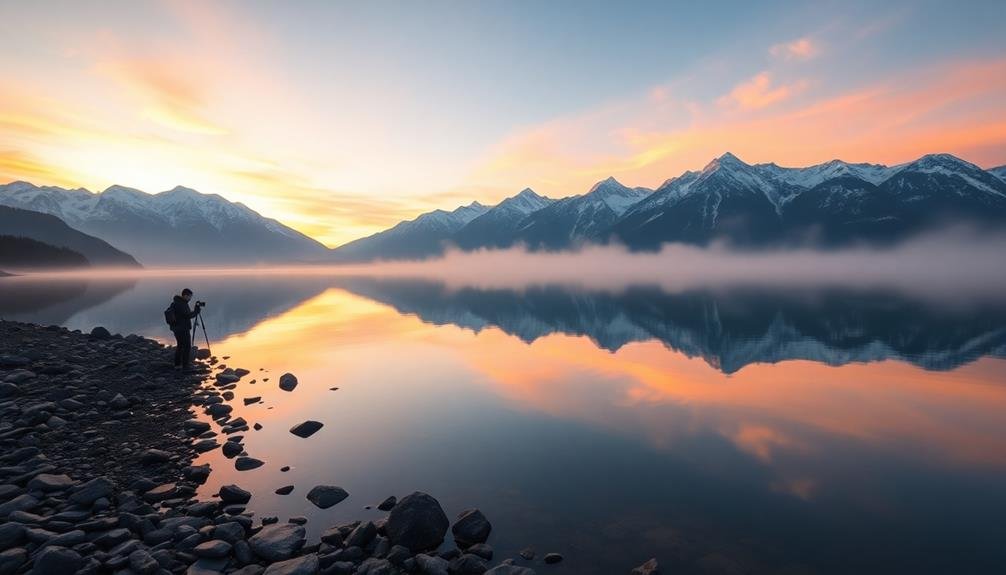
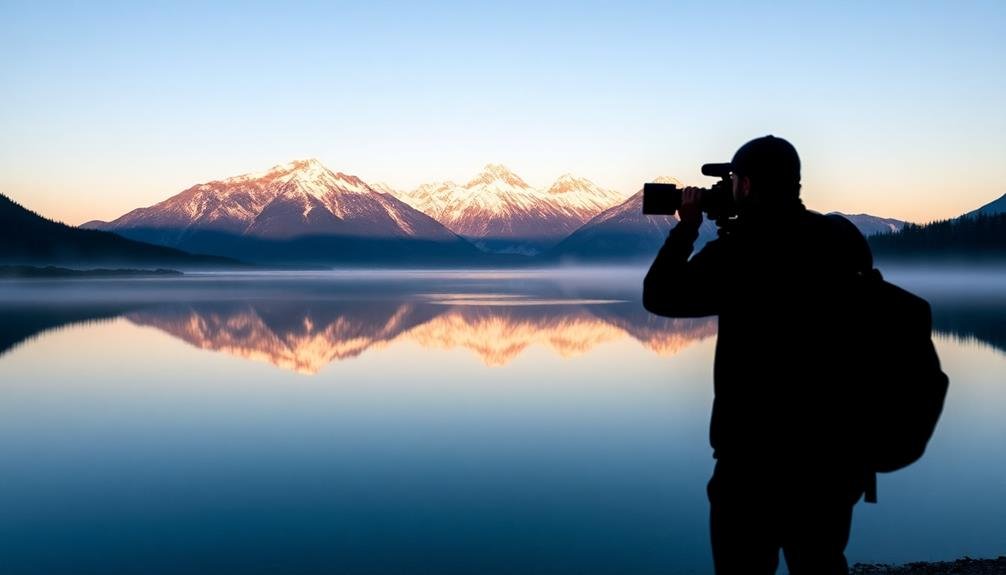
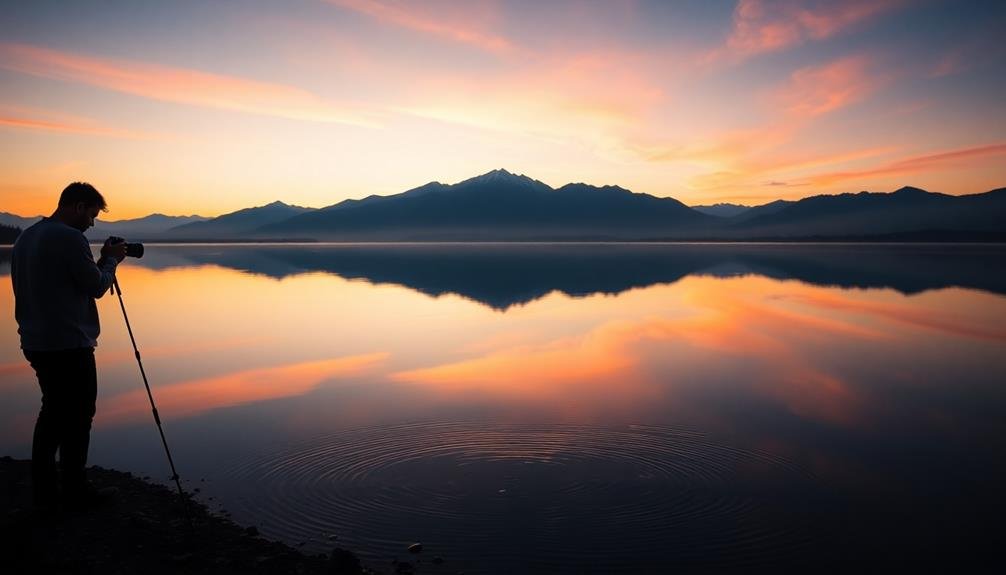
Position Camera Correctly
Once you've found your ideal calm water source, it's time to focus on camera positioning. For mirror-like reflections, you'll want to get as close to the water's surface as possible. This often means crouching down or even lying on the ground. The lower your angle, the more prominent and dramatic the reflection will appear in your frame.
Experiment with different heights to find the perfect balance between the subject and its reflection. You'll typically want to position your camera so that the horizon line splits the frame in half, creating a symmetrical composition. However, don't be afraid to break this rule for creative effect.
Here's a quick guide to camera positioning for reflection photography:
| Camera Height | Effect | Best For |
|---|---|---|
| Low | Dramatic reflections | Landscapes |
| Eye-level | Natural perspective | Portraits |
| High | Minimized reflections | Emphasizing foreground |
Remember to use a tripod for stability, especially in low light conditions. It'll help you maintain a level horizon and reduce camera shake. If you're shooting handheld, use a faster shutter speed to guarantee sharpness. Don't forget to adjust your focus point, as the reflection may appear slightly closer than the actual subject.
Adjust Shutter Speed
Shutter speed mastery is essential for capturing mirror-like reflections in water. When shooting reflections, you'll want to experiment with different shutter speeds to achieve the desired effect. Slower shutter speeds can create a smooth, glass-like surface, while faster speeds will freeze any ripples or movement in the water.
For perfectly still water, aim for a shutter speed of 1/60 second or slower. This allows the camera to capture a longer exposure, smoothing out any minor disturbances on the water's surface. If there's a slight breeze or gentle movement, you might need to go even slower, possibly using a tripod to avoid camera shake.
Consider the following factors when adjusting your shutter speed:
- Light conditions: Lower light requires slower speeds
- Subject movement: Faster speeds for moving subjects
- Desired effect: Slower for silky water, faster for texture
Don't be afraid to bracket your shots, taking multiple exposures at different shutter speeds. This gives you more options to choose from later.
Position Your Smartphone Correctly
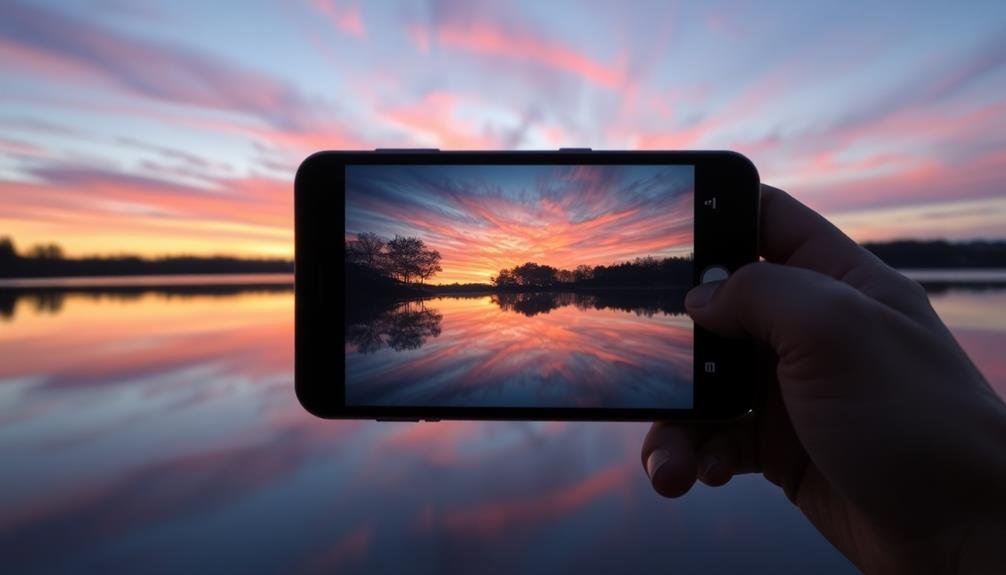
To capture perfect symmetry in your reflection photos, you'll need to position your smartphone with precision.
Start by finding a stable surface to rest your device on, ensuring it's completely level and parallel to the reflective surface.
Align your camera perfectly, using the gridlines feature in your camera app to help you achieve a straight horizon and centered composition.
Find Stable Surface
With your location scouted, it's time to position your smartphone correctly for those stunning symmetrical reflection shots. Finding a stable surface is essential for capturing crisp, clear images with perfect symmetry.
Look for flat, level surfaces near your chosen water body. This could be a pier, boardwalk, or even a large, flat rock. If you're shooting in an urban setting, seek out smooth pavements or concrete surfaces near fountains or pools.
Once you've found your stable surface, set up your smartphone carefully. Use a tripod or smartphone mount if you have one, as this will provide the most stability and control.
If you don't have these tools, improvise with what's available:
- Place your phone against a solid object like a wall or tree
- Use a small bean bag or folded cloth to create a makeshift stand
- Balance your phone on a flat surface using its own case as a prop
Align Camera Perfectly
Perfection is key when aligning your smartphone for symmetrical reflection photos. To achieve flawless symmetry, position your device parallel to the reflective surface. Use your phone's grid feature to guarantee the horizon line is perfectly centered and level. If you're shooting a vertical reflection, align the central gridline with the object's axis of symmetry.
For water reflections, hold your phone close to the water's surface, but be careful not to submerge it. This low angle will capture more of the reflection and create a striking mirror effect.
When photographing reflections in windows or mirrors, position yourself at a 45-degree angle to minimize your own reflection in the shot.
Pay attention to your phone's tilt. Even a slight angle can throw off the symmetry, so use your device's built-in level tool if available. If not, download a bubble level app for precise alignment.
Take multiple shots with subtle adjustments to guarantee you capture the perfect symmetry.
For added stability, use a smartphone tripod or rest your device on a stable surface. This will help maintain the exact alignment you've carefully set up, resulting in crisp, perfectly symmetrical reflection photos.
Use Gridlines Feature
Your smartphone's gridlines feature is an invaluable tool for capturing stunning symmetrical reflection photos. Most modern smartphones have this option in their camera settings. When enabled, it overlays a grid on your screen, typically dividing it into thirds both horizontally and vertically. This grid helps you align your shot precisely, ensuring the reflection's symmetry is perfect.
To use gridlines effectively:
- Position the horizon or water's edge along one of the horizontal lines
- Align vertical elements, like trees or buildings, with the vertical lines
- Center your main subject at the intersection of two grid lines
When shooting reflections, pay special attention to the center line. It should bisect your image, with the real scene above and its reflection below. This creates a mirror-like effect that's visually striking.
Don't forget to experiment with different angles and compositions while using the grid as your guide.
Experiment With Different Angles
Photographers' quests for the perfect reflection shot often lead them to experiment with various angles. Don't limit yourself to eye-level perspectives. Try crouching low to capture a wider expanse of water, or elevate your position for a bird's-eye view. Tilt your camera slightly to create dynamic diagonal lines, or shoot straight down for abstract patterns.
Consider the following angles and their effects:
| Angle | Effect | Best For |
|---|---|---|
| Low | Emphasizes foreground | Lakeside scenes |
| High | Showcases patterns | City reflections |
| Side | Creates depth | River landscapes |
| Diagonal | Adds dynamism | Urban architecture |
You'll find that each angle offers a unique interpretation of the scene. A low angle might exaggerate the reflection's size, while a high angle could reveal intricate details in the water's surface. Side angles often highlight the contrast between reality and reflection, creating a compelling visual narrative.
Don't be afraid to get creative. Try shooting through objects like fences or foliage to frame your reflection. Experiment with different focal lengths to compress or expand the scene. Remember, the most striking symmetrical photos often come from unexpected perspectives.
Adjust Exposure for Balance
Exposure balancing is essential when capturing symmetrical reflection photos. You'll often find that the sky and water have different brightness levels, making it challenging to capture both elements correctly. To achieve a balanced exposure, you'll need to take into account the dynamic range of your scene and adjust your camera settings accordingly.
Start by metering for the brighter part of the image, usually the sky. Then, use exposure compensation to fine-tune the overall brightness. You might need to underexpose slightly to preserve details in the highlights while still maintaining visibility in the reflections.
Think about using these techniques to improve your exposure balance:
- Graduated neutral density filters to darken the sky
- Bracketing exposures for HDR compositing in post-processing
- Adjusting your camera's metering mode for challenging scenes
Don't be afraid to experiment with different exposure settings to find the perfect balance. Remember that slight underexposure can often be corrected in post-processing, while overexposed areas are more difficult to recover.
Pay attention to the histogram on your camera's LCD screen to make sure you're not clipping highlights or shadows.
With practice, you'll develop an eye for achieving the ideal exposure balance in your symmetrical reflection photos.
Edit to Enhance Symmetry
Three key editing techniques can greatly enhance the symmetry in your reflection photos. First, use the crop tool to precisely align the horizon or central line of reflection. This guarantees a perfect split between the real image and its reflection. Second, apply the straighten tool to correct any slight tilts that might disrupt the symmetry. Even a fraction of a degree can make a difference in the overall impact of your image.
Lastly, use the clone stamp or healing brush to remove any distracting elements that break the symmetry. This could include small objects, imperfections in the water, or uneven edges along the reflection line.
| Technique | Purpose | Impact |
|---|---|---|
| Crop | Align horizon | Perfect split |
| Straighten | Correct tilts | Balanced composition |
| Clone/Heal | Remove distractions | Seamless symmetry |
Create Illusions With Partial Reflections
Partial reflections offer a playground for creating enchanting illusions in your symmetrical photos. By strategically capturing only portions of a reflection, you can craft images that challenge perception and spark curiosity. Experiment with different angles and compositions to reveal just enough of the reflection to intrigue viewers while maintaining a sense of mystery.
To create compelling illusions with partial reflections:
- Use objects or elements in the foreground to partially obstruct the reflection
- Position your camera at varying heights to control how much of the reflection is visible
- Incorporate negative space to emphasize the partial reflection and create visual balance
When shooting, pay attention to the interplay between the real subject and its partial reflection. This relationship can tell a story or evoke emotions in unexpected ways.
Don't be afraid to break traditional symmetry rules; sometimes, asymmetry in partial reflections can lead to more fascinating results.
Try capturing reflections in unconventional surfaces like puddles, glass buildings, or even sunglasses. These unique reflective surfaces can add an extra layer of intrigue to your partial reflection illusions.
Frequently Asked Questions
What Camera Gear Is Essential for Capturing Symmetrical Reflection Photos?
You'll need a camera with manual settings, a sturdy tripod, and a wide-angle lens. Don't forget a polarizing filter to control reflections. A remote shutter release helps minimize camera shake for crisp, symmetrical images.
How Can I Achieve Reflections in Urban Environments Without Water Sources?
You can create reflections in urban settings using glass buildings, polished surfaces, or puddles after rain. Try positioning yourself to capture symmetrical reflections in windows, car hoods, or even smartphone screens for unique urban shots.
Are There Specific Weather Conditions That Enhance Reflective Surfaces?
You'll find that wet surfaces enhance reflections. Rainy days or just after rain are ideal. Overcast skies can also create softer, more even reflections. Early morning dew or foggy conditions can add a magical quality to reflective surfaces.
Can I Create Artificial Reflections for Symmetrical Photos Indoors?
Yes, you can create artificial reflections indoors. Use mirrors, glass surfaces, or even a shallow pan of water. Position your subject and light source carefully. You'll need to experiment with angles to achieve the perfect symmetrical reflection you're after.
What Post-Processing Techniques Help Correct Imperfect Symmetry in Reflection Images?
You can use photo editing software to fix imperfect symmetry. Crop the image carefully, use the transform tool to align elements, and apply mirror effects. Don't forget to adjust brightness and contrast for a seamless look.
In Summary
You've now got the tools to capture mesmerizing symmetrical reflection photos. Remember, it's all about finding the right surface, positioning your phone correctly, and experimenting with angles. Don't forget to adjust your exposure and edit for perfect symmetry. With practice, you'll create stunning illusions that'll make viewers do a double-take. So grab your smartphone and start exploring the world of reflections. Your feed's about to get a whole lot more enchanting!


Leave a Reply