To capture jaw-dropping reflection photos, you'll want to explore these essential filters. Start with a polarizing filter to control reflections and enhance colors. Try a mirror effect filter for symmetrical compositions, or a reflection glow filter for a soft, ethereal look. HDR and black and white filters can add depth and timelessness to your images. Experiment with symmetry and water ripple filters for dynamic effects. Don't forget the golden hour filter to enhance warm tones, and long exposure filters for smooth water reflections. These tools will transform your ordinary scenes into stunning visual masterpieces. Discover how each filter can elevate your reflection photography to new artistic heights.
Polarizing Filter

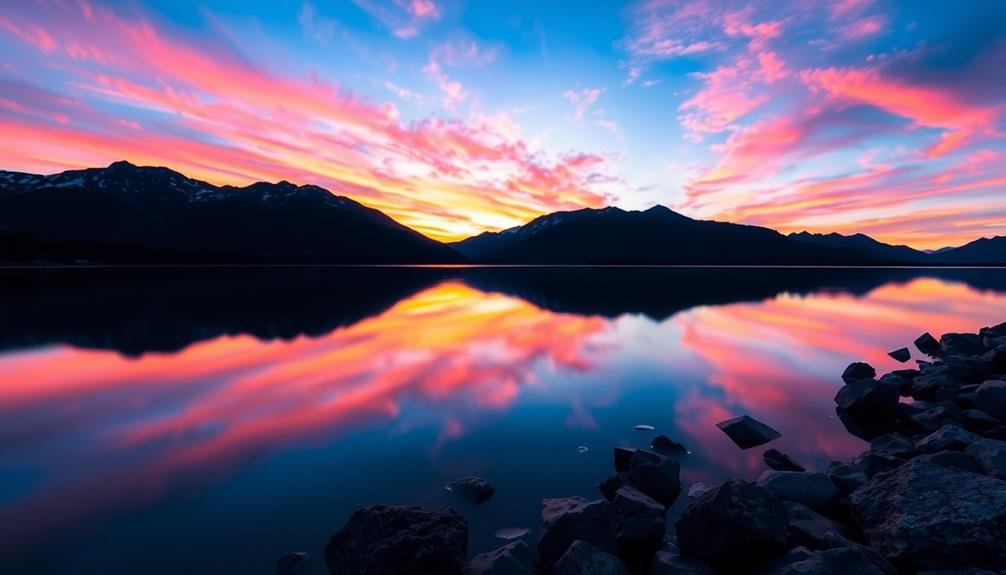
When it comes to reflection photography, a polarizing filter is your secret weapon. This versatile tool allows you to control the amount of reflection in your images, giving you unprecedented creative control.
By rotating the filter, you can enhance or reduce reflections on water surfaces, glass, or other reflective materials. The polarizing filter works by blocking light waves that vibrate in certain directions.
This selective light filtration not only manages reflections but also deepens colors and increases contrast in your shots. You'll notice a significant improvement in the vibrancy of blue skies and the richness of foliage.
To use a polarizing filter effectively, attach it to your lens and rotate it while looking through your camera's viewfinder. You'll see the reflection effect change as you turn the filter.
For maximum impact, position yourself at a 90-degree angle to the sun.
Mirror Effect Filter
Photographers seeking to add a surreal twist to their reflection shots should consider the mirror effect filter. This unique filter creates a perfect mirror image by duplicating half of your composition and flipping it vertically or horizontally. It's an excellent tool for creating symmetrical landscapes, cityscapes, or abstract images that captivate viewers with their unnatural perfection.
To use a mirror effect filter effectively, you'll need to:
- Choose your composition carefully, focusing on strong lines or interesting elements in one half of the frame.
- Experiment with both vertical and horizontal orientations to find the most visually appealing result.
- Pay attention to the center line where the image is mirrored, as this becomes an essential element in the final composition.
Unlike polarizing filters, mirror effect filters don't alter the light entering your lens. Instead, they manipulate the image digitally or through a physical split in the glass.
While some cameras have built-in mirror effects, dedicated filters offer more control and higher quality results. You can also achieve similar effects in post-processing, but using a physical filter allows you to compose and visualize the mirrored image in real-time, enhancing your creative process on location.
Reflection Glow Filter
Enhancing the ethereal quality of reflections, the reflection glow filter adds a soft, luminous halo around reflected elements in your image. This filter creates a dreamy atmosphere by diffusing light around the edges of reflections, making them appear to radiate a gentle glow.
You'll find this effect particularly useful when photographing water reflections at sunrise or sunset, as it amplifies the warm, golden light.
To use the reflection glow filter effectively, you'll want to adjust its intensity based on the lighting conditions and your artistic vision. A subtle glow can add a touch of magic without overwhelming the scene, while a stronger effect can transform your image into a surreal masterpiece.
You can apply this filter selectively to specific areas of your photo, allowing you to emphasize certain reflections while maintaining clarity in others.
When combining the reflection glow filter with other techniques, such as long exposures or polarizing filters, you'll create even more enchanting results.
Experiment with different strengths and combinations to discover the perfect balance for your reflection photography, elevating your images from simple reflections to mesmerizing, glowing spectacles that fascinate viewers.
HDR Filter
The HDR filter stands as a powerful tool for capturing the full range of tones in reflection photography. It allows you to combine multiple exposures, guaranteeing that both the brightest highlights and darkest shadows are preserved in your final image.
When working with reflections, this filter is particularly useful for balancing the often-contrasting light levels between the reflected subject and its surroundings.
To maximize the HDR filter's potential in reflection photography:
- Bracket your exposures: Take multiple shots at different exposure levels, typically -2, 0, and +2 EV.
- Use a tripod: This guarantees perfect alignment between shots, vital for clean HDR merging.
- Pay attention to movement: Be cautious of moving elements in the scene, as they can create ghosting effects in the final image.
When applying the HDR filter, aim for a natural look rather than an over-processed appearance.
Adjust the tone mapping carefully to maintain the delicate balance of your reflection composition. By mastering the HDR filter, you'll be able to capture stunning reflection images with enhanced dynamic range, revealing details in both the brightest and darkest areas of your scene.
Black and White Filter
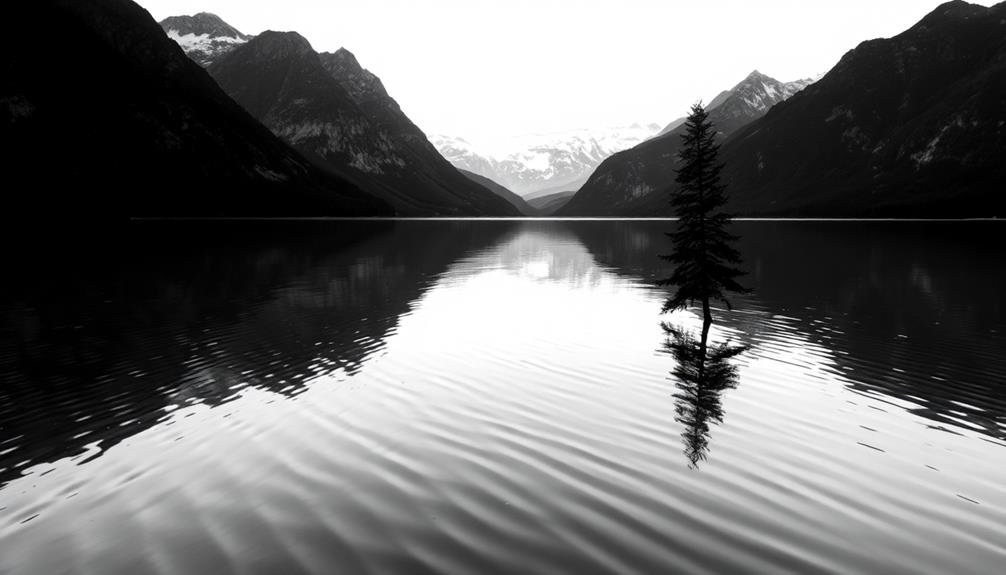
While color often steals the show in reflection photography, the black and white filter can transform your images into timeless masterpieces. This classic filter strips away distracting hues, allowing you to focus on the essence of your composition: form, contrast, and texture.
When you apply a black and white filter to reflection shots, you'll notice how it emphasizes the interplay between light and shadow. Water surfaces become mirror-like, creating striking contrasts between the reflected subject and its surroundings.
You'll find that this filter enhances the mood of your images, adding drama and depth to even the most serene scenes.
To make the most of black and white in reflection photography, look for strong geometric shapes and patterns. Architectural reflections, in particular, benefit from this treatment, as the monochrome palette accentuates lines and angles.
Don't shy away from high-contrast scenes; they'll produce the most impactful results.
Experiment with different conversion methods, adjusting contrast, brightness, and tonal range to achieve your desired effect.
Prism Filter
When you're looking to add a touch of magic to your reflection photography, a prism filter can be your secret weapon.
You'll find that this filter excels at creating ethereal light effects, introducing dreamy rainbow flares and prismatic distortions to your images.
Additionally, a prism filter can enhance colors and reflections, giving your photos a unique and enchanting dimension that's sure to make them stand out.
Creating Ethereal Light Effects
Through the use of a prism filter, photographers can create mesmerizing, ethereal light effects in their reflection images. This unique filter bends and refracts light, producing dreamy, rainbow-like patterns that add a touch of magic to your photographs.
By experimenting with different angles and positions, you'll discover an array of stunning effects that can transform ordinary reflections into extraordinary works of art.
To maximize the potential of your prism filter, consider these key techniques:
- Rotate the filter: Slight adjustments in the prism's orientation can dramatically alter the light patterns, allowing you to fine-tune the effect to your liking.
- Vary the distance: Moving the filter closer to or further from your lens will change the intensity and spread of the light effects.
- Combine with other elements: Incorporate reflective surfaces like water or glass to amplify the prism's impact and create multi-layered, complex images.
When using a prism filter, you'll find that even subtle changes in lighting conditions can lead to vastly different results.
Embrace this unpredictability and let your creativity soar as you explore the endless possibilities of ethereal light effects in your reflection photography.
Enhancing Colors and Reflections
Vibrancy is at the heart of stunning reflection photography, and a prism filter can take your color game to the next level. This unique filter splits light into its component colors, creating rainbow-like effects in your reflections. By rotating the filter, you'll control the intensity and direction of these prismatic streaks, adding depth and intrigue to your shots.
When using a prism filter, experiment with different angles to find the sweet spot for your composition. You'll notice how it enhances existing colors while introducing new hues. This effect works particularly well in scenes with water, glass, or metallic surfaces, as they naturally reflect and refract light.
| Effect | Best Conditions | Tips |
|---|---|---|
| Rainbow streaks | Bright sunlight | Rotate filter slowly |
| Color separation | Golden hour | Use with wide aperture |
| Light flares | Backlit scenes | Combine with polarizer |
Don't be afraid to stack your prism filter with other filters for even more creative possibilities. A polarizer can help manage reflections, while a neutral density filter allows for longer exposures, enhancing the dreamy quality of your prismatic reflections. Remember, the key is to experiment and find the perfect balance between natural beauty and artistic enhancement.
Symmetry Filter
The symmetry filter is a powerful tool for enhancing reflection photography. It helps create a perfect mirror image by duplicating one half of your photo and flipping it to form a complete, symmetrical composition. This filter can transform ordinary reflections into striking, balanced images that captivate viewers.
When using the symmetry filter, you'll need to choose which half of your original image to duplicate. Often, the most interesting part of the reflection or the clearest section works best. Once applied, you can fine-tune the filter by adjusting the placement of the dividing line and tweaking contrast and color to guarantee a seamless blend.
To make the most of the symmetry filter, consider these tips:
- Shoot with symmetry in mind, positioning your subject centrally.
- Use a tripod to guarantee your camera is perfectly level.
- Experiment with different orientations – vertical and horizontal symmetry can yield unique results.
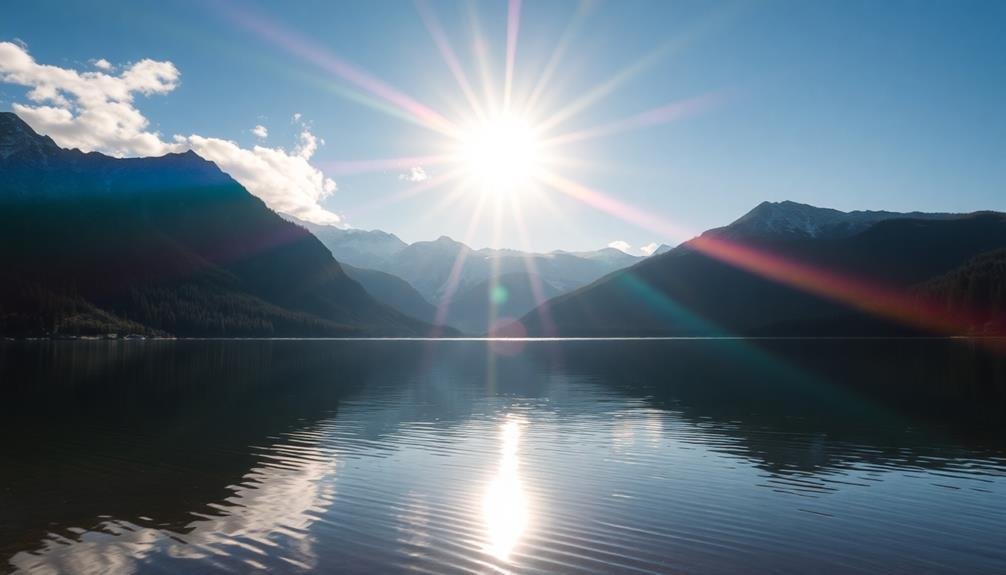
Golden Hour Filter

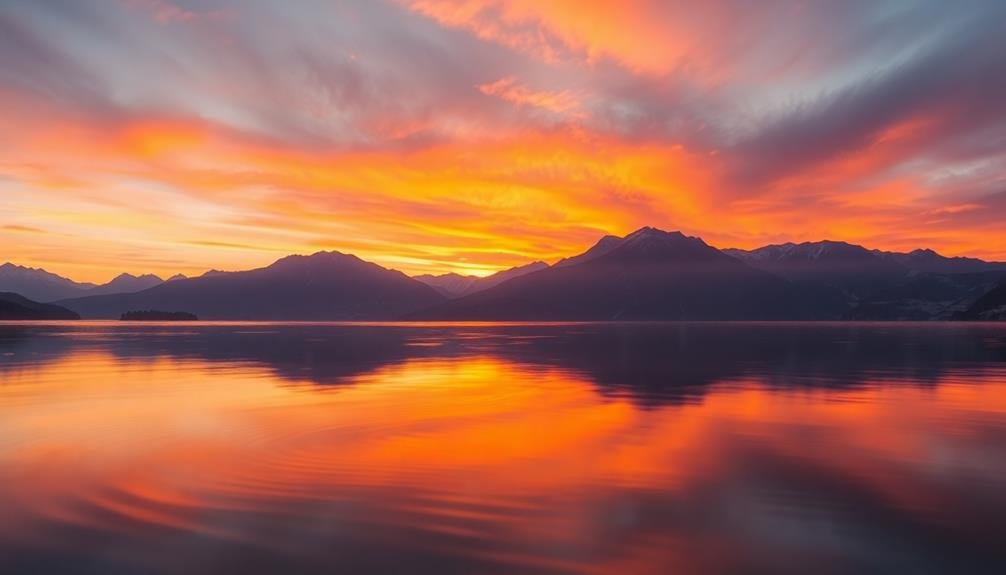
When it comes to reflection photography, the golden hour filter can elevate your images to new heights. This filter mimics the warm, soft light that occurs during the first and last hours of daylight, known as the "golden hour." It adds a rich, golden hue to your reflections, creating a dreamy and ethereal atmosphere in your photos.
To use the golden hour filter effectively, you'll want to apply it selectively. Focus on enhancing the sky and water reflections, as these areas will benefit most from the warm tones. The filter works particularly well with landscapes featuring calm bodies of water, where the golden light can create stunning mirror-like reflections.
You'll find that the golden hour filter enhances contrast and depth in your images, making them more visually appealing. It can transform an ordinary scene into something truly magical, especially when combined with the right composition.
Experiment with different intensities of the filter to find the perfect balance for your shot. Remember, subtlety is key – you don't want your image to look overly processed.
With practice, you'll master the art of using the golden hour filter to capture breathtaking reflection photographs that will captivate your viewers.
Water Ripple Filter

Many photographers rely on the water ripple filter to add dynamic movement and texture to their reflection shots. This filter simulates the effect of gentle waves or ripples on a water surface, transforming a static reflection into a mesmerizing, dreamlike image.
You'll find that it's particularly effective when shooting landscapes, cityscapes, or architecture reflected in lakes, ponds, or even puddles.
To use a water ripple filter effectively, you'll need to take into account a few key factors:
- Intensity: Choose a filter with the right level of ripple effect for your scene. Subtle ripples work well for serene landscapes, while stronger patterns can create a more abstract look.
- Direction: Align the filter's ripple pattern with the natural flow of water in your scene for a realistic effect.
- Exposure time: Experiment with longer exposures to blend the ripple effect smoothly with the actual water movement.
You can also combine the water ripple filter with other techniques, like using a polarizer to control reflections or a neutral density filter for longer exposures.
Long Exposure Filter

You'll find long exposure filters invaluable for creating stunning reflection photographs.
These filters allow you to smooth out water surfaces, capture the ethereal movement of clouds, and enhance the reflective qualities of various surfaces.
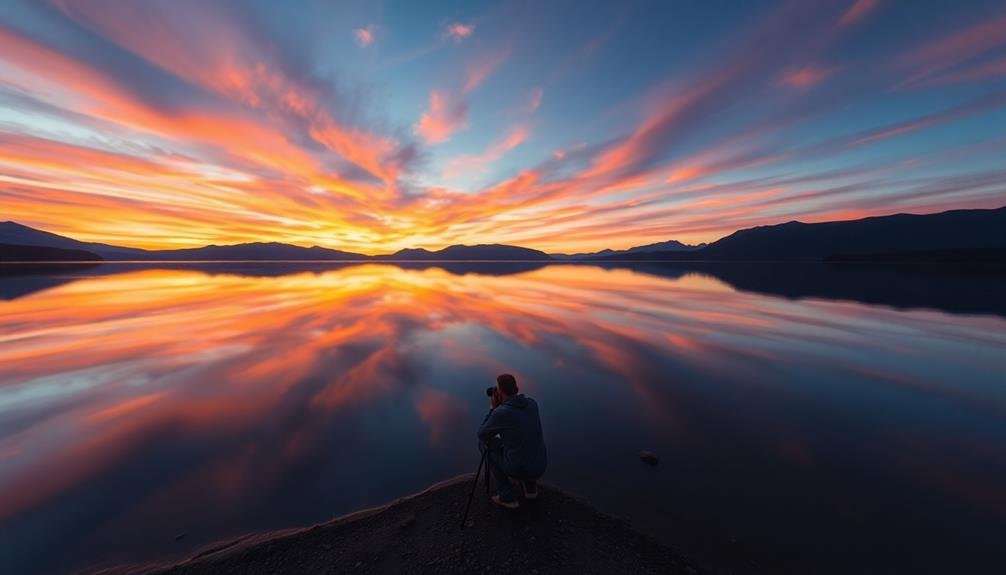
Smooth Water Effects
For creating smooth water effects in reflection photography, a long exposure filter is an essential tool. It allows you to capture the passage of time in a single image, transforming rippling water into a silky, glass-like surface. This effect enhances the reflections, creating a dreamy and ethereal atmosphere in your photographs.
To achieve smooth water effects, you'll need a neutral density (ND) filter. These filters reduce the amount of light entering your camera, enabling longer exposure times even in bright conditions. Choose an ND filter with a strength appropriate for your desired effect and lighting conditions. Typically, a 6-stop or 10-stop ND filter works well for smooth water photography.
When using a long exposure filter for smooth water effects, keep these tips in mind:
- Use a sturdy tripod to eliminate camera shake during long exposures.
- Experiment with different shutter speeds to find the ideal smoothness for your scene.
- Consider using a remote shutter release or your camera's self-timer to minimize vibrations.
Capturing Cloud Movement
Long exposure filters aren't just for creating smooth water effects; they're also ideal for capturing cloud movement in reflection photography. These filters allow you to extend your shutter speed, turning wispy clouds into dramatic streaks across the sky and their reflections in water.
To capture cloud movement effectively, you'll need to choose the right filter strength based on the lighting conditions and desired effect. Here's a quick guide:
| Filter Strength | Typical Use | Exposure Time |
|---|---|---|
| 3-stop ND | Bright days | 1-4 seconds |
| 6-stop ND | Golden hour | 15-30 seconds |
| 10-stop ND | Overcast | 1-4 minutes |
When shooting, set your camera on a sturdy tripod and use a remote shutter release to avoid camera shake. Compose your shot with interesting foreground elements to anchor the image. As clouds move, they'll create striking patterns in both the sky and the reflection, adding depth and drama to your composition. Experiment with different exposure times to find the perfect balance between cloud movement and maintaining detail in the rest of your scene. Remember, longer exposures will result in more pronounced streaking effects.
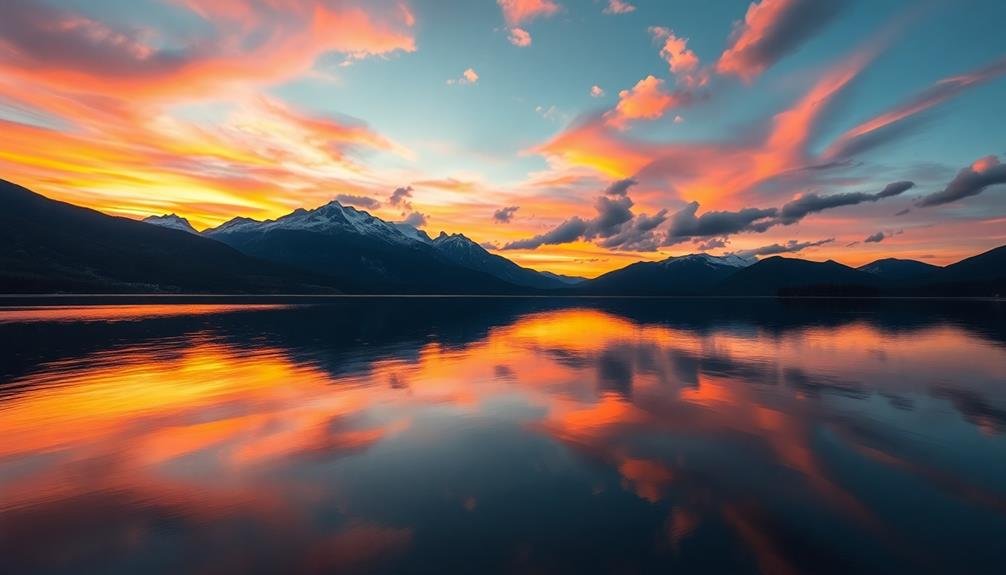
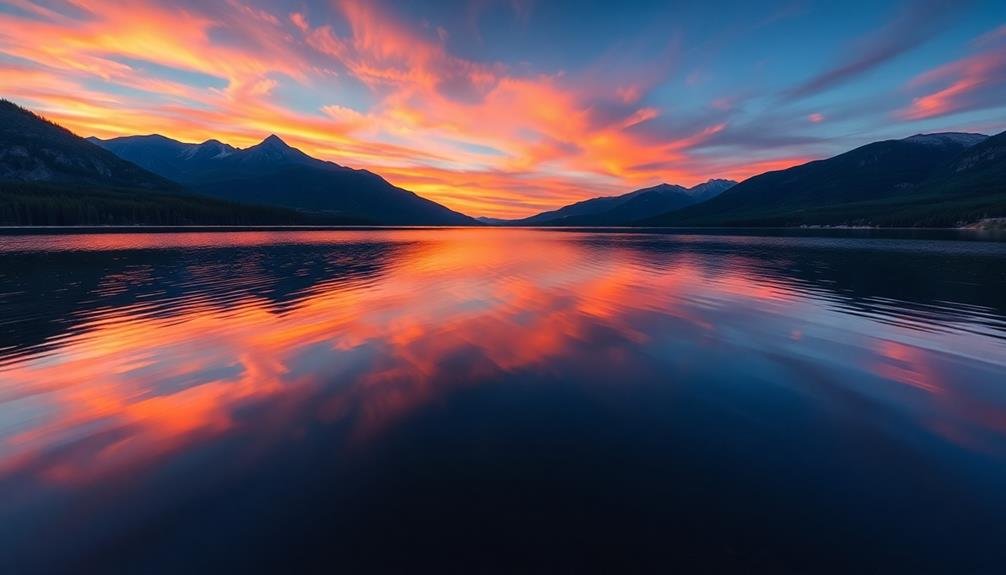
Enhancing Reflective Surfaces
Three key benefits make long exposure filters invaluable for enhancing reflective surfaces in photography.
These filters allow you to extend your shutter speed, creating smoother, more mirror-like reflections in water bodies. By reducing the amount of light entering your camera, they enable you to capture stunning images even in bright daylight conditions.
Long exposure filters help you achieve a dreamy, ethereal effect in your reflection photos. They smooth out ripples and waves, transforming choppy water into a glass-like surface that perfectly mirrors the surrounding landscape. This technique works particularly well for scenes with architectural elements, mountains, or colorful skies.
To maximize the impact of long exposure filters on reflective surfaces:
- Choose the right strength: Select a neutral density filter that allows for exposure times between 30 seconds and several minutes, depending on the desired effect.
- Use a sturdy tripod: Stability is essential for sharp images during long exposures.
- Experiment with timing: Try different exposure lengths to find the perfect balance between smooth reflections and retained texture in the water.
Frequently Asked Questions
Can I Stack Multiple Filters for Reflection Photography?
Yes, you can stack multiple filters for reflection photography. It's a great way to enhance your shots. You'll need to be careful about vignetting and image quality, but combining filters can create unique and stunning effects.
How Do Weather Conditions Affect the Use of Reflection Filters?
Weather greatly impacts your use of reflection filters. You'll find overcast days ideal for soft reflections, while sunny conditions create sharper contrasts. Wind can disrupt water reflections, and rain may enhance reflective surfaces but challenge your setup.
Are There Any Smartphone Apps That Simulate Reflection Filter Effects?
Yes, you'll find several apps that simulate reflection filter effects. Try popular options like Snapseed, VSCO, or Adobe Lightroom Mobile. They offer various tools to create stunning reflections, enhancing your photos without physical filters.
What's the Best Way to Clean and Maintain Reflection Filters?
To maintain your reflection filters, you'll want to clean them gently with a microfiber cloth. Don't use harsh chemicals. Store them in protective cases when not in use. Regularly inspect for scratches or damage. Handle with care.
Do Reflection Filters Work Equally Well for Both Water and Glass Surfaces?
No, reflection filters don't work equally well for water and glass. You'll find they're more effective on glass surfaces, which are consistently smooth. For water reflections, you're better off using polarizing filters to enhance the effect.
In Summary
You've now got an arsenal of filters to take your reflection photography to the next level. Whether you're capturing serene lakes or bustling cityscapes, these tools will help you create stunning, eye-catching images. Don't be afraid to experiment and combine different filters for unique effects. Remember, practice makes perfect, so get out there and start shooting! With these filters at your disposal, you'll soon be creating jaw-dropping reflection photos that'll wow your audience.


Leave a Reply