To master bokeh on your smartphone, start by understanding portrait mode and depth-of-field effects. Choose backgrounds that contrast with your subject and experiment with distances. Adjust your aperture settings if possible, or use portrait mode for a similar effect. Focus carefully on your subject, ensuring they're 2-8 feet away for ideal results. Play with lighting, especially during golden hour, for flattering shots. Try lens attachments for unique effects, and don't shy away from post-processing apps to enhance your bokeh. Avoid common mistakes like positioning subjects too close to backgrounds. With these tips, you'll be well on your way to capturing stunning, professional-looking portraits.
Understanding Bokeh in Smartphone Photography
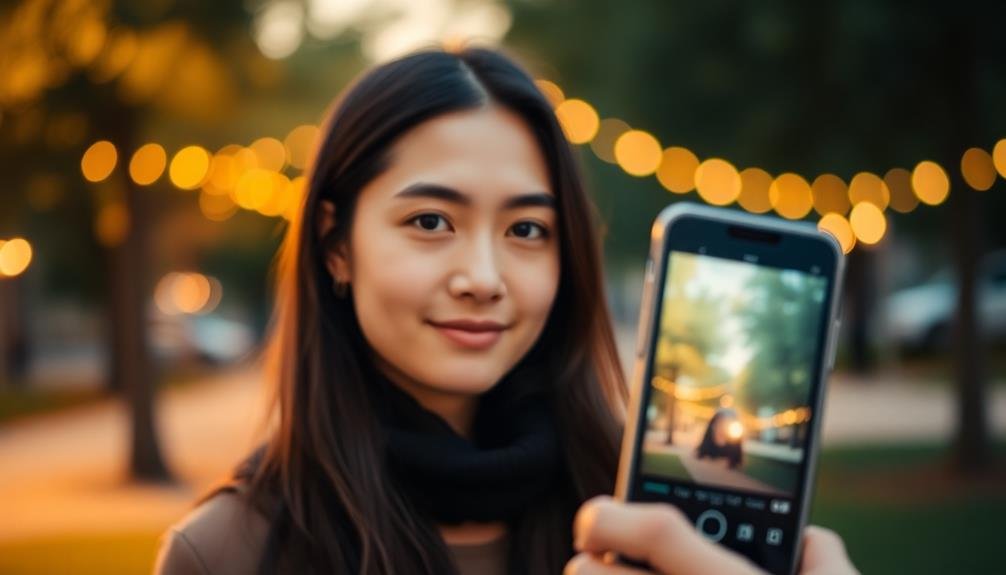
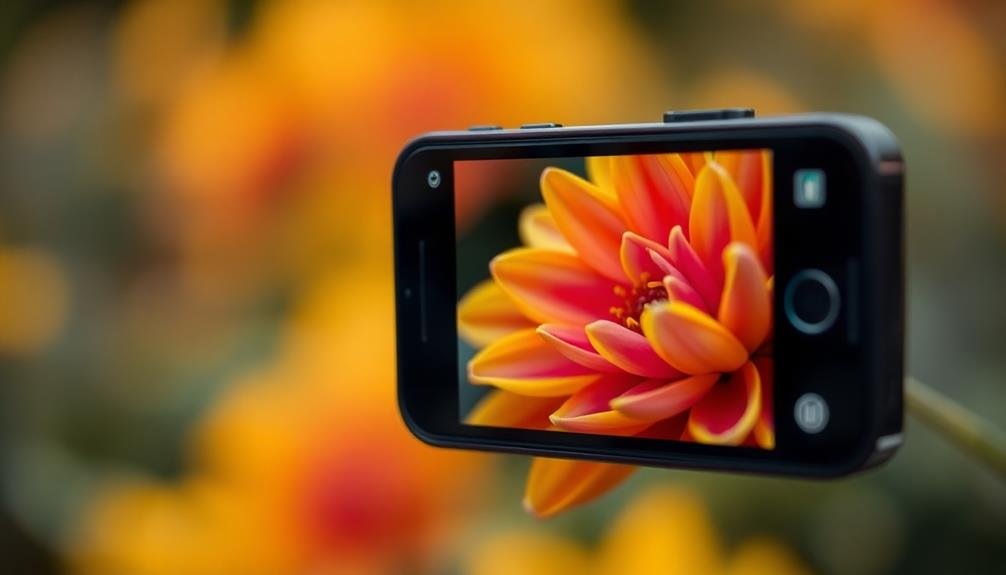
Nearly every modern smartphone camera offers a bokeh effect, which can transform your photos from ordinary to extraordinary. Bokeh, derived from the Japanese word for "blur," refers to the aesthetically pleasing out-of-focus areas in an image. It's particularly effective for portrait photography, creating a soft, dreamy background that makes your subject pop.
To achieve bokeh with your smartphone, you'll need to use portrait mode or a similar feature. This mode uses depth sensing or AI to separate the subject from the background, applying a selective blur. For the best results, position your subject about 6-8 feet away from the background.
Make certain there's adequate lighting, as bokeh works best in well-lit conditions. Experiment with different distances between you and your subject to adjust the intensity of the bokeh effect. Remember, closer subjects typically result in more pronounced background blur.
Pay attention to the edges of your subject, as smartphone bokeh can sometimes struggle with intricate details like hair or glasses. Don't be afraid to manually adjust the blur in post-processing using your phone's built-in editing tools or third-party apps for even more control over your bokeh effect.
Choosing the Right Background
When choosing a background for your smartphone photos, consider how it contrasts with your subject to make them stand out.
You'll need to decide between simple backgrounds that don't distract from your main focus and complex ones that add interest to the image.
Remember that the distance between your subject and the background can greatly impact the overall composition and depth of your photo.
Contrast With Subject
Choosing the right background can make or break your smartphone photos. When it comes to contrast with your subject, you'll want to pay close attention to how your main focus stands out against its surroundings. A high-contrast background can create a striking image, while a low-contrast one may cause your subject to blend in.
To achieve ideal contrast, consider the color, brightness, and texture of both your subject and the background. If your subject is light-colored, opt for a darker background to make it pop. Conversely, a light background can make a dark subject stand out. You can also play with complementary colors to create visual interest.
Texture differences can add depth to your photos. A smooth subject against a rough background, or vice versa, can create an appealing contrast. Additionally, consider the lighting in your scene. Backlighting can create a dramatic silhouette effect, while side lighting can enhance texture and depth.
Don't be afraid to move around or adjust your composition to find the best contrast. Sometimes, a slight change in angle or position can dramatically improve your photo's impact.
Simple vs. Complex Backgrounds
Backgrounds play an essential role in smartphone photography, and you'll need to decide between simple and complex options.
Simple backgrounds, like solid-colored walls or clear skies, can create a clean, uncluttered look that draws attention to your subject. They're ideal for portraits, product shots, and minimalist compositions. When using simple backgrounds, focus on the subject's details and positioning to create visual interest.
Complex backgrounds, on the other hand, can add depth, context, and storytelling elements to your images. They're great for environmental portraits, street photography, and landscape shots. However, be careful not to let busy backgrounds overshadow your main subject. Use techniques like the rule of thirds or leading lines to guide the viewer's eye.
To choose between simple and complex backgrounds, consider your subject and the story you want to tell. If you're highlighting a specific person or object, a simple background might be best.
For scenes that benefit from context or atmosphere, opt for a more complex setting. Remember, you can also create a simple background effect by adjusting your smartphone's aperture or using portrait mode to blur the background, effectively simplifying even complex scenes.
Distance From Subject
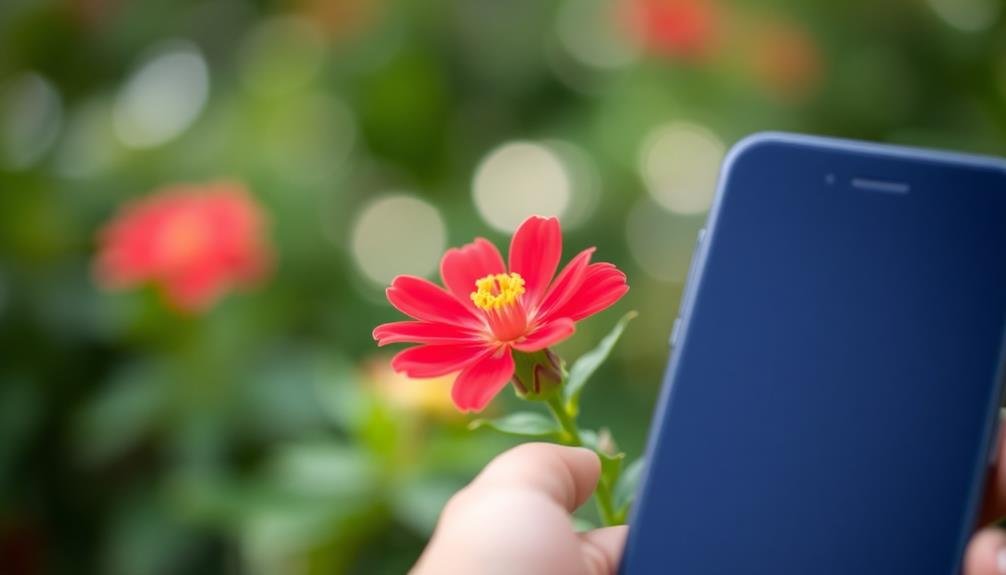
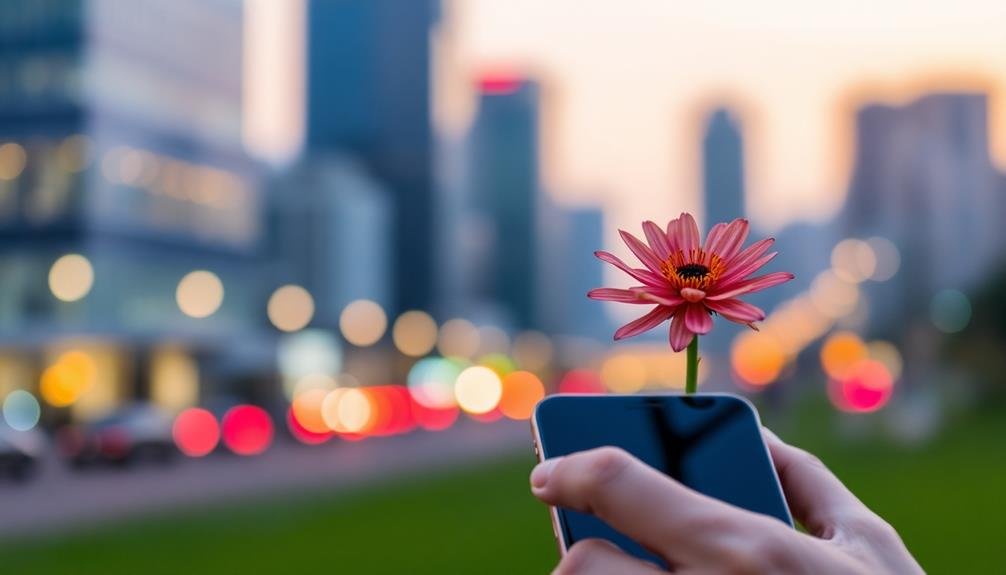
Step closer or move farther away to dramatically change your smartphone photos. The distance between you and your subject plays an essential role in achieving the desired bokeh effect. When you're closer to your subject, you'll create a shallower depth of field, resulting in a more pronounced background blur. This technique works particularly well for portrait shots or close-ups of small objects.
On the other hand, increasing the distance between you and your subject will reduce the bokeh effect, bringing more of the background into focus. This can be useful when you want to showcase the environment or provide context to your subject. Experiment with different distances to find the sweet spot that best suits your composition.
Remember that your smartphone's focal length also affects the bokeh. Most phones have a fixed focal length, but some offer multiple lenses with different focal lengths. If your phone has this feature, try switching between lenses to see how it impacts the background blur.
Additionally, many smartphones now offer portrait modes that simulate bokeh digitally, allowing you to adjust the blur intensity after taking the shot.
Adjusting Aperture Settings
Mastering aperture settings can greatly enhance your smartphone photography.
You'll need to understand how aperture affects depth of field and light intake, then learn to manually control it if your device allows.
If manual control isn't available, experiment with your phone's aperture priority mode to achieve similar effects.
Understanding Aperture Basics
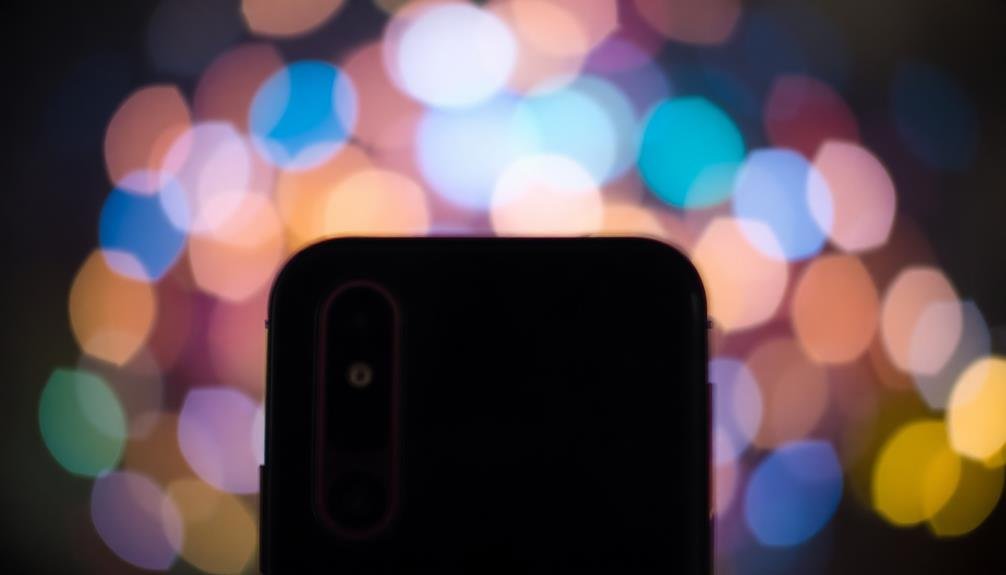
The camera's eye opens and closes with each shot, controlling how much light enters the lens. This opening is called the aperture, and it's essential for achieving that coveted bokeh effect.
Aperture is measured in f-stops, with lower numbers indicating a wider opening and higher numbers a smaller one. On smartphones, you'll often see aperture expressed as f/1.8 or f/2.2. A wider aperture (lower f-number) allows more light in, creating a shallower depth of field. This means your subject will be in sharp focus while the background blurs beautifully. It's perfect for portraits or close-up shots where you want to isolate your subject.
Conversely, a narrower aperture (higher f-number) increases the depth of field, keeping more of the scene in focus. This is ideal for landscapes or group photos.
While many smartphone cameras have fixed apertures, some models offer adjustable settings. If yours doesn't, don't worry – you can still achieve bokeh by using portrait mode or adjusting focus points.
Manual Aperture Control
While not all smartphones offer manual aperture control, some advanced models allow you to adjust this setting for greater creative control. If your phone has this feature, you'll typically find it in the camera app's "Pro" or "Manual" mode. Look for an icon that resembles a camera diaphragm or the letter "f" followed by a number.
To adjust the aperture, simply tap on the icon and slide the control to your desired f-stop. Remember, a lower f-number (like f/1.8) creates a wider aperture, resulting in a shallower depth of field and more background blur. A higher f-number (like f/8) narrows the aperture, increasing the depth of field and keeping more of the scene in focus.
Experiment with different aperture settings to achieve various effects. Use a wide aperture for portraits to blur the background and make your subject stand out. For landscape shots, opt for a narrower aperture to keep everything sharp from foreground to background.
Keep in mind that changing the aperture affects the amount of light entering the camera, so you may need to adjust other settings like ISO or shutter speed to maintain proper exposure.
Aperture Priority Mode
For those who want more control over their smartphone camera's aperture without the complexity of full manual mode, Aperture Priority mode offers an excellent middle ground. In this mode, you'll set the aperture while your phone automatically adjusts the shutter speed for proper exposure. This allows you to control depth of field while still maintaining correct exposure.
To use Aperture Priority mode, look for an "A" or "Av" setting in your camera app. Once selected, you'll typically see a slider or dial to adjust the f-stop number. Remember, a lower f-number means a wider aperture, resulting in a shallower depth of field.
| Aperture | Depth of Field | Best For |
|---|---|---|
| f/1.8 | Shallow | Portraits |
| f/4 | Medium | Group shots |
| f/8 | Deep | Landscapes |
Experiment with different aperture settings to achieve various effects. Wide apertures (low f-numbers) are great for isolating subjects and creating a blurred background, while narrow apertures (high f-numbers) keep more of the scene in focus. By mastering Aperture Priority mode, you'll have greater creative control over your smartphone photography without sacrificing the convenience of automatic exposure.
Mastering Portrait Mode
Portrait mode has revolutionized smartphone photography, allowing even novice users to capture stunning, professional-looking images. This feature uses software algorithms to simulate the shallow depth of field typically achieved with DSLR cameras, creating a blurred background effect known as bokeh.
To master portrait mode, start by finding good lighting. Natural light works best, so position your subject near a window or shoot outdoors during golden hour. Make sure your subject is 2-8 feet away from the camera and place them against a simple background for best results.
Frame your subject carefully, leaving enough space around them to allow for the bokeh effect. Tap on the subject's face to set focus and exposure. Experiment with different angles and compositions to add interest to your shots.
Pay attention to the edge detection around your subject. If you notice any blurring artifacts, adjust your position or lighting. Some smartphones allow you to adjust the blur intensity after taking the photo, so don't be afraid to fine-tune your images.
Practice regularly and try capturing various subjects to improve your portrait mode skills. With time, you'll develop an eye for creating engaging, professional-looking portraits using just your smartphone.
Utilizing Depth-of-Field Effects
When using depth-of-field effects, you'll want to master focal point selection to guarantee your subject stands out.
You can control the aperture and distance to your subject, which affects how much of the image is in focus.
To create stunning background blur, experiment with different distances between your subject and the background while keeping your camera close to the main focal point.
Focal Point Selection
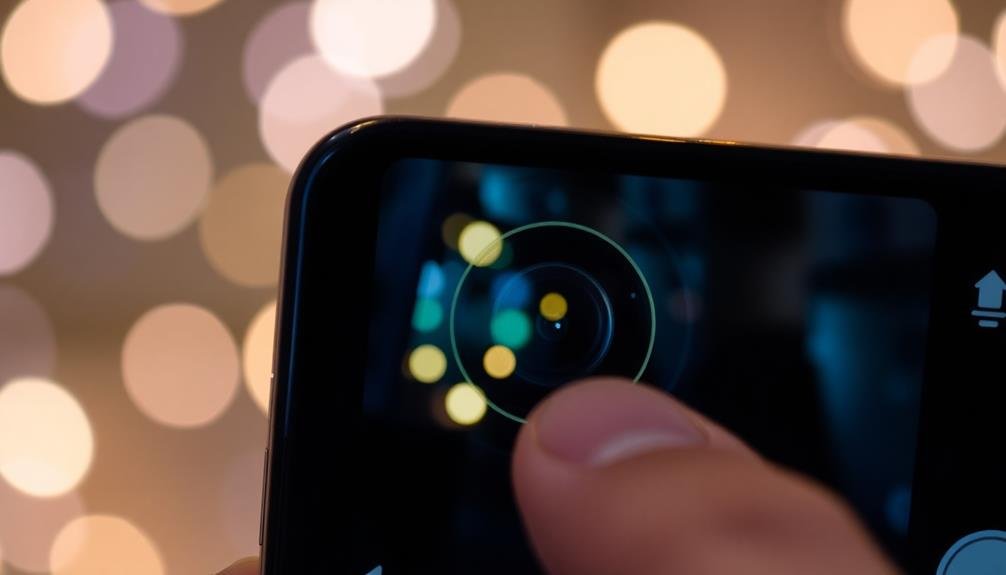
Often overlooked, focal point selection is a powerful tool in smartphone photography that can dramatically enhance your images. It's the process of choosing where you want the camera to focus within your frame. Most smartphones allow you to tap on the screen to select a focal point, instantly adjusting the focus and exposure.
When selecting a focal point, consider the story you're trying to tell. For portraits, focus on the eyes. For landscapes, choose a prominent foreground element. Experiment with unconventional focal points to create intriguing compositions. Remember, the focal point doesn't always need to be at the center of the frame.
Here's a quick guide to focal point selection for different scenarios:
| Subject Type | Recommended Focal Point | Effect |
|---|---|---|
| Portrait | Eyes | Draws attention to subject's gaze |
| Landscape | Foreground element | Creates depth and leads the eye |
| Action shot | Moving subject | Freezes motion, adds dynamism |
Aperture and Distance
Despite the fixed aperture in most smartphone cameras, you can still create stunning depth-of-field effects by manipulating distance. The key is to understand how distance affects your photo's focus and background blur. When you're closer to your subject, you'll naturally create a shallower depth of field, resulting in a more pronounced bokeh effect.
To maximize this effect, position your subject as close to the camera as possible while maintaining focus. Then, guarantee there's ample space between your subject and the background. This separation will enhance the blur of distant objects.
Many smartphones now offer portrait modes that simulate a wider aperture, further accentuating this effect. Experiment with different distances and angles to find the sweet spot for your desired look.
Remember, the closer you're to your subject, the more dramatic the bokeh will be. However, be cautious not to get too close, as your camera may struggle to focus. If your phone has multiple lenses, try switching between them to achieve different perspectives and depth-of-field effects.
With practice, you'll learn to use distance creatively to produce professional-looking photos with beautifully blurred backgrounds.
Background Blur Techniques
While smartphone cameras have fixed apertures, you can still achieve beautiful background blur effects through various techniques. One of the most effective methods is to use your phone's portrait mode, which uses software to simulate a shallow depth of field. This feature works best when your subject is within 2-8 feet of the camera.
Another technique is to maximize the distance between your subject and the background. The further away the background is, the more blurred it'll appear. You can also get closer to your subject, as this naturally creates more separation between the subject and background.
Try using a macro lens attachment for extreme close-ups, which can create a dramatic blur effect. Some phones offer a manual focus option; use this to precisely control which areas are in focus.
Experiment with foreground objects to frame your subject and create natural blur.
Optimizing Lighting Conditions
Lighting is the cornerstone of great smartphone photography. To optimize lighting conditions, you'll need to understand how different light sources affect your images. Start by identifying the main light source in your scene, whether it's natural sunlight or artificial indoor lighting.
For outdoor shots, the golden hour (just after sunrise or before sunset) offers warm, soft light that flatters most subjects. Midday sun can create harsh shadows, so try using shade or a diffuser to soften the light. Indoors, position your subject near a window for natural light or use lamps to create interesting shadows and highlights.
Here's a quick guide to lighting techniques:
| Lighting Technique | Best For | Tips |
|---|---|---|
| Front Lighting | Portraits | Minimizes shadows, flatters features |
| Side Lighting | Textures | Enhances depth and dimension |
| Backlighting | Silhouettes | Creates dramatic effects |
Remember to adjust your camera's exposure settings to compensate for bright or dark areas. Use HDR mode for high-contrast scenes, and experiment with your phone's night mode for low-light situations. Don't be afraid to move around to find the best angle and lighting for your subject. With practice, you'll develop an eye for great lighting conditions and capture stunning smartphone photos.
Focusing Techniques for Bokeh
To create stunning bokeh effects with your smartphone, you'll need to master the art of selective focus. Start by identifying your main subject and tapping on it in your camera app to set the focus point. This will blur the background, creating that coveted bokeh effect.
For more pronounced bokeh, get closer to your subject while ensuring there's distance between it and the background.
Many smartphones now offer portrait mode, which simulates a shallow depth of field. Use this feature to enhance your bokeh, but experiment with manual focus for more control.
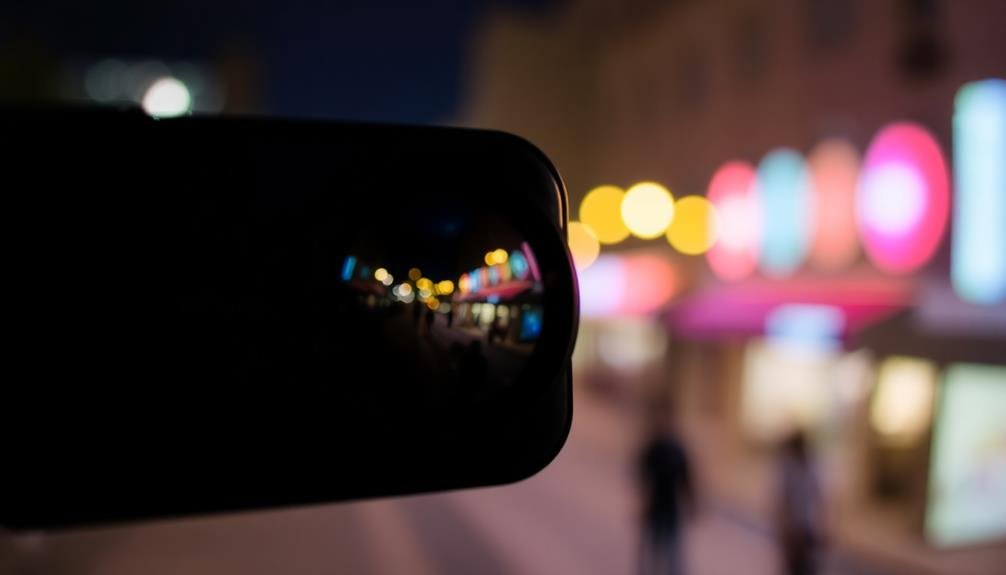
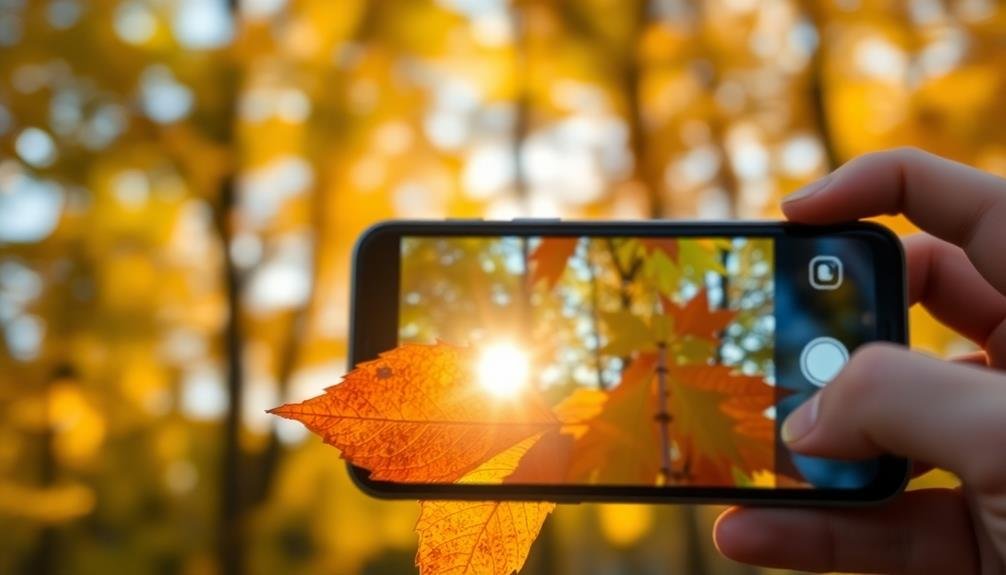
When shooting, look for bright points of light in the background; these will transform into beautiful, soft circles when out of focus.
Remember that contrast is key. Choose a subject that stands out from the background for the most dramatic effect.
Play with different angles and distances to find the sweet spot where your subject is sharp and the background beautifully blurred.
Don't be afraid to adjust the intensity of the blur in post-processing apps if your phone allows it.
With practice, you'll soon be capturing professional-looking bokeh shots that'll make your photos stand out.
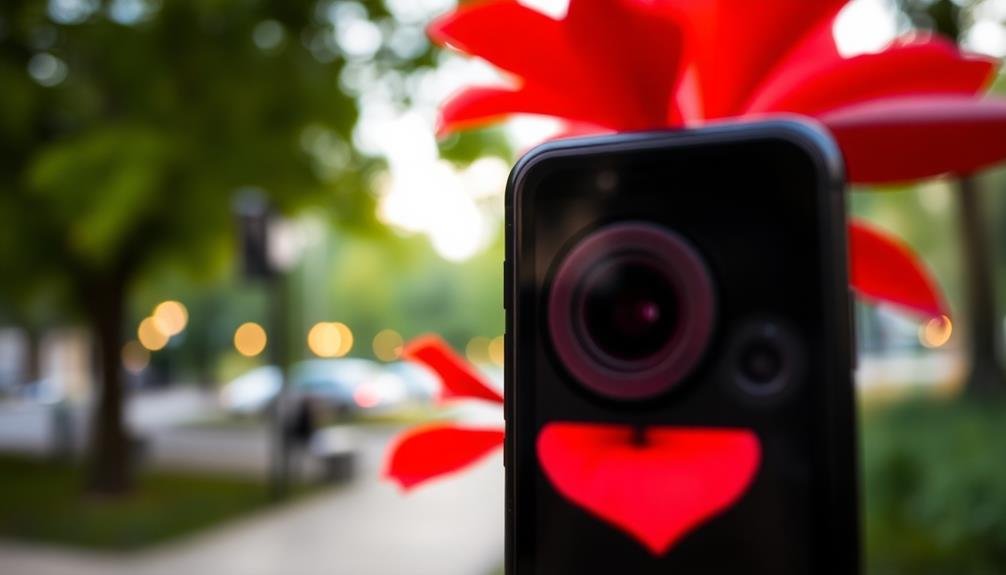
Experimenting With Lens Attachments
Enhancing your smartphone's camera capabilities doesn't stop at mastering built-in features. Lens attachments offer an exciting way to expand your creative possibilities and achieve unique bokeh effects.
These clip-on or magnetic lenses can transform your phone's camera, allowing you to capture images that were previously impossible with standard smartphone optics.
When experimenting with lens attachments for bokeh, consider trying:
- Macro lenses for extreme close-ups with blurred backgrounds
- Telephoto lenses to compress perspective and create smooth bokeh
- Wide-angle lenses for dramatic depth-of-field effects
- Anamorphic lenses for cinematic, oval-shaped bokeh
- Specialty lenses like prisms or filters for creative distortions
Start by researching compatible lens attachments for your specific smartphone model.
Once you've chosen a lens, practice attaching and removing it smoothly to avoid missing spontaneous photo opportunities.
Experiment with different distances between your subject and background to maximize the bokeh effect.
Remember that lens attachments may affect your camera's autofocus, so be prepared to use manual focus more often.
As you become comfortable with these add-ons, you'll discover new ways to elevate your smartphone photography and create stunning bokeh-rich images that stand out from the crowd.
Post-Processing Bokeh Effects
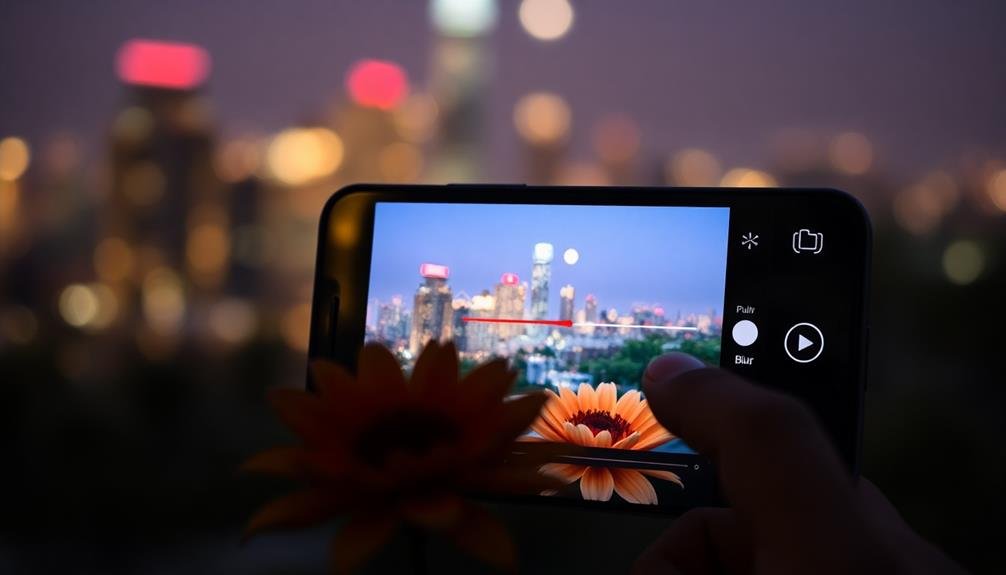
Post-processing opens up a world of possibilities for creating or enhancing bokeh effects in your smartphone photos. Many apps now offer features to simulate or adjust bokeh after you've taken the shot.
Apps like Snapseed, VSCO, and Focos allow you to add blur to specific areas of your image, mimicking the bokeh effect of high-end cameras.
To create convincing bokeh in post-processing, focus on these key aspects:
- Identify your subject clearly and keep it sharp.
- Gradually increase blur as you move away from the focal point.
- Pay attention to light sources in the background, softening their edges for a natural look.
- Adjust the intensity and shape of the bokeh to match your desired aesthetic.
- Be subtle; over-processed bokeh can look artificial.
Common Bokeh Mistakes to Avoid
While creating bokeh effects can enhance your smartphone photos, it's easy to fall into common traps that diminish the overall impact. To avoid these pitfalls, be mindful of your subject placement, lighting conditions, and background elements.
One frequent mistake is positioning your subject too close to the background, which reduces the depth of field and limits the bokeh effect. Another error is using bokeh in every shot, which can make your portfolio feel repetitive and unimaginative.
To elevate your bokeh game, steer clear of these common mistakes:
- Overusing artificial bokeh filters
- Neglecting proper focus on the main subject
- Choosing distracting or cluttered backgrounds
- Ignoring the quality of light in your scene
- Failing to experiment with different aperture settings
Remember that bokeh should complement your subject, not overpower it. Pay attention to the shape and quality of the bokeh circles, ensuring they're smooth and pleasing to the eye.
Don't be afraid to move around and try different angles to find the perfect balance between your subject and the blurred background. With practice and awareness of these potential pitfalls, you'll soon master the art of creating stunning bokeh effects in your smartphone photography.
Frequently Asked Questions
Can I Achieve Bokeh Effects With an Older Smartphone Model?
You can achieve bokeh effects with older smartphones, but it may be limited. Try using portrait mode if available, or manually focus on a close subject. You can also create artificial bokeh using photo editing apps.
How Does Sensor Size Affect Bokeh Quality in Smartphone Cameras?
Sensor size greatly impacts bokeh quality in your smartphone camera. Larger sensors capture more light and detail, allowing for better depth-of-field control. They'll create smoother, more natural-looking bokeh effects compared to smaller sensors in older or budget models.
Are There Specific Apps That Can Enhance Bokeh Effects?
Yes, you'll find several apps to enhance bokeh effects. Try Focos, AfterFocus, or Snapseed for manual adjustments. Portrait mode in native camera apps often works well too. Experiment with these to create stunning, blurred backgrounds in your photos.
What's the Difference Between Artificial and Optical Bokeh in Smartphones?
You'll notice artificial bokeh is created by software, blurring backgrounds after you've taken the photo. Optical bokeh, however, is produced naturally by the lens as you're shooting, resulting in a more authentic depth-of-field effect.
How Do Weather Conditions Impact Bokeh Photography With Smartphones?
Weather conditions can greatly affect your bokeh photography. You'll find that overcast days soften light, enhancing bokeh effects. Bright sunlight can create harsher contrasts, while rain or fog can add interesting elements to your blurred backgrounds.
In Summary
You've now got the tools to create stunning bokeh effects with your smartphone. Remember, practice makes perfect. Don't be afraid to experiment with different settings, backgrounds, and techniques. As you refine your skills, you'll capture more professional-looking photos. Keep exploring new apps and accessories to enhance your bokeh game. With these tips in your arsenal, you're well on your way to becoming a smartphone bokeh master.


Leave a Reply