
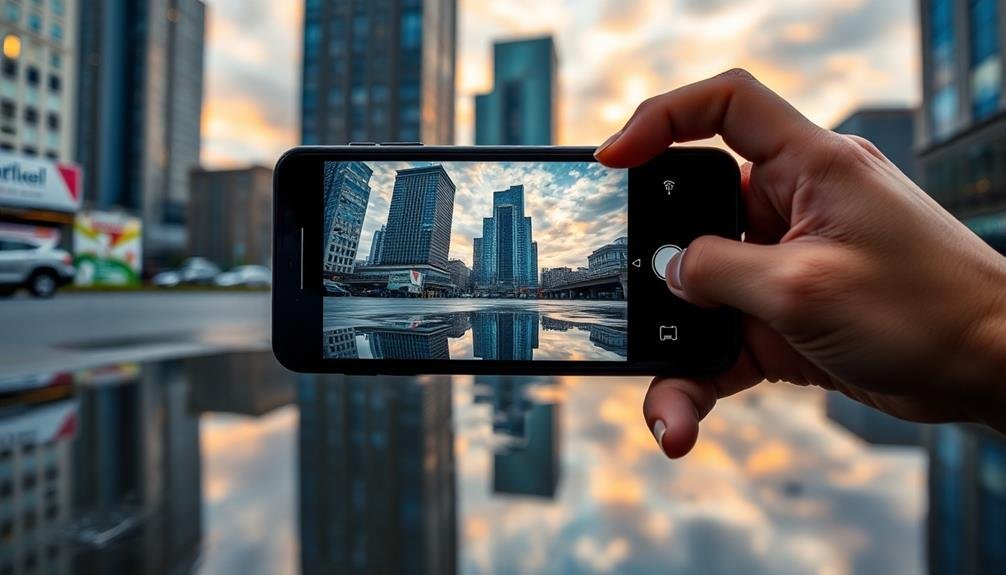
To master building reflection shots with your phone, start by finding the perfect reflective surface like glass windows or calm water bodies. Position your camera at various angles to experiment with composition and use HDR mode for balanced exposure. Focus on the reflected image and adjust settings to capture crisp details. Compose your shot creatively, using the rule of thirds or symmetry for impact. Don't forget to edit your photos to enhance contrast and colors. Timing is essential, so try shooting during golden hour for softer light. With practice and these techniques, you'll transform ordinary urban scenes into engaging visual stories.
Finding the Perfect Reflective Surface
When searching for the perfect reflective surface, you'll want to contemplate both natural and man-made options.
Natural reflective surfaces include bodies of water like lakes, ponds, puddles, and even wet pavement after rain. These can offer stunning, mirror-like reflections of buildings and skylines.
Man-made surfaces such as glass windows, polished metal, or marble facades can also provide unique reflective opportunities.
Consider the time of day and lighting conditions when scouting locations. Early morning or late afternoon often offer the best light for reflection shots.
Look for surfaces that are clean and smooth, as they'll provide clearer reflections. Angle is essential; experiment with different positions to find the ideal reflection. Sometimes, a slight tilt of your phone can dramatically improve the shot.
Don't limit yourself to obvious reflections. Partial reflections or distorted images in curved surfaces can create intriguing compositions.
Urban environments are particularly rich in reflective opportunities, so explore city centers, modern architecture, and business districts.
Positioning Your Smartphone Camera

When positioning your smartphone for reflection shots, finding the ideal angle is essential.
You'll want to experiment with different heights and distances from the reflective surface to capture the most compelling composition.
Finding Optimal Shooting Angle
Finding the perfect shooting angle is essential for capturing stunning reflection shots with your smartphone. Start by experimenting with different heights and perspectives. Crouch down low to capture more of the reflection, or stand tall to include more of the surrounding environment. Tilt your phone slightly to adjust the composition and create a balance between the reflected image and its surroundings.
Consider the following tips when searching for the ideal angle:
| Angle Type | Effect | Best Used For |
|---|---|---|
| Low | Emphasizes reflection | Water surfaces |
| Eye-level | Balanced composition | Building reflections |
| High | Shows more surroundings | Puddles or small mirrors |
| Tilted | Creates dynamic tension | Artistic shots |
| Straight-on | Symmetrical composition | Architectural reflections |
Pay attention to the light source and its direction. The angle of the sun or artificial lighting can dramatically affect the quality of your reflection. Try shooting from different positions relative to the light source to find the most flattering angle. Don't forget to use your phone's grid feature to align your shot and verify straight horizons. Finally, don't be afraid to move around and explore various angles until you find the perfect shot that captures the essence of the reflection.
Distance From Reflective Surface
Once you've found the right angle, the next key factor in capturing stunning reflection shots is your distance from the reflective surface. Your proximity to the reflective object greatly impacts the composition and clarity of your image.
Generally, you'll want to experiment with different distances to find the sweet spot for your specific scene. If you're too close to the reflective surface, you might lose the context of the surrounding environment. However, being too far away can diminish the impact of the reflection itself.
Start by positioning yourself about 3-5 feet away from the reflective surface and adjust from there. As you move closer, you'll notice more detail in the reflection but less of the overall scene. Moving farther back will include more of the surroundings but may reduce the reflection's prominence.
Don't forget to take into account the focal length of your phone's camera. If your device has multiple lenses, try switching between them to see how it affects the reflection's appearance.
Wide-angle lenses can capture more of the scene, while telephoto lenses can compress the image, potentially enhancing the reflection's impact. Keep adjusting your position until you achieve the desired balance between the reflection and its surroundings.
Adjusting Camera Settings for Reflections

When capturing reflection shots, you'll need to carefully manage your camera's exposure settings.
Aim to strike a balance between the reflected image and its surroundings, ensuring neither is over or underexposed.
For sharp results, tap on your screen to focus directly on the reflection itself, rather than the surface it's appearing on.
Exposure for Reflection Balance
Capturing the perfect reflection shot boils down to mastering exposure balance. When photographing reflections, you'll often encounter high contrast scenes, with bright skies and darker foregrounds.
To achieve a balanced exposure, start by tapping on the reflection in your phone's camera app. This sets the exposure for the reflected image, which is usually darker than the actual subject.
If the sky appears overexposed, use your phone's HDR mode or adjust the exposure compensation. Slide the exposure control down slightly to retain detail in the highlights while maintaining the reflection's visibility.
For challenging lighting situations, try bracketing your shots by taking multiple exposures at different settings.
Pay attention to the histogram if your camera app provides one. Aim for a balanced distribution of tones across the graph. If you're shooting in RAW, you'll have more flexibility to adjust exposure in post-processing.
Focus on Reflected Image
Nearly every smartphone camera app offers manual focus controls, which are essential for nailing reflection shots. To use these effectively, tap on the reflected image in your frame to set the focus point. This guarantees the reflection, not the reflective surface, is sharp and clear.
If your app allows, adjust the focus manually by sliding the focus bar. This gives you precise control over which part of the reflection appears crisp. For complex scenes, try focus stacking. Take multiple shots with different focus points and combine them later for overall sharpness.
Don't forget about depth of field. A wider aperture (lower f-number) creates a shallow depth of field, isolating the reflection. A narrower aperture keeps more of the scene in focus. Experiment with both to see which suits your vision.
When shooting water reflections, focus on the most interesting part of the reflected image. This might be a building's architectural details or a tree's intricate branches.
If you're after a dreamlike effect, slightly defocus the reflection while keeping the actual subject sharp. This technique adds a magical quality to your reflection shots.
Composing Your Reflection Shot
Three key elements form the foundation of a compelling reflection shot: subject placement, angle, and framing. When composing your reflection shot, start by carefully positioning your subject. Experiment with different placements within the frame, considering both the subject and its reflection. You'll often find that off-center compositions create more dynamic and interesting images.
Next, pay attention to your shooting angle. Adjust your position to capture the most striking reflection possible. Sometimes, a lower angle can emphasize the reflection, while a higher angle might reveal more of the surrounding environment. Don't be afraid to crouch, kneel, or even lie down to find the perfect perspective.
Framing is essential in reflection photography. Use natural elements like puddles, windows, or bodies of water to create a border around your subject and its reflection. Consider including complementary elements that enhance the overall composition without distracting from the main focus.
Remember to keep the rule of thirds in mind as you compose your shot. This guideline can help you create balanced and visually appealing images.
Experimenting With Different Angles
When you're ready to take your reflection shots to the next level, try exploring different angles.
You can start by getting low to the ground and capturing reflections in puddles or other low-lying reflective surfaces.
Don't be afraid to tilt your phone for more dynamic compositions, or seek out elevated positions to capture unique overhead reflections.
These varied perspectives will add depth and intrigue to your reflection photography, pushing your creative boundaries.
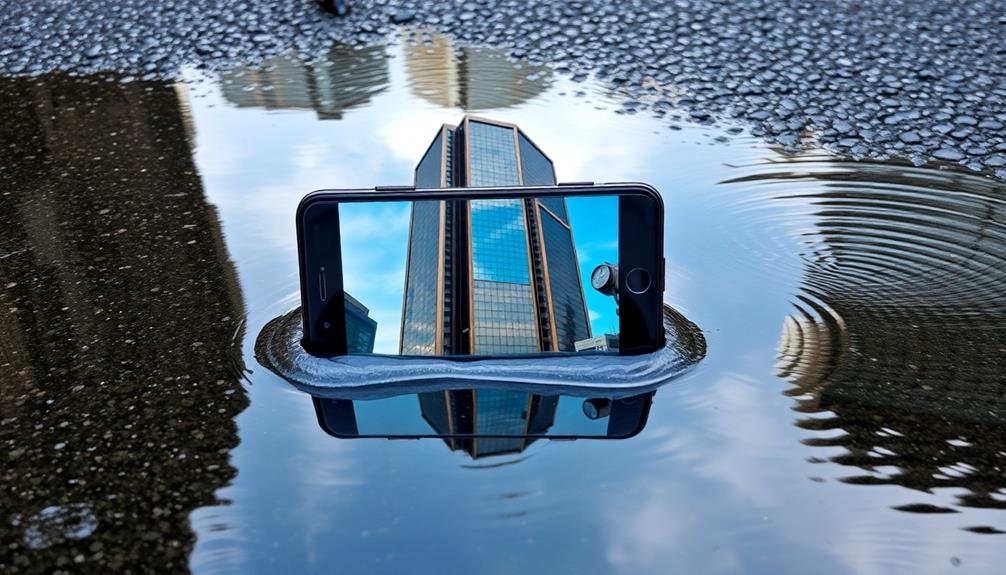
Low-Angle Reflective Surfaces
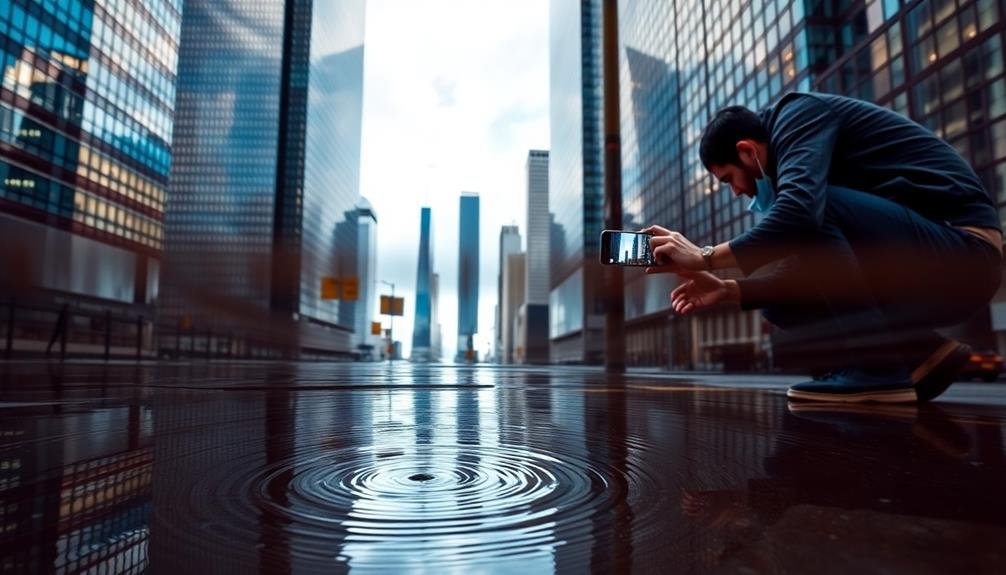
Low-angle reflective surfaces offer a treasure trove of creative possibilities for phone photographers. These surfaces, often overlooked, can transform ordinary scenes into enthralling images. To capture stunning low-angle reflections, get down low and position your phone close to the reflective surface. Puddles, wet streets, and polished floors are excellent options to explore.
When shooting, pay attention to the composition. Align your subject with the reflection to create symmetry, or experiment with off-center placements for a more dynamic effect. Use the rule of thirds to guide your framing, placing key elements along the grid lines or at intersection points.
Don't be afraid to get your phone wet (if it's water-resistant) to achieve the perfect shot. A waterproof case can provide extra protection. Adjust your phone's exposure to balance the brightness between the reflection and the actual subject. Experiment with HDR mode to capture a wider range of tones.
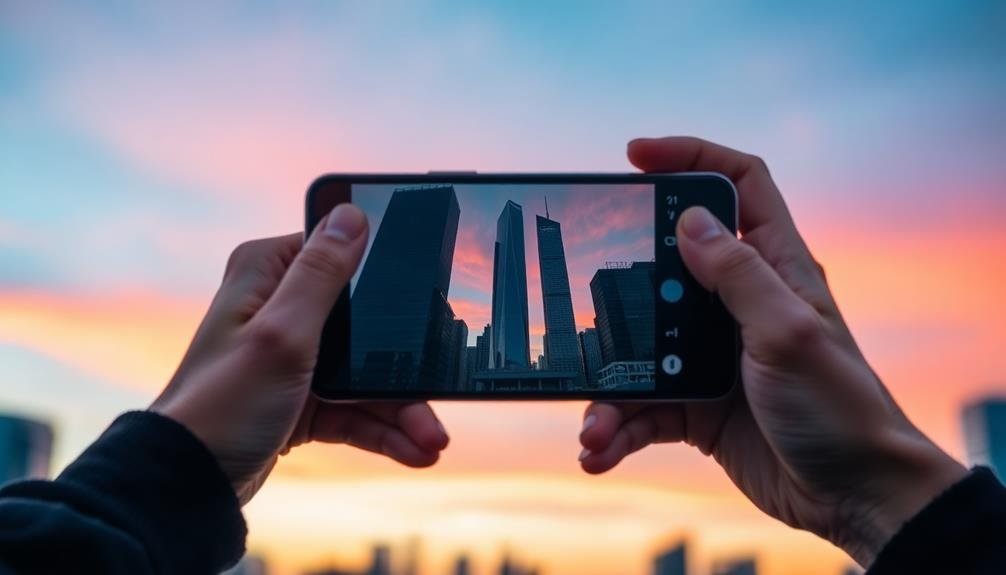
Try different times of day for varied lighting effects. Early morning or late afternoon often provide the most dramatic results, with long shadows and warm light enhancing reflections.
Tilted Frame Compositions
Moving beyond traditional angles, tilted frame compositions offer a fresh perspective in reflection photography. By rotating your phone slightly off-axis, you'll create dynamic images that draw the viewer's eye in unexpected ways.
Start by identifying a reflective surface, such as a puddle or glass building, then experiment with various tilts.
Try a subtle 15-degree tilt to add intrigue without disorienting the viewer. For more dramatic effects, increase the angle to 30 or 45 degrees. This technique works particularly well when capturing tall buildings or structures with strong vertical lines. The tilt will transform these lines into diagonals, adding energy and movement to your shot.
Don't forget to contemplate the reflection itself. Tilting can create interesting intersections between the real subject and its mirror image.
Play with the balance between these elements to craft a compelling composition. You can also use the tilt to emphasize certain parts of the reflection or to create abstract patterns.
Elevated Vantage Points
Three key elevated vantage points can revolutionize your reflection photography: rooftops, balconies, and bridges. These higher perspectives offer unique angles that capture reflections in ways ground-level shots can't match.
When you're up high, you'll often find surprising reflections in unexpected places, like puddles, car hoods, or even sunglasses.
To make the most of elevated vantage points:
- Scout locations in advance to find safe, accessible high points
- Bring a zoom lens or use your phone's digital zoom for close-ups
- Experiment with different times of day for varied lighting effects
- Consider using a tripod or stabilizer for sharper images
Don't be afraid to get creative with your elevated shots. Try capturing reflections in windows of nearby buildings or look for interesting patterns created by multiple reflective surfaces.
Remember, the higher you go, the more expansive your reflection possibilities become. You'll be able to capture wider scenes and more intricate details that aren't visible from ground level.
Always prioritize safety when seeking elevated vantage points, and respect private property and local regulations.
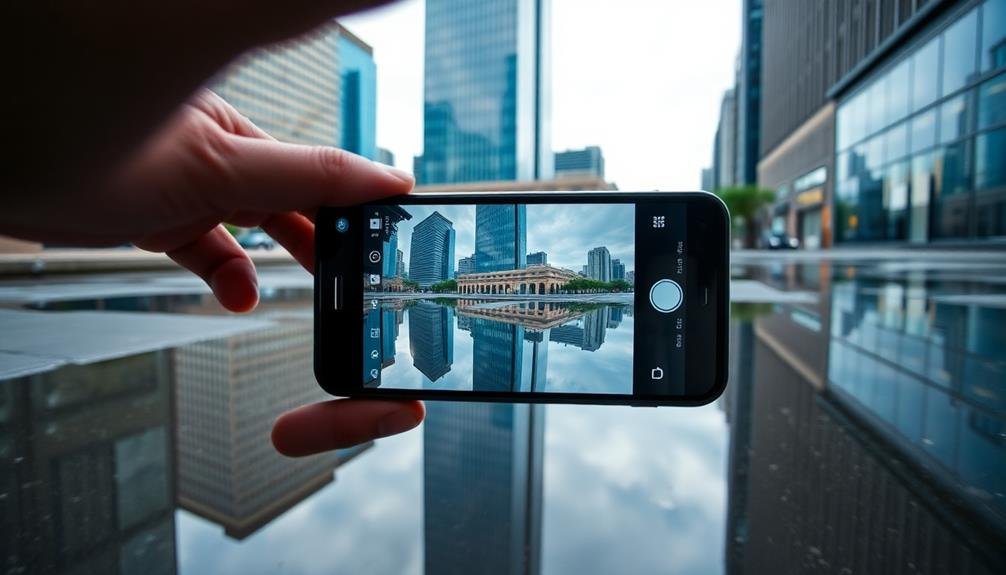
Capturing Water Reflections of Buildings
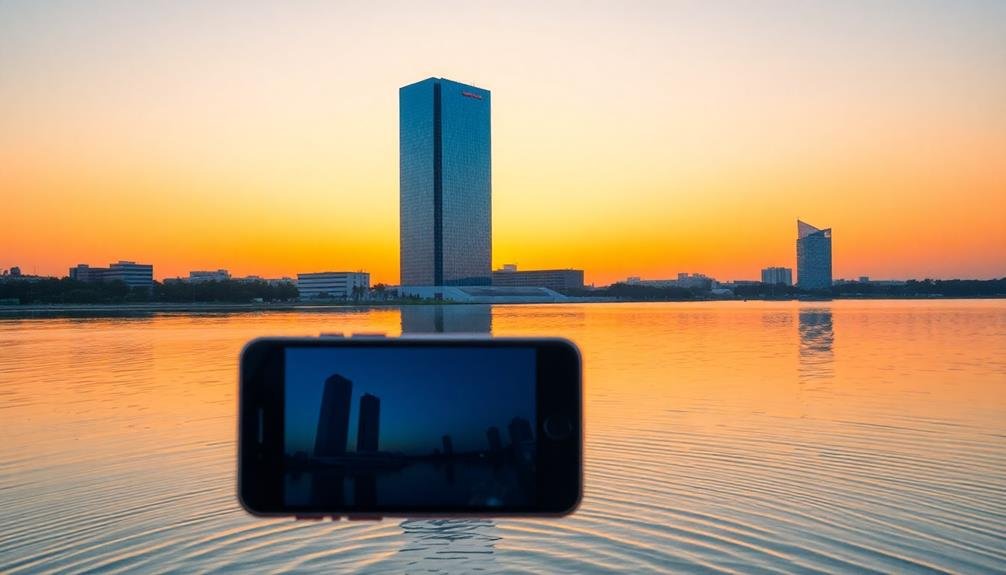
When it comes to capturing water reflections of buildings, timing and positioning are essential. Look for calm bodies of water like lakes, ponds, or even puddles after rain. Early morning or late evening often provide the best conditions, as the water is typically still and the light is soft.
Position yourself low to the water's surface to maximize the reflection's size in your frame. Experiment with different angles to find the most striking composition. You'll want to include both the building and its reflection, so try to divide your frame equally between the two.
Use your phone's grid feature to align the horizon perfectly straight. This will guarantee your reflection appears symmetrical. If your phone has a manual mode, adjust the exposure to capture details in both the building and its reflection. HDR mode can also help balance the lighting.
For added interest, include foreground elements like rocks or vegetation. These can create depth and frame your shot.
Don't be afraid to get creative with partial reflections or abstract compositions. Remember, practice makes perfect, so keep experimenting with different buildings and water sources.
Using HDR for Reflection Photography

Harnessing HDR (High Dynamic Range) can markedly enhance your reflection photography. This technique allows you to capture a wider range of light and dark tones, which is particularly useful when dealing with reflective surfaces. By combining multiple exposures, HDR helps you balance the brightness of the sky with the darker reflections in water or glass.
To effectively use HDR for reflection shots:
- Enable HDR mode on your phone's camera app
- Keep your phone steady or use a tripod for sharper images
- Experiment with different exposure levels
- Use editing apps to fine-tune the HDR effect post-capture
When shooting reflections with HDR, focus on scenes with high contrast, such as sunsets reflected in water or buildings mirrored in glass facades. The technique excels at preserving details in both bright and shadowy areas, ensuring your reflections maintain clarity and depth.
Be cautious not to overuse HDR, as it can sometimes lead to unnatural-looking images. Aim for a subtle enhancement that brings out the best in your reflection shots without compromising their authenticity.
With practice, you'll develop an eye for when HDR can truly elevate your phone photography, especially in challenging lighting conditions.
Editing Reflection Photos on Smartphone
After capturing your reflection shots, you'll often find that they benefit from some post-processing. Most smartphones come with built-in editing tools that can greatly enhance your reflection photos.
Start by adjusting the exposure and contrast to bring out the details in both the reflective surface and the reflected image. You can use the highlights and shadows sliders to fine-tune these elements.
Next, focus on color correction. Adjust the temperature and tint to achieve a natural look, especially if the reflection appears in water or glass. Don't be afraid to boost saturation slightly to make colors pop, but be careful not to overdo it.
Clarity and sharpness adjustments can help define edges and textures in your image. For a more artistic approach, try cropping your photo to emphasize the reflection or experiment with symmetry.
Some apps offer advanced features like selective editing, allowing you to adjust specific areas of your image. Finally, consider using filters or presets as a starting point, but customize them to suit your unique shot.
Dealing With Challenging Lighting Conditions
Although reflection photography can create stunning images, challenging lighting conditions often pose significant hurdles. You'll frequently encounter situations where the light source creates glare, harsh shadows, or uneven illumination.
To overcome these obstacles, you'll need to adapt your technique and use your phone's features creatively.
First, experiment with different angles to minimize unwanted reflections or glare. Move around the subject and adjust your position until you find the best angle.
Next, use your phone's HDR mode to balance exposure in high-contrast scenes. This feature can help capture details in both bright and dark areas of the image.
Consider using these additional techniques to manage challenging lighting:
- Use a polarizing filter to reduce glare and enhance reflections
- Shoot during golden hour for softer, more flattering light
- Adjust exposure compensation to prevent overexposure
- Utilize your phone's manual mode for greater control over settings
Creating Unique Reflection Effects
Reflection photography offers countless opportunities for creative expression. You can create unique effects by experimenting with different surfaces and angles. Try capturing reflections in puddles, glass buildings, or shiny car exteriors.
For a more abstract look, seek out rippled water surfaces or distorted mirrors.
To add depth to your images, incorporate foreground elements that frame the reflection. This technique creates a sense of context and draws the viewer's eye to the main subject. You can also play with symmetry by aligning the reflection perfectly with its source, or deliberately misalign them for a more dynamic composition.
Don't limit yourself to natural reflections. Create your own using props like mirrors, metallic objects, or even a phone screen. These can introduce unexpected elements into your shots and challenge viewers' perceptions.
Experiment with partial reflections by adjusting your angle or using selective focus. This approach can create intriguing, fragmented images that spark curiosity.
Frequently Asked Questions
How Do I Remove Unwanted Objects From Building Reflections in Post-Processing?
You can remove unwanted objects from building reflections using photo editing software. Use the clone stamp or healing brush tool to paint over the object, sampling nearby areas. Adjust opacity and blend modes for seamless results.
Can I Use Lens Attachments to Enhance Building Reflection Shots?
Yes, you can use lens attachments to enhance building reflection shots. Wide-angle lenses will capture more of the reflection, while polarizing filters can reduce glare and increase contrast. Macro lenses help you focus on intricate details in reflections.
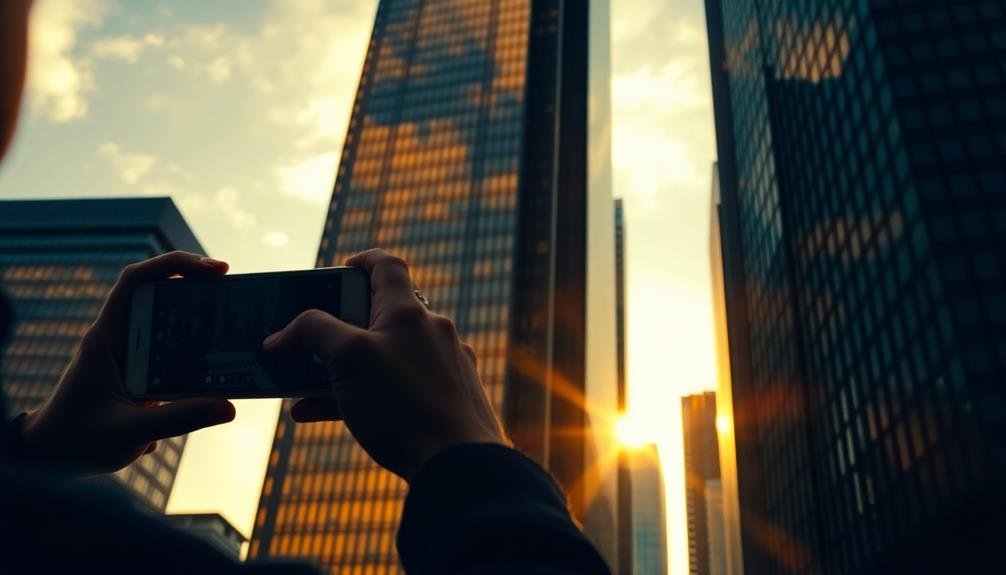
What's the Best Time of Day for Capturing Dramatic Building Reflections?
You'll capture the most dramatic building reflections during the golden hour, just after sunrise or before sunset. The low, warm light creates stunning contrasts and colors. Cloudy days can also offer unique opportunities for softer reflections.
How Can I Create a Symmetrical Reflection Effect When the Surface Isn't Perfectly Flat?
To create a symmetrical reflection on an uneven surface, you'll need to adjust your angle carefully. Try moving around to find the sweet spot where reflections align best. Post-processing can also help perfect the symmetry if needed.
Are There Any Legal Considerations When Photographing Reflections of Copyrighted Buildings?
You'll generally be safe photographing building reflections, as architectural works in public spaces are usually fair game. However, it's best to avoid using these images commercially without permission to prevent potential legal issues.
In Summary
You've now got the tools to capture stunning building reflections with your smartphone. Remember to experiment with different surfaces, angles, and camera settings. Don't be afraid to get creative with your compositions and editing techniques. With practice, you'll master the art of reflection photography, turning ordinary cityscapes into extraordinary images. Keep exploring, pushing your limits, and you'll soon be creating mesmerizing reflections that'll make your photos stand out from the crowd.

Leave a Reply