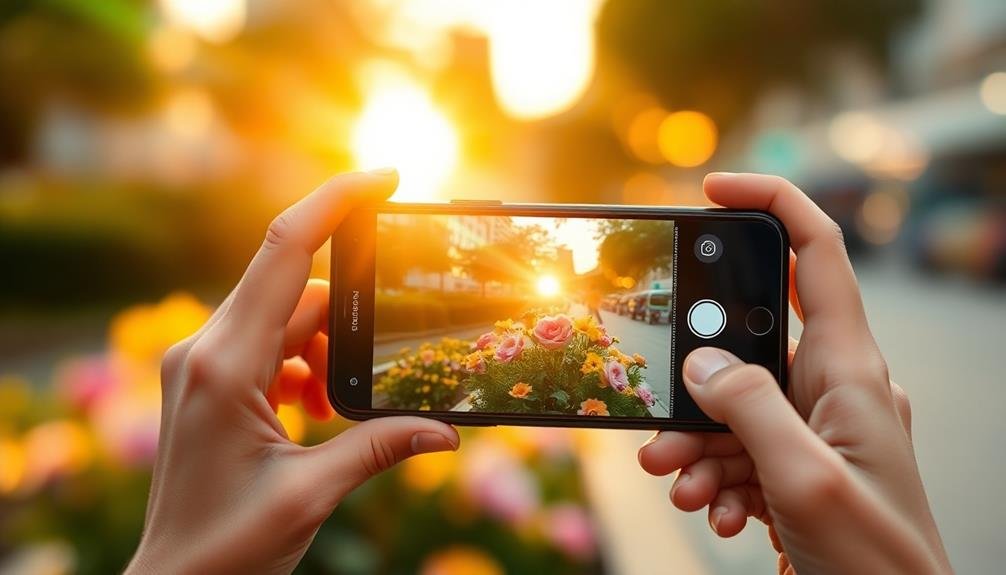
To capture stunning Live Focus photos with your smartphone, start by choosing subjects with contrast and depth. Adjust the background blur intensity for a natural bokeh effect. Experiment with lighting conditions, especially during golden hour. Frame your shots creatively using leading lines and the rule of thirds. Incorporate motion for dynamic effects by capturing moving subjects or creating intentional blur. Master the focus lock technique for precise control over your focal point. Finally, edit your images to enhance depth through color grading and selective sharpening. These pro tricks will elevate your smartphone photography, but there's even more to discover about mastering Live Focus.
Choose the Right Subject

Three key factors make a subject ideal for Live Focus photography: contrast, depth, and visual interest. When selecting your subject, look for objects or people that stand out from the background. This contrast will help your smartphone's AI distinguish between the foreground and background, creating a more pronounced bokeh effect.
Depth is essential for Live Focus shots. Choose subjects that have space behind them, allowing the camera to blur the background effectively. Avoid flat scenes or subjects pressed against walls, as these won't provide the depth needed for a striking Live Focus image.
Visual interest is the final key element. Opt for subjects with intricate details, unique shapes, or vibrant colors. Portraits of people with expressive faces or interesting clothing work well, as do close-ups of flowers, textured objects, or small animals.
Consider the lighting when choosing your subject. Soft, diffused light often produces the best results for Live Focus photos. Avoid harsh midday sun, which can create unflattering shadows and make it difficult for the camera to separate the subject from the background accurately.
Instead, shoot during the golden hour or in slightly overcast conditions for more flattering and easier-to-capture Live Focus images.
Adjust Background Blur Intensity

Most smartphones with Live Focus capabilities allow you to adjust the intensity of the background blur after taking the photo. This feature gives you greater control over the final look of your image, enabling you to fine-tune the depth effect to your liking.
To achieve the finest results, experiment with different blur intensities and consider the following tips:
- Start with a moderate blur and gradually increase or decrease it
- Pay attention to how the blur affects the subject's edges
- Make sure the blur doesn't obscure important background elements
- Aim for a natural-looking bokeh effect
- Consider the overall mood and composition of the image
When adjusting the blur intensity, keep in mind that less is often more. A subtle blur can create a professional-looking image, while excessive blur might appear artificial.
You'll want to strike a balance between drawing attention to your subject and maintaining a pleasing overall aesthetic.
Remember that the ideal blur intensity can vary depending on the scene, lighting conditions, and distance between the subject and background.
Don't be afraid to take multiple shots with different blur settings to compare and choose the best one.
Experiment With Lighting Conditions

Lighting plays an essential role in creating stunning Live Focus photos. You'll want to experiment with different lighting conditions to achieve the best results. Natural light often provides the most flattering look, so try shooting outdoors during the golden hour or on overcast days for soft, even lighting. When indoors, position your subject near a window to take advantage of natural light.
For more creative effects, don't hesitate to use artificial lighting sources. Try backlighting your subject for a dramatic silhouette or use a small LED light to add a catchlight to your subject's eyes. Remember, the direction and quality of light can greatly impact the mood and depth of your Live Focus shots.
| Lighting Type | Best For | Tips |
|---|---|---|
| Natural Light | Portraits, landscapes | Shoot during golden hour |
| Artificial Light | Studio-style shots | Use diffusers for softer light |
| Low Light | Moody, atmospheric photos | Increase ISO, use a tripod |
Experiment with various lighting setups to find what works best for your style and subject. Don't be afraid to mix different light sources or use reflectors to fill in shadows. With practice, you'll develop an eye for how lighting affects your Live Focus photos and create more fascinating images.
Frame Your Shot Creatively

To frame your shot creatively, you'll want to employ some key composition techniques.
Use leading lines to draw the viewer's eye through the image, and apply the rule of thirds to create a balanced, visually appealing composition.
You can also incorporate natural frames within your environment, such as doorways or arches, to add depth and focus to your live focus photos.
Use Leading Lines
Drawing the viewer's eye through your image, leading lines are a powerful compositional tool in smartphone photography. They guide the gaze towards your subject, creating depth and interest. To effectively use leading lines in your Live Focus shots, look for natural or man-made elements that form paths or directional cues.
Some common examples of leading lines include:
- Roads or pathways
- Fences or railings
- Rivers or streams
- Architectural features like staircases or hallways
- Tree lines or rows of objects
When composing your shot, position these lines to lead towards your main subject. This technique works particularly well with Live Focus, as it can help emphasize the separation between foreground and background.
You can use diagonal lines for a dynamic feel or straight lines for a more structured look. Experiment with different angles to find the most compelling composition. Try shooting from a low angle to emphasize lines on the ground, or look for converging lines that create a sense of perspective.
Apply Rule of Thirds
One of the most fundamental composition techniques in photography, the Rule of Thirds can dramatically improve your Live Focus shots. To apply this principle, imagine dividing your smartphone screen into a 3×3 grid. Place your main subject along these lines or at their intersections, rather than centering it.
This technique creates a more balanced and visually appealing composition. It draws the viewer's eye naturally across the image, creating a sense of movement and interest. When shooting portraits with Live Focus, try positioning your subject's eyes along the upper third line.
For landscapes, align the horizon with either the upper or lower third line, depending on whether you want to emphasize the sky or foreground.
Many smartphones offer a grid overlay feature in the camera settings. Enable this to help you precisely align your shots. As you practice, you'll develop an intuitive sense for the Rule of Thirds.
Don't be afraid to break this rule occasionally for creative effect, but master it first. Remember, the goal is to create a more dynamic and engaging image that guides the viewer's gaze through your composition. Experiment with different subject placements to find what works best for each unique scene.
Incorporate Natural Frames
Natural frames elevate your Live Focus photos from ordinary to extraordinary. By incorporating elements from your surroundings to frame your subject, you'll add depth and context to your images. Look for architectural features, foliage, or other objects that can create a natural border around your main subject. This technique draws the viewer's eye to the focal point while adding visual interest to the overall composition.
When seeking natural frames, consider these options:
- Archways or doorways
- Tree branches or leaves
- Window frames
- Rock formations
- Bridges or tunnels
As you compose your shot, position your subject within the frame to create a sense of balance. Experiment with different angles and distances to find the most flattering arrangement.
Remember that the frame doesn't need to completely surround your subject; partial frames can be just as effective.
Use Live Focus mode to blur the framing elements slightly, creating a subtle depth of field effect that enhances the main subject. This technique works particularly well for portraits, adding a professional touch to your smartphone photography.
Use Motion for Dynamic Effects

To add energy and excitement to your Live Focus photos, don't shy away from incorporating motion.
You can capture moving subjects, like a person walking or a car driving by, to create a sense of action in your image.
Alternatively, try experimenting with motion blur by intentionally moving your camera during a longer exposure, resulting in streaks of light or blurred backgrounds that contrast beautifully with your sharp, focused subject.
Capture Moving Subjects
With Live Focus mode, you can create stunning dynamic effects by capturing moving subjects. This technique adds energy and excitement to your photos, making them visually compelling. To achieve this, focus on a moving subject while keeping the background blurred. As the subject moves, you'll create a sense of motion and depth in your image.
When capturing moving subjects with Live Focus, consider these tips:
- Anticipate the subject's movement and position yourself accordingly
- Use burst mode to capture multiple frames in quick succession
- Experiment with different shutter speeds to control motion blur
- Try panning techniques to keep the subject sharp while blurring the background
- Adjust the blur intensity in post-processing for the desired effect
Practice capturing various moving subjects, such as people walking, cars driving, or animals running. Pay attention to the direction of movement and how it affects your composition.
You can also combine this technique with other Live Focus effects, like color point or spin bokeh, to create even more unique and eye-catching images. Remember to experiment with different angles and perspectives to find the most dynamic shots.
With practice, you'll master the art of capturing moving subjects in Live Focus mode.
Create Motion Blur
Motion blur can transform your Live Focus photos from static to dynamic, adding a sense of energy and movement. To create this effect, you'll need to combine a longer exposure time with intentional camera movement or subject motion.
Start by selecting your smartphone's "Pro" or "Manual" mode, which allows you to adjust shutter speed. Choose a slower shutter speed, typically between 1/15 and 1/4 of a second, depending on the desired blur effect. For moving subjects, keep your camera steady and let the subject create the blur. For stationary subjects, move your camera slightly during exposure to create streaks of light or blurred backgrounds.
Experiment with different techniques:
- Panning: Follow a moving subject, keeping it in focus while blurring the background.
- Zoom burst: Zoom in or out during exposure for a radial blur effect.
- Light painting: Use long exposures to capture light trails from moving vehicles or handheld light sources.
Remember to use a tripod or stabilize your phone for sharper results. Adjust your ISO and aperture to compensate for the longer exposure time, ensuring proper image brightness.
With practice, you'll master the art of creating stunning motion blur effects in your Live Focus photos.
Master Focus Lock Technique

Focus lock, a powerful tool in your smartphone's camera arsenal, allows you to precisely control what's in sharp focus.
To master this technique, start by tapping on your screen where you want the focus to be. Most smartphones will display a yellow square or circle, indicating the focus point.
Once set, press and hold until you see a message like "AE/AF Lock" or feel a slight vibration.
With focus locked, you can now recompose your shot without losing that crisp focus on your subject.
This technique is particularly useful for:
- Off-center compositions
- Capturing moving subjects
- Macro photography
- Low-light situations
- Creating depth of field effects
Edit for Enhanced Depth

Once you've captured your live focus photo, post-processing can take your image to the next level. Start by adjusting the blur intensity to enhance the depth effect. Most smartphones allow you to fine-tune this after taking the shot. Experiment with different levels to find the perfect balance between subject sharpness and background softness.
Next, focus on color grading. Enhance the contrast between your subject and the background by adjusting saturation and temperature. Warming up your subject while cooling down the background can create a striking depth illusion.
Don't overlook the power of vignetting. A subtle dark vignette can draw attention to your subject and enhance the sense of depth. Use it sparingly to avoid an overdone look.
Consider selectively sharpening your subject. This technique can make them pop against the blurred background, further emphasizing the depth effect.
Lastly, play with highlights and shadows. Brightening your subject while slightly darkening the background can create a natural-looking depth separation.
Frequently Asked Questions
Can Live Focus Be Used for Video Recording?
Yes, you can use live focus for video recording on many smartphones. It's often called "portrait mode" or "bokeh effect" for videos. You'll get a blurred background while keeping your subject sharp, adding depth to your footage.
How Does Live Focus Affect Battery Life?
Live focus can impact your battery life. When you're using it, your phone's processor works harder to create the effect in real-time. This increased processing power consumption means you'll likely see faster battery drain during use.
Are There Third-Party Apps That Enhance Live Focus Capabilities?
You'll find several third-party apps that enhance live focus capabilities. Try FiLMiC Pro, Focos, or AfterFocus. They offer advanced depth control, bokeh effects, and post-capture editing. Experiment with these apps to take your live focus photos to the next level.
Does Live Focus Work Equally Well on Front and Rear Cameras?
Live focus typically works better on rear cameras due to their superior hardware. However, you'll find many phones now offer improved front camera live focus. You can still achieve great results with either, but rear cameras often have an edge.
Can Live Focus Be Applied to Existing Photos in the Gallery?
You can't apply live focus to existing photos in your gallery. It's a feature that works when taking new photos. However, you'll find editing tools in your gallery to add blur effects to existing images.
In Summary
You've now got the tools to take your live focus photos to the next level. Don't be afraid to experiment with different subjects, lighting, and framing. Play around with blur intensity and focus lock to create stunning depth. Remember, motion can add excitement to your shots. Finally, don't skimp on editing – it's your chance to perfect that professional look. With practice, you'll soon be capturing breathtaking live focus images that'll wow your followers.

Leave a Reply