
RAW mobile street photos pop when you leverage their uncompressed data for maximum flexibility. Start by capturing a wide dynamic range, then fine-tune exposure and contrast to reveal hidden details. Adjust white balance to set the mood and enhance colors for vibrancy. Apply selective sharpening to emphasize key elements while carefully reducing noise. Crop strategically to create impactful compositions, removing distractions and focusing on compelling details. Throughout the process, preserve authenticity by maintaining natural tones and the genuine essence of the scene. By mastering these techniques, you'll transform ordinary street shots into eye-catching masterpieces that tell powerful stories.
Understanding RAW Format
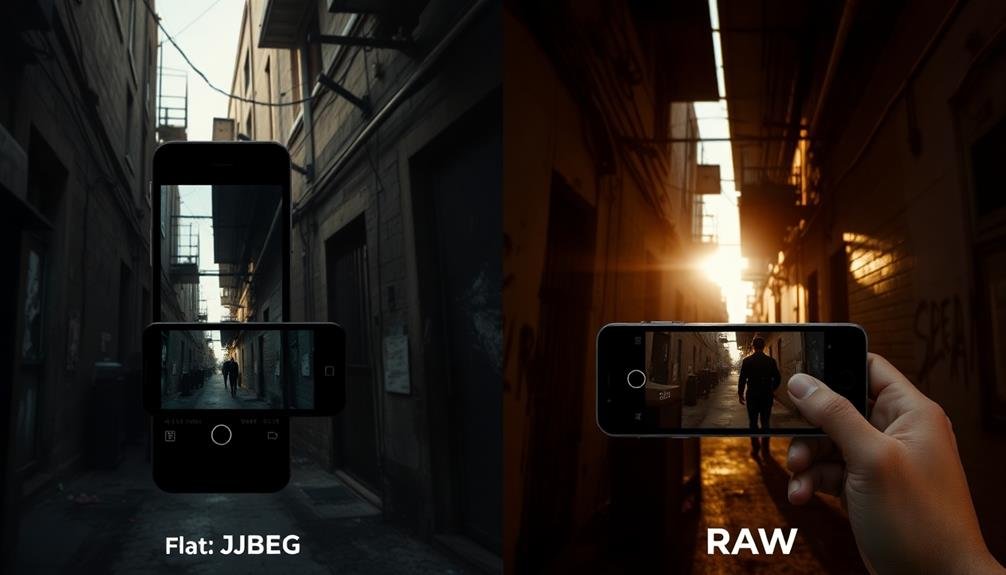
In the world of digital photography, RAW format stands out as a powerful tool for mobile street photographers. When you shoot in RAW, you're capturing all the data your camera's sensor detects, unlike JPEG which compresses and processes the image immediately. This uncompressed format gives you greater flexibility in post-processing, allowing you to adjust exposure, white balance, and color with minimal quality loss.
RAW files contain more color information and a wider dynamic range, meaning you can recover details in highlights and shadows that would be lost in JPEG. This is particularly valuable in high-contrast street scenes. You'll have more control over noise reduction and sharpening, essential for low-light street photography.
However, RAW files are larger and require processing before sharing. They're not universally supported, so you'll need compatible editing software.
Despite these challenges, shooting RAW can greatly elevate your street photography. It preserves the maximum amount of data, giving you the freedom to fine-tune your images and bring out the vibrant, gritty essence of street life in post-processing.
Capturing Dynamic Range
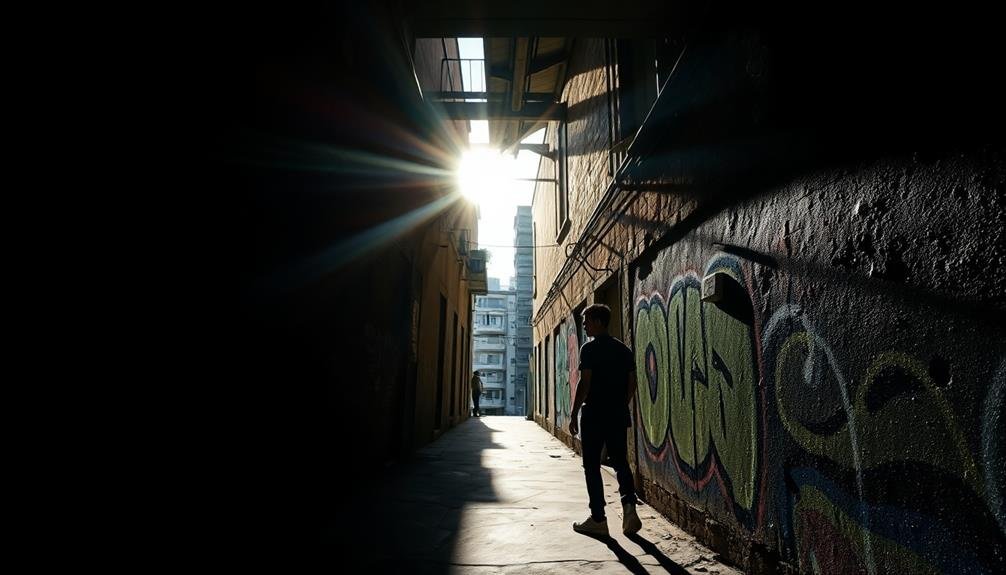
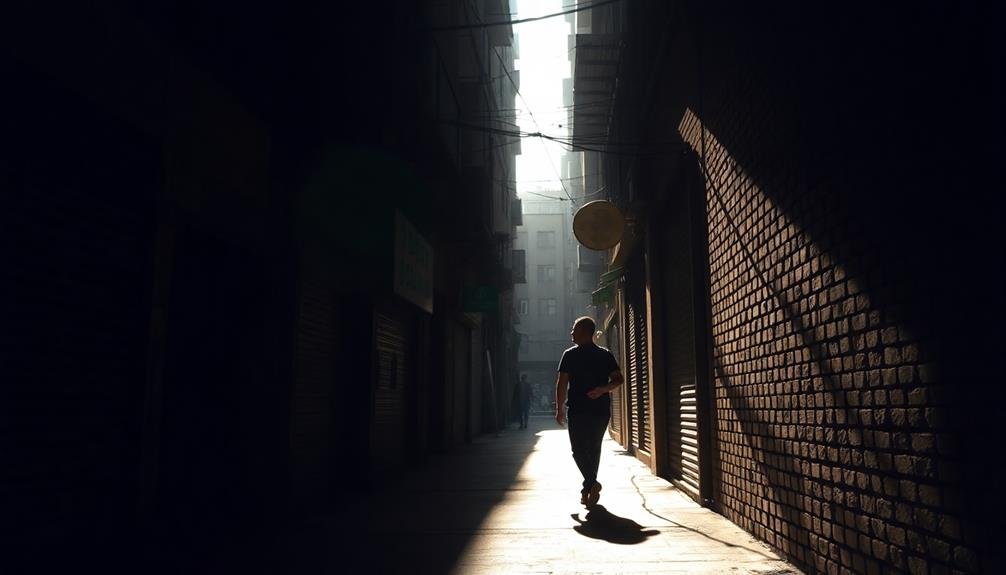
Mastery of dynamic range is essential for compelling mobile street photography. When you shoot in RAW, you'll capture a wider range of tones from shadows to highlights, giving you more flexibility in post-processing. To make the most of this advantage, expose for the highlights in high-contrast scenes. You can recover shadow details later, but blown-out highlights are often irretrievable.
Pay attention to the light and shadow interplay in urban environments. Look for scenes with dramatic lighting conditions that showcase the full spectrum of tones. Use HDR sparingly, as it can make your images look artificial. Instead, rely on your RAW file's inherent dynamic range and your post-processing skills.
Here's a table to help you visualize dynamic range in street photography:
| Tonal Range | Emotion Evoked | Scene Examples |
|---|---|---|
| High-Key | Ethereal | Foggy mornings |
| Mid-Tones | Balanced | Overcast days |
| Low-Key | Moody | Night scenes |
| High Contrast | Dramatic | Harsh sunlight |
| Full Range | Enchanting | Golden hour |
Adjusting Exposure and Contrast
Three key steps are essential when adjusting exposure and contrast in RAW mobile street photos.
First, you'll want to set the overall exposure. Use the exposure slider to brighten or darken the image, ensuring you don't lose important details in the highlights or shadows. Pay close attention to the histogram to avoid clipping.
Next, fine-tune the contrast. Increase it to add depth and separation between elements, or decrease it for a softer look. The contrast slider affects the entire tonal range, so use it judiciously.
For more precise control, adjust the highlights and shadows separately. This allows you to recover details in bright skies or dark alleyways without impacting the entire image.
Fine-Tuning White Balance
After adjusting exposure and contrast, you'll need to address the color temperature of your RAW mobile street photos. Fine-tuning white balance is essential for achieving natural-looking colors and creating the desired mood in your images. You'll have more flexibility with RAW files compared to JPEGs, allowing you to correct color casts and adjust the overall warmth or coolness of your photos.
Start by selecting the appropriate white balance preset that matches your shooting conditions, such as daylight, cloudy, or tungsten. Then, use the temperature and tint sliders to make precise adjustments. Warmer tones can evoke feelings of comfort and nostalgia, while cooler tones can create a sense of calm or detachment.
| Mood | Temperature | Tint |
|---|---|---|
| Warm | Increase | Add magenta |
| Cool | Decrease | Add green |
| Natural | Neutral | Balanced |
| Dramatic | Extreme | Extreme |
| Creative | Mixed | Mixed |
Remember that white balance isn't just about technical accuracy; it's also a creative tool. Don't be afraid to experiment with unconventional settings to enhance the atmosphere of your street scenes. You can even use split-toning techniques to add different color casts to the shadows and highlights for a unique look.
Enhancing Colors and Tones
Immerse yourself in enhancing colors and tones to bring your RAW mobile street photos to life. Start by adjusting the overall exposure to guarantee a balanced image.
Then, fine-tune the highlights and shadows to recover detail in bright skies or dark alleyways. Don't be afraid to boost the contrast slightly for added depth.
Next, focus on color saturation and vibrance. Increase these settings gradually to make colors pop without appearing unnatural.
Pay attention to specific hues that define your scene, such as the warm glow of street lamps or the cool tones of evening shadows. Use selective color adjustments to enhance or mute particular shades as needed.
Experiment with the clarity slider to add definition to textures and details. This can make architectural elements and street textures more pronounced.
For a moodier look, try lowering the blacks slightly and adding a subtle vignette.
Finally, consider applying a subtle split-toning effect to your highlights and shadows for a cohesive color palette.
Sharpening and Noise Reduction
When sharpening your RAW mobile street photos, you'll want to focus on selective techniques to enhance key areas without oversharpening the entire image.
It's essential to strike a balance between noise reduction and maintaining important details, as aggressive noise reduction can lead to a loss of texture.
You can preserve fine details by using advanced methods like masking and edge detection, which allow you to sharpen specific elements while leaving smoother areas untouched.
Selective Sharpening Techniques
Selective sharpening techniques are essential for enhancing RAW mobile street photos without introducing excessive noise. You'll want to focus on key areas of your image to draw the viewer's attention and create depth.
Start by identifying the main subject or focal point of your photo. This could be a person's face, a striking architectural detail, or a unique street sign.
Use your editing software's masking tools to isolate these areas. Apply a higher level of sharpening to these selected regions, while leaving the background relatively softer. This contrast in sharpness will make your subject pop.
When sharpening eyes or facial features, be careful not to overdo it, as this can look unnatural.
For street scenes with intricate details, try using a high-pass filter to sharpen only the edges and textures. This technique preserves smooth areas while enhancing fine details.
Don't forget to sharpen text or signage in your photos, as crisp lettering can add to the overall impact of the image.
Always zoom in to check your work at 100% magnification to ascertain you're not introducing unwanted artifacts or over-sharpening.
Noise Reduction Balance
Balancing sharpening and noise reduction is a delicate art in RAW mobile street photography. You'll need to find the sweet spot between enhancing details and minimizing digital noise.
Start by evaluating your image's noise levels at different ISO settings. Higher ISOs typically require more noise reduction.
Apply noise reduction cautiously, focusing on luminance noise first. Reduce color noise separately, as it's often less noticeable. Be mindful not to overdo it, as excessive noise reduction can lead to a loss of texture and detail. Adjust the noise reduction strength based on the image's content and your artistic vision.
After noise reduction, apply sharpening to bring back lost detail. Use a small radius for fine details and a larger one for broader edges.
Mask your sharpening to target specific areas, avoiding noise amplification in smooth regions like skies. Experiment with different sharpening techniques, such as high pass filters or unsharp mask, to find what works best for your style.
Detail Preservation Methods
Preserving detail in RAW mobile street photos requires a nuanced approach to sharpening and noise reduction. You'll want to strike a balance between enhancing image clarity and avoiding artificial-looking results.
Start by applying selective sharpening to key areas like faces, textures, and architectural elements. Use a high-pass filter or unsharp mask with a small radius to target fine details. Adjust the amount and threshold to prevent over-sharpening, which can introduce halos or amplify noise.
For noise reduction, focus on luminance noise first, as it's more noticeable than color noise. Apply it sparingly to maintain texture and avoid a plasticky look. Use masking techniques to protect high-detail areas from excessive smoothing.
Consider using frequency separation to treat detail and noise independently. This method allows you to sharpen the detail layer while smoothing the color layer, preserving fine textures.
Experiment with local adjustments to refine specific areas. Use brushes or gradient filters to apply sharpening and noise reduction selectively, tailoring the effect to each part of your image.
Cropping for Impact
When cropping your street photos, consider using the rule of thirds to create more dynamic compositions.
Don't hesitate to zoom in on specific details that capture the essence of the scene, as this can often lead to more powerful images.
You'll also want to carefully evaluate the frame's edges, removing any distracting elements that might pull attention away from your main subject.
Rule of Thirds
The Rule of Thirds often proves invaluable when cropping your mobile street photos for maximum impact. This fundamental composition principle divides your image into a 3×3 grid, creating nine equal parts. By placing key elements along these lines or at their intersections, you'll create more balanced and visually appealing images.
When applying the Rule of Thirds to your RAW mobile street photos, consider these tips:
- Position your main subject at one of the grid's intersections.
- Align horizons or strong horizontal lines along the top or bottom third.
- Use vertical lines to frame elements or create separation between subjects.
Don't be afraid to experiment with different crops to find the most compelling composition.
Sometimes, slightly off-center placements can add tension and interest to your street scenes. Remember, the Rule of Thirds is a guide, not a strict law. Trust your artistic instincts and break the rule when it serves your creative vision.
Focusing on Details
How can you make your street photos more impactful? One powerful technique is focusing on details through strategic cropping. When you're editing your RAW mobile street photos, don't be afraid to zoom in and crop tightly on specific elements that tell a story or evoke emotion.
Look for compelling facial expressions, interesting textures, or unique interactions between subjects. By isolating these details, you'll create a more intimate and engaging image that draws viewers in. Experiment with different aspect ratios to find the most effective composition for each photo.
Remember, cropping isn't just about removing distractions; it's about emphasizing what's important. You can use cropping to create tension, direct the viewer's gaze, or highlight contrasts within the scene.
Don't be afraid to crop out parts of your subject if it strengthens the overall impact. When focusing on details, pay attention to the edges of your frame. Make sure that every element within the cropped image contributes to the story you're trying to tell.
Removing Distracting Elements
Often, the key to creating impactful street photos lies in what you leave out. Removing distracting elements through careful cropping can dramatically improve your raw mobile street shots. By eliminating unnecessary details, you'll draw the viewer's attention to the heart of your image and enhance its overall impact.
When cropping your photos, consider these key points:
- Identify the main subject: Focus on what drew your eye to the scene initially.
- Remove competing elements: Crop out objects that detract from your subject.
- Follow composition rules: Apply the rule of thirds or golden ratio for balanced images.
Don't be afraid to crop aggressively if it means creating a stronger composition. Experiment with different aspect ratios to find what works best for each image. Remember, sometimes less is more. A tightly cropped photo can create intimacy and emphasize emotion.
However, be careful not to over-crop and lose important context or image quality. Aim to strike a balance between removing distractions and maintaining the essence of the scene.
With practice, you'll develop an eye for effective cropping, transforming your raw mobile street photos into compelling visual stories.
Preserving Authenticity in Edits
Preserving authenticity in raw mobile street photos can be a delicate balancing act. As you edit your images, it's vital to maintain the genuine essence of the moment you've captured. Avoid over-processing, which can strip away the raw energy and spontaneity that make street photography so compelling.
When adjusting exposure and contrast, aim to enhance visibility without creating an artificial look. Subtle tweaks to shadows and highlights can reveal hidden details while keeping the overall mood intact.
Be cautious with color adjustments; preserve the natural tones of the scene rather than imposing unrealistic hues. Cropping should be minimal, if used at all. The original framing often captures the photographer's intent and the context of the moment.
If you must crop, make sure it doesn't alter the story or remove vital elements. Resist the temptation to remove or add objects digitally. The strength of street photography lies in its unfiltered representation of reality.
Instead, focus on improving what's already there through careful adjustments to light, color, and composition. By respecting the authenticity of your raw captures, you'll create more powerful and honest street photographs.
Frequently Asked Questions
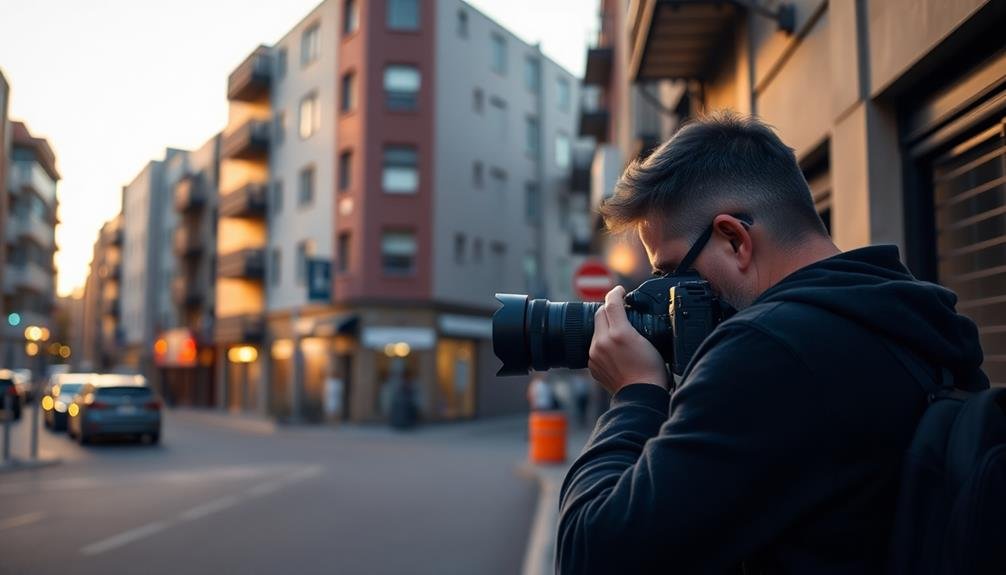
What Camera Settings Are Best for RAW Street Photography?
You'll want to use a fast shutter speed (1/250 or higher), wide aperture (f/2.8-f/5.6), and moderate ISO (400-1600). Shoot in RAW format for maximum editing flexibility. Experiment with these settings to find what works best for you.
How Can I Shoot RAW on a Smartphone?
To shoot RAW on your smartphone, you'll need a camera app that supports RAW capture. Enable RAW mode in the app's settings, then shoot as usual. Remember, RAW files are larger and require post-processing to look their best.
What Software Is Recommended for Editing RAW Street Photos?
For editing RAW street photos, you'll want powerful software like Adobe Lightroom, Capture One, or DxO PhotoLab. These programs offer advanced tools for adjusting exposure, color, and detail. Don't forget free options like RawTherapee or Darktable.
How Much Storage Space Do RAW Files Typically Require?
You'll need plenty of storage for RAW files. They're typically 20-30MB each, much larger than JPEGs. A 32GB card might hold 1,000-1,500 RAW images. Consider external drives or cloud storage for your growing collection.
Can I Convert JPEG Files to RAW Format for Editing?
You can't convert JPEGs to true RAW format. RAW files contain unprocessed sensor data, which JPEGs lack. However, you can edit JPEGs in RAW-like software. For best results, always shoot in RAW when possible.
In Summary
You've now got the tools to make your raw mobile street photos truly pop. Remember, it's all about balancing technical skills with creative vision. Don't be afraid to experiment with exposure, contrast, and colors, but always stay true to the scene's authenticity. With practice, you'll develop your unique style. Keep shooting, keep editing, and watch as your street photography transforms from ordinary snapshots to striking, impactful images that tell compelling stories.
Leave a Reply