
To capture pro-level portrait shots with your smartphone, start by mastering your device's camera capabilities and portrait mode settings. Optimize lighting conditions, favoring natural light or the golden hour for flattering results. Apply composition techniques like the rule of thirds and framing to create compelling images. Guide your subjects with gentle posing tips to guarantee natural, engaging portraits. Experiment with lens attachments to expand your creative options, and don't shy away from challenging lighting situations or unique angles. Finally, perfect your images in post-processing, focusing on skin tones and subtle enhancements. With practice, you'll reveal your phone's full potential for stunning portraits.
Understanding Smartphone Camera Capabilities

Smartphones have revolutionized the way we capture and share moments. Today's devices pack powerful camera systems that rival dedicated point-and-shoot cameras. To take pro-level portrait shots, you'll need to understand your phone's capabilities.
Most modern smartphones feature multiple lenses, including wide-angle, ultra-wide, and telephoto options. The main camera typically offers the highest resolution and best low-light performance. Portrait mode uses depth sensors or software algorithms to create a bokeh effect, blurring the background while keeping the subject sharp.
Your phone's camera app likely includes various shooting modes and settings. Explore features like HDR, night mode, and manual controls. HDR balances exposure in high-contrast scenes, while night mode enhances low-light shots. Manual mode lets you adjust ISO, shutter speed, and focus for precise control.
Many smartphones now offer advanced features like optical image stabilization, larger sensors, and improved computational photography. These technologies help reduce blur, capture more light, and enhance image quality.
Mastering Portrait Mode Settings

Immerse yourself in the world of portrait mode to elevate your smartphone photography. This feature creates a shallow depth of field, blurring the background while keeping your subject sharp.
To master portrait mode, start by selecting the right distance from your subject, typically 2-8 feet away. Make sure your subject is well-lit and contrasts with the background for best results.
Experiment with different focal lengths by zooming in or out to alter the composition. Many phones offer adjustable blur intensity; fine-tune this setting to achieve a natural-looking bokeh effect.
Pay attention to edge detection, as some phones struggle with intricate details like hair. If you notice imperfections, try adjusting your angle or moving to a different location.
Don't forget to explore additional portrait mode features like studio lighting effects or high-key mono. These can add dramatic flair to your shots.
Remember to tap on your subject's face to set focus and exposure. Finally, consider using a timer or voice command to capture group portraits without a designated photographer.
With practice, you'll master portrait mode and create stunning, professional-looking images using just your smartphone.
Optimal Lighting for Smartphone Portraits

When shooting portraits with your smartphone, you'll need to contemplate natural versus artificial light sources.
Natural light often produces softer, more flattering results, while artificial light can offer more control over your shots.
For stunning outdoor portraits, take advantage of the "golden hour" just after sunrise or before sunset, when the warm, diffused light creates a magical glow on your subject's skin.
Natural vs. Artificial Light
Regarding smartphone portrait photography, lighting can make or break your shot. Understanding the differences between natural and artificial light is essential for capturing stunning portraits.
Natural light offers a soft, flattering glow that's ideal for outdoor shoots. Golden hour, just after sunrise or before sunset, provides warm, diffused light that enhances skin tones. Overcast days create even lighting, perfect for eliminating harsh shadows.
However, natural light can be unpredictable and challenging to control.
Artificial light gives you more control over your environment. LED panels, ring lights, and softboxes allow you to manipulate light direction, intensity, and color temperature. This precision is especially useful for indoor shoots or when natural light is insufficient.
However, artificial light can sometimes look unnatural if not used skillfully.
To decide between natural and artificial light, consider your subject, location, and desired mood. For a natural, candid look, opt for outdoor settings with soft natural light. For more dramatic or stylized portraits, artificial lighting might be your best bet.
Don't be afraid to experiment with both types, or even combine them for unique effects.
Golden Hour Magic
Renowned among photographers, the golden hour offers unparalleled opportunities for stunning smartphone portraits. This magical time occurs twice daily, just after sunrise and before sunset, when the sun's position creates soft, warm light that flatters your subjects.
To capture golden hour magic, plan your shoots around these times. Use apps like Golden Hour One or PhotoPills to predict the exact timing for your location.
Position your subject facing the sun for a warm, ethereal glow, or place them with their back to the sun for dramatic backlighting and lens flares.
Experiment with silhouettes by exposing for the sky and letting your subject fall into shadow. For a softer look, seek out open shade or use a reflector to bounce light onto your subject's face.
Don't forget to adjust your phone's white balance to "cloudy" or "shade" to enhance the warm tones.
Composition Techniques for Compelling Portraits

When composing portraits with your smartphone, you'll want to master a few key techniques.
Start by applying the Rule of Thirds, placing your subject off-center for a more dynamic image.
You can also use Leading Lines to draw attention to your subject, and try Framing techniques to add depth and context to your portraits.
Rule of Thirds
Balance is key when crafting compelling portraits with your phone camera, and the Rule of Thirds is a fundamental principle to achieve it. This technique divides your frame into a 3×3 grid, creating nine equal sections. The idea is to place your subject along these lines or at their intersections, rather than centering them.
To apply this rule, activate your phone's grid feature in the camera settings. As you frame your shot, position your subject's eyes or other key features along the upper horizontal line or at one of the top intersections. This creates a more dynamic and visually appealing composition than a centered portrait.
Don't limit yourself to just the subject's placement. Consider aligning other elements in your scene with the grid lines as well. For example, position the horizon on the lower third line to emphasize the sky, or along the upper third to highlight the foreground.
Leading Lines Technique
Leading lines are a powerful composition technique that can dramatically enhance your phone portraits. They're visual elements that guide the viewer's eye to the main subject, creating depth and interest in your images. To use leading lines effectively, look for natural or man-made lines in your environment that point towards your subject.
When composing your shot, position your subject where the lines converge or intersect. This draws attention to them and creates a sense of movement within the frame. You can use various types of lines:
| Line Type | Examples |
|---|---|
| Straight | Roads, fences, buildings |
| Curved | Rivers, winding paths, bridges |
| Diagonal | Staircases, tree branches |
| Converging | Railroad tracks, long hallways |
| Implied | Gaze direction, pointing fingers |
Experiment with different angles and perspectives to find the most compelling leading lines. Try shooting from low angles or high vantage points to emphasize the lines in your composition. Remember, the goal is to use these lines to direct attention to your subject, not overshadow them. With practice, you'll develop an eye for spotting and incorporating leading lines into your phone portraits, resulting in more dynamic and visually engaging images.
Framing Your Subject
Framing is a powerful composition technique that can elevate your phone portraits from ordinary to extraordinary. It involves using elements within the scene to create a natural border around your subject, drawing the viewer's eye to the focal point. Look for architectural features like doorways, windows, or arches to frame your subject. Natural elements like tree branches, rock formations, or foliage can also serve as effective frames.
When framing your subject, consider the balance between the frame and the portrait. The frame should enhance, not overpower, your subject. Experiment with different positions, placing your subject off-center or using the rule of thirds for added interest. Pay attention to the negative space created by the frame, as it can contribute to the overall composition.
Try using foreground elements to create depth and add context to your portraits. Shooting through objects like leaves, fabric, or glass can create intriguing framing effects.
Don't forget to explore unconventional framing options, such as reflections in mirrors or puddles. Remember, effective framing not only enhances your subject but also tells a story and adds visual interest to your phone portraits.
Posing Subjects Effectively

Capturing compelling portraits with your phone camera hinges on mastering the art of posing your subjects. Start by making your subject feel comfortable. Engage in light conversation and offer gentle guidance rather than rigid instructions. Encourage natural poses that reflect the person's personality and avoid stiff, unnatural positions.
Pay attention to your subject's body language. Slightly angled poses often create more dynamic and flattering shots than straight-on poses. Ask your subject to shift their weight onto one leg or turn their shoulders slightly.
For seated poses, have them lean forward slightly to create a more engaged look.
Don't forget about hand placement. Idle hands can look awkward, so give your subject something to do with them. They can touch their face gently, adjust their hair, or hold a prop.
For group shots, create depth by positioning subjects at different heights and distances from the camera.
Utilizing Environmental Elements

When you're out taking photos with your phone, look for ways to incorporate the environment into your shots.
Use natural framing techniques, like archways or tree branches, to draw attention to your subject.
Don't forget to explore different textures and backgrounds in your surroundings to add depth and interest to your images.
Natural Framing Techniques
Through the lens of your smartphone camera, the world becomes a canvas filled with natural framing opportunities. By skillfully incorporating these elements, you'll elevate your portrait shots to new heights.
Look for archways, doorways, or tree branches that can encircle your subject, drawing the viewer's eye to the focal point. Windows offer a unique framing option, allowing you to play with reflections and light. Don't overlook man-made structures like fences or bridges, which can provide interesting geometric frames.
When using natural framing techniques, consider the following:
- Position your subject slightly off-center for a more dynamic composition
- Experiment with depth of field by focusing on the frame or the subject
- Use contrasting colors between the frame and subject to create visual impact
- Incorporate negative space within the frame to add balance and intrigue
Textures and Backgrounds
The world around you is teeming with textures and backgrounds that can transform ordinary phone photos into extraordinary visual experiences. To harness these elements, start by observing your surroundings with a keen eye. Look for interesting patterns, contrasts, and surfaces that can add depth and character to your portraits.
When you've found a compelling texture or background, position your subject strategically. Consider how the environmental elements interact with your subject's features and clothing. Experiment with different angles and distances to create balance between the background and your subject.
Use your phone's focus and exposure controls to emphasize the desired elements. Tap on your subject to guarantee sharp focus, then adjust exposure to highlight textures without overwhelming the main subject. Don't be afraid to get close to capture intricate details or step back to showcase broader patterns.
Remember that textures and backgrounds can evoke emotions and set the mood for your portrait. Rough surfaces might convey ruggedness, while smooth textures can suggest elegance. Urban settings offer geometric patterns and gritty textures, while natural environments provide organic shapes and soothing backdrops.
Choose wisely to complement your subject and tell a compelling visual story.
Editing Apps for Portrait Enhancement

Several powerful editing apps can transform your smartphone portraits from ordinary to extraordinary. These tools offer a range of features to enhance your images, from basic adjustments to advanced retouching. Popular apps like Snapseed, VSCO, and Adobe Lightroom Mobile provide intuitive interfaces and professional-grade editing capabilities.
When enhancing portraits, focus on subtle improvements that maintain a natural look. Adjust exposure, contrast, and color balance to create a pleasing overall appearance. Use selective editing tools to brighten eyes, whiten teeth, and smooth skin without overdoing it. Experiment with portrait-specific features like facial contouring and skin tone adjustment to refine your subject's features.
Don't forget to crop and straighten your images for ideal composition. Many apps offer preset filters and looks that can instantly elevate your portraits. However, use them sparingly and adjust their intensity to avoid an artificial appearance.
To create enchanting portraits, consider these editing techniques:
- Soften skin texture while preserving natural details
- Enhance eye color and catchlights for a vibrant gaze
- Adjust facial symmetry subtly for a balanced look
- Add a gentle vignette to draw focus to your subject
With practice, you'll develop a signature editing style that enhances your portraits while maintaining their authenticity.
Capturing Authentic Expressions

While editing can enhance portraits, capturing authentic expressions is the foundation of compelling phone photography. To achieve this, focus on creating a comfortable environment for your subject. Engage in conversation, tell jokes, or ask them to recall happy memories. This helps relax them and brings out natural expressions.
Timing is essential. Be ready to capture fleeting moments of genuine emotion. Use burst mode or continuous shooting to increase your chances of catching the perfect expression. Pay attention to your subject's eyes, as they often convey the most emotion.
Experiment with different angles and perspectives to find the most flattering and expressive shots. Don't be afraid to get close or try unconventional compositions. Encourage your subject to move and interact with their surroundings naturally.
Consider using the live photo feature if your phone has it. This captures a few seconds of video before and after the shot, allowing you to select the most authentic moment.
Lastly, be patient and take plenty of photos. The more relaxed and comfortable your subject becomes, the more likely you're to capture those genuine, compelling expressions that make portraits truly shine.
Maximizing Depth of Field

Although phone cameras have fixed apertures, you can still maximize depth of field in your photos. By understanding and applying a few key techniques, you'll create stunning portraits with sharp focus from foreground to background.
First, increase the distance between your subject and the background. This naturally enhances depth perception and creates a more three-dimensional look.
Next, use your phone's HDR mode to capture a wider range of tones, which can help maintain detail in both highlights and shadows across the entire scene.
Consider using your phone's panorama mode for a unique twist on depth of field. By slowly panning across a scene, you'll capture a wider field of view with more elements in focus.
Finally, experiment with composition to emphasize depth, such as including foreground elements or using leading lines.
To create vivid imagery in your portraits, try these techniques:
- Frame your subject through natural arches or doorways
- Incorporate reflections in water or glass surfaces
- Use contrasting textures to add visual interest
- Position your subject against a backdrop of repetitive patterns
Lens Attachments for Smartphones
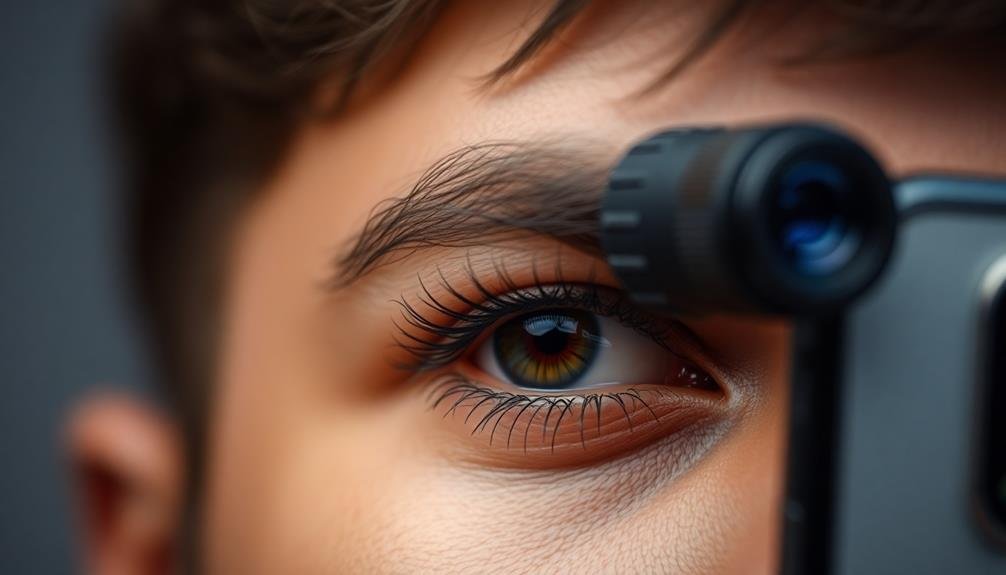
Expanding your smartphone's photographic capabilities is easier than ever with lens attachments. These accessories clip onto your phone's camera, enhancing its versatility and allowing you to capture images that were once exclusive to DSLR cameras.
Wide-angle lenses are perfect for landscapes and group shots, letting you fit more into the frame. They're ideal for tight spaces or when you can't step back far enough.
Telephoto lenses, on the other hand, bring distant subjects closer, making them great for wildlife or sports photography.
For close-up details, macro lenses are your go-to. They'll help you capture intricate textures and tiny subjects with stunning clarity.
Fisheye lenses offer a unique, ultra-wide perspective with a distinctive curved distortion, perfect for creative shots.
When choosing lens attachments, consider compatibility with your phone model and case. Look for high-quality glass to maintain image sharpness.
Some brands offer multi-lens kits, giving you various options in one package. Remember, while these attachments can greatly expand your phone's capabilities, they may slightly reduce image quality compared to your phone's native lens.
Practice and experiment to get the most out of your new gear.
Handling Challenging Lighting Conditions

Mastering lens attachments is just one aspect of smartphone photography. Equally essential is your ability to handle challenging lighting conditions.
Whether you're shooting in harsh sunlight or dimly lit interiors, understanding how to work with available light can greatly elevate your portrait shots.
In bright sunlight, seek shade or use a diffuser to soften harsh shadows. For low-light situations, stabilize your phone and use the night mode feature if available. When dealing with backlit subjects, tap on the screen to adjust exposure and consider using HDR mode to balance highlights and shadows.
To create stunning portraits in various lighting conditions, keep these visual elements in mind:
- A subject bathed in golden hour light, their features softly illuminated
- Dramatic shadows cast by side lighting, enhancing facial contours
- The ethereal glow of a backlit subject, creating a dreamy halo effect
- A well-lit face against a moody, darker background for added depth
Creative Angles and Perspectives

How can you break free from conventional compositions and capture truly eye-catching smartphone photos? Start by experimenting with unique angles.
Get low to the ground for a worm's-eye view, or climb to a higher vantage point for a bird's-eye perspective. These unconventional viewpoints can add drama and intrigue to your portraits.
Try tilting your phone to create dynamic diagonal lines, which can lead the viewer's eye through the image. Incorporate foreground elements to add depth and context to your shots.
Frame your subject through natural openings like doorways or branches to create visual interest.
Don't be afraid to get close. Fill the frame with your subject's face or focus on specific features for impactful close-ups.
Alternatively, step back and include more of the environment to tell a broader story.
Play with reflections in mirrors, puddles, or shiny surfaces to create surreal, double-image effects.
Use leading lines in your environment to draw attention to your subject. Experiment with symmetry or intentionally break compositional rules for striking results.
Perfecting Skin Tones in Post-Processing

Achieving natural-looking skin tones in smartphone photography can be challenging, but it's essential for creating stunning portraits. Start by adjusting the white balance to guarantee accurate color representation.
Then, fine-tune the exposure and contrast to bring out the skin's natural texture without overexposing highlights or losing detail in shadows.
Next, focus on color correction. Use selective adjustments to target specific areas of the skin, such as reducing redness or balancing uneven tones. Pay attention to the subject's undertones and adjust accordingly.
Don't forget to maintain consistency across different parts of the face and body.
For a polished look, consider these techniques:
- Soften skin texture using a subtle blur or smoothing tool
- Enhance eyes by slightly increasing contrast and clarity
- Add warmth to cheeks with a gentle touch of color
- Brighten teeth and whites of eyes for a fresh appearance
Frequently Asked Questions
How Can I Take Professional-Quality Selfie Portraits?
You can take professional-quality selfie portraits by focusing on lighting, composition, and angles. Use natural light, experiment with different poses, and consider a tripod or selfie stick. Don't forget to edit your photos for a polished look.
What's the Best Smartphone for Portrait Photography in Low-Budget Range?
For budget-friendly portrait photography, you'll want to contemplate the Google Pixel 4a or iPhone SE (2nd gen). They offer excellent camera quality and portrait modes. Don't forget, your skills and lighting matter more than the device itself.
Are There Any Legal Considerations When Taking Portraits of Strangers?
When photographing strangers, you'll need their consent. Public spaces offer more freedom, but respect privacy rights. Be aware of local laws and restrictions. Always ask permission before sharing or publishing someone's portrait. It's best to err on the side of caution.
How Do I Achieve a Film-Like Aesthetic in Smartphone Portraits?
To achieve a film-like aesthetic in smartphone portraits, you'll want to use editing apps that offer film grain effects. Adjust your colors to create a vintage look, and experiment with light leaks and lens flares for added authenticity.
Can I Use Smartphone Portrait Photos for Commercial Purposes?
You can use smartphone portrait photos for commercial purposes, but it's essential to guarantee you have proper permissions. Check licensing requirements, get model releases, and consider image quality. It's best to consult with a legal professional for specific situations.
In Summary
You've now got the tools to take stunning portraits with just your smartphone. Remember, it's not about having the fanciest gear, but how you use what you've got. Experiment with lighting, composition, and angles. Don't be afraid to try new techniques or accessories. With practice, you'll develop your own style. Keep shooting, refining your skills, and soon you'll be capturing pro-level portraits that'll wow everyone. Your smartphone's potential is limitless – go create!


Leave a Reply