Adjusting light levels on your phone camera allows you to capture stunning images in any lighting condition. You can enhance image clarity, preserve details in high-contrast scenes, and reveal hidden information in shadows. By tweaking exposure settings, you'll adapt to challenging lighting situations and balance foreground and background elements effectively. It's also a powerful tool for creating artistic effects and setting the mood of your photos. Whether you're shooting in bright sunlight or low-light environments, mastering light level adjustments will greatly improve your mobile photography skills. Dive deeper to access the full potential of your phone's camera capabilities.
Understanding Exposure Compensation

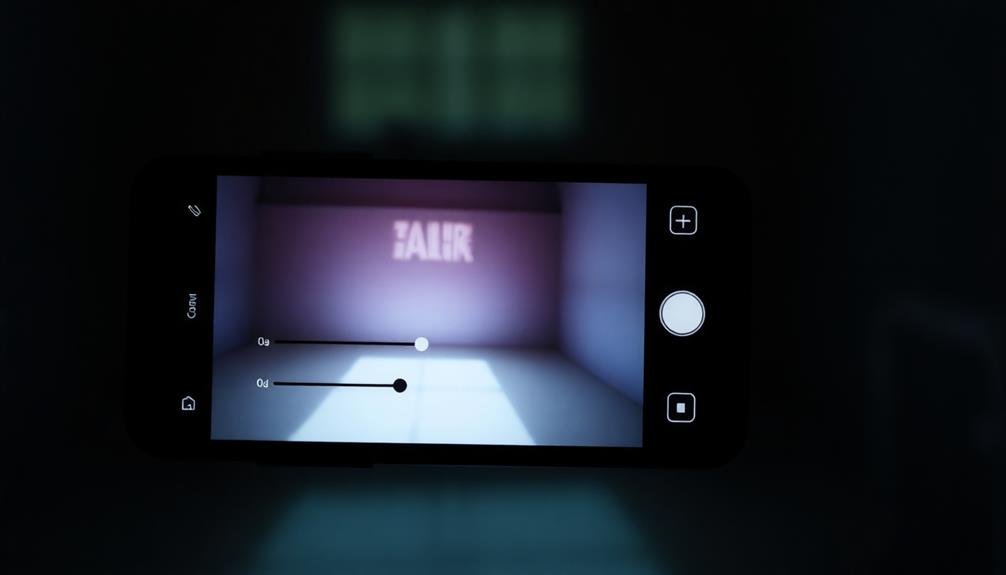
Exposure compensation is a powerful tool that allows you to adjust the overall brightness of your photos. It's a feature found in most smartphone camera apps, usually represented by a "+/-" icon or slider. When you use exposure compensation, you're fundamentally telling your camera to make the image brighter or darker than its automatic settings would typically produce.
Understanding how to use this feature effectively can greatly improve your photography. Positive exposure compensation (+) brightens your image, which is useful in backlit situations or when capturing dark subjects. Negative exposure compensation (-) darkens the image, helping to preserve details in bright scenes or prevent overexposure of light-colored subjects.
To use exposure compensation effectively, start by evaluating your scene. If your subject appears too dark or details are lost in shadows, try increasing the exposure. Conversely, if highlights are blown out or the image looks washed out, decrease the exposure.
Enhancing Image Clarity

Achieving crystal-clear images is a top priority for many smartphone photographers. By adjusting light levels, you'll enhance image clarity notably. Start by ensuring your lens is clean and free from smudges or fingerprints. Next, focus on proper lighting techniques to illuminate your subject evenly.
Use your phone's HDR mode to capture a wider range of tones, especially in high-contrast scenes. This feature combines multiple exposures to create a balanced image with improved detail in both shadows and highlights. Don't forget to stabilize your phone using a tripod or steady surface for sharper results, particularly in low-light conditions.
| Technique | Purpose | Effect |
|---|---|---|
| HDR Mode | Balance exposure | Improved detail |
| Stabilization | Reduce motion blur | Sharper images |
| Manual focus | Precise control | Enhanced clarity |
Experiment with your camera's manual focus option to fine-tune sharpness. This is especially useful for close-up shots or when capturing subjects at varying distances. Finally, consider using your phone's built-in editing tools to adjust contrast, sharpness, and noise reduction after taking the photo. These post-processing techniques can further refine your image's clarity and overall quality.
Capturing High-Contrast Scenes

When capturing high-contrast scenes, you'll need to balance light and shadow effectively.
You can achieve this by focusing on the brightest area and adjusting your camera's exposure to preserve details in both highlights and shadows.
Balancing Light and Shadow
High-contrast scenes can be challenging to capture with your phone camera, as they often feature both bright highlights and deep shadows. To balance these extremes, you'll need to adjust your camera's light settings carefully.
Start by tapping on different areas of the screen to see how the exposure changes. This will help you find a middle ground between the lightest and darkest parts of the scene.
Many phone cameras offer HDR (High Dynamic Range) mode, which can automatically balance light and shadow. If your phone has this feature, try using it for high-contrast scenes.
You can also manually adjust the exposure by sliding your finger up or down on the screen after tapping to focus. This allows you to fine-tune the brightness level.
If you're still struggling to capture all the details, consider using exposure bracketing. Take multiple shots at different exposure levels and combine them later using photo editing software.
Alternatively, you can use editing apps to adjust highlights and shadows after taking the photo. Remember, the key is to preserve details in both bright and dark areas while maintaining a natural-looking image.
Preserving Detail in Extremes
To preserve detail in high-contrast scenes, you'll need to employ advanced techniques beyond basic exposure adjustments.
Your phone camera's HDR mode can capture multiple exposures and blend them, retaining details in both highlights and shadows. Experiment with this feature to see how it handles challenging lighting situations.
If HDR isn't available or doesn't produce satisfactory results, try bracketing your shots. Take multiple photos at different exposure levels, then combine them later using editing software. This manual approach gives you more control over the final image.
Another technique is to expose for the highlights and lift the shadows in post-processing. Modern phone cameras capture enough data in RAW format to recover significant shadow detail without introducing too much noise.
For scenes with extremely bright areas, consider using spot metering. This allows you to set the exposure based on a specific part of the image, ensuring that vital details aren't blown out.
Lastly, don't shy away from using artificial lighting or reflectors to fill in shadows. Even a simple phone flashlight can help balance the light in a high-contrast scene, preserving details that might otherwise be lost.
Preserving Highlight Details

When capturing scenes with bright highlights, you'll want to prevent overexposed areas that can lose important details.
To preserve the nuances in bright skies or other illuminated objects, adjust your camera's exposure settings downward. This technique allows for a more balanced light distribution across your image, ensuring you don't sacrifice the details in highlights while still maintaining visibility in darker areas.
Prevent Overexposed Areas
Bright skies and reflective surfaces can easily lead to overexposed areas in your photos. These blown-out highlights can ruin an otherwise perfect shot, obscuring details and creating distracting bright spots. To prevent overexposure, you'll need to adjust your phone camera's light levels.
Start by tapping on the brightest area of your composition before taking the shot. This tells your camera to expose for that part of the image, reducing the chances of overexposure.
You can also use your camera app's exposure compensation feature, typically represented by a "+/-" icon. Sliding this control towards the negative side will darken the overall image, helping to retain details in bright areas.
Another useful technique is to enable HDR (High Dynamic Range) mode if your phone offers it. HDR combines multiple exposures to create a balanced image, often salvaging details in both bright and dark areas.
If you're shooting in challenging lighting conditions, consider using your phone's manual or pro mode. This allows you to adjust ISO, shutter speed, and other settings to achieve the perfect exposure and prevent those pesky overexposed areas.
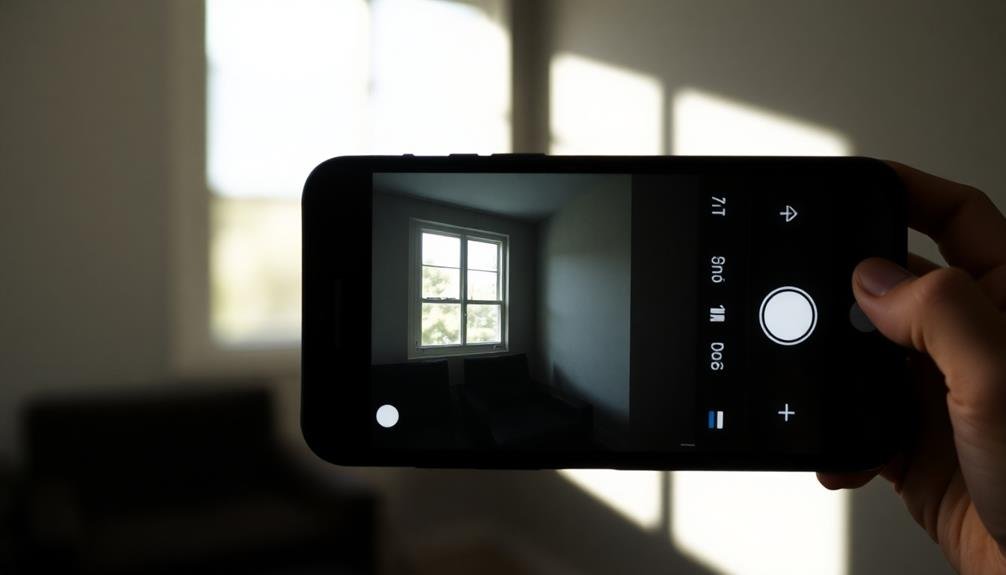
Capture Sky Details
In spite of their beauty, bright skies often pose a challenge for phone photographers. When you're trying to capture a stunning landscape or cityscape, you might find that the sky appears as a washed-out white expanse, lacking the vibrant colors and cloud details you see with your eyes. This is where adjusting light levels becomes essential.
To capture sky details, you'll need to reduce the exposure of your shot. Most phone cameras have a built-in exposure compensation feature. Tap on the sky in your frame, and you'll see a slider appear. Drag this slider down to decrease exposure, revealing more sky detail. You can also use HDR mode, which takes multiple shots at different exposures and combines them.
For even more control, try using a third-party camera app that offers manual controls. These apps allow you to adjust ISO, shutter speed, and white balance independently.
Balanced Light Distribution
Achieving balanced light distribution in your phone photography is essential for preserving highlight details. When you're faced with high-contrast scenes, your camera's auto-exposure can struggle to capture both bright and dark areas effectively. This often results in overexposed highlights or underexposed shadows, losing vital details in your image.
To address this, start by tapping on the brightest area of your scene to set the exposure. Then, use your phone's exposure compensation feature to fine-tune the overall brightness. Slowly increase the exposure until you see details in the darker areas without completely blowing out the highlights.
Consider using HDR mode for scenes with extreme contrast. This feature takes multiple exposures and combines them, preserving details in both highlights and shadows. However, use it judiciously, as it can sometimes produce unnatural-looking results.
Another technique is to slightly underexpose your shot and then recover shadow details in post-processing. This approach helps maintain highlight information that would otherwise be lost.
Revealing Shadow Information
While adjusting exposure can enhance overall brightness, revealing shadow information requires a more nuanced approach.
By carefully manipulating your phone camera's settings, you can bring out details hidden in darker areas of your image without overexposing the brighter parts.
To reveal shadow information effectively, try these techniques:
- Use HDR mode: This automatically captures multiple exposures and combines them, bringing out details in both shadows and highlights.
- Adjust the shadows slider: Many camera apps offer a specific control for boosting shadow areas without affecting the entire image.
- Experiment with local adjustments: Some advanced editing apps allow you to selectively brighten specific areas of your photo.
- Capture in RAW format: This preserves more information, giving you greater flexibility to adjust shadows in post-processing.
Achieving Desired Mood
You can create dramatic lighting effects by adjusting your phone camera's light levels.
By manipulating shadows and highlights, you'll enhance the emotional atmosphere of your photos.
These techniques allow you to convey specific feelings, such as mystery, joy, or melancholy, through your images.
Dramatic Lighting Effects
Light manipulation can transform ordinary photos into enchanting works of art. By adjusting light levels on your phone camera, you can create dramatic lighting effects that elevate your images to new heights. These effects can add depth, contrast, and mood to your photos, making them stand out from the crowd.
To achieve dramatic lighting effects, you'll want to experiment with various techniques:
- Use low-key lighting: Reduce overall exposure and highlight specific areas to create moody, high-contrast images.
- Play with shadows: Strategically position your subject to cast interesting shadows, adding depth and intrigue.
- Exploit backlighting: Place your subject in front of a strong light source to create striking silhouettes or halos.
- Experiment with light painting: In low-light situations, use long exposures and moving light sources to "paint" with light.
You can adjust your phone camera's exposure compensation, ISO, and shutter speed to fine-tune these effects.
Don't be afraid to push the boundaries and create unconventional images. Remember, dramatic lighting is about emphasizing contrast and creating visual impact.
With practice, you'll develop an eye for spotting and capturing these enthralling moments, transforming everyday scenes into stunning, emotionally charged photographs.
Enhancing Emotional Atmosphere
Beyond creating dramatic effects, adjusting light levels on your phone camera allows you to enhance the emotional atmosphere of your photos. By manipulating brightness, contrast, and shadows, you can evoke specific moods and feelings in your images.
For a warm, nostalgic atmosphere, try increasing the warmth and lowering the brightness slightly. This technique can create a soft, golden-hour effect that's perfect for portraits or landscape shots.
To convey a sense of mystery or intrigue, decrease the overall brightness and enhance the shadows. This approach works well for moody street photography or dramatic architecture shots.
If you're aiming for a light, airy feel, boost the brightness and reduce contrast. This technique is ideal for capturing the essence of a bright, cheerful day or creating a dreamy, ethereal look.
For a more somber or reflective mood, try muting the colors and increasing the contrast slightly. This can add depth and gravitas to your images, making them more thought-provoking.
Conveying Specific Feelings
Mood mastery in photography hinges on your ability to convey specific feelings through light manipulation. By adjusting light levels on your phone camera, you can create images that evoke particular emotions in viewers.
Whether you're aiming for a cozy, intimate atmosphere or a bright, energetic vibe, controlling light is key to achieving your desired mood.
To convey specific feelings through your photos, consider these techniques:
- Use low light for mystery and intimacy
- Increase brightness for cheerfulness and optimism
- Create contrast for drama and intensity
- Employ soft, diffused light for calmness and serenity
When you're shooting in low light, embrace the shadows to create a sense of mystery or romance.
For a more upbeat mood, bump up the exposure to flood your image with light. High contrast can add excitement and tension to your photos, while soft, even lighting promotes a peaceful atmosphere.
Remember that color temperature also plays a role in mood creation. Warm tones can evoke comfort and nostalgia, while cool tones might suggest detachment or tranquility.
Correcting Camera Metering Errors
Despite their advanced technology, smartphone cameras can sometimes misinterpret a scene's lighting, leading to over or underexposed photos. You can correct these metering errors by manually adjusting your camera's light levels. This gives you control over the final image's exposure, ensuring your photos accurately represent the scene you're capturing.
To identify metering errors, look for these common issues:
| Metering Error | Symptoms | Correction | Result |
|---|---|---|---|
| Overexposure | Washed-out highlights | Lower exposure | Restored details |
| Underexposure | Dark, muddy shadows | Increase exposure | Visible shadow details |
| High contrast | Lost details in highlights and shadows | Adjust HDR settings | Balanced exposure |
| Backlit subject | Dark foreground | Spot metering or exposure compensation | Properly lit subject |
When you encounter these issues, use your phone's camera app to make adjustments. Most apps offer exposure compensation, allowing you to brighten or darken the image before taking the shot. Some advanced apps provide histogram views, helping you visualize the light distribution and make precise adjustments. By mastering these techniques, you'll consistently produce well-exposed photos that capture the scene as you intend.
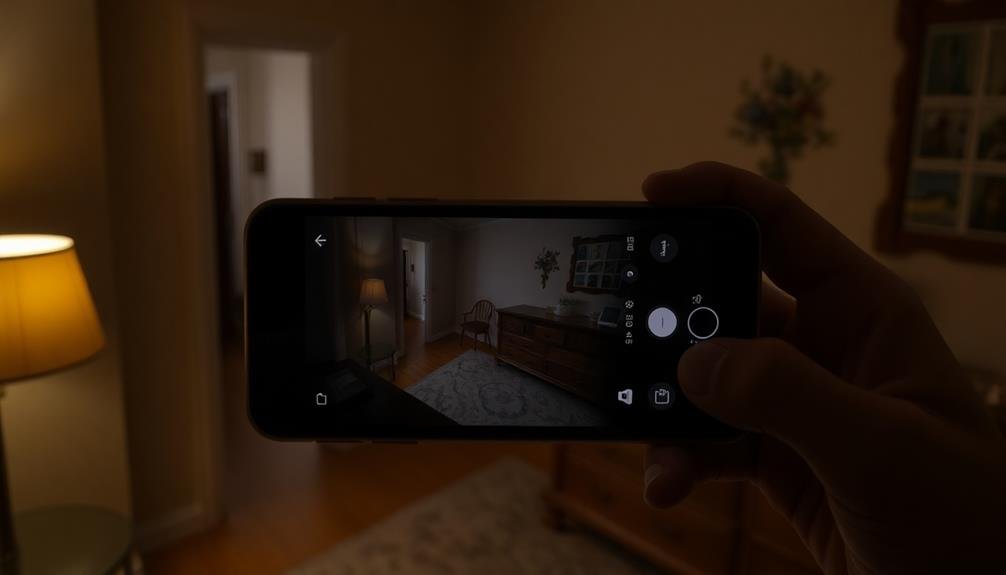
Adapting to Challenging Lighting

In challenging lighting conditions, even the best smartphone cameras can struggle to capture the scene accurately. You'll often encounter situations where the lighting is far from ideal, such as harsh midday sun, dimly lit interiors, or high-contrast scenes.
By adjusting light levels manually, you can overcome these challenges and capture stunning images.
To adapt to challenging lighting conditions, consider these techniques:
- Use HDR mode for high-contrast scenes
- Tap to focus and adjust exposure on the main subject
- Employ exposure compensation to fine-tune brightness
- Utilize night mode for low-light situations
When shooting in bright sunlight, reduce exposure to prevent overexposed highlights. Conversely, in low-light scenarios, increase exposure to bring out details in shadows.
For backlit subjects, tap on the darkest area to adjust exposure and reveal more detail. In mixed lighting situations, such as indoor scenes with bright windows, use HDR mode to balance the exposure across the entire frame.
Balancing Foreground and Background

When capturing scenes with distinct foreground and background elements, balancing the light levels between them is essential for creating visually appealing images. Your phone's camera often struggles to expose both areas correctly, resulting in either a well-lit foreground with a washed-out background or a properly exposed background with a dark foreground.
To address this, you'll need to adjust your camera's exposure settings manually. Start by tapping on the area you want to prioritize, typically the foreground subject. This will set the exposure based on that point. If the background is too bright or dark, use the exposure slider to fine-tune the overall brightness.
You can also try HDR mode, which combines multiple exposures to balance high-contrast scenes. Another technique is to use exposure bracketing, taking multiple shots at different exposure levels and combining them later.
Some phones offer a "Portrait" or "Live Focus" mode, which can help separate the subject from the background, allowing for easier light balancing. Don't forget to experiment with different angles or positions to find the best lighting balance naturally.
With practice, you'll develop an eye for achieving the perfect balance between foreground and background light levels.
Creating Artistic Effects

While mastering basic exposure techniques is essential, your phone's camera can also be a powerful tool for creating artistic effects. By adjusting light levels, you can transform ordinary scenes into enchanting visual stories.
Experiment with underexposure to create moody, dramatic images with deep shadows and rich contrasts. Alternatively, overexpose your shots to achieve a dreamy, ethereal look that's perfect for portraits or landscape photography.
Don't be afraid to push the boundaries of traditional exposure. Try these creative techniques:
- Light painting: Use long exposures in dark environments to "paint" with light sources.
- Silhouettes: Underexpose your subject against a bright background for striking outlines.
- High-key photography: Overexpose your scene to create bright, minimalist images.
- Low-key photography: Underexpose to emphasize shadows and create a mysterious atmosphere.
Optimizing for Post-Processing
Post-processing powerhouses can transform your smartphone photos, but optimizing your initial capture is essential for the best results. When you adjust light levels for post-processing, you're giving yourself more flexibility in editing.
Start by shooting in RAW format if your phone camera allows it. RAW files contain more data, enabling you to recover details in shadows and highlights during editing.
Expose for the highlights when capturing high-contrast scenes. This preserves detail in bright areas, which you can't recover if overexposed. You can then lift the shadows in post-processing.
For low-light situations, slightly overexpose your shot. This reduces noise in the darker areas, which you can then adjust in editing.
Use your phone's HDR mode sparingly, as it can limit your post-processing options. Instead, take multiple exposures manually and blend them later.
Pay attention to the histogram if your camera app provides one. Aim for a balanced distribution of tones, avoiding clipping at either end. This gives you the most latitude for adjustments in post-processing.
Frequently Asked Questions
Can Adjusting Light Levels Affect Battery Life When Using the Camera?
Yes, adjusting light levels can impact your battery life when using the camera. Higher brightness settings and longer exposure times typically consume more power. You'll notice your battery draining faster if you're frequently adjusting light levels while taking photos.
Are There Any Risks to the Camera Sensor From Frequent Light Adjustments?
You're unlikely to damage your camera sensor through frequent light adjustments. Modern phone cameras are built to handle these changes. However, excessive adjustments might strain the sensor over time, potentially affecting its longevity.
How Do Weather Conditions Impact the Need for Light Level Adjustments?
Weather conditions greatly impact your need for light adjustments. You'll often need to increase brightness on cloudy days or in shadows. In bright sunlight, you'll want to decrease exposure to avoid overexposed images. Always adapt to your environment.
Can Adjusting Light Levels Help With Taking Photos Through Glass or Windows?
Yes, adjusting light levels can considerably improve your photos through glass or windows. You'll reduce glare and reflections, enhance clarity, and capture more detail. It's especially helpful when shooting in bright daylight or at night.
Do Different Phone Brands Have Varying Capabilities for Light Level Adjustments?
Yes, different phone brands offer varying capabilities for light adjustments. You'll find some have more advanced features, like manual exposure control, while others may only offer basic auto-adjustments. It's worth exploring your phone's specific camera settings.
In Summary
You've now learned why adjusting light levels on your phone camera is essential. It's a powerful tool that'll help you capture better photos in various situations. By mastering exposure compensation, you'll enhance image quality, handle tricky lighting, and release your creativity. Don't be afraid to experiment with different settings. Remember, adjusting light levels isn't just about technical perfection; it's about expressing your unique vision and telling compelling visual stories through your phone's lens.

Leave a Reply