
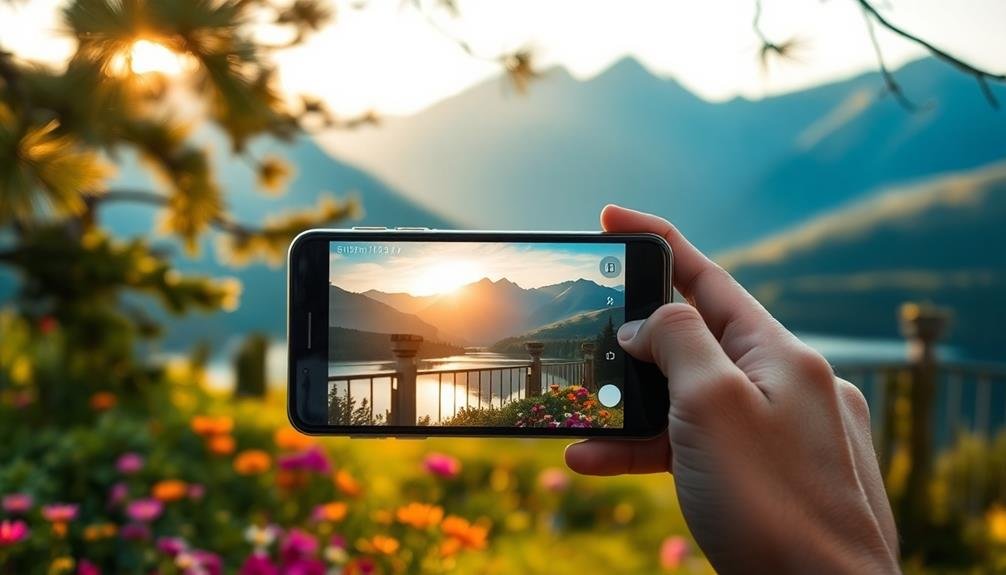
Elevate your mobile landscape photography with these seven composition tricks. Utilize the rule of thirds to balance your shots, and frame subjects with foreground elements for depth. Guide viewers' eyes with leading lines, and incorporate reflections for symmetry. Seek out natural frames like arches or branches to add context. Create depth by layering foreground, middle ground, and background elements. Don't shy away from negative space—it can add drama and focus. These techniques will help you capture stunning landscapes right from your smartphone. Master these tricks, and you'll reveal a whole new world of mobile photography possibilities.
Use the Rule of Thirds

The rule of thirds is a fundamental principle in photography composition. It involves dividing your frame into a 3×3 grid and placing key elements along these lines or at their intersections. When shooting landscapes with your mobile phone, you'll find this technique particularly useful for creating balanced and visually appealing images.
To apply the rule of thirds, activate your phone's camera grid feature. This overlay will help you position important elements within your frame. Place the horizon along the upper or lower horizontal line, depending on whether you want to emphasize the sky or foreground.
Position focal points, such as trees, buildings, or rock formations, at the grid's intersections to draw the viewer's eye.
Don't feel constrained by this rule; it's more of a guideline. Experiment with different placements to see what works best for each scene. You'll often find that slightly off-center compositions create more dynamic and interesting images than perfectly centered subjects.
As you practice, you'll develop an intuitive sense of balance in your landscape shots, elevating your mobile photography skills.
Frame With Foreground Elements
Framing your landscape shots with foreground elements can dramatically improve your mobile photography.
You'll create depth and scale by including objects in the foreground, guiding the viewer's eye through the image.
This technique also adds visual interest, transforming a potentially flat scene into a more dynamic and engaging composition.
Create Depth and Scale
One powerful technique to enhance your mobile landscape photography is framing with foreground elements.
Now, let's focus on creating depth and scale in your images to make them even more engaging.
To create depth, use leading lines that draw the viewer's eye into the scene. Look for natural paths, roads, or rivers that guide attention from the foreground to the background.
Incorporate layers in your composition by including elements at varying distances from your camera. This technique adds dimensionality and interest to your shots.
For scale, include recognizable objects in your frame. A person, tree, or building can provide context and help viewers understand the size of the landscape.
Position these elements strategically to emphasize the grandeur of your surroundings.
Experiment with different perspectives to enhance depth and scale. Get low to the ground to exaggerate foreground elements, or find an elevated vantage point to showcase the vastness of the landscape.
Use your phone's wide-angle lens to capture expansive scenes, but be mindful of distortion at the edges.
Remember to adjust your focus and exposure settings to guarantee both foreground and background elements are sharp and well-exposed.
Guide Viewer's Attention
Guiding your viewer's attention is an essential skill in mobile landscape photography. By strategically framing your shots with foreground elements, you'll create more engaging and dynamic compositions. Use natural objects like trees, rocks, or flowers to frame the main subject of your landscape, drawing the eye towards the focal point.
Consider using leading lines to direct attention through your image. Roads, rivers, or fences can guide the viewer's gaze towards key elements in your composition. Experiment with different angles and perspectives to find the most effective framing elements.
Here's a quick guide to framing techniques:
| Technique | Purpose | Example |
|---|---|---|
| Natural frames | Create depth | Archways, tree branches |
| Leading lines | Direct attention | Roads, rivers, fences |
| Rule of thirds | Balance composition | Place subject off-center |
Remember to keep your framing elements in focus and well-exposed. Use your phone's tap-to-focus feature to guarantee both foreground and background are sharp. Don't be afraid to move around and try different compositions – sometimes a slight shift in position can dramatically improve your framing. By mastering these techniques, you'll create more compelling landscape photos that guide your viewers through the scene.
Add Visual Interest
While guiding your viewer's attention is important, adding visual interest through foreground elements can elevate your mobile landscape photography to new heights. Framing with foreground elements creates depth and draws the viewer into the scene, making your images more engaging and dynamic.
Look for natural frames like overhanging branches, rock formations, or archways to add context and dimension to your shots. These elements can provide a sense of scale and help tell a story about the location.
Don't be afraid to get low and close to interesting foreground objects like flowers, leaves, or pebbles. This technique can create a unique perspective and add texture to your composition.
When using foreground elements, make sure they complement rather than overpower the main subject. Experiment with different apertures to control the depth of field, allowing you to keep both the foreground and background in focus or create a selective focus effect.
Remember to pay attention to the balance between foreground and background elements, adjusting your composition as needed to achieve a harmonious result. By thoughtfully incorporating foreground elements, you'll create more immersive and visually appealing landscape photographs with your mobile device.
Lead the Eye With Lines

Leading lines are often a photographer's secret weapon for creating compelling landscape compositions. These lines guide your viewer's eye through the image, drawing attention to the main subject or focal point. When you're shooting landscapes with your mobile phone, look for natural or man-made lines that can serve this purpose.
Roads, rivers, fences, and even shadows can act as powerful leading lines. Position yourself so that these elements lead from the foreground into the distance, creating depth and guiding the viewer's gaze. Try different angles to find the most effective composition. You can use diagonal lines for a dynamic feel or straight lines for a more formal look.
Don't forget about implied lines, too. A row of trees or a series of rocks can create a visual path for the eye to follow. When you're composing your shot, place your main subject at the end of these lines to maximize impact.
Incorporate Reflections for Symmetry

Reflections in landscapes offer a powerful tool for creating symmetry and visual interest in your mobile photography. When you encounter still bodies of water like lakes, ponds, or even puddles, take advantage of the mirroring effect they provide. Position your phone's camera to capture both the real scene and its reflection, creating a balanced composition.
To enhance the impact of reflections, try aligning the horizon line in the middle of your frame. This technique creates a perfect mirror image, doubling the visual impact of your subject. You can also experiment with slight asymmetry by positioning the horizon off-center, which adds dynamism to your shot.
Don't limit yourself to water reflections. Look for reflective surfaces like glass buildings, car hoods, or even wet pavement after rain. These unconventional mirrors can add unexpected elements to your landscape compositions.
When shooting reflections, pay attention to lighting conditions. Early morning or late afternoon light often provides the best conditions for capturing clear, vibrant reflections. Use your phone's HDR mode to balance exposure between the sky and reflected elements.
Utilize Natural Frames

Look for natural elements in your landscape that can frame your main subject, such as arches, tree branches, or rock formations.
By positioning these framing elements in the foreground, you'll add depth to your composition and guide the viewer's eye to the focal point.
Using natural frames not only creates visual interest but also helps emphasize the scale and context of your landscape scene.
Find Natural Frame Elements
In addition to contemplating overall composition, mobile photographers can enhance their landscape shots by incorporating natural frame elements. These elements add depth, context, and visual interest to your images. Look for objects in your surroundings that can create a frame around your main subject. Trees, branches, and foliage are common natural framing elements in outdoor settings.
Position yourself so that overhanging branches or leaves border the edges of your frame, drawing attention to the central landscape. Rock formations, archways, and cave openings can also serve as powerful framing devices. If you're near water, consider using the curve of a shoreline or the edge of a lake to frame your shot.
In urban environments, doorways, windows, and architectural features can provide interesting frames for cityscapes or distant landscapes. When using natural frames, pay attention to the balance between the framing elements and your main subject.
Experiment with different angles and positions to find the most appealing composition. Don't be afraid to move around or adjust your perspective to align the frame perfectly. Remember, the goal is to guide the viewer's eye to the focal point of your landscape while adding an extra layer of visual interest to your mobile photography.
Create Depth and Focus
Building on the concept of natural frames, you can create depth and focus in your landscape compositions by strategically utilizing these elements. By carefully positioning natural frames in the foreground, you'll guide the viewer's eye to the main subject while adding a sense of depth to your image. This technique works particularly well with mobile photography, as it helps compensate for the limitations of smaller sensors and lenses.
To effectively create depth and focus using natural frames:
- Look for overhanging branches, rock formations, or archways
- Position yourself to include foreground elements that frame the scene
- Use leading lines within the frame to draw attention to the focal point
- Experiment with different aperture settings to control depth of field
- Consider using HDR mode to balance exposure between frame and subject
When composing your shot, make sure that the frame doesn't overpower the main subject. Adjust your position to find the perfect balance between the framing elements and the landscape beyond.
You'll often find that slight movements can dramatically change the composition, so don't be afraid to explore different angles. By mastering this technique, you'll elevate your mobile landscape photography, creating images with greater depth and visual impact.
Create Depth With Layering

Layering is a powerful technique to add depth and dimension to your mobile landscape photographs. It involves arranging elements in your frame to create distinct foreground, middle ground, and background layers. This approach guides the viewer's eye through the image, creating a sense of depth and immersion.
To use layering effectively, start by identifying elements at different distances from your camera. In the foreground, include interesting objects like rocks, flowers, or tree branches. These elements provide a strong entry point for the viewer.
For the middle ground, focus on larger features such as trees, hills, or buildings. These help facilitate the eye from the foreground to the background. Finally, use distant elements like mountains, clouds, or the horizon to complete the background layer.
When composing your shot, guarantee each layer is distinct and contributes to the overall story. Experiment with different angles and positions to find the most effective arrangement.
Use leading lines or natural frames within your layers to further enhance the sense of depth. Remember, successful layering creates a visual journey through your image, inviting viewers to explore the scene as if they were there themselves.
Experiment With Negative Space

Negative space, often overlooked in landscape photography, can be a powerful tool for mobile photographers. It's the area around and between the main subjects in your image. By intentionally incorporating negative space, you'll create more impactful and visually striking compositions.
When experimenting with negative space, look for opportunities to isolate your subject against a simple background. This could be a vast sky, calm water, or a minimalist landscape.
Don't be afraid to let the empty areas dominate your frame; they'll draw attention to your main subject and evoke a sense of scale or solitude.
Here are some tips for effectively using negative space in your mobile landscape photography:
- Use the rule of thirds to position your subject off-center
- Experiment with different angles to maximize empty areas
- Incorporate minimalist elements like a single tree or rock formation
- Play with symmetry by reflecting subjects in water
- Use negative space to create a sense of mystery or intrigue
Frequently Asked Questions
How Does Weather Affect Landscape Photography Composition?
Weather dramatically affects your landscape compositions. It can add mood, create dramatic lighting, and shape the scene. You'll need to adapt your framing and exposure for fog, storms, or golden hour light to capture the atmosphere effectively.
What's the Best Time of Day for Capturing Landscape Photos?
You'll find the best light for landscape photos during the golden hours – just after sunrise and before sunset. They'll give you warm, soft light and long shadows. Don't overlook blue hour for moody, ethereal shots.
How Can I Incorporate People Into Landscape Compositions Without Overwhelming the Scene?
To incorporate people without overwhelming landscapes, use them as focal points or scale references. Position subjects off-center, and let them interact naturally with the environment. You'll create depth and interest while maintaining the scene's grandeur.
Which Mobile Apps Are Best for Post-Processing Landscape Photographs?
You'll find several great apps for editing landscape photos on your phone. Try Snapseed, Lightroom Mobile, or VSCO for powerful tools. They'll help you enhance colors, adjust lighting, and fine-tune details to perfect your images.
How Do I Choose the Right Focal Length for Landscape Photography?
You'll want to contemplate the scene's scale and your creative vision. Wide-angle lenses (24-35mm) capture expansive views, while telephoto lenses (70-200mm) isolate details. Experiment with different focal lengths to find what works best for your composition.
In Summary
You've now got a toolkit of powerful composition techniques for your mobile landscape photography. Don't be afraid to experiment and combine these tricks to create stunning images. Remember, rules are meant to be broken, so trust your artistic instincts. With practice, you'll develop an eye for compelling compositions. Keep exploring, shooting, and refining your skills. The world's your canvas, so get out there and capture its beauty through your unique lens!


Leave a Reply