
Light painting transforms your ordinary mobile photos into magical works of art by capturing moving light sources during long exposures. You'll need a dark environment, a stabilized smartphone, and creative light tools like LEDs or glow sticks. By adjusting your camera settings and mastering fluid movements, you can create stunning streaks and patterns of light that seem to dance across your image. This technique allows you to paint with light, crafting unique designs and adding depth to your photographs. The combination of technology and creativity opens up a world of possibilities for enthralling visual storytelling. Explore further to reveal the full potential of this enchanting photographic method.
Understanding Light Painting Basics
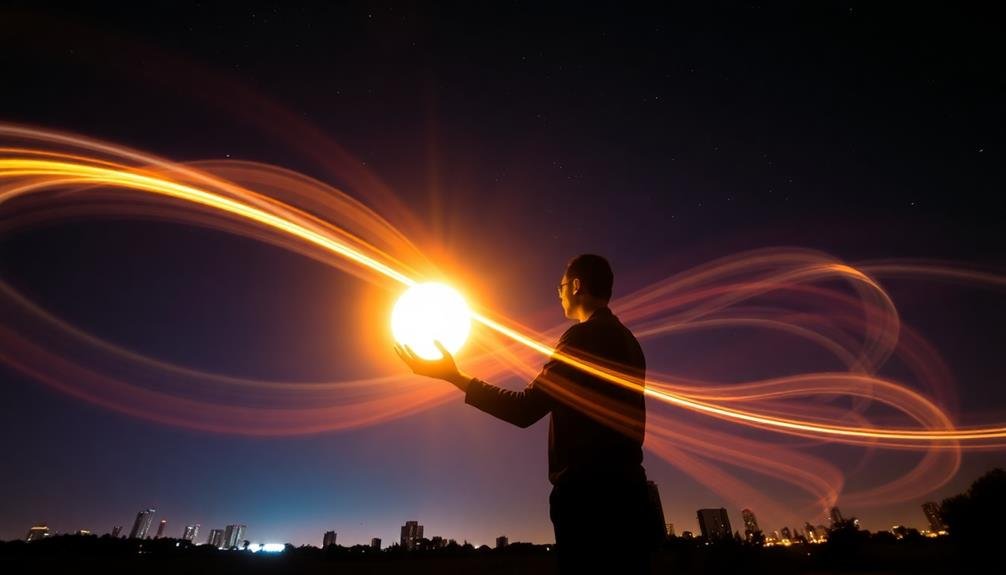
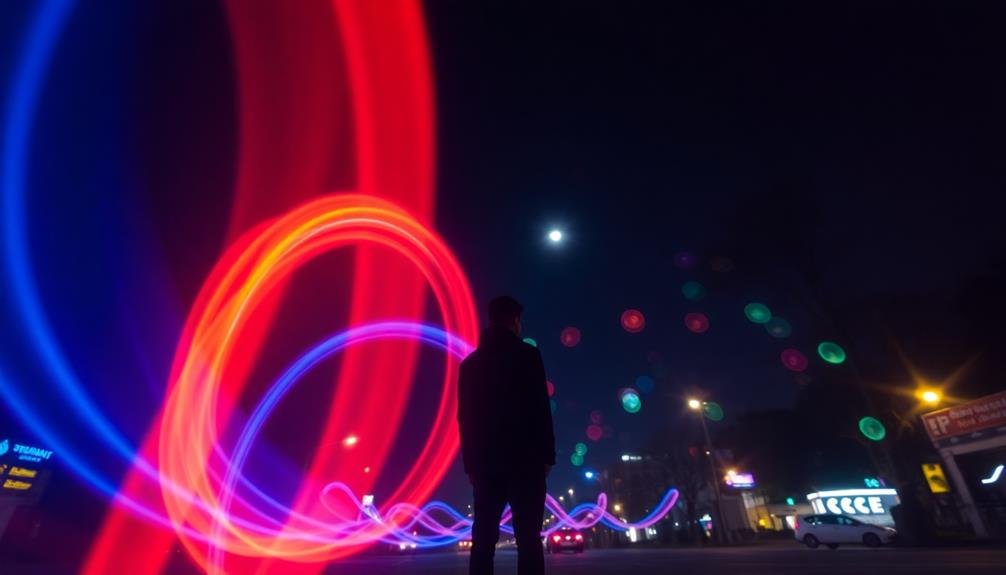
What exactly is light painting, and how does it work? At its core, light painting is a photography technique where you use long exposure times to capture moving light sources. It's a creative way to add luminous elements to your mobile photos, transforming ordinary scenes into magical, glowing compositions.
To create a light painting, you'll need a dark environment and a light source. Your smartphone's camera must be set to a long exposure time, typically several seconds or more. As the shutter remains open, you or your subject moves a light source through the frame, "painting" with light. The camera records this movement as streaks or trails of light.
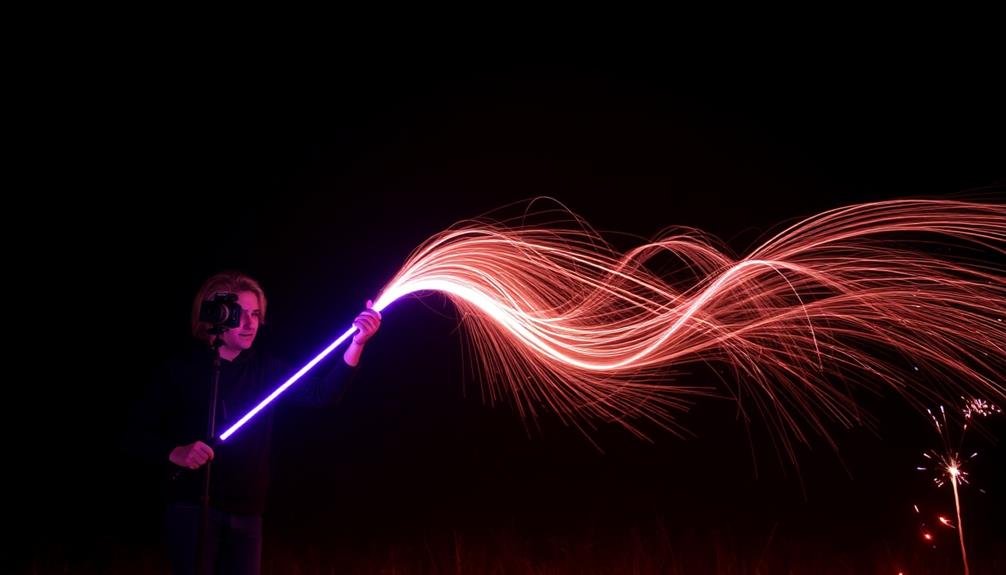
You can use various light sources for painting: flashlights, LED strips, glow sticks, or even sparklers. Each type of light creates unique effects. The key is to experiment with different movements and patterns.
Smooth, flowing motions result in graceful light trails, while quick, jagged movements produce more dynamic results. You can also combine multiple light sources or colors for more complex compositions.
With practice, you'll learn to control the intensity and direction of your light painting, creating stunning visual effects in your mobile photography.
Essential Equipment for Mobile Light Painting
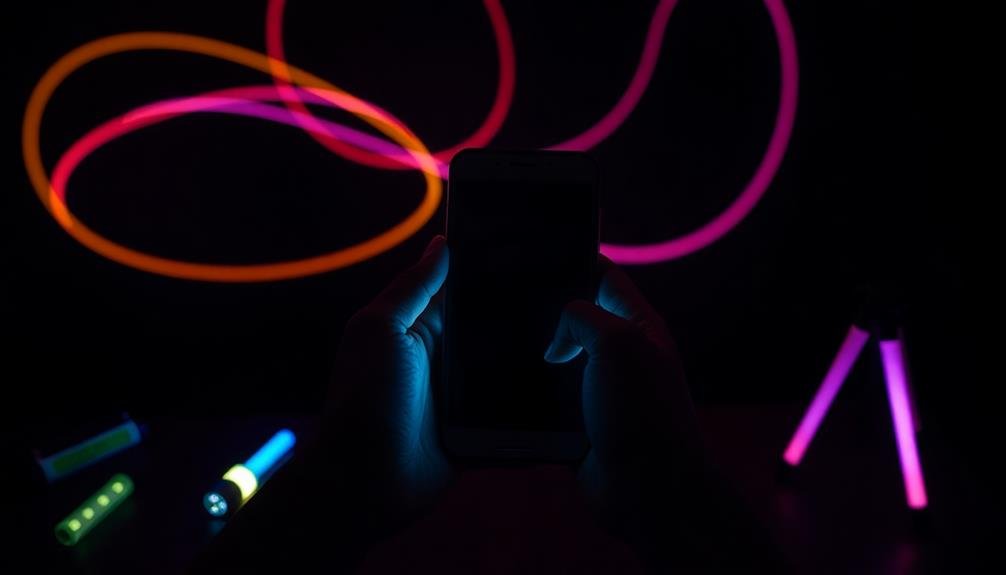
When it comes to light painting with your mobile device, you don't need a ton of expensive gear to get started. Your smartphone is the primary tool, so make sure it has a manual or pro mode that allows you to adjust shutter speed and ISO. A sturdy tripod is essential to keep your phone stable during long exposures. Invest in a smartphone tripod mount to securely attach your device.
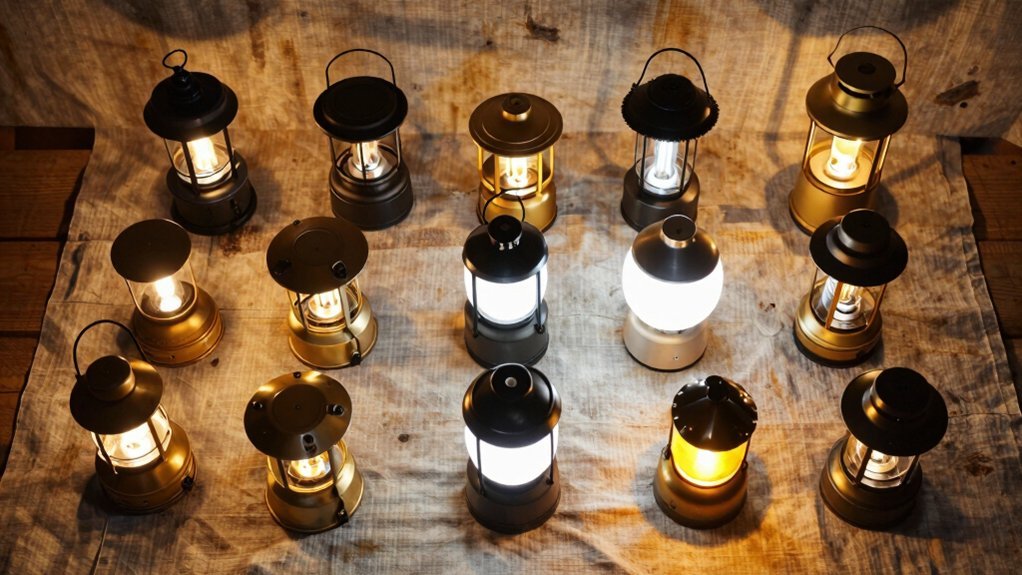
For light sources, you've got plenty of options. Small LED flashlights, glow sticks, or even your phone's flashlight can work wonders. Colored gels or translucent materials can add variety to your light effects.
Don't forget a remote shutter release or use your phone's timer function to avoid camera shake.
To enhance your shots, consider apps like Slow Shutter Cam or LongExpo, which offer more control over exposure settings. A portable battery pack can be handy for extended shooting sessions.
Choosing the Perfect Location
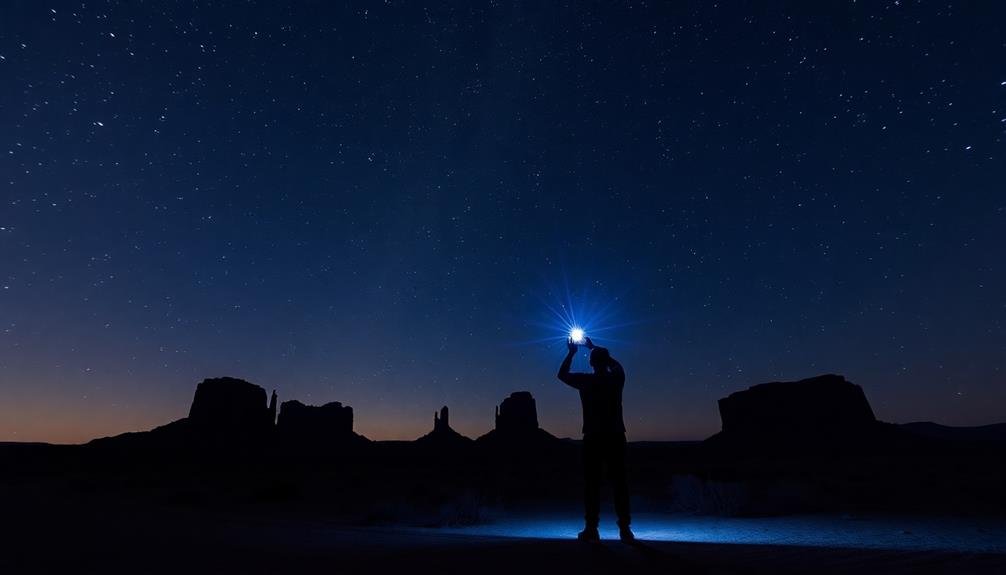
Selecting the right location can make or break your mobile light painting shots. You'll want to find a spot that's dark enough to capture the light trails effectively, yet interesting enough to provide context for your creation. Look for areas with minimal light pollution, such as rural settings or secluded urban spaces.
Consider the background elements that'll complement your light painting, like architecture, natural landscapes, or even starry skies.
When scouting locations, keep safety in mind. Verify you have permission to access the area and that it's not too isolated. Bring a friend along for company and added security. Don't forget to check the weather forecast, as clear nights are ideal for light painting.
Here are some location ideas to spark your creativity:
- Abandoned buildings or industrial sites
- Beaches with interesting rock formations
- City parks after dark
- Forests with winding paths
- Bridges or tunnels with unique architectural features
Once you've found your perfect spot, take some test shots to familiarize yourself with the environment and lighting conditions. This'll help you plan your light painting composition and adjust your camera settings accordingly.
With the right location, you're one step closer to creating stunning mobile light painting photos.
Camera Settings for Light Painting
Now that you've found the perfect location, it's time to focus on your camera settings. For successful light painting, you'll need to adjust your smartphone's camera to capture long exposures. Most modern smartphones have a built-in "Night" or "Pro" mode that allows manual control over settings like ISO, shutter speed, and focus.
Start by setting your ISO low (100-400) to reduce noise and increase image quality. Choose a slow shutter speed (1-30 seconds) to allow enough time for light painting. Set your focus to manual and adjust it for your scene. Use a timer or remote shutter release to prevent camera shake.
Here's a quick reference table for light painting camera settings:
| Setting | Recommendation | Purpose |
|---|---|---|
| ISO | 100-400 | Reduce noise, improve quality |
| Shutter Speed | 1-30 seconds | Allow time for light painting |
| Focus | Manual | Guarantee sharp subject |
| White Balance | Auto or Custom | Adjust for light source |
| Timer | 2-10 seconds | Prevent camera shake |
Experiment with these settings to find the perfect combination for your light painting scene. Remember, practice makes perfect, so don't be afraid to try different combinations until you achieve the desired effect.
Popular Light Sources and Tools
With the right camera settings in place, it's time to explore the exciting world of light painting tools. You'll find a wide array of options to create stunning effects in your mobile photos. From everyday household items to specialized equipment, your choices are nearly limitless.
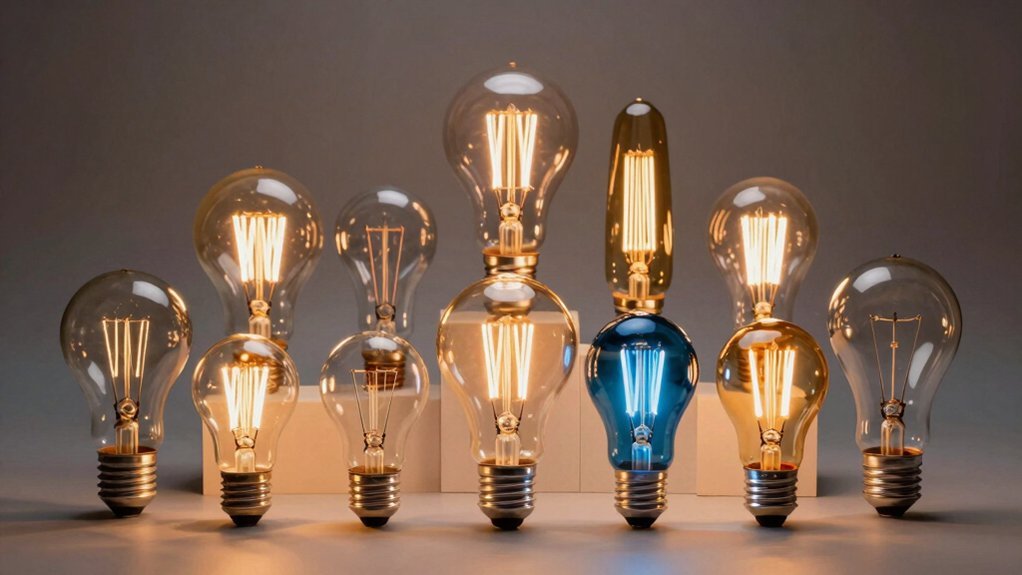
LED lights are a popular starting point due to their versatility and availability. You can use flashlights, glow sticks, or even your smartphone's screen as light sources. For more advanced techniques, consider investing in fiber optic wands, light tubes, or programmable LED sticks that offer multiple colors and patterns.
Don't forget about unconventional tools like sparklers, fire poi, or even glow-in-the-dark objects. These can add unique textures and dimensions to your light paintings. Experiment with different combinations to discover your favorite effects.
Here are some popular light painting tools to get you started:
- LED flashlights with color filters
- El wire or electroluminescent wire
- Pixel sticks for creating images and text
- Light painting brushes for fluid, colorful strokes
- Steel wool for sparks and fire effects
Mastering Light Painting Movements
To master light painting movements, you'll want to start with basic shapes and patterns, gradually building your skills.
As you practice, focus on timing your movements to create the desired effect within your exposure time.
Don't hesitate to experiment with different tools and techniques, as this will help you develop your unique style and expand your creative possibilities.
Basic Shapes and Patterns
Once you've got the basics of light painting down, it's time to master some fundamental shapes and patterns. Start with simple geometric forms like circles, squares, and triangles. Practice drawing these shapes in the air with your light source, maintaining a steady hand and consistent speed.
As you improve, try combining shapes to create more complex designs. Experiment with different light sources to achieve various effects. LED lights produce crisp, defined lines, while flashlights create softer, more diffused patterns.
Don't forget to play with distance – moving closer or farther from the camera will change the size and intensity of your light paintings.
To add depth and interest to your compositions, try these techniques:
- Layer multiple shapes for a 3D effect
- Use zigzags and spirals for dynamic energy
- Create symmetrical patterns for balance
- Incorporate written words or simple symbols
- Blend organic shapes with geometric forms
As you practice, you'll develop your own unique style. Remember, light painting is all about creativity and experimentation.
Don't be afraid to push boundaries and try new ideas. With patience and practice, you'll soon be creating stunning, otherworldly images that captivate viewers and showcase your artistic vision.
Timing Your Movements
Mastering the timing of your movements is essential for creating stunning light paintings. The key is to move slowly and steadily, maintaining a consistent speed throughout your chosen pattern. Start by practicing simple shapes, like circles or figure-eights, to get a feel for the pace required.
As you become more comfortable, experiment with varying your speed to create different effects. Moving faster will result in thinner, more delicate lines, while slower movements produce thicker, more pronounced streaks of light. Remember that the camera's shutter will remain open for the duration of your light painting, so every movement counts.
Pay attention to your starting and ending positions. Begin your light painting just outside the frame and finish beyond it to guarantee smooth, complete lines. If you're creating multiple elements in one shot, plan your movements carefully to avoid overlapping or leaving awkward gaps.
Don't be afraid to use pauses strategically. Holding your light source still for a moment can create interesting points of emphasis or add depth to your composition.
With practice, you'll develop an intuitive sense of timing that'll elevate your light paintings to new levels of artistry.
Experimenting With Tools
After mastering the basics of timing, it's time to explore the diverse array of tools at your disposal for light painting. You'll find that everyday objects can become magical light sources, transforming your mobile photos into stunning works of art.
Experiment with various items to create unique effects and textures in your images. Consider these creative tools for your light painting adventures:
- LED strips or fairy lights for flowing lines and patterns
- Glow sticks for vibrant, colorful streaks
- Flashlights with colored gels for dramatic beams
- Fiber optic wands for delicate, ethereal effects
- EL wire for precise, neon-like shapes
Don't limit yourself to these suggestions; let your imagination run wild. Try using household items like kitchen utensils, toys, or even your smartphone's screen as light sources.
Each tool will produce distinct results, so test different combinations to achieve your desired effect. Remember to adjust your camera settings accordingly, as some tools may require longer exposure times or different ISO settings.
As you experiment, you'll develop a personal style and discover which tools work best for your creative vision. Keep pushing boundaries and refining your techniques to create truly enchanting light paintings with your mobile device.
Creating Unique Shapes and Patterns
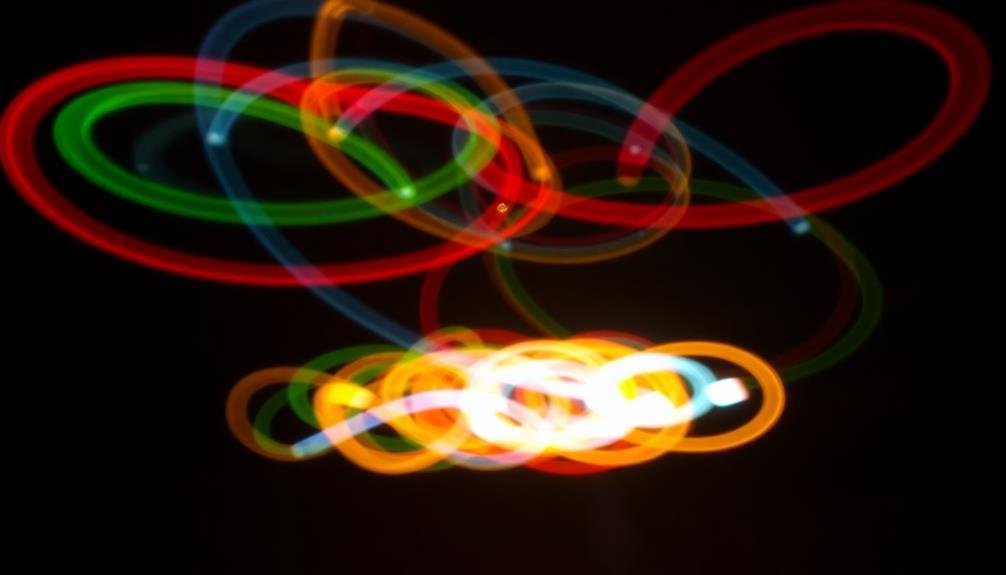
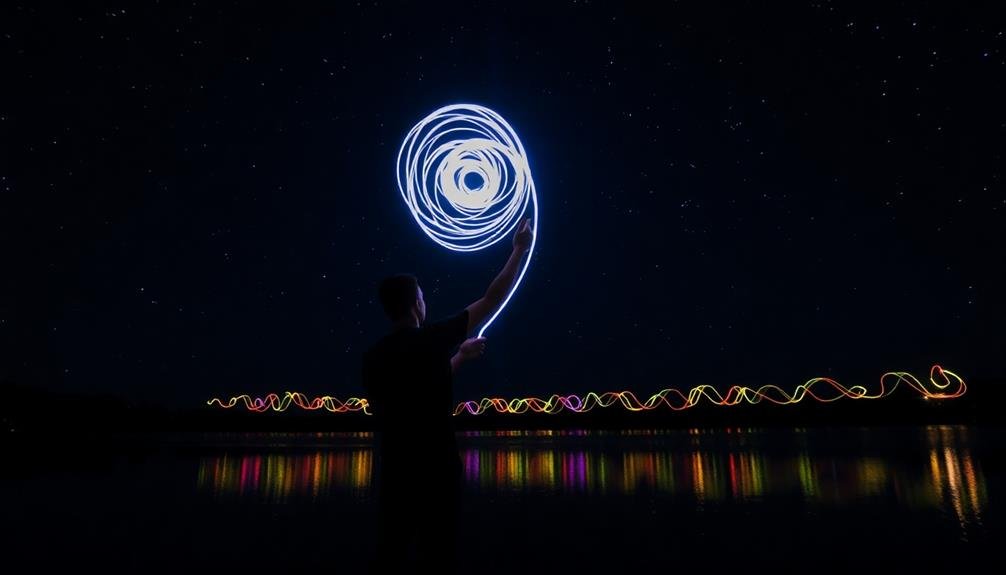
The domain of light painting opens up endless possibilities for creating unique shapes and patterns in your mobile photos. You can start by mastering simple shapes like circles, spirals, and zigzags.
Practice drawing these in the air with your light source while your camera's shutter remains open. As you gain confidence, experiment with more complex designs. Try writing words or creating recognizable symbols.
You can even attempt intricate geometric patterns or abstract shapes. Remember, the key is smooth, controlled movements.
Combine different colors and intensities of light to add depth and dimension to your creations. Use multiple light sources simultaneously for layered effects.
Don't be afraid to incorporate physical objects into your light paintings, creating hybrid compositions. For truly unique patterns, explore unconventional light sources.
Fiber optic toys, EL wire, or even illuminated hula hoops can produce fascinating results. You can also create custom stencils to project light through, forming precise shapes and silhouettes.
Lastly, consider the background and foreground elements in your composition. Strategically place your light patterns to interact with the scene, creating a harmonious blend of reality and light art.
Incorporating Models Into Light Paintings

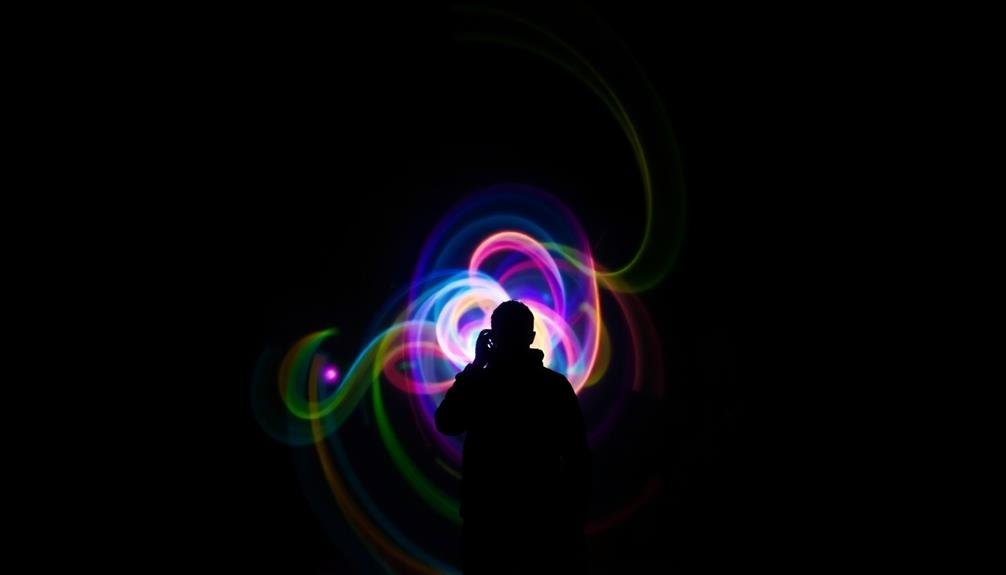
Adding human subjects to your light paintings can elevate your mobile photography to new heights. By incorporating models, you'll create a mesmerizing contrast between the static human form and the dynamic light trails. This combination adds depth, emotion, and storytelling elements to your images.
To successfully integrate models into your light paintings, consider these key points:
- Pose your model before starting the long exposure
- Instruct them to remain perfectly still during the shot
- Use a dim light source to illuminate the model's features
- Experiment with different model positions and light painting techniques
- Blend the light trails with the model's silhouette for a surreal effect
When working with models, communication is essential. Explain your vision clearly and guide them through the process. You'll need to work quickly, as holding a pose for an extended period can be challenging.
Try various lighting techniques to highlight different aspects of your model, such as rim lighting for a dramatic silhouette or soft front lighting for a more ethereal look. Remember to experiment with different poses, expressions, and clothing to create diverse and enchanting light painting portraits that will stand out in your mobile photography portfolio.
Editing Light Painted Photos

Once you've captured your light painting masterpiece, editing can take your mobile photos to the next level. Start by adjusting the exposure and contrast to bring out the light trails and enhance the overall mood. Use the shadows and highlights sliders to reveal hidden details in darker areas while preserving the brightness of your light painting.
Next, fine-tune the color balance. Light paintings often benefit from slight adjustments to temperature and tint, creating a more cohesive look between the light trails and the background.
Don't be afraid to experiment with vibrance and saturation to make your light trails pop.
Consider using selective editing tools to enhance specific areas of your photo. You can brighten certain light trails, darken the background, or add a subtle vignette to draw attention to your subject.
For a polished finish, try applying noise reduction to smooth out any graininess, especially in low-light areas.
Overcoming Common Light Painting Challenges
As you explore light painting with your mobile device, you'll encounter several common challenges.
To create stunning images, you'll need to master long exposure techniques, effectively manage your light sources, and address camera shake issues.
Mastering Long Exposure Techniques
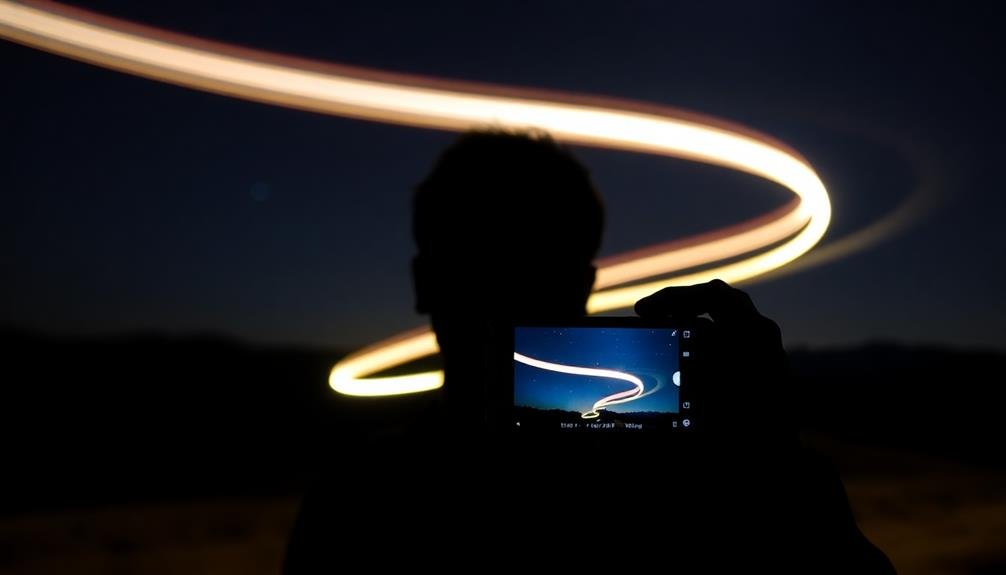
Long exposure techniques' mastery is essential for successful light painting, but it comes with its own set of challenges. You'll need to keep your phone steady, control ambient light, and manage your camera settings effectively.
To achieve stunning results, start by using a tripod or stabilizing your phone against a fixed object. This prevents unwanted blur and guarantees crisp, clear images.
Next, familiarize yourself with your phone's manual camera mode or a third-party app that allows for longer exposures. Experiment with different shutter speeds, typically between 1 and 30 seconds, to capture the desired light trails. Don't forget to adjust your ISO and aperture settings to compensate for the extended exposure time.
To enhance your light painting skills, consider these key techniques:
- Use a remote shutter release or timer to avoid camera shake
- Experiment with different light sources, like flashlights, LEDs, or glow sticks
- Practice coordinating your movements with the exposure time
- Try combining multiple exposures for complex light paintings
- Incorporate interesting foreground elements to add depth to your compositions
With practice and patience, you'll soon master long exposure techniques and create fascinating light painted images with your mobile phone.
Managing Light Sources Effectively
Managing light sources effectively is essential for overcoming common light painting challenges. You'll need to control the intensity, direction, and color of your light sources to create the desired effect. Start by experimenting with different light tools, such as flashlights, LED strips, or even glow sticks. Each source has unique characteristics that can add depth and interest to your images.
To achieve ideal results, consider these key factors:
| Factor | Impact | Tips |
|---|---|---|
| Intensity | Affects exposure | Use dimmer switches or distance |
| Direction | Creates shape | Move light source during exposure |
| Color | Sets mood | Use gels or colored LEDs |
| Duration | Controls light trails | Practice consistent movements |
Remember to balance ambient light with your light painting. Too much background illumination can overpower your designs, while too little may leave your subject underexposed. Don't be afraid to take multiple shots, adjusting your technique as you go. With practice, you'll develop a keen sense of how different light sources interact with your camera's settings and the environment. This knowledge will help you overcome common challenges and create stunning light-painted mobile photos that captivate viewers.
Overcoming Camera Shake Issues
During light painting, camera shake can ruin your carefully crafted images. To overcome this challenge, you'll need to stabilize your mobile device effectively. Start by using a tripod or a stable surface to keep your phone steady throughout the exposure.
If you don't have a tripod, improvise with everyday objects like books or a bean bag to create a makeshift support. When handling your phone, use the volume buttons or a remote shutter release to minimize physical contact with the device.
Enable your phone's built-in image stabilization feature if available, as it can help reduce minor movements. Practice proper breathing techniques and maintain a steady hand when moving light sources during the exposure.
Here are five essential tips to combat camera shake:
- Use a sturdy tripod or phone mount
- Enable your phone's image stabilization feature
- Utilize the timer function or a remote shutter release
- Brace yourself against a stable object when moving light sources
- Experiment with shorter exposure times to reduce shake risk
Inspirational Light Painting Ideas
Release your creativity with these inspiring light painting ideas for mobile photography. Experiment with different light sources to create unique effects. Try using LED strips, flashlights, or even glow sticks to paint vibrant streaks across your frame. Don't forget to explore everyday objects like sparklers, fairy lights, or light-up toys for unexpected results.
Consider incorporating silhouettes or landscapes into your light paintings. Use a stationary subject as an anchor point and paint light around them for a striking contrast. You can also try writing words or drawing simple shapes in the air to add a personal touch to your images.
Here's a table of light painting ideas to spark your imagination:
| Light Source | Technique | Effect |
|---|---|---|
| LED strip | Spiral motion | Colorful vortex |
| Flashlight | Quick gestures | Abstract patterns |
| Sparkler | Slow waves | Glowing trails |
| Glow stick | Circular movements | Neon rings |
Remember to adjust your camera settings for ideal results. Use a longer exposure time to capture more light trails, and experiment with different ISO settings to balance brightness and noise. With practice, you'll master the art of light painting and create stunning, magical mobile photos.
Advancing Your Light Painting Skills

To take your light painting to the next level, you'll need to master long exposure techniques on your mobile device.
You can expand your creative possibilities by experimenting with various light sources, from flashlights to glow sticks.
As you progress, focus on perfecting your composition and movement to create more intricate and visually stunning light paintings.
Mastering Long Exposure Techniques
Long exposure techniques form the backbone of advanced light painting. To master these techniques, you'll need to understand how to control your camera's shutter speed and aperture settings. Start by experimenting with exposures ranging from 5 to 30 seconds, depending on the complexity of your light painting design. As you gain confidence, try longer exposures for more intricate patterns.
To create stunning long exposure light paintings, consider these key points:
- Use a tripod or stable surface to keep your camera steady
- Set your ISO to the lowest possible setting to reduce noise
- Experiment with different light sources, like LEDs, flashlights, or glow sticks
- Plan your movements carefully to create smooth, fluid light trails
- Combine multiple exposures in post-processing for more complex designs
Practice is essential when mastering long exposure techniques. Don't be discouraged if your first attempts aren't perfect – each shot will teach you something new.
As you refine your skills, you'll discover how to balance ambient light with your light painting, create depth in your images, and produce unique, eye-catching compositions that'll make your mobile photos stand out from the crowd.
Experimenting With Light Sources
One of the most exciting aspects of light painting is exploring different light sources to create unique effects. You'll find that everyday items can become powerful tools for your mobile light painting.
Start with LED flashlights, which offer a bright, concentrated beam. Experiment with colored gels or cellophane to add vibrant hues to your light trails.
Don't overlook household items like glow sticks, fairy lights, or even sparklers for more whimsical effects. For precise control, try electroluminescent wire or light painting brushes designed specifically for this purpose.
You can also use your smartphone's screen or a tablet as a light source, displaying patterns or images to paint with.
Get creative with unconventional sources like fiber optic cables, light-up toys, or even car headlights for larger-scale scenes.
Remember to adjust your camera app's exposure settings to capture the light effectively. As you experiment, you'll discover how different light sources interact with your surroundings and camera settings.
This exploration will help you develop your unique style and push the boundaries of mobile light painting photography.
Perfecting Composition and Movement
Mastery of composition and movement is essential for taking your light painting skills to the next level. As you frame your shot, consider the balance between the light painting elements and the surrounding environment. Experiment with different angles and perspectives to create depth and visual interest.
Remember, the movement of your light source will directly impact the final image, so practice smooth, deliberate motions.
To elevate your light painting compositions:
- Use leading lines to guide the viewer's eye
- Incorporate foreground elements for added dimension
- Experiment with symmetry and asymmetry
- Play with negative space to enhance your light designs
- Combine multiple light sources for complex patterns
When perfecting your movements, start with simple shapes and gradually progress to more intricate designs. Practice consistent speed and pressure to achieve uniform light trails.
Don't be afraid to mix straight lines with curves for dynamic results. If you're struggling with precision, try using a tripod or other stabilizing tools to steady your hand.
Remember that timing is vital; coordinate your movements with your camera's exposure length for the best results. With practice, you'll develop the muscle memory and control needed to create stunning light paintings that captivate viewers and showcase your artistic vision.
Frequently Asked Questions
Can Light Painting Be Done During the Day?
Yes, you can do light painting during the day, but it's more challenging. You'll need to use neutral density filters, find shaded areas, or create a darkened environment. Long exposures and bright light sources are still essential.
Are There Any Legal Restrictions for Light Painting in Public Spaces?
You should be aware of potential legal restrictions when light painting in public spaces. It's best to check local laws, as some areas may have regulations on using bright lights or accessing certain locations after dark.
How Do You Protect Your Eyes When Using Bright Light Sources?
To protect your eyes when using bright light sources, you'll want to wear specially designed protective eyewear. Don't look directly at the light, use diffusers to soften intensity, and take regular breaks to rest your eyes during sessions.
Can Light Painting Damage Your Camera Sensor?
You shouldn't worry about damaging your camera sensor with light painting. It's generally safe, but avoid extremely bright sources or prolonged exposures. If you're concerned, use lower power lights or shorter exposure times for added precaution.
Are There Competitions or Exhibitions Specifically for Light Painting Photography?
Yes, there are competitions and exhibitions dedicated to light painting photography. You'll find local and international events showcasing this unique art form. Enter contests to gain exposure, or attend exhibitions to be inspired by other artists' creative techniques.
In Summary
You've now revealed the secrets of light painting with your mobile device. It's time to embrace your creativity and experiment with this magical technique. Don't be afraid to try new tools, locations, and ideas. Remember, practice makes perfect, so keep honing your skills. Share your mesmerizing light paintings with others and inspire them to explore this enchanting art form. The world's your canvas—go paint it with light!

Leave a Reply