
To capture dramatic lightning photos at night, you'll need to master a few key techniques. Start by finding a safe location with an unobstructed view of the storm. Use manual camera mode on your smartphone or DSLR, setting a low ISO and slow shutter speed to capture multiple strikes. Focus manually on infinity and stabilize your device with a tripod. Experiment with multiple exposures and HDR techniques to enhance detail and dynamic range. In post-processing, adjust contrast and colors to make the lightning pop. Remember to prioritize safety throughout the process. These tips are just the beginning of your journey to stunning storm photography.
Choosing the Right Location

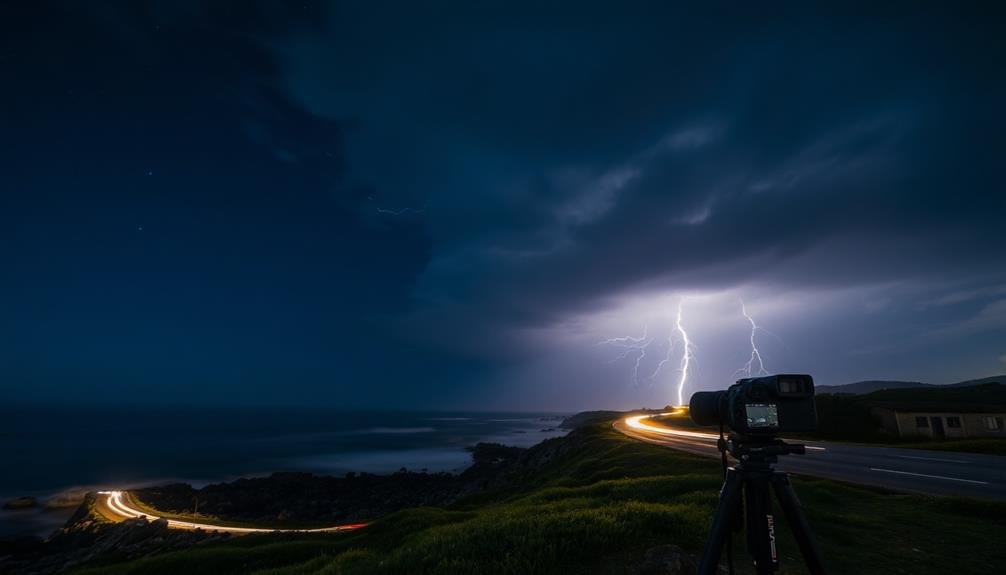
When it comes to capturing lightning in night photos, selecting the right location is crucial. You'll want to find a spot with an unobstructed view of the storm, preferably elevated to maximize your field of vision.
Look for locations that offer interesting foreground elements, such as buildings, trees, or bodies of water, to add depth and context to your shots.
Safety should be your top priority. Choose a sheltered area, like a covered porch or a car, to protect yourself and your equipment from rain and potential lightning strikes.
Avoid open fields, hilltops, or tall structures that might attract lightning.
Consider the direction of the storm's movement. Positioning yourself to capture lightning as it approaches can yield dramatic results.
Urban environments can provide unique opportunities, with city lights adding an extra layer of interest to your photos.
Research potential locations in advance, keeping in mind local regulations and property access. You may need permits for certain areas.
Don't forget to check weather forecasts to plan your shoot during ideal conditions.
With careful location scouting, you'll set yourself up for stunning lightning photography.
Setting Up Your Smartphone
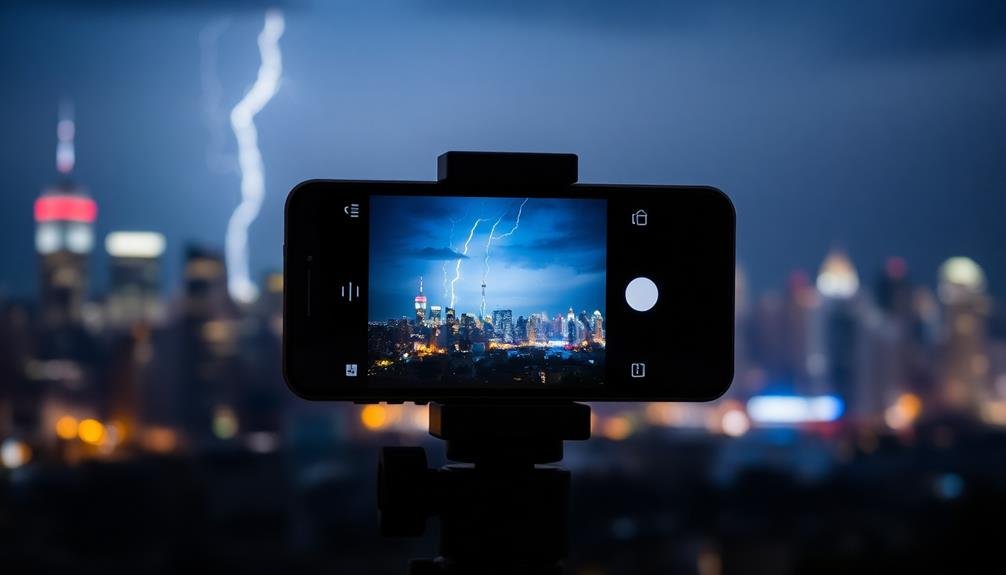
Once you've found the perfect location, it's time to set up your smartphone for lightning photography.
Start by ensuring your device is fully charged or connected to a portable power bank. You'll likely be taking multiple shots over an extended period, so conserving battery life is vital.
Next, stabilize your smartphone using a tripod or a sturdy surface. This is essential for capturing sharp images during long exposures. If you don't have a tripod, improvise with a rock, ledge, or even a bean bag to keep your phone steady.
To maximize your chances of capturing lightning, follow these steps:
- Enable your phone's manual or pro mode
- Set the ISO to the lowest possible value
- Use a slow shutter speed, starting at 2-3 seconds
- Turn off the flash and HDR features
Using Manual Camera Mode

When capturing lightning at night, you'll want to switch to manual camera mode for full control.
Start by adjusting your aperture and ISO to balance light sensitivity with image quality, then select an appropriate shutter speed to capture the lightning strike.
As you experiment with these settings, remember that the key is finding the right balance between all exposure elements to achieve the perfect lightning shot.
Adjusting Aperture and ISO
Manual camera mode empowers you to take full control over your lightning photography. When capturing lightning at night, adjusting your aperture and ISO settings is vital for achieving dramatic results.
Start by setting your aperture to a wide opening, around f/4 to f/5.6, to allow more light into the camera. This wider aperture helps capture the brief flashes of lightning effectively.
Next, adjust your ISO to balance sensitivity with image quality. A lower ISO, between 100 and 400, will produce cleaner images with less noise, but may require longer exposures. Higher ISOs, from 800 to 1600, can help capture faster lightning strikes but may introduce more grain.
To fine-tune your settings for ideal lightning photos:
- Experiment with different aperture and ISO combinations
- Monitor your histogram to guarantee proper exposure
- Use a remote shutter release to minimize camera shake
- Take test shots and adjust as needed based on the lightning's intensity
Selecting Appropriate Shutter Speed
With aperture and ISO settings dialed in, your next step is to master shutter speed for lightning photography. In manual mode, you'll need to experiment with different exposure times to capture the perfect bolt. Longer exposures increase your chances of catching lightning but may result in overexposed images.
Start with exposures between 10 to 30 seconds, adjusting based on storm intensity and frequency. If lightning is frequent, use shorter exposures to avoid overlapping strikes. For distant storms or infrequent flashes, try exposures up to 30 seconds or use bulb mode for even longer captures.
Here's a quick guide to shutter speeds for different lightning scenarios:
| Scenario | Shutter Speed | Notes |
|---|---|---|
| Frequent strikes | 5-15 seconds | Prevents overexposure |
| Distant storm | 20-30 seconds | Increases catch probability |
| Infrequent flashes | Bulb mode | Manual control, up to minutes |
Balancing Exposure Settings
Mastering the balance of exposure settings is essential for capturing stunning lightning photographs. When shooting in manual mode, you'll have full control over your camera's settings, allowing you to adapt to the unpredictable nature of lightning.
Start by setting your ISO as low as possible, typically around 100-200, to minimize noise in your images. Adjust your aperture to a mid-range value, such as f/8 or f/11, to maintain a good depth of field while allowing enough light to enter the lens.
To achieve the perfect balance, consider these key points:
- Use the histogram to guarantee you're not overexposing the sky or underexposing the foreground.
- Experiment with different shutter speeds to capture single bolts or multiple strikes.
- Monitor your camera's LCD screen to check for proper exposure and adjust as needed.
- Be prepared to make quick changes as lighting conditions evolve throughout the storm.
Adjusting ISO and Shutter Speed
Photographers face a delicate balancing act when capturing lightning at night. You'll need to adjust your ISO and shutter speed carefully to achieve stunning results. Start by setting your ISO relatively low, around 100-400, to minimize noise in your images. Then, experiment with longer shutter speeds to increase your chances of capturing multiple lightning strikes in a single frame.
Use this table as a guideline for adjusting your settings:
| ISO | Shutter Speed | Conditions |
|---|---|---|
| 100 | 15-30 seconds | Very dark |
| 200 | 10-20 seconds | Some ambient light |
| 400 | 5-15 seconds | Brighter skies |
Remember, these are starting points. You'll need to fine-tune based on your specific location and lighting conditions. If you're using a wide-angle lens, you can often get away with longer exposures without star trails becoming noticeable.
As you adjust your settings, keep an eye on your histogram. You'll want to ascertain you're not overexposing the brightest parts of the lightning or underexposing the surrounding landscape. If you're struggling to balance the exposure, consider using graduated neutral density filters or taking multiple exposures to blend later in post-processing.
Focusing in Low Light

Focusing in low light conditions presents a unique challenge when capturing lightning at night. Your camera's autofocus system may struggle to lock onto a subject in the darkness. To overcome this, you'll need to employ specific techniques to guarantee your lightning shots are crisp and clear.
Here are four essential focusing methods for low-light lightning photography:
- Manual focus: Switch to manual focus mode and set your lens to infinity. Fine-tune the focus using live view if available.
- Pre-focus on a distant light: Use a far-off light source, like a street lamp or building, to help your camera's autofocus system lock onto the correct distance.
- Hyperfocal distance: Calculate and set your lens to its hyperfocal distance to maximize depth of field and keep both foreground and lightning in focus.
- Focus stacking: Take multiple shots with different focus points and blend them in post-processing for maximum sharpness throughout the image.
Remember to use a tripod to keep your camera steady and avoid any movement that could blur your photos.
If possible, use a remote shutter release or your camera's self-timer to minimize camera shake when pressing the shutter button.
With these techniques, you'll be well-equipped to capture stunning, razor-sharp lightning photos even in challenging low-light conditions.
Capturing Multiple Exposures
When capturing night scenes, you'll often need multiple exposures to achieve your desired result.
You can stack exposures for creating mesmerizing star trails, blend separate shots of the foreground and sky for a balanced composition, or use HDR techniques to expand the dynamic range of your image.
These methods allow you to overcome the limitations of a single exposure and create stunning nighttime photographs with enhanced detail and visual impact.
Stacking for Star Trails
In light of capturing mesmerizing star trails, stacking multiple exposures has become a go-to technique for night photographers. This method allows you to create stunning images that showcase the movement of stars across the night sky. Instead of relying on a single long exposure, you'll take multiple shorter exposures and combine them in post-processing.
To achieve impressive star trail photos through stacking, follow these steps:
- Set up your camera on a sturdy tripod and compose your shot, including an interesting foreground element.
- Use manual mode, setting a wide aperture (f/2.8 to f/4), high ISO (1600-3200), and exposure time between 20-30 seconds.
- Enable continuous shooting mode and use an intervalometer to capture a series of images over several hours.
- Import your images into specialized stacking software or Photoshop, then blend them to create the final star trail image.
Blending Foreground and Sky
Blending foreground and sky often presents a challenge in night photography due to the stark contrast between the two elements. To overcome this, you'll need to capture multiple exposures and blend them in post-processing.
Start by taking a long exposure for the foreground, typically 30 seconds to several minutes, depending on available light. Use a low ISO and wider aperture to capture detail.
Next, shoot the sky separately, using a higher ISO and shorter exposure time to freeze stars or capture the Milky Way.
In post-processing, layer your images in Photoshop or a similar program. Use layer masks to blend the exposures seamlessly. Pay attention to the horizon line, ensuring a natural shift between foreground and sky. You can also use the gradient tool to create a smooth blend.
For more complex scenes, you might need additional exposures for midground elements or light painting. Experiment with different exposure settings to achieve the desired balance.
Remember to maintain consistency in white balance and overall mood across your exposures for a cohesive final image.
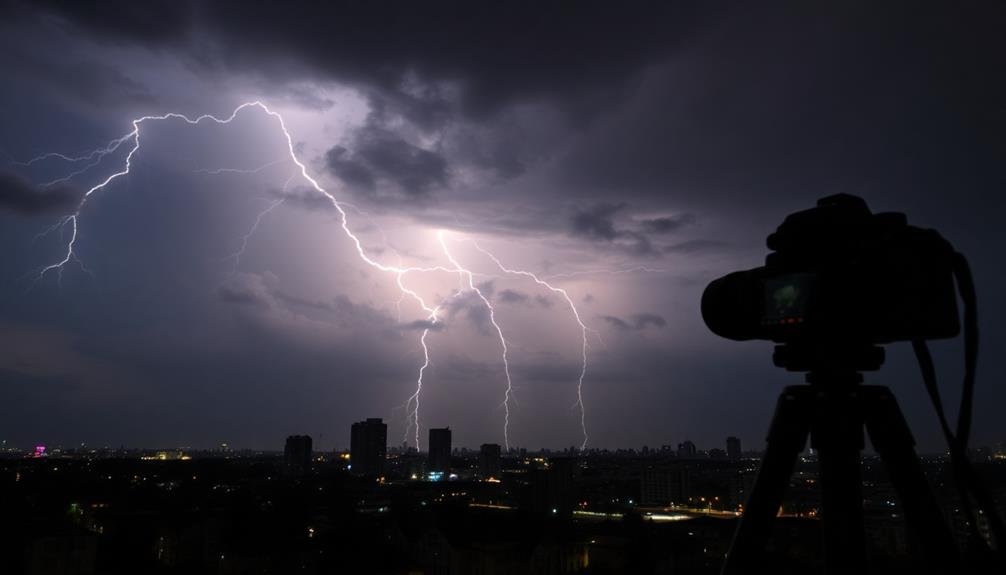
HDR for Dynamic Range
High Dynamic Range (HDR) techniques offer a powerful solution for night photographers grappling with extreme contrast. By capturing multiple exposures of the same scene, you'll be able to retain details in both the brightest and darkest areas of your image.
This method is particularly useful when photographing lightning against a dark landscape or cityscape.
To create an effective HDR lightning photo:
- Set up your camera on a sturdy tripod and use a remote shutter release to minimize camera shake.
- Take at least three exposures: one for the midtones, one for the highlights, and one for the shadows.
- Use manual mode to maintain consistent settings across all shots, adjusting only the shutter speed.
- Blend the exposures in post-processing software, carefully masking areas to achieve a natural look.
Employing HDR Techniques

How can you capture the full range of light in a nighttime lightning scene? HDR techniques are your answer. By combining multiple exposures, you'll preserve both the bright lightning strikes and the dark landscape details.
Start by setting up your camera on a tripod and switching to manual mode. Take at least three shots of the same scene at different exposures: one for the shadows, one for the midtones, and one for the highlights. Use your camera's auto-bracketing feature if available.
When processing, merge these exposures in software like Adobe Lightroom or Photomatix. Adjust the tone mapping to balance the bright and dark areas. Be careful not to overdo it; aim for a natural look that doesn't appear artificial.
For moving subjects like clouds, use layer masks in Photoshop to blend the exposures manually. This prevents ghosting and guarantees sharp details throughout the image.
Post-Processing Lightning Photos

After capturing your lightning photos, post-processing is where the magic truly happens. You'll enhance the dramatic effect of your lightning shots and bring out details that may have been lost in the original capture.
Start by adjusting the exposure and contrast to make the lightning bolts stand out against the dark sky. Don't be afraid to increase the clarity and dehaze sliders to add definition to the storm clouds.
Next, focus on color adjustments to create the desired mood:
- Boost the vibrance to enhance the natural colors of the scene
- Adjust the white balance to emphasize the cool tones of the lightning
- Use split toning to add a subtle color cast to the shadows and highlights
- Experiment with selective color adjustments to make specific elements pop
Fine-tune your image by applying noise reduction to smooth out any graininess in the dark areas.
Use sharpening techniques sparingly to avoid introducing artifacts. Finally, consider adding a subtle vignette to draw the viewer's eye toward the center of the image.
Safety Precautions for Night Photography

While capturing stunning lightning photos is exciting, your safety should always be the top priority. When photographing lightning at night, stay inside a sturdy building or vehicle whenever possible. If you must be outside, avoid open areas, hilltops, and tall objects like trees or poles. Don't use metal tripods or equipment that could conduct electricity.
Keep an eye on weather reports and track the storm's movement. If you hear thunder, lightning is close enough to strike. Follow the 30-30 rule: count the seconds between seeing lightning and hearing thunder. If it's less than 30 seconds, seek shelter immediately. Wait 30 minutes after the last thunder before resuming your shoot.
Wear appropriate clothing, including rubber-soled shoes for insulation. Bring a waterproof cover for your camera and a headlamp for hands-free illumination. Always let someone know your location and expected return time.
If you're in a group, designate a weather watcher to monitor conditions while others focus on photography. Remember, no photo is worth risking your life. If conditions become unsafe, pack up and leave immediately.
Frequently Asked Questions
How Can I Predict Where Lightning Will Strike for Better Photo Composition?
You can't precisely predict lightning strikes, but you'll improve your chances by watching storm patterns and movement. Look for active cells, position yourself safely, and aim your camera where you've seen frequent flashes. Be patient and prepared.
What Lens Filters Enhance Lightning Photography at Night?
You'll want to use a neutral density filter to reduce light and allow longer exposures. A polarizing filter can help reduce glare and enhance contrast. Don't forget a UV filter to protect your lens from rain.
Are There Apps That Help Detect and Alert Photographers to Lightning Activity?
Yes, there are apps that can help you detect and alert you to lightning activity. You'll find options like "My Lightning Tracker," "Lightning Finder," and "Blitzortung Lightning Monitor" useful for planning your lightning photography sessions.
How Do Different Types of Lightning Affect Photo Exposure and Techniques?
You'll need to adjust your techniques for different lightning types. Cloud-to-ground strikes require faster shutter speeds, while sheet lightning calls for longer exposures. Intra-cloud lightning often demands a wider lens and multiple shots to capture effectively.
Can Lightning Photography Damage My Camera or Smartphone Sensor Over Time?
You're unlikely to damage your camera or smartphone sensor from lightning photography. However, it's wise to avoid pointing directly at strikes. Use protective gear and remote triggers when possible to minimize any potential risks.
In Summary
You've now got the tools to capture stunning lightning photos at night with your smartphone. Remember to prioritize safety, experiment with settings, and practice often. Don't be afraid to try different techniques and post-processing methods. With patience and persistence, you'll soon be creating dramatic night photos that showcase nature's power. Keep pushing your skills, and you'll be amazed at the results you can achieve with just your phone's camera.


Leave a Reply