Organize your mobile photos like a pro with these top hacks. Utilize cloud storage services for seamless syncing and backup. Create date-based albums for easy retrieval. Use descriptive file names and implement a tagging system to enhance searchability. Leverage AI-powered sorting tools to automate categorization. Sync across multiple devices for accessibility. Set up automatic backups to protect your memories. Explore third-party apps for advanced organization features. Master in-app editing tools to streamline your workflow. By adopting these strategies, you'll transform your smartphone into a powerful photo management hub. Dive deeper to reveal the full potential of mobile photo organization.
Utilize Cloud Storage Services

Cloud storage services are your best friend when it comes to organizing mobile photos. They offer a secure, easily accessible solution for backing up and managing your ever-growing photo collection. Popular options like Google Photos, iCloud, and Dropbox automatically sync your images across devices, ensuring you'll never lose a precious memory.
To make the most of cloud storage, enable automatic backup on your smartphone. This feature uploads your photos as soon as you take them, freeing up space on your device. Most services offer smart organization tools, using AI to categorize images by faces, places, and objects. Take advantage of these features to quickly find specific photos later.
Create albums within your cloud storage to group related images. You can sort by events, trips, or themes, making it easier to locate and share photos. Don't forget to use tags or keywords to further enhance searchability. Many services allow you to collaborate on shared albums, perfect for family events or group trips.
Regularly review and delete unnecessary photos to keep your cloud storage tidy. Set aside time each month to curate your collection, ensuring you're not paying for storage you don't need.
Create Albums by Date

When it comes to organizing your mobile photos, creating albums by date is a simple yet effective strategy. It allows you to quickly locate specific memories and keeps your photo library tidy. Most smartphones automatically organize photos by date, but you can take it a step further by creating custom albums for different time periods.
To implement this method, start by deciding on a timeframe that works best for you. You might choose to create albums for each month, season, or year. Then, go through your photos and sort them into these date-based albums. This process can be time-consuming initially, but it'll save you countless hours of searching in the future.
Here are three benefits of organizing your photos by date:
- Easy retrieval of memories from specific events or trips
- Simplified sharing of photos from particular time periods
- Effortless creation of yearly photo books or slideshows
As you continue to take new photos, make it a habit to regularly sort them into your date-based albums. This ongoing maintenance will keep your photo library organized and easily accessible.
You'll appreciate having a well-structured system when you want to revisit old memories or find specific images quickly.
Use Descriptive File Names

When naming your mobile photos, adopt a standardized convention to make finding specific images easier.
You'll benefit from enabling automatic date inclusion in file names, which adds an essential time reference to each photo.
Don't forget to incorporate location information in your file names, helping you quickly recall where each picture was taken.
Standardize Naming Conventions
In light of the overwhelming number of photos we accumulate on our devices, standardizing naming conventions is essential for efficient organization. By establishing a consistent system for naming your photos, you'll save time and frustration when searching for specific images later on. Create a naming structure that works for you and stick to it religiously.
When developing your naming convention, consider including key information such as the date, location, event, or subject of the photo. For example, you might use a format like "YYYY-MM-DD_Location_Event" or "Subject_YYYYMMDD_Description." This approach allows you to quickly identify and sort your photos without having to open each file.
To help you get started, here are three popular naming conventions you can adopt or adapt:
- Date-based: 2023-04-15_Paris_EiffelTower
- Event-based: Wedding_JohnAndJane_20230415_FirstDance
- Subject-based: Portrait_EmmaSmith_20230415_Graduation
Remember to be consistent with your chosen format across all your devices and backup systems. This standardization will make it easier to merge photo collections and maintain order in your digital library.
Include Dates Automatically
Modern smartphones and cameras automatically embed date information into photo metadata, making it easier than ever to include dates in your file names. You can leverage this feature to streamline your photo organization process. Most photo management apps and software allow you to automatically incorporate date information when renaming files.
To make the most of this feature, set up a consistent date format in your file naming system. For example, use YYYY-MM-DD at the beginning of each file name. This guarantees your photos are sorted chronologically when viewed in file explorers. You can also add more specific time information if needed, such as YYYY-MM-DD-HHMM.
Many apps offer customizable naming templates that let you combine date information with other details like location or event names. Experiment with different combinations to find what works best for your needs.
Remember to keep your naming convention consistent across all devices and platforms you use.
Add Location Information
Adding location information to your photo file names is another essential step in effective mobile photo organization. By incorporating location details, you'll create a more thorough and searchable photo library. Most smartphones automatically capture GPS data when you take a picture, but you can also manually add location information to your file names.
To add location data to your photo file names:
- Use your phone's built-in location services to tag photos automatically as you take them.
- Rename files manually to include location details, such as "Paris_EiffelTower_2023.jpg".
- Utilize photo organization apps that can read GPS data and add location tags to your file names.
When adding location information, be specific but concise. Include the city, landmark, or specific area where the photo was taken. This practice will make it much easier to find photos from particular trips or locations later on.
You can also use abbreviations or codes for frequently visited places to keep file names manageable. Remember to be consistent in your naming conventions to maintain an organized photo library. By combining date, location, and event information in your file names, you'll create a robust system for quickly locating and enjoying your photos.
Implement a Tagging System

Implementing a tagging system can revolutionize your mobile photo organization.
Create meaningful tag categories that align with your photo-taking habits, such as events, locations, or people.
Maintain consistent tagging habits by immediately adding relevant tags to new photos, ensuring you'll always be able to find the images you're looking for quickly.
Create Meaningful Tag Categories
A well-organized tagging system can transform your photo library from chaotic to easily navigable. When creating tag categories, focus on aspects that matter most to you and will help you find photos quickly in the future. Start with broad categories and then refine them into more specific subcategories.
Consider these key areas for your tag categories:
- People: Family members, friends, pets
- Places: Countries, cities, landmarks, home
- Events: Holidays, birthdays, weddings, vacations
Don't overwhelm yourself with too many tags. Stick to categories that you'll actually use and remember. For instance, you might create tags for emotions, seasons, or activities like "happy," "winter," or "hiking." If you're a foodie, consider tags for different cuisines or restaurants.
Be consistent with your tagging approach. Use singular nouns and avoid redundant tags. For example, if you have a "beach" tag, you mightn't need separate tags for "sand" and "ocean."
Use Consistent Tagging Habits
Consistency is key when implementing a tagging system for your mobile photos. Once you've established your tag categories, stick to them religiously. Use the same tags across all your devices and platforms to guarantee seamless organization.
Create a habit of tagging photos immediately after taking them. This practice prevents backlogs and keeps your collection organized in real-time. Develop a shorthand system for quick tagging, such as using abbreviations or symbols that you'll easily remember.
Be specific with your tags, but don't overdo it. Choose tags that'll help you find photos quickly later. For example, instead of just "vacation," use "Italy2023" or "RomeTrip." Combine broad and narrow tags to cover all bases, like "family" and "Christmas2022."
Consider using hierarchical tags, such as "animals/dogs/labrador" to create a structured system. This approach allows for both broad and specific searches.
Don't forget to tag people consistently, using their full names or nicknames you'll remember.
Regularly review and update your tagging system. As your photo collection grows, you might need to refine or expand your categories. Stay flexible and adjust your habits as needed to maintain an efficient organization system.
Leverage AI-Powered Sorting Tools
Numerous AI-powered sorting tools have revolutionized the way we organize our mobile photos. These smart applications use advanced algorithms to analyze and categorize your images, saving you hours of manual sorting. By leveraging these tools, you'll effortlessly create a well-organized photo library that's easy to navigate and enjoy.
Many AI-powered sorting tools offer features like facial recognition, object detection, and scene classification. They can automatically group photos by:
- People: Identifying and tagging faces of your friends and family
- Places: Recognizing landmarks and sorting images by location
- Events: Clustering photos taken at specific occasions or dates
To make the most of these tools, start by selecting a reputable app that integrates well with your mobile device. Once installed, allow the AI to scan your entire photo library. This process may take some time, but it's worth the wait.
After the initial scan, the app will continue to organize new photos as you take them.
Don't forget to review and fine-tune the AI's categorizations occasionally. While these tools are impressive, they're not perfect. Your input will help improve their accuracy over time, resulting in an increasingly organized and personalized photo collection.
Regularly Delete Unnecessary Photos

While AI-powered tools can help organize your photos, regularly deleting unnecessary images is essential for maintaining a clutter-free library. Set aside time each week or month to review your recent photos and remove duplicates, blurry shots, and images you no longer need. This habit will keep your storage space manageable and make it easier to find the photos you truly value.
Start by creating a "to delete" album where you can quickly move unwanted photos. This allows you to review them one last time before permanent deletion. Be ruthless in your selection process – if you haven't looked at a photo in months and it doesn't hold sentimental value, it's probably safe to delete.
Consider implementing a "one in, one out" rule for your photo library. For every new photo you take, challenge yourself to delete an old one. This practice helps maintain a balance and prevents your collection from growing uncontrollably.
Don't forget to empty your "Recently Deleted" folder regularly to free up space. Many phones keep deleted photos for 30 days, so make sure to clear this folder to reclaim storage.
Sync Across Multiple Devices
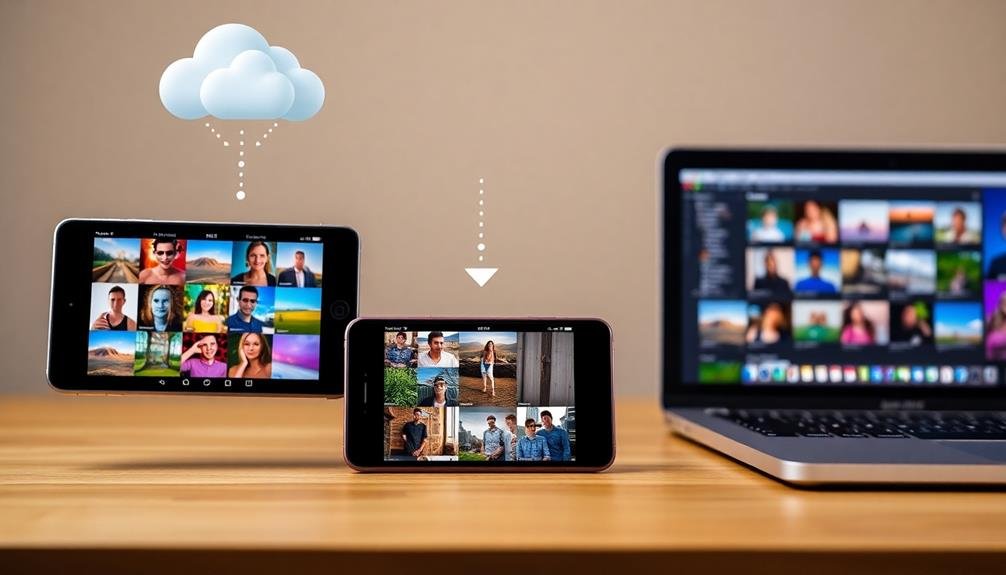
Once you've streamlined your photo library, it's time to guarantee you can access your images from anywhere. Syncing across multiple devices assures your photos are always at your fingertips, regardless of which device you're using.
Most modern smartphones offer cloud storage options that automatically sync your photos across devices. Enable this feature in your settings to keep your photo library consistent across your phone, tablet, and computer.
To make the most of cross-device syncing:
- Choose a reliable cloud service like iCloud, Google Photos, or Dropbox
- Set up automatic backup and sync on all your devices
- Ascertain you have sufficient cloud storage space for your entire photo collection
Set Up Automatic Backups

To safeguard your precious photos, you'll want to set up automatic backups.
Start by selecting a reliable cloud storage service that offers ample space for your growing collection.
Once you've chosen your preferred platform, enable the auto-sync feature and customize your backup settings to guarantee your photos are securely stored without any manual intervention.
Choose Cloud Storage Service
Selecting the right cloud storage service is vital for hassle-free photo backup. You'll want to evaluate factors like storage capacity, pricing, and integration with your devices. Popular options include Google Photos, iCloud, Dropbox, and Amazon Photos. Each service offers unique features, so it's important to assess your specific needs.
When choosing a cloud storage service, think about these key points:
- Storage limits: Some services offer unlimited storage for photos, while others have tiered plans.
- Automatic upload: Look for services that can automatically sync your photos across devices.
- Sharing capabilities: Verify the service allows easy sharing of photos with friends and family.
Compare the pricing structures of different services, as they can vary greatly. Some offer free tiers with limited storage, while others require a subscription for full features.
Check if the service provides editing tools, face recognition, or AI-powered organization.
Examine the long-term sustainability of the service and its compatibility with your preferred devices. It's also wise to review the privacy policies and security measures in place to protect your photos.
Enable Auto-Sync Feature
After choosing your cloud storage service, it's time to set up automatic backups. Enabling auto-sync guarantees your photos are continuously backed up without manual intervention. This feature safeguards your memories and frees up space on your device.
To activate auto-sync, go to your cloud service's app settings. Look for options like "Auto Upload" or "Camera Upload." Toggle this setting on, and select which folders you want to sync. Most services allow you to choose between Wi-Fi-only or cellular data uploads.
Configure the sync frequency to suit your needs. Some apps offer real-time syncing, while others update at set intervals. Consider your data usage and battery life when making this choice.
Don't forget to enable background app refresh for your cloud service. This allows syncing to occur even when the app isn't actively open. On iOS, go to Settings > General > Background App Refresh. For Android, check your app's settings for a similar option.
Lastly, verify that your auto-sync is working correctly. Take a test photo and check if it appears in your cloud storage within the expected timeframe. If it doesn't, troubleshoot by reviewing your settings and internet connection.
Configure Backup Settings
Configuring backup settings is a crucial step in safeguarding your mobile photos. By setting up automatic backups, you'll guarantee that your precious memories are protected from device loss, damage, or accidental deletion.
Most smartphones offer built-in cloud backup options, but you can also use third-party services for added security and flexibility.
To configure your backup settings effectively:
- Choose your preferred backup service (e.g., Google Photos, iCloud, Dropbox)
- Enable automatic backup for photos and videos
- Select Wi-Fi only backup to conserve mobile data
Once you've chosen a service, navigate to your phone's settings and locate the backup options. Enable automatic backups and decide whether you want to back up over cellular data or Wi-Fi only.
Consider setting up multiple backup locations for extra protection, such as combining cloud storage with an external hard drive.
Don't forget to regularly check your backup status to confirm everything's running smoothly. Set reminders to verify that your photos are being saved correctly and that you haven't run out of storage space.
Organize With Third-Party Apps

Third-party apps offer powerful solutions for organizing your mobile photos beyond your device's native capabilities. These apps provide advanced features like AI-powered categorization, facial recognition, and intelligent tagging systems.
Consider apps like Google Photos, which automatically sorts your images into categories and creates albums based on people, places, and events. It also offers powerful search functionality, allowing you to find specific photos quickly.
Another popular option is Slidebox, which lets you swipe through your photos and sort them into albums with a simple gesture. For more detailed organization, try Gemini Photos, which identifies duplicate or similar images and helps you declutter your library.
If you're looking for an all-encompassing solution, Mylio offers cross-device syncing and advanced metadata editing.
When choosing a third-party app, consider factors like storage limits, privacy policies, and integration with your existing workflow. Many apps offer free tiers with basic features, allowing you to test them before committing to a paid subscription.
Master In-App Editing Features

Mastery of in-app editing features can transform your mobile photography experience. Most smartphone cameras come with built-in editing tools that allow you to enhance your photos without downloading additional apps.
These features often include adjustments for brightness, contrast, saturation, and sharpness. You'll also find options for cropping, straightening, and applying filters.
To make the most of these tools, start by experimenting with each feature individually. This will help you understand how each adjustment affects your images.
Once you're comfortable with the basics, try combining different edits to create your unique style. Don't be afraid to push the boundaries and see what works best for your photos.
Here are three key benefits of mastering in-app editing:
- Instant gratification: Edit and share your photos on the go
- Consistency: Develop a signature look for your images
- Time-saving: Streamline your editing process without switching between apps
Remember to save your original photos before making edits. This allows you to return to the unedited version if needed.
As you become more proficient with in-app editing, you'll find yourself relying less on third-party apps and more on your phone's native capabilities.
Frequently Asked Questions
How Can I Recover Accidentally Deleted Photos From My Mobile Device?
You can recover deleted photos by checking your device's trash or recently deleted folder. If that doesn't work, try using recovery software or cloud backups. Act quickly, as new data can overwrite deleted files.
What's the Best Way to Transfer Photos Between Different Operating Systems?
You've got options for transferring photos across operating systems. Use cloud services like Google Photos or Dropbox, email them to yourself, or connect your device to a computer and drag-and-drop. USB cables work great for direct transfers too.
Are There Privacy Concerns When Using Ai-Powered Photo Organization Tools?
Yes, there are privacy concerns with AI-powered photo organization tools. You're sharing personal images with AI systems, which may store or analyze your data. It's essential to review privacy policies and understand how your photos are used.
How Can I Create a Slideshow of My Organized Photos for Sharing?
You can easily create a slideshow by selecting your organized photos in your device's gallery app. Use built-in slideshow features or download a third-party app. Add music, changes, and captions to personalize your presentation before sharing.
What's the Most Efficient Way to Organize Photos Taken With Multiple Devices?
You'll want to centralize your photos using a cloud service like Google Photos or iCloud. Sync all your devices to this platform, enabling automatic uploads. Then, use tags, albums, and facial recognition to categorize and organize your images efficiently.
In Summary
You've now got a toolkit of photo organization hacks at your fingertips. By implementing these strategies, you'll transform your mobile photo library from chaos to order. Remember, consistency is key. Make these practices part of your routine, and you'll never lose track of a precious memory again. Whether you're a casual snapper or a dedicated shutterbug, these tips will help you keep your digital memories organized, accessible, and secure. Happy organizing!



Leave a Reply