
RAW bracketing can transform your mobile photography, elevating it to professional levels. By capturing multiple exposures in RAW format, you'll preserve more detail in highlights and shadows, allowing for extensive post-processing flexibility. To get started, verify your smartphone supports RAW capture and invest in a reliable camera app with manual controls. Use a tripod for stability and experiment with different exposure values to capture the full dynamic range of your scene. After shooting, merge your bracketed images using HDR software to create stunning, high-quality photos with enhanced color and detail. With practice, you'll access the full potential of your mobile device's camera and produce images that rival those of DSLRs.
Understanding RAW Photography

Versatility lies at the heart of RAW photography. When you capture images in RAW format, you're fundamentally saving all the data your camera's sensor collects. Unlike JPEG files, which compress and process the image data, RAW files preserve the full range of information, giving you unparalleled control over your photos during post-processing.
RAW files contain more color information and a wider dynamic range, allowing you to recover details in highlights and shadows that might be lost in JPEG format. This flexibility means you can adjust white balance, exposure, and color with greater precision without degrading image quality.
While RAW files are larger and require processing before sharing, they offer significant advantages for serious photographers. You'll have more latitude to correct exposure errors, fine-tune colors, and create multiple versions of an image from a single file.
Many modern smartphones now support RAW capture, bringing professional-grade capabilities to mobile photography. By shooting in RAW, you'll future-proof your images, ensuring you have the highest quality files to work with as editing software continues to improve.
Benefits of RAW Bracketing

RAW bracketing offers you two significant advantages for your mobile photography.
You'll capture an enhanced dynamic range, preserving details in both highlights and shadows that a single exposure might miss.
Additionally, you'll gain flexible post-processing options, allowing you to fine-tune exposure, color, and other elements with greater control after the shot.
Enhanced Dynamic Range
Photography enthusiasts know that one of the most significant benefits of RAW bracketing is its ability to enhance dynamic range. When you use RAW bracketing, you're capturing multiple exposures of the same scene, each with different light settings.
This technique allows you to capture details in both the brightest highlights and the darkest shadows that a single exposure might miss. By combining these multiple exposures in post-processing, you'll create an image with a much wider dynamic range than what your phone's camera can typically achieve in a single shot.
You'll preserve details in the sky that might otherwise be blown out, while also revealing textures in shadowy areas that would normally appear too dark.
This enhanced dynamic range gives your photos a more professional look, closely resembling what your eyes actually see. It's particularly useful in high-contrast scenes, like landscapes with bright skies and dark foregrounds, or interiors with sunlight streaming through windows.
You'll be able to produce images that are more balanced, natural-looking, and visually appealing, rivaling the quality of photos taken with high-end DSLR cameras.
Flexible Post-Processing Options
Beyond enhancing dynamic range, RAW bracketing offers unparalleled flexibility in post-processing. When you shoot RAW brackets, you're capturing multiple exposures with all the raw sensor data intact. This gives you tremendous latitude to adjust various aspects of your images without degrading quality.
You'll have the freedom to fine-tune white balance, recover blown-out highlights, and lift shadows without introducing noise. RAW files also allow for more precise color grading and sharpening. By combining multiple RAW exposures, you can create HDR images with natural-looking results or focus stack for increased depth of field.
Here's a comparison of post-processing options for RAW brackets vs. single JPEG shots:
| Adjustment | RAW Brackets | Single JPEG |
|---|---|---|
| White Balance | Full control | Limited |
| Exposure | ±4-5 stops | ±1-2 stops |
| Color Grading | Precise | Restricted |
Essential Equipment for Mobile RAW

What do you really need to plunge into mobile RAW photography? The good news is that you likely already have the most essential piece of equipment: a smartphone with RAW capture capabilities. Most modern high-end phones support this feature, but check your device's settings to confirm.
Beyond your phone, invest in a sturdy tripod and smartphone mount. These will help you maintain stability during bracketed exposures, especially in low-light conditions. Consider a pocket-sized option for portability.
A remote shutter release or Bluetooth camera trigger can further reduce camera shake. Many wireless earbuds now double as camera remotes, so you might already own one.
To expand your creative possibilities, look into clip-on smartphone lenses. Wide-angle, macro, and telephoto attachments can broaden your photographic range.
Don't forget about storage. RAW files are larger than JPEGs, so invest in a high-capacity microSD card if your phone supports expandable storage. Alternatively, consider a cloud storage subscription for seamless backup and file management.
Lastly, a portable battery pack can be a lifesaver during extended shooting sessions, ensuring you never miss a shot due to a dead battery.
Selecting a RAW Camera App

When choosing a RAW camera app for your mobile device, you'll find several popular options like Halide, ProCam, and VSCO.
You'll want to take into account key features such as manual controls, exposure bracketing, and post-processing capabilities.
It's essential to verify the app you select is compatible with your specific smartphone model and operating system version.
Popular RAW Camera Apps
Given the abundance of RAW camera apps available, choosing the right one for your mobile photography needs can be overwhelming. However, a few stand out for their features and user-friendly interfaces.
ProCamera is a top choice for iOS users, offering advanced manual controls and RAW capture capabilities. It's known for its intuitive design and powerful editing tools.
For Android users, Camera FV-5 is a popular option. It provides DSLR-like manual controls and supports RAW capture on compatible devices. The app's interface mimics a traditional camera, making it easy for photography enthusiasts to navigate.
Adobe Lightroom Mobile is another excellent choice for both iOS and Android. It not only captures RAW images but also offers powerful editing features and seamless integration with the desktop version. This app is ideal if you're already familiar with Adobe's ecosystem.
Halide is a highly regarded iOS-exclusive app known for its sleek interface and professional-grade features. It offers intuitive gesture controls and advanced tools like focus peaking and histogram.
Lastly, VSCO, while primarily known for its filters, also supports RAW capture on both platforms and provides a clean, minimalist interface for shooting and editing.
Key Features to Consider
Savvy mobile photographers know that selecting the right RAW camera app can make or break their work. When choosing an app for RAW bracketing, you'll want to focus on key features that enhance your shooting experience and final results.
First, look for manual controls. You'll need the ability to adjust exposure, ISO, shutter speed, and focus independently. This level of control is vital for creating perfectly bracketed exposures.
Next, take into account the app's user interface. A clean, intuitive design will help you work quickly and efficiently in the field.
Other essential features to keep in mind include:
- Histogram display: This helps you assess exposure accuracy in real-time.
- Focus peaking: Guarantees sharp focus, especially in challenging lighting conditions.
- Custom bracketing options: Allows you to set specific exposure increments for your brackets.
Don't overlook the app's processing capabilities. Look for robust editing tools that let you merge and edit your bracketed RAW files directly on your device. This can streamline your workflow, especially when you're on the go.
Compatibility With Devices
Selecting the right RAW camera app isn't just about features; it's also about guaranteeing compatibility with your specific device. Not all smartphones support RAW photography, so you'll need to check if your device is capable. For iOS users, iPhones from the 6s and newer can shoot in RAW. Android users should look for devices that support Camera2 API.
Once you've confirmed RAW compatibility, research apps that work well with your phone model. Popular options like Halide, ProCam, and VSCO are great for iOS, while Android users might prefer Camera FV-5, Open Camera, or Adobe Lightroom Mobile. Pay attention to user reviews specific to your device, as some apps may perform better on certain models.
Consider the app's file management system. Some apps automatically save RAW files to your phone's gallery, while others use their own storage. Guarantee the app you choose integrates smoothly with your preferred workflow and backup solutions.
Additionally, check if the app supports the latest RAW formats for your device, such as ProRAW for newer iPhones, to take full advantage of your phone's capabilities.
Setting Up Your Smartphone

Before diving into RAW bracketing, you'll need to confirm your smartphone is properly set up. First, verify your device's camera app supports RAW capture. If it doesn't, download a third-party app like Lightroom Mobile or ProCam that offers this feature.
Next, check your phone's storage capacity, as RAW files are considerably larger than standard JPEGs.
Once you've confirmed RAW compatibility and storage, follow these steps to set up your smartphone for RAW bracketing:
- Enable RAW capture in your camera app's settings. This option is usually found under "Image Quality" or "Advanced Settings."
- Adjust your camera's exposure compensation (EV) settings. Most apps allow you to set this between -2 and +2 in increments of 1/3 or 1/2 stops.
- Set up burst mode or continuous shooting if your app doesn't have a dedicated bracketing feature. This will allow you to quickly capture multiple exposures.
With these settings in place, you're ready to start experimenting with RAW bracketing.
Remember to keep your phone steady during shoots, as even slight movements can affect the final result when combining multiple exposures.
Mastering Exposure Bracketing Techniques
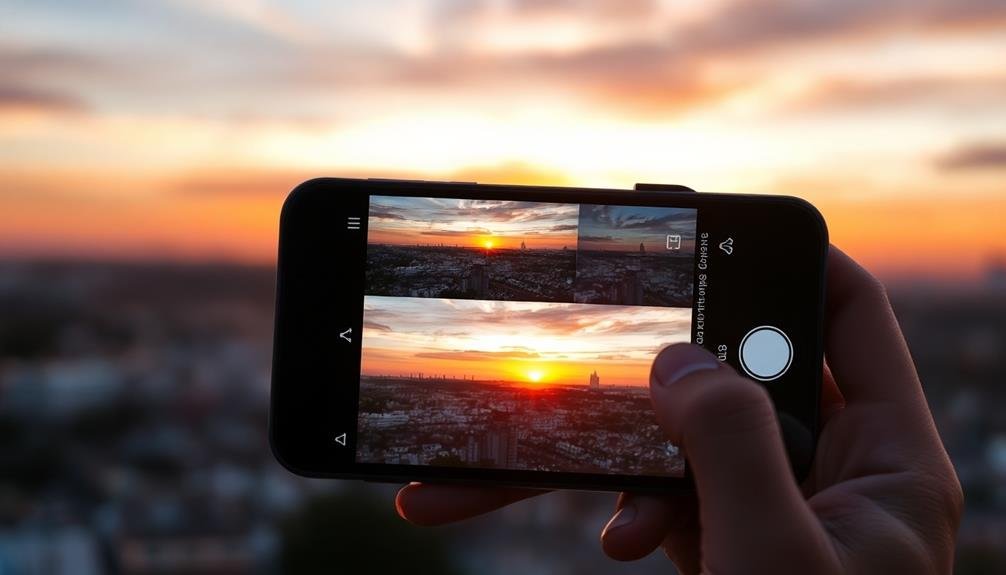
Exposure bracketing is a powerful technique that can elevate your mobile photography to new heights. By capturing multiple shots at different exposure levels, you'll have more flexibility in post-processing and create stunning HDR images. To master this technique, start by setting your camera app to bracket mode, typically found in the advanced settings.
When bracketing, you'll usually take three shots: one at the correct exposure, one underexposed, and one overexposed. Experiment with different exposure values (EV) to find the right balance for your scene. Here's a quick guide to help you choose:
| Scene Type | Underexposed | Correct Exposure | Overexposed |
|---|---|---|---|
| High Contrast | -2 EV | 0 EV | +2 EV |
| Low Light | -1 EV | 0 EV | +1 EV |
| Bright Daylight | -1.5 EV | 0 EV | +1.5 EV |
| Sunset/Sunrise | -2 EV | 0 EV | +2 EV |
Remember to keep your phone steady while shooting bracketed exposures. Use a tripod or stable surface when possible to guarantee sharp images. After capturing your bracketed shots, you can merge them in editing apps like Snapseed or Lightroom Mobile to create a well-balanced final image with enhanced dynamic range.
Capturing RAW Brackets in Action
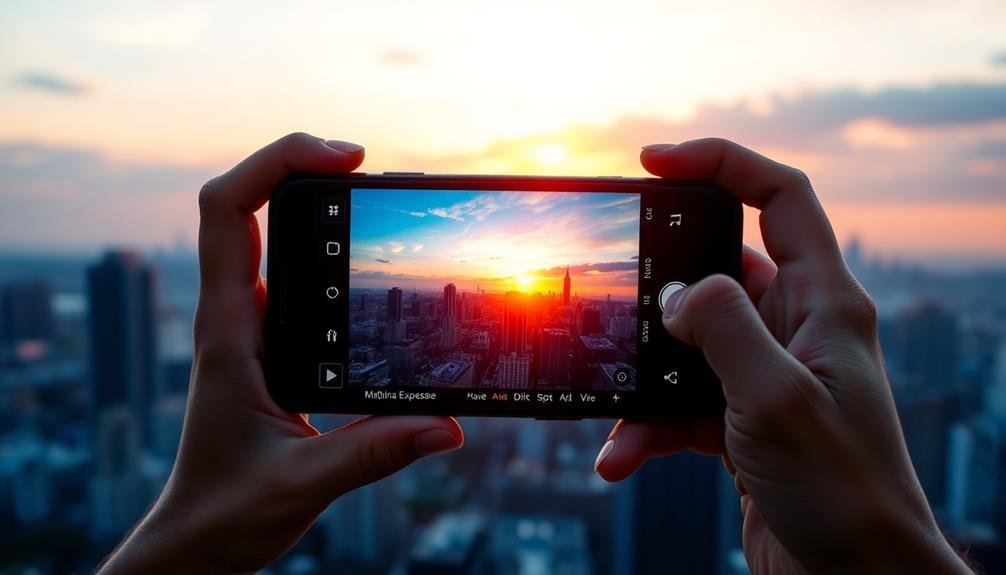
When capturing RAW brackets in action, you'll need to optimize your exposure settings for each shot in the sequence.
You can adjust your camera's ISO, shutter speed, and aperture to guarantee a range of exposures that cover both highlights and shadows.
Whether you're shooting handheld or using a tripod, you'll want to take into account factors like camera stability and subject movement to determine the most effective bracketing technique for your mobile photography.
Optimal Exposure Settings
Now that you're ready to capture RAW brackets, it's crucial to understand the ideal exposure settings. For best results, aim to capture a range of exposures that cover both the highlights and shadows in your scene. Start with your camera's base exposure, then bracket one or two stops above and below it.
When setting up your brackets, consider these key factors:
- ISO: Keep it as low as possible to minimize noise, typically around 100-400.
- Aperture: Choose a mid-range aperture (f/8-f/11) for sharpness across the frame.
- Shutter speed: Vary this to achieve your exposure brackets, starting with your camera's recommended speed.
Use your camera's histogram to verify you're capturing the full dynamic range of the scene. The darkest bracket should have details in the highlights, while the brightest should reveal shadow details.
If your phone allows manual control, adjust exposure compensation between shots. For automatic bracketing, use your camera app's AEB (Auto Exposure Bracketing) feature if available.
Handheld vs. Tripod Techniques
Capturing RAW brackets successfully hinges on your ability to keep the camera steady between shots. When shooting handheld, brace your elbows against your body and hold your breath to minimize movement. Use your phone's burst mode or a dedicated bracketing app to capture multiple exposures quickly, reducing the chance of misalignment between frames.
For even better results, consider using a tripod. It'll eliminate camera shake and guarantee perfect alignment across all bracketed shots. Invest in a compact, smartphone-compatible tripod and a remote shutter release or use your phone's timer function. This setup is especially essential for low-light situations or when using slower shutter speeds.
If you don't have a tripod, improvise by resting your phone on a stable surface like a table, wall, or rock. Use props to adjust the angle if needed. Remember, even slight movements between brackets can cause ghosting or alignment issues during post-processing.
Whether shooting handheld or with a tripod, always review your bracketed shots on-site. Check for any misalignment or motion blur, and reshoot if necessary. This practice will save you time and frustration during the editing process.
Transferring Files to Your Computer

The next step in your RAW bracketing workflow involves transferring files from your mobile device to your computer. This process is essential for editing and merging your bracketed images effectively.
You'll want to guarantee a smooth transfer to maintain the quality and integrity of your RAW files.
There are several methods to transfer your files, depending on your device and preferences:
- Cloud storage: Upload your images to services like iCloud, Google Drive, or Dropbox, then download them to your computer.
- USB connection: Connect your phone directly to your computer using a USB cable for fast, reliable transfers.
- Wi-Fi transfer: Use apps like AirDrop (for Apple devices) or dedicated file transfer apps for wireless convenience.
Choose the method that best suits your needs and equipment.
Remember to organize your transferred files into clearly labeled folders for easy access during post-processing.
It's also wise to keep your original files on your mobile device until you've completed editing, just in case you need to refer back to them.
Choosing RAW Processing Software

Selecting the right software is essential for processing your RAW bracketed images. You'll need a program that can handle RAW files from your mobile device and offers advanced editing tools for merging exposures.
Popular options include Adobe Lightroom, Capture One, and DxO PhotoLab. These professional-grade software packages provide robust features for RAW processing and HDR merging. If you're looking for a free alternative, consider GIMP or RawTherapee.
When choosing software, consider your skill level and specific needs. Beginners might prefer user-friendly interfaces and automated HDR merging, while advanced users may want more manual control over the process.
Look for software that offers non-destructive editing, allowing you to experiment without altering your original files. Features like noise reduction, lens corrections, and local adjustments are also valuable for enhancing your bracketed images.
Don't forget to check if the software is compatible with your computer's operating system and has regular updates to support the latest mobile RAW formats. Many programs offer free trials, so you can test them before committing to a purchase.
Merging Bracketed RAW Images

Once you've captured your bracketed RAW images and chosen your processing software, it's time to merge them into a single high dynamic range (HDR) photo. This process combines the best-exposed parts of each image, resulting in a final photo with improved detail in both highlights and shadows.
Start by importing your bracketed RAW files into your chosen software. Most programs will automatically detect the bracketed sequence and group them together.
Next, initiate the HDR merge function, which will align the images and blend them. You'll typically have options to adjust the merge settings, such as ghost reduction for moving subjects or degridding for lens artifacts.
After merging, you'll need to fine-tune your HDR image. Here are three key areas to focus on:
- Tone mapping: Adjust overall brightness, contrast, and color balance
- Local adjustments: Enhance specific areas using brushes or graduated filters
- Noise reduction: Minimize any artifacts introduced during the merging process
Adjusting Exposure and Contrast

When adjusting exposure and contrast in your bracketed RAW images, you'll want to focus on balancing highlights and shadows effectively.
Use the histogram as your guide to guarantee you're not clipping important details in either the bright or dark areas.
Balancing Highlights and Shadows
Balancing highlights and shadows is essential for creating stunning mobile photos with RAW bracketing. When you're working with multiple exposures, you'll have the opportunity to capture a wider range of tones than a single shot allows. This technique helps you preserve details in both bright and dark areas of your image, resulting in a more balanced and professional-looking photograph.
To effectively balance highlights and shadows in your RAW bracketed photos:
- Analyze your histogram to identify any clipping in the shadows or highlights.
- Use the exposure slider to set a base exposure that captures the midtones well.
- Adjust the highlights and shadows sliders separately to recover lost details.
As you work on balancing your image, pay attention to the overall contrast and mood you want to convey.
Don't be afraid to push the shadows slightly darker or the highlights brighter if it enhances the atmosphere of your photo.
Remember that RAW files contain much more information than JPEGs, so you have more flexibility to make adjustments without degrading image quality.
Experiment with different combinations of highlight and shadow recovery to find the perfect balance for each unique scene you capture.
Using Histogram Effectively
The histogram is a powerful tool for adjusting exposure and contrast in your RAW bracketed photos. It's a graphical representation of your image's tonal distribution, showing the number of pixels at each brightness level. By learning to read and use the histogram effectively, you'll greatly improve your photo editing skills.
When examining the histogram, pay attention to its overall shape and distribution. A well-exposed image typically has a balanced histogram without considerable clipping on either end. If you see a spike on the left side, it indicates underexposure, while a spike on the right suggests overexposure. Use this information to make informed adjustments to your exposure settings.
To fine-tune contrast, focus on the histogram's middle section. Spreading out the midtones will increase contrast, while compressing them will reduce it.
Don't be afraid to experiment with the curves tool, which allows for precise control over specific tonal ranges.
Hdr-Like Results Manually
Through careful adjustment of exposure and contrast, you can achieve HDR-like results manually without relying on automatic HDR processing. This technique gives you more control over the final image and often produces more natural-looking results.
Start by taking multiple exposures of the same scene, bracketing your shots to capture details in both highlights and shadows.
Once you've captured your bracketed images, use a photo editing app to blend them manually. Here's a basic process to follow:
- Choose your base exposure, typically the most balanced image.
- Layer the overexposed shot on top to recover shadow details.
- Add the underexposed shot to bring back highlight information.
Adjust the opacity of each layer to fine-tune the blend. Pay close attention to areas where different exposures meet, using masks or selective adjustments to create seamless shifts.
Don't forget to tweak overall contrast and saturation to enhance the final image.
This manual approach allows you to create images with a wider dynamic range while maintaining a natural look. It's particularly useful for high-contrast scenes like sunsets or interiors with bright windows.
Fine-Tuning Colors and White Balance

Once you've captured your RAW bracketed shots, fine-tuning colors and white balance becomes an essential step in creating stunning mobile photos. RAW files give you unprecedented control over these aspects, allowing you to correct color casts and adjust white balance with precision.
Start by setting the correct white balance for your scene. You can use the eyedropper tool to select a neutral gray area or adjust the temperature and tint sliders manually. This step guarantees your colors are accurate and true to life.
Next, fine-tune your colors using the HSL (Hue, Saturation, Luminance) panel. Adjust individual color channels to enhance specific elements in your image. For example, you can boost the blues in a sky or tone down overly saturated greens in foliage.
Don't forget to check your image's overall color balance. Use the color mixer to refine the relationship between different hues and create a cohesive look.
You can also apply split toning to add subtle color tints to your highlights and shadows for a more artistic effect.
Sharpening and Noise Reduction

Sharpening and noise reduction are essential steps in perfecting your RAW bracketed mobile photos. These techniques help bring out the fine details in your images while minimizing unwanted grain or digital artifacts. When working with RAW files, you'll have more control over these aspects compared to JPEG images.
Start by applying sharpening to enhance the overall clarity of your photo. Use a high-pass filter or unsharp mask to accentuate edges and textures. Be careful not to overdo it, as excessive sharpening can introduce artifacts and make your image look unnatural.
Next, tackle noise reduction to eliminate graininess, especially in low-light shots. Focus on:
- Luminance noise: Reduce brightness variations without affecting color
- Chrominance noise: Minimize color speckles while preserving detail
- Hot pixel removal: Eliminate bright, isolated pixels caused by sensor heat
Remember, there's a delicate balance between noise reduction and detail preservation. Experiment with different settings to find the sweet spot for each image.
You'll want to maintain enough texture and sharpness while eliminating distracting noise.
Exporting Your Final Image

The culmination of your RAW bracketing and editing process arrives with exporting your final image. You'll want to choose the right file format and settings to showcase your work effectively. Consider your image's intended use: social media, printing, or professional portfolio.
For most purposes, JPEG remains the go-to format due to its wide compatibility and reasonable file size. However, if you need to preserve maximum quality for further editing, consider exporting as TIFF or PNG. When exporting as JPEG, select an appropriate quality level – higher for print, lower for web use.
Here's a quick guide to common export settings:
| Purpose | Format | Quality | Color Space |
|---|---|---|---|
| Social Media | JPEG | 70-80% | sRGB |
| TIFF | Lossless | Adobe RGB | |
| Web Display | PNG | Lossless | sRGB |
Don't forget to resize your image if needed. For web use, aim for dimensions that balance quality and loading speed. Finally, add metadata like copyright information and keywords to protect and organize your work. With these steps, you'll guarantee your RAW-bracketed mobile photos shine in their final form.
Frequently Asked Questions
Can RAW Bracketing Be Used for Night Sky Photography on Smartphones?
Yes, you can use RAW bracketing for night sky photography on smartphones. It'll help you capture more detail in the stars and reduce noise. Experiment with different exposures to find the best balance for your specific scene.
How Much Storage Space Do RAW Bracketed Images Typically Consume?
You'll find RAW bracketed images consume considerably more storage than standard photos. Typically, each bracketed set can take up 50-100MB or more, depending on your phone's camera resolution and the number of brackets captured.
Are There Any Smartphone Models That Don't Support RAW Photography?
Yes, some smartphones don't support RAW photography. You'll typically find this limitation in budget or older models. If you're looking for RAW capabilities, you'll want to check the specs of mid-range to high-end phones before purchasing.
Can RAW Bracketing Help Reduce Motion Blur in Action Shots?
Raw bracketing won't directly reduce motion blur in action shots. You're better off using faster shutter speeds or burst mode. However, it can help you capture more detail and dynamic range, which may enhance your overall image quality.
Is It Possible to Bracket RAW Images Using Voice Commands?
You'll find that voice-activated RAW bracketing isn't widely available on most devices. However, some camera apps may offer this feature. You'd need to check your specific app or phone model for voice command capabilities.
In Summary
You've now got the tools to take your mobile photography to the next level with RAW bracketing. Don't be afraid to experiment with different settings and techniques. Remember, practice makes perfect. As you continue to refine your skills, you'll see a dramatic improvement in your photos' quality and dynamic range. Keep pushing your creative boundaries, and soon you'll be capturing professional-level images right from your smartphone. Happy shooting!
Leave a Reply