To master time-lapse photography on your mobile device, start by understanding the basics: interval, duration, and frame rate. Choose a suitable app like Hyperlapse or Lapse It that offers manual controls and stabilization features. Secure your phone on a tripod or stable surface, and select a location with dynamic subjects like moving clouds or bustling cityscapes. Experiment with composition techniques, adjust camera settings for consistent exposure, and manage battery life effectively. After capturing, edit your footage using apps like LumaFusion or KineMaster to enhance the final product. Share your creations on social media platforms to engage your audience. With practice, you'll reveal the full potential of mobile time-lapse photography.
Understanding Time-Lapse Photography Basics

Time-lapse photography condenses hours, days, or even months of footage down into a short, enchanting video. It's a technique that captures the passage of time by taking photos at set intervals and then playing them back at a faster speed. This creates the illusion of time moving quickly, allowing you to observe slow processes in a matter of seconds.
To create a time-lapse, you'll need to take into account three key elements: interval, duration, and frame rate. The interval is how often you take a photo, ranging from seconds to hours. Duration refers to how long you'll be capturing images. Frame rate determines how many photos will be shown per second in the final video.
Choose your subject carefully. Ideal subjects for time-lapse include moving clouds, blooming flowers, or bustling cityscapes. Stability is essential, so use a tripod or stable surface to keep your mobile device steady.
Exposure settings should remain consistent throughout the shoot to avoid flickering in the final video. Many mobile devices now offer built-in time-lapse modes, simplifying the process. However, third-party apps can provide more control over settings and post-processing options.
Choosing the Right Mobile App

When selecting a time-lapse app for your mobile device, you'll find numerous options available.
Look for popular apps like Lapse It, Hyperlapse, or Time Lapse Camera, which offer user-friendly interfaces and reliable performance.
Key features to evaluate include adjustable frame rates, exposure control, and the ability to export in various formats.
Popular Time-Lapse Apps
Diving into the world of time-lapse photography on your mobile device can be overwhelming with the plethora of apps available.
To help you navigate this landscape, here's a look at some popular time-lapse apps that stand out from the crowd.
For iOS users, Hyperlapse from Instagram offers a simple, user-friendly interface with impressive image stabilization. It's free and perfect for beginners.
Lapse It, available on both iOS and Android, provides more advanced features like custom frame rates and filters.
Android users might prefer Framelapse, which offers interval control and the ability to create long-duration time-lapses.
TimeLapse Camera is another solid Android option, featuring exposure and white balance controls.
If you're looking for cross-platform compatibility, consider Microsoft Hyperlapse. It works on both iOS and Android, offering smooth results and the ability to speed up existing videos.
For more professional results, FilmicPro (iOS and Android) is a top choice.
While it's not exclusively for time-lapses, its advanced controls and high-quality output make it a favorite among mobile filmmakers.
Key App Features
Now that you're familiar with some popular time-lapse apps, let's focus on the key features you should consider when choosing the right one for your needs.
Look for apps that offer manual control over camera settings like ISO, shutter speed, and white balance. This flexibility allows you to adapt to various lighting conditions and achieve your desired aesthetic.
Interval settings are vital; opt for apps that let you adjust the time between shots. Some apps offer preset intervals, while others allow custom durations.
Frame rate control is equally important, as it determines the speed of your final video.
Consider apps with built-in stabilization features to compensate for slight movements during long shoots.
Look for exposure ramping capabilities, which gradually adjust exposure as lighting conditions change throughout your time-lapse.
Post-processing tools within the app can be a significant advantage. Features like color grading, filters, and the ability to add music can enhance your final product.
Setting Up Your Smartphone

You'll need to start by selecting an appropriate time-lapse app for your smartphone, considering factors like user interface, features, and compatibility with your device.
Once you've installed the app, it's essential to find a stable surface or use a tripod to secure your phone, ensuring it remains perfectly still throughout the recording process.
Choose the Right App
Choosing the right app is vital for successful time-lapse photography on your smartphone. While many devices come with built-in time-lapse features, third-party apps often offer more advanced options and greater control over your shots.
When selecting an app, consider factors like interval settings, exposure control, and output format. Look for apps that allow you to adjust the time between shots and the total duration of your time-lapse. Some popular options include Lapse It, Hyperlapse, and Time Lapse Camera.
Pay attention to the app's interface and ease of use. You'll want something intuitive that doesn't require extensive setup time in the field. Check if the app offers features like motion stabilization, which can be critical for handheld time-lapses.
Consider the output quality as well. Some apps compress files heavily, while others allow for high-resolution exports. If you plan to edit your time-lapse later, look for apps that save individual frames rather than just the final video.
Lastly, read user reviews and try free versions before committing to a paid app. This way, you'll guarantee the app meets your specific needs and works well with your device.
Secure Phone Placement
Proper phone placement is essential for capturing smooth, professional-looking time-lapse videos. To achieve stability, invest in a sturdy tripod designed for smartphones. Look for one with adjustable legs and a reliable phone mount. If you don't have a tripod, improvise with everyday objects like books or rocks to prop up your device.
Choose a location that's safe from accidental bumps or environmental factors. Avoid placing your phone near busy walkways or in areas with strong winds. If you're shooting outdoors, consider using a waterproof case for protection against unexpected rain.
Ensure your phone is fully charged or connected to a portable power bank, as time-lapse recordings can drain your battery quickly. Clean your camera lens thoroughly before starting to prevent smudges or dust from ruining your footage.
Frame your shot carefully, leaving room for movement within the frame. Use your phone's grid feature to align elements and create a balanced composition. If possible, lock your phone's exposure and focus to maintain consistency throughout the time-lapse.
Selecting the Perfect Location

The location-scouting process is essential for creating enchanting time-lapse photography on your mobile device. Start by identifying subjects that undergo noticeable changes over time, such as bustling cityscapes, blooming flowers, or shifting cloud patterns. Consider the movement and lighting conditions throughout your intended shooting period.
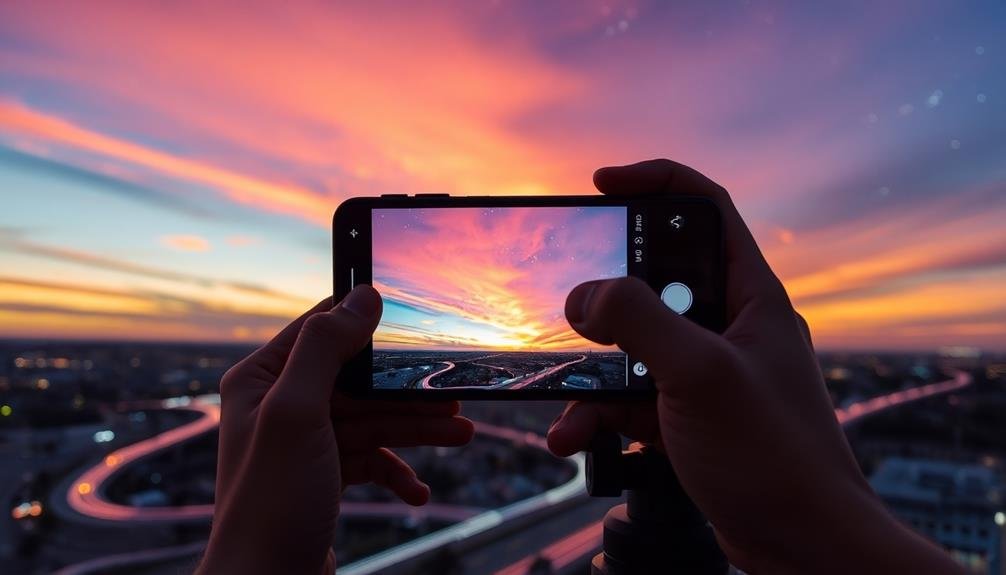
Look for spots with unobstructed views and minimal interference from passersby. Elevated positions often provide excellent vantage points for capturing wide scenes. If you're shooting urban environments, rooftops, bridges, or high-rise buildings can offer unique perspectives.
For nature shots, seek out clearings with open skies or vantage points overlooking valleys or coastlines. Pay attention to the sun's path and how it affects your chosen location. Golden hour lighting can add warmth and depth to your time-lapse, while dramatic cloud movements can create stunning effects.
Don't shy away from challenging weather conditions; storms or fog can produce enchanting results. Lastly, verify you have permission to shoot at your chosen location, especially if it's private property or requires special access.
Scout multiple locations in advance to have backup options in case of unforeseen circumstances.
Composition Techniques for Time-Lapse

With your location secured, it's time to focus on composition techniques that will elevate your time-lapse photography. The Rule of Thirds remains a powerful tool in time-lapse, helping you create balanced and visually appealing scenes. Place key elements along the grid lines or at their intersections to draw the viewer's eye.
Consider the movement within your frame; position static elements to anchor the shot while allowing dynamic elements to flow through the composition. Foreground interest adds depth to your time-lapse, creating a sense of scale and perspective. Include objects in the foreground to frame your main subject or guide the viewer's gaze.
Leading lines are particularly effective in time-lapse, as they can direct attention to the changing elements in your scene. To create compelling imagery, consider these composition techniques:
- Frame a bustling city street with overhanging tree branches
- Capture a sunset behind a silhouetted mountain range
- Position a stationary rock formation in the foreground of a moving tide
- Use architectural elements to frame a changing sky
- Align a winding road or river to lead the eye through a landscape
Adjusting Camera Settings

When setting up your mobile time-lapse, you'll need to make essential adjustments to your camera settings.
Start by selecting an appropriate frame rate, which determines the speed and smoothness of your final video.
Next, fine-tune your exposure and focus control to guarantee consistent image quality throughout the sequence, and explore interval timing options to set the frequency of shots based on your subject's movement speed.
Frame Rate Selection
Adjusting frame rate in time-lapse photography lets you control the speed and smoothness of your final video.
When selecting a frame rate, consider the subject you're capturing and the desired effect. For slow-moving subjects like clouds or sunsets, a lower frame rate of 1-5 frames per second (fps) can create a dreamy, ethereal look.
For faster-moving subjects like city traffic or crowds, opt for higher frame rates of 15-30 fps to maintain smooth motion.
Experiment with different frame rates to achieve various effects:
- A bustling city street transforms into a river of light streaks
- Blooming flowers unfurl their petals in a graceful dance
- Shadows creep across a landscape like living entities
- Stars wheel overhead in a cosmic ballet
- A construction site evolves from foundation to skyscraper in seconds
Exposure and Focus Control
Mastery of exposure and focus control is vital for creating stunning time-lapse videos on your mobile device. You'll need to adjust these settings manually to maintain consistency throughout your sequence. Start by locking your exposure and focus to prevent unwanted shifts as lighting conditions change.
For exposure, use your device's manual controls to set the ISO, shutter speed, and aperture (if available). Choose a balanced exposure that works for the entire duration of your time-lapse. If you're shooting a day-to-night shift, consider using the auto exposure bracketing feature to capture a wider dynamic range.
Focus is equally important. Use manual focus to guarantee your subject remains sharp throughout the sequence. If your scene has multiple depth layers, opt for a narrower aperture to increase the depth of field.
Here's a quick guide to help you adjust these settings:
| Setting | Low Light | Bright Light |
|---|---|---|
| ISO | Higher (800-1600) | Lower (100-400) |
| Shutter | Slower (1/30-1/60) | Faster (1/125-1/250) |
| Aperture | Wider (f/2.8-f/4) | Narrower (f/8-f/11) |
| Focus | Manual, wider DOF | Manual, narrow DOF |
Interval Timing Options
The key to creating enchanting time-lapse videos lies in selecting the right interval timing. Your mobile device's time-lapse feature typically offers preset intervals, but many advanced apps allow you to customize this setting.
Consider the speed of your subject when choosing an interval. Faster-moving subjects like clouds or traffic require shorter intervals, while slower processes like plant growth need longer gaps between shots.
Experiment with different intervals to achieve your desired effect. A shorter interval creates smoother motion but requires more storage space and battery life. Longer intervals can produce dramatic jumps in action but might miss vital moments. Most scenes work well with intervals between 1-5 seconds, but don't hesitate to push boundaries for unique results.
When selecting your interval, visualize the following scenarios:
- Bustling city streets transforming into rivers of light
- Flowers blossoming in a colorful dance
- Shadows creeping across a landscape like living entities
- Stars wheeling overhead in cosmic ballet
- Construction projects rising from the ground like magic
Remember to factor in your final video length when choosing an interval. Longer recordings with shorter intervals will result in more footage to edit later.
Balance your creative vision with practical considerations to capture the perfect time-lapse sequence.
Stabilizing Your Device

Stable footage is paramount for creating stunning time-lapse videos on your mobile device. To achieve this, you'll need to keep your phone as still as possible throughout the entire recording process.
Start by investing in a sturdy tripod designed for smartphones. These come in various sizes and styles, from compact tabletop models to full-sized options for outdoor shoots.
If you don't have a tripod, improvise with everyday objects. Lean your phone against a stable surface like a stack of books or a window ledge. Use a makeshift stand by propping it up with a water bottle or cup. For added stability, use your phone's case to create a wider base.
When shooting outdoors, consider wind and vibrations. Shield your setup from gusts using a windbreak or by positioning yourself as a barrier. On uneven terrain, use small objects to level your tripod.
If you're shooting from a moving vehicle, use a suction cup mount or a specialized car mount to minimize shaking.
Managing Battery Life

Longevity is essential when capturing time-lapse videos on your mobile device. To guarantee your phone doesn't die mid-shoot, implement these battery-saving strategies.
First, dim your screen brightness or enable auto-brightness. Next, turn off unnecessary features like Wi-Fi, Bluetooth, and GPS. If possible, switch to airplane mode to conserve even more power.
Consider using an external battery pack for extended shooting sessions. These portable chargers can greatly extend your device's runtime.
Additionally, close all background apps that aren't essential for your time-lapse capture. This reduces CPU usage and preserves battery life.
To create a vivid mental image of your time-lapse setup, imagine:
- Your phone securely mounted on a tripod
- A sleek external battery pack connected via a short cable
- The screen dimmed to its lowest comfortable setting
- All unnecessary apps closed, leaving only the camera app open
- A small LED indicator showing airplane mode is active
Editing Your Time-Lapse Footage

Once you've captured your time-lapse footage, it's time to polish it into a stunning final product. Most mobile devices come with basic video editing apps, but you'll want to explore more advanced options for professional-looking results. Start by trimming your footage to remove any unnecessary segments at the beginning or end.
Next, adjust the playback speed to achieve your desired effect. Slower speeds can create a dreamy atmosphere, while faster ones convey energy and urgency. Don't forget to add transitions between scenes if you've stitched multiple time-lapses together.
Reflect on enhancing your footage with color correction and filters. Many apps offer preset looks, but don't be afraid to fine-tune manually for a unique style. Audio can also elevate your time-lapse; choose a fitting soundtrack or ambient sounds to complement the visuals.
Here's a quick guide to popular mobile editing apps:
| App Name | Platform | Key Features | Ease of Use | Price |
|---|---|---|---|---|
| LumaFusion | iOS | Professional-grade | Moderate | Paid |
| KineMaster | iOS/Android | Versatile | Easy | Freemium |
| Adobe Premiere Rush | iOS/Android | Cross-platform | Moderate | Subscription |
| InShot | iOS/Android | User-friendly | Easy | Freemium |
| Filmmaker Pro | iOS | Advanced tools | Moderate | Paid |
Experiment with different apps to find the one that best suits your editing style and needs.
Sharing on Social Media Platforms

After crafting your time-lapse masterpiece, you'll want to share it with the world. Social media platforms offer diverse options for showcasing your work. Instagram's 60-second limit suits most time-lapses perfectly, while TikTok's vertical format can add a unique perspective. Facebook and YouTube allow longer videos, ideal for extended sequences or compilations.
Before posting, consider optimizing your time-lapse for each platform. Adjust aspect ratios, add captions, or include hashtags to increase visibility. Don't forget to watermark your work to protect your content.
When sharing, engage your audience by:
- Explaining the setup process
- Revealing the total real-time duration
- Highlighting interesting elements that appear
- Sharing fun facts about the subject
- Asking viewers questions about what they observe
Remember to interact with comments and respond to questions about your technique. This engagement can help build a following and inspire others to try time-lapse photography.
Consider joining photography communities on these platforms to connect with fellow enthusiasts, share tips, and gain inspiration for future projects. By effectively sharing your time-lapses, you'll not only showcase your skills but also contribute to the vibrant mobile photography community.
Advanced Time-Lapse Techniques

Ready to take your mobile time-lapse photography to the next level? Advanced techniques can elevate your time-lapse videos from good to extraordinary.
Start by experimenting with motion control. Use a motorized slider or a rotating platform to add smooth camera movement during your time-lapse. This creates a dynamic and cinematic feel to your footage.
Next, try day-to-night shifts, also known as the "holy grail" of time-lapse. Begin shooting in daylight and continue through sunset into the night. You'll need to manually adjust your camera settings as the light changes, or use a specialized app that can handle automatic exposure ramping.
Explore creative framing techniques like shooting through objects in the foreground or using reflections to add depth to your compositions.
Don't forget about post-processing; use software to stabilize shaky footage, remove flicker, and color-grade your time-lapse for a polished look.
Frequently Asked Questions
Can Time-Lapse Photography Damage My Smartphone's Camera Sensor?
Time-lapse photography won't damage your smartphone's camera sensor. It's no different from regular photo-taking regarding sensor stress. However, you should be mindful of battery drain and potential overheating during extended time-lapse sessions.
How Much Storage Space Does a Typical Time-Lapse Video Require?
Storage space for a time-lapse video varies, but you'll typically need 1-2GB for a few minutes of footage. It depends on your settings, like resolution and frame rate. You can always adjust these to save space.
Are There Legal Considerations When Shooting Time-Lapse in Public Spaces?
You'll need to be aware of privacy laws and property rights when shooting time-lapses in public. Don't capture identifiable individuals without consent, and be cautious of restricted areas. Always respect local regulations and obtain permits if necessary.
Can I Create Time-Lapse Videos Using My Smartphone's Front-Facing Camera?
Yes, you can create time-lapse videos using your smartphone's front-facing camera. It's a great way to capture selfie time-lapses or document personal transformations. Many camera apps offer this feature, so you'll easily find options to try.
How Do Weather Conditions Affect Time-Lapse Photography on Mobile Devices?
Weather greatly impacts your mobile time-lapses. Rain can damage your device, while changing light conditions affect exposure. Wind may shake your phone, causing blurry footage. You'll need to adjust settings and stabilize your setup accordingly.
In Summary
You've now got the tools to create stunning time-lapse videos with your mobile device. Don't be afraid to experiment with different subjects, settings, and techniques. Remember to keep your phone stable, plan your shots, and be patient. With practice, you'll capture breathtaking sequences that compress hours into seconds. Share your creations and inspire others. The world of time-lapse photography is at your fingertips – go out and make time stand still!


Leave a Reply