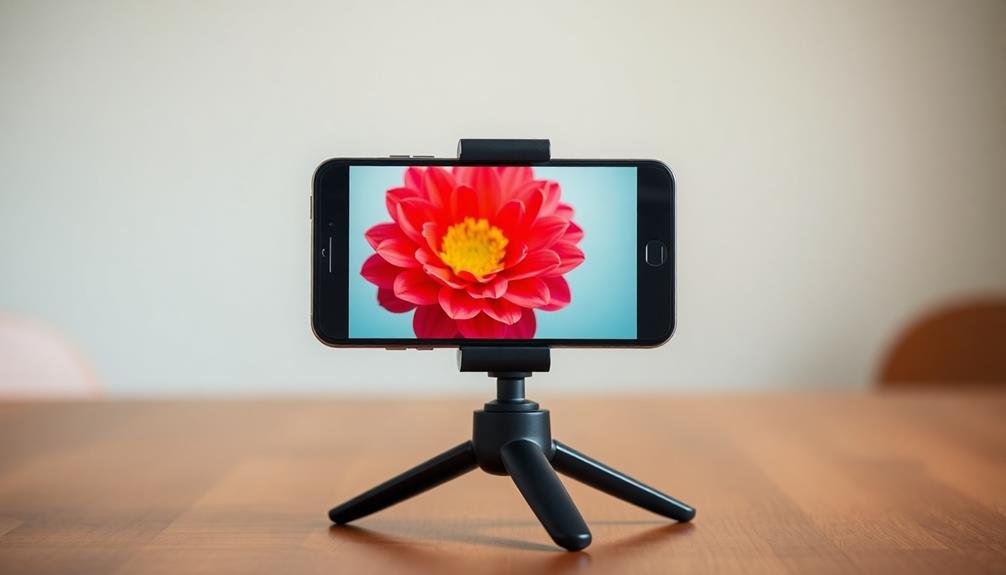
Compact tabletop tripods are essential tools for capturing stunning close-up shots with your smartphone. They offer portability, stability, and versatility, allowing you to set up on various surfaces. When choosing a tripod, consider factors like material, leg sections, and camera compatibility. To use, simply extend the legs, adjust the angles, and attach your phone securely. Many models come with adjustable heads for precise framing. These tripods enhance your ability to control focus and exposure, especially in challenging lighting conditions. With the right techniques, you'll be able to create professional-looking macro photos and stable videos. Dive deeper to reveal the full potential of your tabletop tripod setup.
Benefits of Tabletop Tripods

Why should you consider a tabletop tripod? These compact tools offer numerous advantages for photographers and content creators. First, they're incredibly portable, easily fitting into your bag or pocket. This makes them ideal for travel or spontaneous shooting sessions.
Tabletop tripods provide stability for your camera or smartphone, reducing camera shake and resulting in sharper images. They're particularly useful for low-light situations or when using slower shutter speeds. You'll also find them invaluable for self-portraits, group shots, and time-lapse photography.
These mini tripods are versatile, working on various surfaces like tables, rocks, or even car hoods. They're perfect for macro photography, allowing you to get close to your subject while maintaining a steady shot. Many models feature flexible legs, enabling you to wrap them around objects for unique angles.
Tabletop tripods are cost-effective compared to full-size tripods, making them an excellent choice for beginners or as a backup option. They're also ideal for vlogging, providing a stable platform for your camera during indoor shoots or outdoor adventures.
With a tabletop tripod, you'll expand your creative possibilities and improve your overall image quality.
Choosing the Right Tabletop Tripod

When selecting a tabletop tripod, you'll need to balance stability against portability.
Consider how you'll use the tripod and whether you prioritize a steadier shot or easier transport.
The material and construction of the tripod will greatly influence both its stability and weight, so examine these factors carefully in your decision-making process.
Stability vs. Portability
Choosing the perfect tabletop tripod often boils down to a balancing act between stability and portability. You'll need to take into account your specific needs and shooting conditions to make the best decision. Heavier tripods generally offer more stability but can be cumbersome to carry, while lightweight options are easy to transport but may sacrifice some steadiness.
Here's a quick comparison of stability and portability features:
| Feature | High Stability | High Portability | Balanced Option |
|---|---|---|---|
| Weight | 1-2 lbs | 0.5 lbs or less | 0.5-1 lb |
| Material | Metal | Plastic or carbon fiber | Aluminum |
| Leg Sections | 2-3 | 4-5 | 3-4 |
| Max Height | 12-18 inches | 6-10 inches | 10-14 inches |
Take into account your shooting environment when making your choice. If you're mostly working indoors or in calm conditions, a lighter tripod might suffice. For outdoor use or windy situations, prioritize stability. Don't forget to factor in your camera's weight and any additional accessories you'll be using. Ultimately, the best tabletop tripod for you will be one that meets your stability requirements while still being convenient to carry and set up.
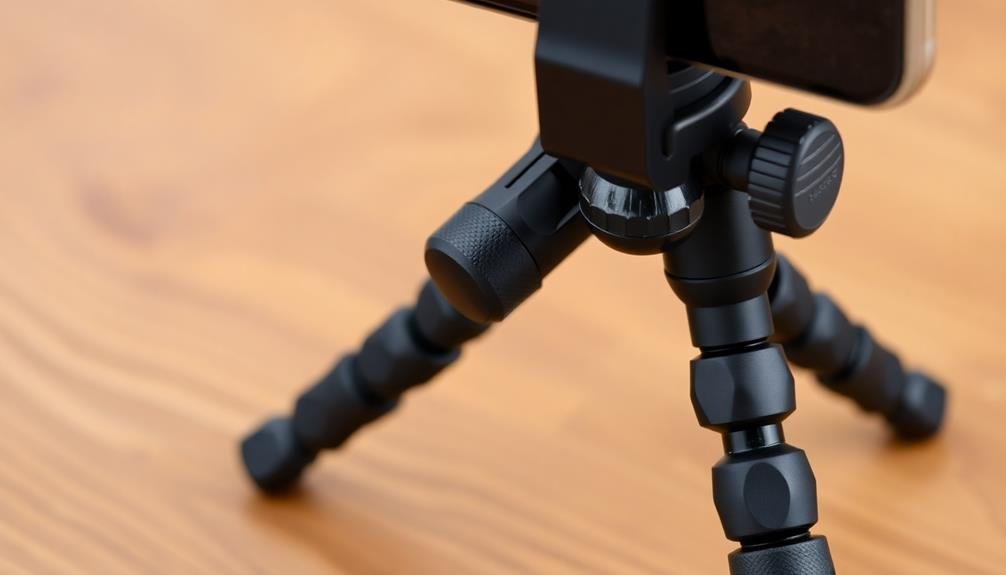
Material and Construction
The materials and construction of a tabletop tripod play a key role in its performance and durability. When choosing a compact tripod, you'll encounter options made from various materials, each with its own advantages.
Aluminum is a popular choice, offering a balance between weight and strength. It's resistant to corrosion and provides good stability.
Plastic tripods are lightweight and affordable but may lack the sturdiness of metal options. For premium quality, look for carbon fiber tripods. They're incredibly light yet robust, making them ideal for travel.
Pay attention to the leg construction. Multi-section legs offer greater compactness, but fewer sections generally mean more stability.
Check the locking mechanisms – twist locks are quick to adjust, while flip locks provide a secure hold.
The tripod head is essential for precise adjustments. Ball heads offer flexibility, while pan-tilt heads provide more controlled movements.
For smartphone use, verify the head includes a reliable phone mount.
Examine the build quality of joints and connections. Smooth operation and tight tolerances indicate good construction.
Look for rubber or spiked feet for versatile grip on different surfaces.
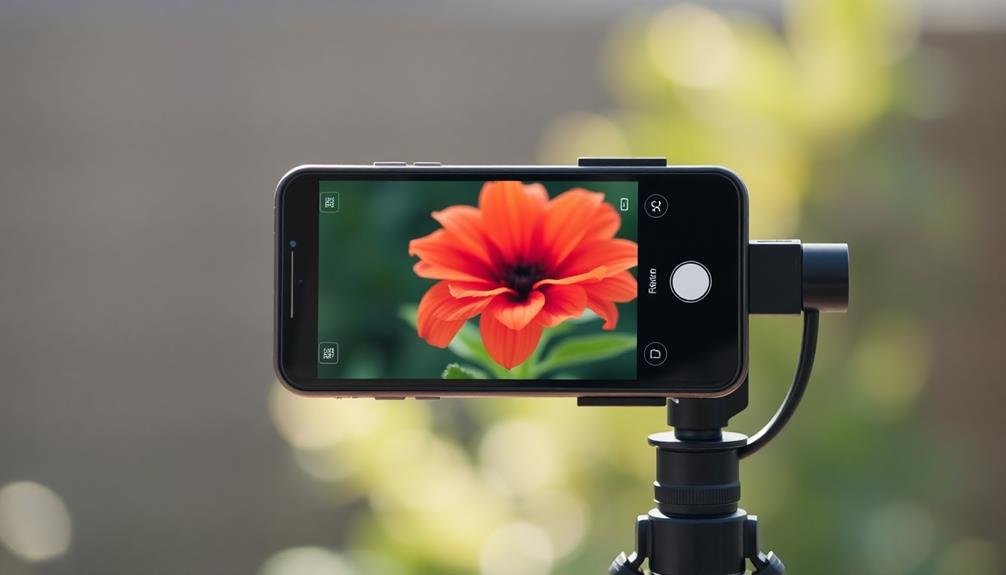
Setting Up Your Tabletop Tripod

Setting up your tabletop tripod is a straightforward process that'll have you ready to shoot in no time. Start by extending the legs to their full length, making certain they're locked securely in place. If your tripod has adjustable leg angles, set them according to your desired height and stability needs.
Next, attach your camera or smartphone to the tripod head. Most tabletop tripods come with a universal 1/4-inch screw mount, but some may include specialized phone adapters. Tighten the mount securely to prevent any unwanted movement during shooting.
| Step | Action | Tips |
|---|---|---|
| 1 | Extend legs | Make certain they're locked |
| 2 | Adjust leg angles | Consider stability |
| 3 | Attach device | Use proper adapter |
Once your device is mounted, adjust the tripod head to achieve the desired angle and composition. Many tabletop tripods feature ball heads, allowing for smooth, multi-directional adjustments. Fine-tune your framing by making small tweaks to the leg positions and head orientation.
Phone Attachment Methods
With your camera or smartphone securely mounted, it's important to understand the various phone attachment methods available for tabletop tripods.
Most compact tripods come with a standard 1/4-inch screw mount, which is compatible with many phone adapters and holders.
One popular option is the spring-loaded phone clamp. It's quick to attach and detach, adjusting to fit different phone sizes.
These clamps often have rubber padding to protect your device and provide a firm grip.
Another method is the universal smartphone mount, which uses an adjustable bracket to hold your phone.
These mounts typically offer more stability and can accommodate phones with cases.
For a more permanent solution, you might consider a dedicated phone case with built-in tripod attachment points.
These cases allow for seamless integration with your tripod but are specific to your phone model.
Some tabletop tripods come with Bluetooth remote controls, enabling you to trigger your phone's camera from a distance.
This feature is particularly useful for group shots or self-portraits.
When choosing an attachment method, consider factors like ease of use, stability, and compatibility with your specific phone model and case.
Adjusting for Optimal Angles

Mastering angle adjustments is essential for getting the perfect shot with your tabletop tripod. Most compact tripods offer multiple points of adjustment, allowing you to fine-tune your phone's position.
Start by adjusting the legs to create a stable base on your surface. Many models have extendable or bendable legs, letting you adapt to uneven terrain or achieve unique perspectives.
Next, focus on the ball head, which is typically found at the top of the tripod. This spherical joint allows for smooth rotation and tilt adjustments. Loosen the locking mechanism, position your phone as desired, then tighten it securely.
Some tripods feature pan-and-tilt heads instead, which offer separate controls for horizontal and vertical movements.
Don't forget about your phone's built-in camera features. Many smartphones allow you to adjust the field of view or use different lenses. Combine these options with your tripod's adjustability for maximum versatility.
For low-angle shots, try spreading the tripod legs wide and lowering the center column. Conversely, for overhead views, extend the legs fully and use the center column at its highest position.
With practice, you'll quickly learn how to achieve the ideal angle for any shot.
Lighting Considerations for Close-ups

While angle adjustments are key for composition, lighting can make or break your close-up shots. When using a compact tabletop tripod for phone close-ups, you'll need to pay extra attention to your lighting setup. Natural light is often your best friend, but it's not always available or sufficient for macro photography.
Consider investing in a small, portable LED light that can attach to your phone or tripod. These lights provide consistent illumination and can be adjusted to achieve the desired effect. You'll also want to experiment with different lighting angles to highlight textures and create depth in your images.
Here are some lighting techniques to try:
- Side lighting: Emphasizes texture and creates shadows
- Backlighting: Produces a glowing effect around your subject
- Diffused lighting: Softens harsh shadows and reduces glare
- Ring lighting: Provides even illumination for macro shots
Don't forget to use your phone's built-in features, such as exposure compensation and HDR mode, to fine-tune your lighting.
With practice, you'll learn to balance ambient light with artificial sources, creating stunning close-up images that showcase your subject's finest details.
Composition Tips for Tabletop Photography

Once you've set up your compact tabletop tripod and sorted out your lighting, it's time to focus on composition. Effective composition can elevate your tabletop photography from amateur to professional-looking. Consider the rule of thirds, leading lines, and symmetry when framing your shots. Experiment with different angles and perspectives to add depth and interest to your images.
Use props and backgrounds that complement your subject without overpowering it. Pay attention to negative space, as it can help draw attention to your main subject. Don't forget about color theory – use contrasting or complementary colors to create visually appealing images.
Here's a quick reference guide for composition techniques:
| Technique | Description | Best For |
|---|---|---|
| Rule of Thirds | Divide frame into 9 equal parts | Balance and interest |
| Leading Lines | Use lines to guide viewer's eye | Directing attention |
| Symmetry | Create mirror-like balance | Formal, structured look |
| Negative Space | Incorporate empty areas | Emphasizing subject |
| Framing | Use elements to frame subject | Focusing viewer's gaze |
Focus and Exposure Techniques
When using compact tabletop tripods, you'll want to master manual focus adjustments for precise control over your subject's sharpness.
Don't forget to experiment with exposure compensation settings to fine-tune the brightness of your images.
For scenes with high contrast, try using HDR mode to capture a wider range of tones and details in your tabletop photography.
Manual Focus Adjustments
Manual focus adjustments on compact tabletop tripods can take your photography up to the next level.
When using a compact tripod for phone close-ups, you'll have more control over your image's sharpness. Unlike autofocus, manual focus allows you to precisely pinpoint the area you want in focus, especially useful for macro shots or low-light situations.
To make the most of manual focus:
- Use your phone's manual focus feature or a third-party camera app
- Zoom in on the screen to guarantee accurate focus
- Adjust focus slowly and deliberately
- Use focus peaking if available on your device
Exposure Compensation Settings
Exposure compensation settings can make or break your photos when using compact tabletop tripods. These settings allow you to adjust the brightness of your images, overriding your camera's automatic exposure.
When shooting close-ups, proper exposure becomes even more critical due to the limited depth of field and potential lighting challenges.
To use exposure compensation effectively, start by evaluating your scene. If your subject appears too dark or too bright in the preview, adjust the exposure accordingly. Most smartphones and cameras let you swipe up or down on the screen to increase or decrease exposure. For more precise control, look for a +/- icon in your camera app.
Experiment with different exposure levels to achieve the desired effect. Slightly overexposing can help brighten dark subjects, while underexposing can preserve highlights in bright scenes.
When shooting reflective or light-colored objects, you'll often need to decrease exposure to maintain detail. Conversely, dark subjects may require increased exposure to reveal texture and color.
HDR Mode Benefits
HDR mode releases new possibilities when using compact tabletop tripods. This feature allows you to capture a wider range of light and dark tones in a single image, resulting in photos with enhanced detail and dynamic range.
When you're shooting close-ups of small objects or scenes with high contrast, HDR mode can make a significant difference in the final result.
By utilizing HDR mode with your compact tabletop tripod, you'll be able to:
- Capture more details in shadows and highlights
- Reduce blown-out areas in bright scenes
- Enhance color accuracy and vibrancy
- Create more balanced exposures in challenging lighting conditions
To make the most of HDR mode, guarantee your tripod is stable and your subject is stationary. This technique works particularly well for still life photography, product shots, and macro images.
You'll notice improved results in scenes with backlighting or high contrast, such as sunsets or interiors with bright windows.
Remember that HDR mode typically combines multiple exposures, so it's essential to keep your camera steady throughout the process.
Your compact tabletop tripod plays a key role in achieving sharp, well-aligned HDR images, especially when shooting in low light conditions or with longer exposure times.
Popular Tabletop Tripod Models

Several popular tabletop tripod models have gained recognition among photographers for their versatility and compact design.
The Manfrotto PIXI stands out for its sturdy build and quick-release plate, making it ideal for both smartphones and lightweight cameras. It's easy to set up and offers a ball head for smooth adjustments.
If you're looking for flexibility, the Joby GorillaPod 3K Kit is hard to beat. Its bendable legs allow you to wrap it around objects or position it on uneven surfaces. It supports heavier gear and comes with a ball head for precise framing.
For ultra-portability, consider the Pedco UltraPod II. It's lightweight, folds flat, and features a Velcro cinch strap to secure it to poles or tree branches.
The Vanguard VESTA TT 140 offers a more traditional design with extendable legs and a pan head for smooth panning shots.
If you're on a budget, the Amazon Basics Lightweight Mini Tripod provides basic functionality at an affordable price. It's compact and includes a ball head for easy positioning.
Remember to check the weight capacity and compatibility with your specific device when choosing a tabletop tripod.
DIY Tabletop Tripod Solutions

For photographers on a budget or those who enjoy DIY projects, creating your own tabletop tripod can be a fun and cost-effective solution.
You'll need some basic materials like wood, metal, or plastic, along with screws, nuts, and bolts. Start by designing a simple three-legged structure that's stable and can support your camera or smartphone.
Consider these DIY tabletop tripod ideas:
- Wooden tripod: Use three identical wooden dowels or small planks as legs, joined at the top with a screw or bolt.
- PVC pipe tripod: Cut PVC pipes to size and use connectors to create a lightweight, adjustable structure.
- Repurposed item tripod: Transform everyday objects like clothespins, binder clips, or even LEGO bricks into a functional tripod.
- 3D printed tripod: Design and print your own custom tripod parts for a perfect fit.
When building your DIY tripod, focus on stability and adjustability.
Guarantee the legs are sturdy and can be locked in place. Add a mount or adapter to securely hold your device.
With some creativity and basic tools, you can craft a unique, functional tabletop tripod that suits your specific needs and budget.
Maintenance and Care Tips

To keep your compact tabletop tripod in top condition, you'll need to clean it regularly and store it properly.
You can easily remove dust and debris from your tripod using a soft brush or microfiber cloth, paying special attention to the joints and moving parts.
When not in use, store your tripod in a padded case or bag to protect it from moisture, impacts, and extreme temperatures.
Cleaning Your Tripod
Tripod maintenance is essential for keeping your compact tabletop tripod in top condition. Regular cleaning not only extends its lifespan but also guarantees smooth operation during photo shoots.
To clean your tripod effectively, start by disassembling it as much as possible, following the manufacturer's instructions.
Use a soft brush or compressed air to remove loose dirt and dust from all surfaces, paying special attention to the leg joints and locking mechanisms. For stubborn grime, dampen a microfiber cloth with a mild soap solution and gently wipe down the tripod's components.
Avoid using harsh chemicals or abrasive materials that could damage the finish or moving parts.
After cleaning, make sure to dry all parts thoroughly before reassembling your tripod.
Here's a quick checklist for tripod cleaning:
- Remove loose dirt with a brush or compressed air
- Clean surfaces with a damp microfiber cloth
- Pay extra attention to joints and locking mechanisms
- Dry all parts completely before reassembly
Don't forget to lubricate moving parts with a small amount of silicone-based lubricant to keep them functioning smoothly.
Proper Storage Techniques
After cleaning your compact tabletop tripod, proper storage is essential for maintaining its condition and functionality. Store your tripod in a cool, dry place away from direct sunlight and extreme temperatures. If your tripod came with a carrying case, use it for protection against dust and minor impacts.
Before storage, confirm all moving parts are fully dried to prevent rust or corrosion. Loosen any tension knobs or locks to relieve stress on the mechanism. If your tripod has a center column, retract it fully. Collapse the legs to their shortest length, but don't force them if there's resistance.
For long-term storage, consider applying a light coat of silicone lubricant to metal parts to prevent oxidation. If you're storing multiple tripods, avoid stacking them to prevent scratches or dents. Instead, store them vertically or hang them using padded hooks.
Keep your tripod away from chemicals, solvents, or other corrosive substances. If you're traveling with your tripod, use padding or bubble wrap for extra protection.
Regularly inspect your stored tripod for signs of wear or damage, addressing any issues promptly to confirm it's always ready for your next photo session.
Frequently Asked Questions
Can Tabletop Tripods Be Used With DSLR Cameras?
Yes, you can use tabletop tripods with DSLR cameras. They're versatile and support various camera types. However, confirm the tripod's weight capacity matches your DSLR's weight. For heavier setups, you'll want a sturdier tabletop tripod.
Are Tabletop Tripods Suitable for Outdoor Use on Uneven Surfaces?
While you can use tabletop tripods outdoors, they're not ideal for uneven surfaces. You'll struggle to keep them stable on rocky or sloped terrain. For outdoor shoots on varied landscapes, you're better off with a full-sized tripod.
How Much Weight Can a Typical Tabletop Tripod Support?
You'll find most tabletop tripods can support 1-3 pounds, but it varies by model. Some sturdier options hold up to 5 pounds. Always check the manufacturer's specifications for your specific tripod's weight capacity before use.
Can Tabletop Tripods Be Used for Video Recording or Live Streaming?
Yes, you can use tabletop tripods for video recording and live streaming. They'll provide stability for your camera or smartphone, ensuring smooth footage. You'll find them especially useful for vlogging, product reviews, and online tutorials.
Are There Any Travel Restrictions for Carrying Tabletop Tripods on Airplanes?
You'll generally have no issues carrying tabletop tripods on planes. They're allowed in carry-on and checked luggage. However, it's always wise to check with your airline for any specific restrictions or size limitations they might have.
In Summary
You've now got the tools to capture stunning close-ups with your phone using a compact tabletop tripod. Remember to choose the right model, set it up properly, and experiment with angles and attachments. Don't forget to fine-tune your focus and exposure for the best results. Whether you opt for a popular brand or a DIY solution, your tabletop tripod will elevate your phone photography. Keep it clean and well-maintained, and you'll be ready for any close-up opportunity.

Leave a Reply