
Time-lapse plant growth fascinates mobile photographers because it reveals nature's hidden rhythms in stunning visual detail. You'll capture transformations invisible to the naked eye, compressing hours or days into seconds. This technique highlights processes like phototropism and circadian rhythms, fostering a deeper appreciation for plant life's complexity and beauty. With your smartphone, you can easily set up time-lapses to document entire growth cycles, from seed to bloom. It's a patience-testing but rewarding endeavor that combines technology with nature's wonders. By mastering lighting, plant selection, and camera positioning, you'll create mesmerizing footage that tells a unique story of life and growth. The possibilities for creativity are as limitless as nature itself.
Capturing Nature's Hidden Rhythms

Revealing the unseen dance of nature, time-lapse photography allows us to witness plant growth in a way our eyes can't normally perceive. As a mobile photographer, you have the power to capture these hidden rhythms, disclosing the secret life of plants in mesmerizing sequences.
By compressing hours, days, or even weeks into mere seconds, you'll expose the subtle movements and transformations that occur in the plant world. You'll see seedlings break through the soil, stems elongate, leaves unfurl, and flowers bloom in a graceful choreography.
This technique brings to light the intricate processes of phototropism, where plants bend towards light sources, and circadian rhythms that regulate their daily cycles.
To capture these moments, you'll need patience and planning. Set up your mobile device on a stable surface, ensuring consistent lighting and framing. Use time-lapse apps to automate the process, taking photos at regular intervals.
As you experiment with different subjects and timeframes, you'll develop a deeper appreciation for the complexity and beauty of plant life, sharing nature's hidden rhythms with the world through your lens.
Smartphone Time-Lapse Essentials

Mastering smartphone time-lapse photography requires a few vital tools and techniques.
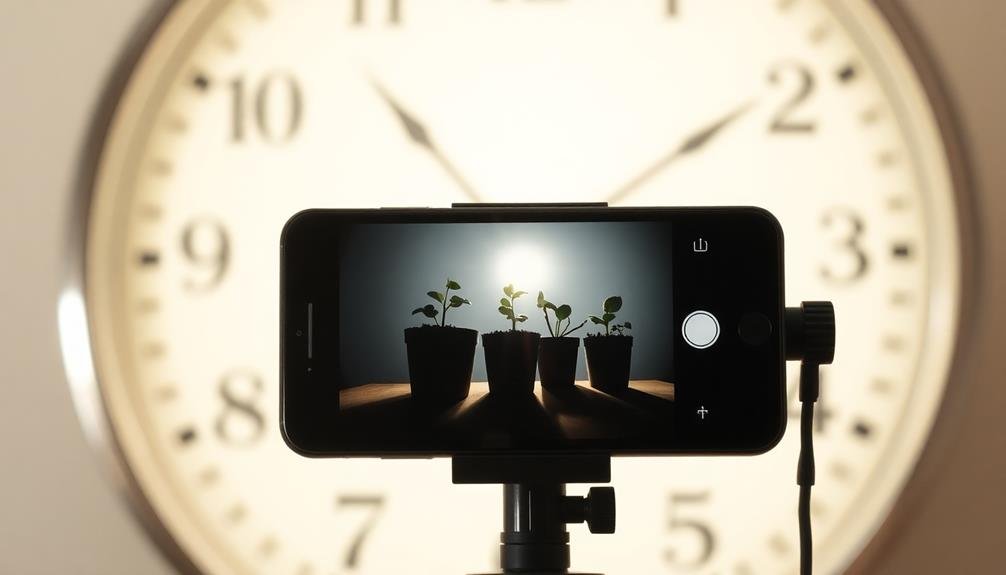
First, you'll need a sturdy tripod or phone mount to keep your device stable for extended periods. Look for adjustable options that allow you to position your phone at various angles.
Next, invest in a reliable time-lapse app. While most modern smartphones have built-in time-lapse features, third-party apps often offer more control over interval settings, exposure, and post-processing.
Lighting is essential. Consider using a small LED panel to maintain consistent illumination, especially for indoor plant growth sequences.
For outdoor shoots, plan your setup to account for changing natural light conditions.
Don't forget power management. Use a portable battery pack or make sure your phone is plugged in for longer shoots. Some photographers opt for older smartphones dedicated solely to time-lapse projects.
Lastly, experiment with composition. Try different angles and distances to capture the most compelling view of your plant's growth.
Remember to clean your lens regularly and check your setup daily to make certain everything's running smoothly.
With these essentials in place, you're ready to create stunning plant growth time-lapses.
Choosing the Right Plants

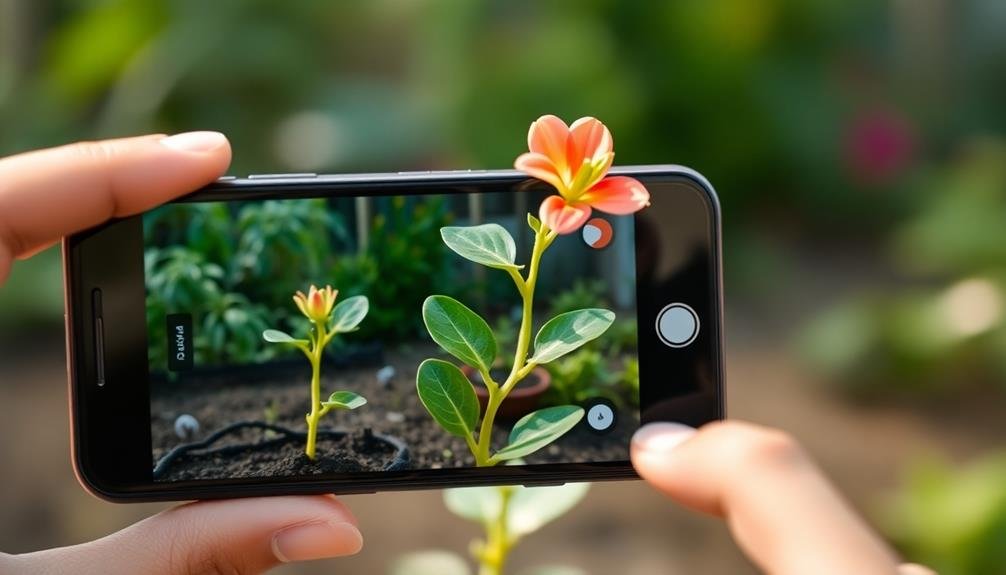
With your time-lapse setup ready, selecting the right plants is your next step. Choose fast-growing species that'll show visible changes within your filming timeframe. Sunflowers, beans, and peas are excellent options, often sprouting and growing rapidly. Succulents, while slower, offer interesting leaf movements and occasional dramatic blooms.
Consider your available space and lighting conditions. If you're working indoors, opt for plants that thrive in low-light environments like pothos or spider plants. For outdoor setups, select plants suited to your climate and season.
Remember, you'll need to keep your camera in place for days or weeks, so choose a location where your plants won't be disturbed.
Don't limit yourself to just one plant. Create a diverse composition with multiple species growing at different rates. This variety will add visual interest to your time-lapse.
Also, include plants with unique features like Venus flytraps or sensitive plants that react to touch. Their movements will create engaging sequences in your final video.
Ideal Lighting Conditions

When setting up your time-lapse plant growth project, you'll need to decide between natural and artificial light sources.
You should aim for consistent illumination throughout the recording period, which can be challenging with natural light but more controllable with artificial setups.
To capture the best footage, you'll want to position your light source to minimize harsh shadows that could obscure plant details.
Natural vs. Artificial Light
Countless photographers debate the merits of natural versus artificial light when capturing time-lapse plant growth.
Natural light offers authenticity and a dynamic range that's hard to replicate artificially. You'll find that sunlight changes throughout the day, creating subtle variations in color temperature and intensity. This can add depth and character to your time-lapse sequences, making them feel more organic and true-to-life.
However, artificial light provides consistency and control. You can maintain steady illumination 24/7, ensuring your plants receive ideal light for growth and your camera captures uniform exposures. LED grow lights are popular choices, offering customizable spectrums that can enhance specific plant characteristics or growth stages.
When choosing between natural and artificial light, consider your project's goals. If you're aiming for a realistic representation of plant growth in a natural setting, opt for sunlight.
But if you need precise control over lighting conditions or want to manipulate growth rates, artificial light is your best bet. Many photographers combine both light sources, using artificial light to supplement natural light during cloudy days or to extend "daylight" hours for faster plant growth and more dramatic time-lapse results.
Consistent Illumination Techniques
Achieving consistent illumination is essential for creating stunning time-lapse plant growth videos. You'll want to set up a controlled lighting environment to guarantee your footage looks seamless and professional. Start by choosing a dedicated space where you can maintain constant light conditions throughout your shoot.
Consider using LED grow lights, which offer several advantages. They're energy-efficient, produce less heat, and allow you to adjust color temperature and intensity. Position your lights at a fixed distance from the plant, guaranteeing even coverage without harsh shadows. You can use diffusers to soften the light and reduce glare on leaves.
To mimic natural light cycles, use a timer to automate your lighting schedule. This will help maintain the plant's natural growth patterns while providing consistent illumination for your time-lapse. Remember to block out any external light sources that could interfere with your setup.
For longer shoots, you might need to adjust your lights as the plant grows taller. Plan for this by using adjustable mounts or stands that allow you to raise the lights gradually.
Avoiding Harsh Shadows
Shadows can make or break your time-lapse plant growth video. Harsh shadows can create distracting patterns and inconsistent lighting, detracting from the main focus of your plant's growth. To avoid these issues, you'll want to create soft, diffused light that minimizes harsh shadows.
One effective method is to use a light tent or softbox to envelop your plant in even, gentle illumination. If you're shooting outdoors, choose an overcast day or a location with natural shade. For indoor setups, position your light source at a 45-degree angle to the plant, which helps reduce shadows while maintaining depth.
Consider these tips to further minimize harsh shadows:
- Use multiple light sources to fill in dark areas
- Employ reflectors to bounce light back onto the plant
- Experiment with translucent materials to diffuse direct light
- Adjust your camera settings to compensate for low light conditions
Camera Setup and Positioning

When setting up your time-lapse plant growth project, you'll need to carefully consider your camera's placement.
Position your camera to capture the full growth cycle while maintaining a stable frame throughout the duration.
You'll want to guarantee your composition allows for the plant's expected growth without needing to adjust the camera mid-project.
Optimal Camera Placement
Proper camera placement is essential for capturing stunning time-lapse plant growth footage. You'll want to position your camera to get the best view of the plant's development without obstructing its growth.
Consider the plant's expected height and spread when choosing your camera angle. A slightly elevated, angled view often works well, as it allows you to capture both vertical growth and leaf expansion.
Ensure your camera is stable and won't move during the time-lapse period. Even slight shifts can ruin your footage. Use a sturdy tripod or mount your phone securely to avoid any unwanted movement.
If you're shooting indoors, place your camera where it won't interfere with the plant's light source or be disturbed by daily activities.
Key considerations for ideal camera placement:
- Distance from the subject to capture the full growth cycle
- Lighting conditions throughout the day
- Background composition for visual appeal
- Potential obstacles that may enter the frame over time
Remember to leave enough space in the frame for the plant to grow into. This foresight will prevent you from having to adjust your camera mid-time-lapse, ensuring a smooth and consistent final video that truly showcases the fascinating journey of plant growth.
Stabilization and Framing
With your camera position determined, it's crucial to focus on stabilization and framing for your time-lapse plant growth project. Use a sturdy tripod or mount to keep your camera perfectly still throughout the entire process. Even slight movements can ruin the seamless effect you're aiming for. If you're using a smartphone, invest in a reliable phone tripod or clamp mount.
Ensure your frame is set up to accommodate the plant's expected growth. Leave ample space above the plant for vertical expansion, but don't frame too wide, as you'll lose detail. Consider the rule of thirds when composing your shot, placing the plant slightly off-center for a more visually appealing result.
To maintain consistent framing, mark the exact position of your tripod legs on the floor with tape. This allows you to remove and replace the setup without losing your composition.
If you're shooting indoors, control your lighting to avoid shadows shifting dramatically over time. Use diffused, constant light sources to maintain a consistent look throughout your time-lapse sequence.
Time-Lapse Interval Selection
How often should you capture images for your time-lapse plant growth project? The interval between shots depends on the plant's growth rate and the duration of your project. For slow-growing plants, you might take a photo every 12 to 24 hours. Fast-growing species may require shots every 30 minutes to an hour.
Consider the following factors when selecting your time-lapse interval:
- Plant type: Different species grow at varying rates
- Growth stage: Seedlings often grow faster than mature plants
- Environmental conditions: Light, temperature, and humidity affect growth speed
- Project duration: Longer projects may need longer intervals between shots
You'll want to strike a balance between capturing enough detail and avoiding overwhelming file sizes. Start with a conservative interval and adjust as needed.
If you're unsure, err on the side of shorter intervals; you can always remove excess frames during editing. Remember, the goal is to create a smooth, engaging video that showcases your plant's growth journey.
Experiment with different intervals to find what works best for your specific project and plant species.
Long-Term Project Planning

When planning a long-term time-lapse plant growth project, you'll need to carefully choose plant species that suit your timeframe and objectives.
You'll also want to reflect on the equipment setup, ensuring your camera, lighting, and growing environment are optimized for extended use.
Establish a consistent schedule for plant care and equipment maintenance to keep your project running smoothly throughout its duration.
Selecting Suitable Plant Species
Choosing the right plants for your time-lapse project is crucial to its success. You'll want to select species that exhibit noticeable growth or changes within your desired timeframe. Fast-growing plants like bamboo, sunflowers, or beans can provide dramatic results in a shorter period. However, don't overlook slower-growing plants that undergo interesting transformations, such as succulents or flowering bulbs.
Consider the following factors when selecting plant species:
- Growth rate: Faster-growing plants will yield more visible changes in less time
- Visual interest: Look for plants with unique features like colorful flowers or interesting leaf patterns
- Hardiness: Choose species that can withstand frequent photography and potential environmental stress
- Size: Confirm the plant fits within your filming setup and doesn't outgrow it too quickly
You'll also need to think about the environmental conditions you can provide. Some plants require specific light, temperature, or humidity levels to thrive.
Match your chosen species to your available resources and filming location. Remember, healthy plants will produce the most engaging time-lapse sequences, so prioritize their care throughout your project.
Equipment Setup Considerations
With an eye toward the long-term, setting up your equipment for a time-lapse plant growth project requires careful planning and deliberation.
You'll need to choose a stable location where your plant and camera can remain undisturbed for weeks or even months. Confirm the area has consistent lighting, either natural or artificial, to maintain uniform exposure throughout the project.
Select a camera that can handle extended use and has time-lapse capabilities. Many smartphones now offer this feature, but for longer projects, you might prefer a dedicated camera with external power options.
Mount your camera securely using a tripod or custom rig to prevent any movement that could disrupt the sequence.
You'll also need to take into account the plant's needs. Set up a watering system that won't interfere with your shots, and make sure the plant has enough space to grow within the frame.
If you're using artificial light, choose a setup that won't overheat the plant or camera.
Lastly, plan for data storage. Time-lapse sequences can generate large amounts of data, so confirm you have sufficient memory cards or cloud storage options available throughout the project's duration.
Scheduling and Maintenance Routine
Once your equipment is set up, you'll need to establish a robust scheduling and maintenance routine to guarantee the success of your long-term plant growth time-lapse project.
Start by creating a daily checklist to make sure you're capturing images consistently and maintaining your equipment properly. Set reminders on your phone to check on your setup at regular intervals throughout the day.
Develop a weekly maintenance schedule to clean your camera lens, check battery levels, and review your captured images for any issues. It's essential to back up your footage regularly to prevent data loss.
As your project progresses, you'll need to adjust your camera's position to accommodate the plant's growth.
Consider these key aspects of your scheduling and maintenance routine:
- Monitor lighting conditions and adjust as needed
- Regularly water and care for your plant subject
- Check for any signs of pest infestation or disease
- Review and organize your captured images weekly
Post-Processing for Stunning Results

Your time-lapse footage comes to life during post-processing. Start by importing your images into editing software like Adobe Premiere Pro or Final Cut Pro. Adjust the frame rate to create smooth motion; 24-30 frames per second typically works well for plant growth sequences.
Color correction is essential. Use tools like curves and levels to enhance contrast and bring out the vibrant greens. Apply a subtle vignette to draw focus to your plant subject. Consider using time remapping to emphasize key growth stages, slowing down dramatic moments like flower blooming.
Stabilization can improve your footage if there's any camera shake. Most editing software offers built-in stabilization tools. Add a soft, atmospheric soundtrack to complement the visual journey of your plant's growth.
For advanced results, try adding subtle zooms or pans in post. This creates a dynamic feel, especially for longer sequences. Experiment with blending modes between frames for dreamy changes.
Overcoming Common Challenges

Capturing time-lapse plant growth presents unique challenges that can test even experienced photographers. You'll need to overcome issues like maintaining consistent lighting, dealing with camera shake, and guaranteeing your plants remain healthy throughout the process.
To tackle these obstacles, start by setting up a dedicated space where you can control the environment. Use a stable tripod or mount to minimize camera movement, and consider investing in a programmable LED light panel to maintain consistent illumination.
Don't forget to account for your plant's needs:
- Water regularly without disturbing the setup
- Maintain ideal temperature and humidity
- Rotate the plant if necessary for even growth
- Remove dead leaves or debris that might obstruct the view
Battery life can be a concern for long-term shoots. Consider using an AC adapter or external power bank to keep your device running.
If you're using a smartphone, guarantee you have enough storage space for the thousands of images you'll capture.
Storytelling Through Plant Growth
Beyond technical proficiency, time-lapse plant growth offers a unique opportunity for visual storytelling. You can capture a plant's entire life cycle, from seed to bloom, in a matter of minutes. This condensed timeline allows you to convey nature's resilience, beauty, and complexity in a powerful, engaging way.
To craft a compelling narrative, consider the plant's environment and growth stages. Start with the seed nestled in soil, then show the first tender shoots pushing through. Capture the unfurling of leaves and the plant's reach towards light. Highlight moments of struggle, like withstanding wind or recovering from underwatering. Showcase the plant's interactions with insects, weather, and human intervention.
As you plan your shots, think about the emotions and messages you want to convey. Is it a story of perseverance? The miracle of life? The passage of time? Use different angles, lighting, and framing to emphasize these themes.
Don't forget to include a satisfying conclusion, whether it's a fully bloomed flower, a mature fruit, or the plant going to seed. Your time-lapse can inspire awe and connection with nature, all through a simple plant's journey.
Sharing Your Time-Lapse Creations
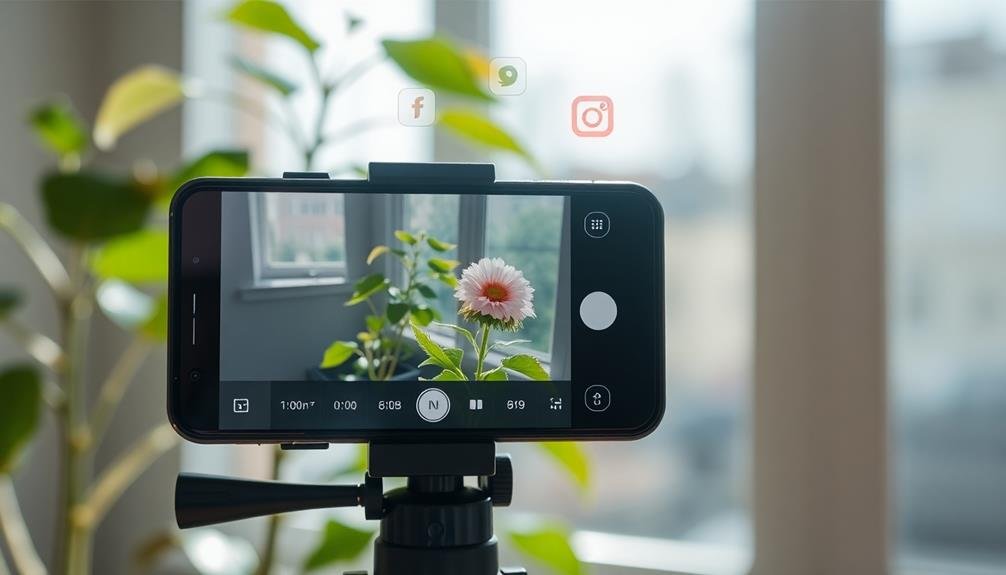
Once you've created your time-lapse plant growth video, how can you share it with the world? There are numerous platforms and methods to showcase your creation and engage with a wider audience.
Social media platforms like Instagram, TikTok, and YouTube are excellent choices for sharing your time-lapse videos. These platforms offer built-in audiences and easy-to-use sharing features that can help your content reach plant enthusiasts and photography lovers alike.
Consider creating a dedicated account or channel for your plant growth time-lapses. This can help you build a following and establish yourself as a niche content creator. Don't forget to use relevant hashtags to increase your video's visibility and attract viewers interested in plant growth and time-lapse photography.
Here are some additional ways to share your time-lapse creations:
- Submit your videos to online plant communities and forums
- Collaborate with other plant enthusiasts or photographers
- Enter photography contests or exhibitions focusing on nature or time-lapse
- Share your work on your personal website or blog
Remember to engage with your audience by responding to comments and questions about your process, equipment, and plant care techniques.
Advanced Techniques for Unique Effects

Innovators in time-lapse plant photography are constantly pushing the boundaries of what's possible. You can elevate your time-lapse plant videos by experimenting with advanced techniques that create unique effects. Try incorporating movement into your shots using motorized sliders or rotating platforms. This adds depth and dynamism to your footage, making it more engaging for viewers.
Experiment with lighting to create dramatic effects. Use colored LEDs or gels to add a surreal atmosphere to your plant growth videos. You can also play with light direction, creating interesting shadows that change as your plants grow.
Here's a table of advanced techniques and their effects:
| Technique | Equipment | Effect |
|---|---|---|
| Slider movement | Motorized slider | Smooth panning shots |
| Rotating platform | Turntable | 360° plant view |
| Colored lighting | LED strips, gels | Atmospheric mood |
| Focus stacking | Macro lens, software | Ultra-sharp details |
| HDR | DSLR, software | Enhanced dynamic range |
Don't be afraid to combine multiple techniques for truly unique results. For instance, try using a rotating platform with colored lighting to create a mesmerizing spiral effect as your plant grows. Remember, the key to standout time-lapse plant photography is experimentation and creativity.
Frequently Asked Questions
How Does Time-Lapse Photography Affect the Health of the Plants Being Filmed?
Time-lapse photography doesn't typically harm plants. You're just capturing their natural growth process. However, you'll need to guarantee your setup doesn't block sunlight or interfere with watering. Constant artificial lighting might stress some plants.
Are There Any Legal Considerations When Filming Plants in Public Spaces?
When filming plants in public spaces, you'll need to contemplate local regulations. Check if you need permits, especially in parks or protected areas. Be mindful of private property boundaries and respect any posted restrictions on photography.
Can Time-Lapse Plant Growth Videos Be Monetized on Social Media Platforms?
Yes, you can monetize time-lapse plant growth videos on social media platforms. You'll need to follow each platform's monetization guidelines, create engaging content, build an audience, and guarantee you're not infringing on any copyrights or trademarks.
What Are the Best Apps for Creating Time-Lapse Plant Growth Videos?
You'll find several great apps for creating time-lapse plant growth videos. Try Lapse It, Hyperlapse, or TimeLapse. They're user-friendly and offer features like interval settings, editing tools, and easy sharing options for your stunning plant growth sequences.
How Do Different Seasons Impact Time-Lapse Plant Growth Photography?
You'll notice dramatic changes in your time-lapse plant growth photography across seasons. Spring brings rapid growth, summer shows lush foliage, fall captures color changes, and winter reveals dormancy. Each season offers unique visual storytelling opportunities.
In Summary
You've now got the tools to create enchanting plant time-lapses with your smartphone. Remember, patience is key – nature's rhythms can't be rushed. Experiment with different plants, lighting, and techniques to find your unique style. As you share your creations, you'll inspire others to see the world in slow motion. So grab your phone, set up your shot, and watch as life unfolds before your eyes. Happy time-lapsing!


Leave a Reply