
To capture stunning traffic light trails with your phone, start by finding a busy intersection or elevated viewpoint during blue hour. Use a sturdy tripod and switch to manual mode, setting a low ISO and small aperture. Experiment with shutter speeds between 2-30 seconds for desired trail length. Frame your composition creatively, incorporating leading lines and iconic landmarks. Maximize low-light performance by enabling night mode or HDR features. Try light painting techniques for added flair. In post-processing, enhance contrast and colors to make trails pop. With these tips, you'll be well on your way to mastering this enchanting photography technique.
Find the Perfect Location
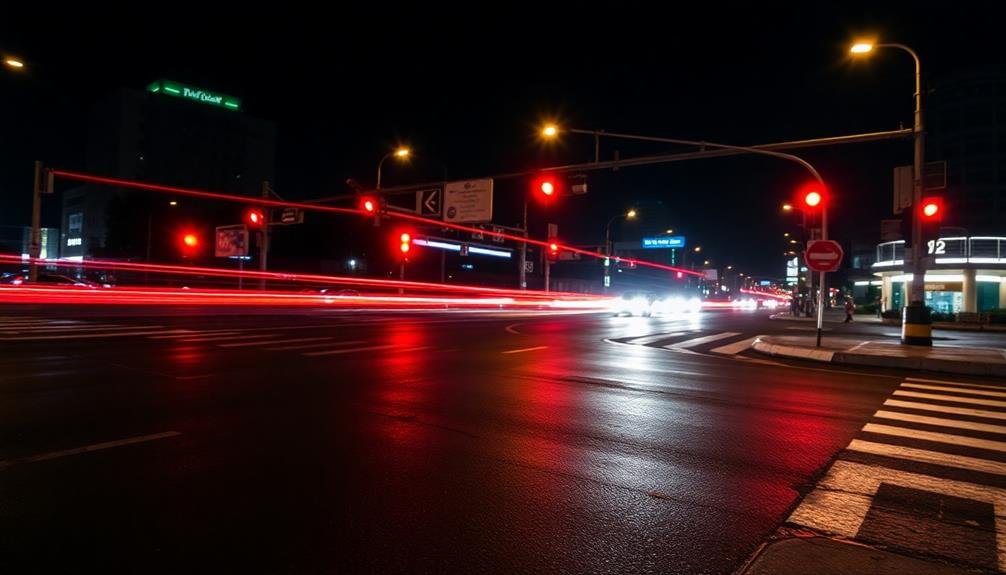
Nighttime cityscapes offer the perfect backdrop for capturing mesmerizing traffic light trails. To find the ideal location, scout busy intersections or elevated viewpoints overlooking major roads. Bridges, overpasses, and parking garages can provide excellent vantage points for capturing long stretches of traffic.
Look for areas with a mix of straight roads and curves, as these create more interesting light patterns. Seek out spots where you can safely set up your phone without obstructing pedestrians or traffic. Consider the surrounding elements that can add depth to your composition, such as illuminated buildings, street lamps, or neon signs.
Timing is essential when choosing your location. Opt for the "blue hour" just after sunset or before sunrise when there's still some ambient light in the sky. This balance between natural and artificial light creates a more dynamic image. Weekday rush hours or busy weekend nights typically offer the most consistent traffic flow for light trails.
Don't forget to check the weather forecast. Clear nights are ideal, but light rain can add reflections and create a moody atmosphere. Always prioritize your safety and follow local regulations when selecting your shooting location.
Use a Sturdy Phone Tripod

A sturdy phone tripod is essential for capturing crisp, blur-free traffic light trails. You'll need to keep your phone completely still during long exposures, which can last several seconds. Hand-holding your device will result in shaky, unusable images.
Choose a tripod that's compact yet stable. Look for models with flexible legs that can wrap around poles or railings, giving you more positioning options. Confirm the tripod has a reliable phone mount that securely holds your device.
Set up your tripod on a flat, stable surface away from vibrations. Avoid placing it on bridges or near heavy traffic, as passing vehicles can cause minute shakes. If you're using a railing or ledge, make sure it's sturdy and won't wobble.
Once your phone is mounted, use your tripod's adjustable head to frame your shot precisely. Many phone tripods offer ball heads for easy angle adjustments. Double-check that your phone is level using the built-in spirit level in your camera app or a separate leveling app.
Remember to tighten all knobs and locks on your tripod before shooting. This prevents any unwanted movement during long exposures, confirming your light trails remain sharp and well-defined.
Adjust Manual Camera Settings

To capture stunning traffic light trails, you'll need to adjust your phone's manual camera settings. Start by switching to manual or pro mode in your camera app.
Set your ISO to the lowest possible value, typically 100 or 200, to reduce noise in your images. Choose a small aperture (high f-number) like f/8 or f/11 to increase depth of field and guarantee sharpness throughout the scene.
For shutter speed, experiment with longer exposures between 2 to 30 seconds, depending on the traffic flow and desired trail length. Use the bulb mode if available for exposures longer than 30 seconds.
Enable your phone's built-in timer or use a remote shutter release to minimize camera shake when pressing the shutter button. Set your white balance to daylight or tungsten to maintain consistent colors across your shots.
Use manual focus and focus peaking (if available) to guarantee your scene is sharp. Enable RAW capture for maximum editing flexibility later. Finally, turn off any image stabilization features, as they can interfere with long exposures.
Remember to review your shots frequently and adjust settings as needed to achieve the desired light trail effect.
Experiment With Shutter Speed
When capturing traffic light trails, you'll want to play with different shutter speeds to achieve various effects.
Try slower speeds for longer, more dramatic trails, and faster speeds for shorter, crisper lines.
Experiment to find the sweet spot that best suits your desired outcome and the traffic conditions you're shooting.
Slow vs. Fast Speeds
Experimenting with shutter speed lies at the heart of capturing stunning traffic light trails. When shooting with your phone, you'll need to understand the difference between slow and fast shutter speeds and their effects on your images.
Slow shutter speeds, typically 1/15 of a second or longer, allow more light to enter the camera sensor. This extended exposure time creates those mesmerizing light trails as vehicles move through the frame. You'll capture longer, more dramatic streaks of light, resulting in a dynamic and fluid image.
However, be aware that slow speeds may lead to overexposure in bright areas.
Fast shutter speeds, usually 1/60 of a second or faster, freeze motion and produce sharper images of stationary objects. While they won't create long light trails, they can capture individual car lights as distinct points, offering a different aesthetic.
Fast speeds are ideal for scenes with brighter ambient light or when you want to maintain detail in surrounding elements.
To achieve the best results, experiment with various shutter speeds. Start with slower speeds for classic light trails, then gradually increase the speed to find the sweet spot that balances trail length and overall exposure for your specific scene.
Finding the Sweet Spot
Finding the perfect shutter speed for enchanting light trails often requires a bit of trial and error. You'll need to experiment with different settings to achieve the desired effect. Start with a shutter speed of around 2-3 seconds and adjust from there. If your trails appear too short or dim, increase the exposure time. Conversely, if they're overly bright or blurred, reduce it.
Remember that the ideal shutter speed depends on various factors, including:
- The speed of passing vehicles
- The brightness of their lights
- The overall ambient light in your scene
- Your phone's camera capabilities
As you experiment, pay attention to how these elements interact with your chosen shutter speed. You might find that a 4-second exposure works beautifully on a dimly lit street, while a 1-second shot captures the essence of a busy intersection perfectly.
Don't be afraid to take multiple shots at different settings. This approach allows you to compare results and fine-tune your technique.
With practice, you'll develop an intuitive sense for the right shutter speed in various situations, elevating your traffic light trail photography to new heights.
Maximize Low Light Performance

To maximize your phone's low light performance for traffic light trail photography, start by adjusting your camera settings.
Switch to manual or pro mode if available, allowing you to control ISO, shutter speed, and focus. Set your ISO as low as possible, typically between 100-400, to reduce noise in your images. Experiment with longer shutter speeds, ranging from 1 to 30 seconds, to capture smooth light trails.
Use a tripod or stable surface to keep your phone steady during long exposures. Enable your phone's night mode or HDR feature if available, as these can help capture more detail in low-light situations.
Clean your camera lens thoroughly to prevent unwanted glare or blurriness.
Consider using third-party camera apps that offer advanced features like RAW shooting and manual controls. These apps can help you push your phone's capabilities further.
Shoot in RAW format if possible, as it gives you more flexibility when editing your images later.
Capture During Blue Hour

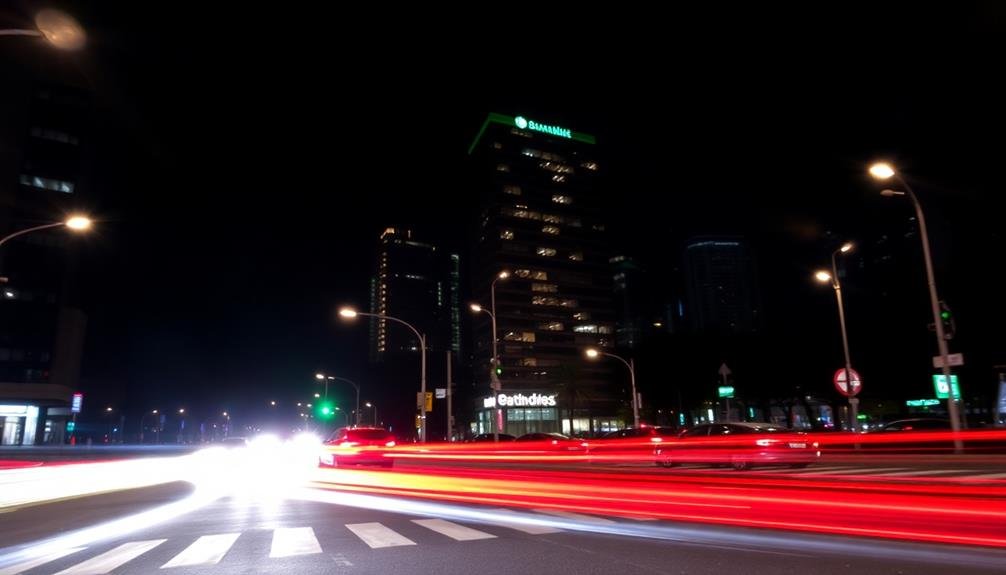
Blue hour offers the perfect lighting conditions for capturing stunning traffic light trails with your phone.
You'll want to adjust your camera settings for long exposure, typically using a slow shutter speed of 1-4 seconds.
Frame your shot to include iconic city elements like skyscrapers or bridges, creating a dynamic composition that showcases both the light trails and the urban landscape.
Optimal Lighting Conditions
When capturing traffic light trails, timing is essential for achieving the most striking results. The ideal lighting conditions for this type of photography occur during the blue hour, which is the period just after sunset or before sunrise when the sky takes on a deep blue hue. This time frame provides the perfect balance between natural and artificial light, allowing you to capture both the vibrant streaks of traffic and the atmospheric sky.
To make the most of these conditions, you'll want to:
- Position yourself at a vantage point overlooking a busy street or intersection
- Set up your phone on a stable surface or use a tripod for sharp images
- Use a long exposure app to capture light trails over several seconds
- Experiment with different exposure times to achieve desired trail lengths
As you shoot, pay attention to the changing sky colors and adjust your composition accordingly. The fading light will gradually reveal more prominent light trails, creating a dynamic interplay between the illuminated vehicles and the darkening environment.
Long Exposure Settings
Several key settings are essential for capturing stunning traffic light trails during the blue hour. First, switch your phone's camera to manual or pro mode. Set your ISO to the lowest possible value, typically 100 or 200, to reduce noise. Choose a small aperture (high f-number) to keep more of the scene in focus.
For shutter speed, aim for 2 to 30 seconds, depending on traffic flow and desired trail length. Use a tripod or steady surface to eliminate camera shake. Enable your phone's self-timer or use a remote shutter to prevent movement when pressing the capture button.
Experiment with these settings to achieve the desired effect:
| Shutter Speed | Traffic Flow | Trail Effect |
|---|---|---|
| 2-5 seconds | Heavy | Short, dense |
| 6-10 seconds | Moderate | Medium, fluid |
| 11-20 seconds | Light | Long, sparse |
| 21-30 seconds | Very light | Extra long |
| 30+ seconds | Minimal | Ethereal |
Remember to adjust your white balance to "daylight" or "cloudy" to capture the blue hour's cool tones accurately. With practice, you'll master these settings and create enchanting light trail images that showcase the city's energy and movement.
Cityscape Composition Tips
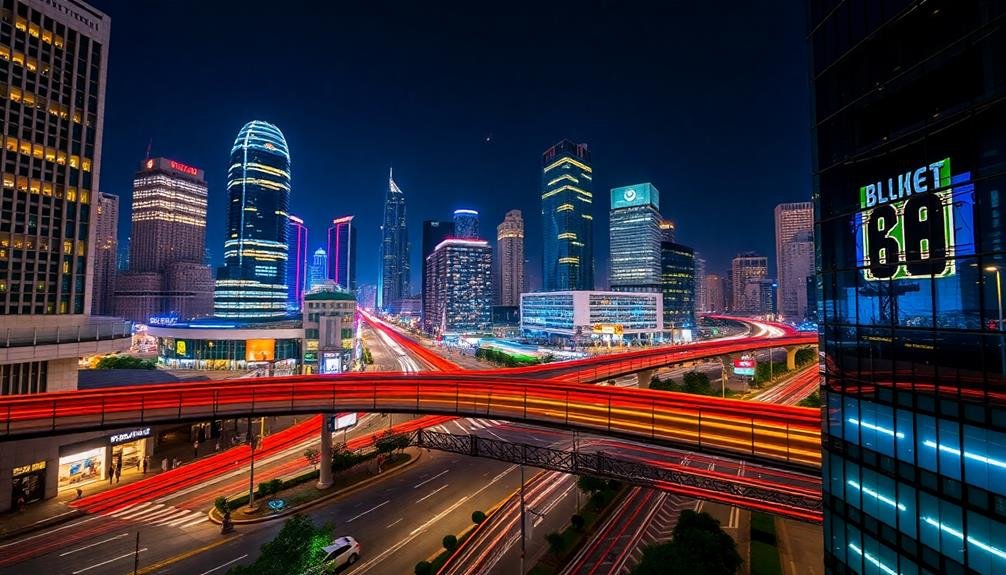
Composing an enchanting cityscape during the blue hour can make or break your light trail photography. The blue hour, occurring shortly before sunrise or after sunset, provides a magical blend of natural and artificial light that enhances urban landscapes. To capture stunning cityscapes with light trails, position your phone to include iconic landmarks or architectural features that complement the streaking lights.
Look for elevated vantage points, such as rooftops or bridges, to gain a broader perspective of the cityscape. Frame your shot with leading lines, like roads or bridges, to guide the viewer's eye through the image. Don't forget to include interesting foreground elements to add depth and context to your composition.
Consider the following elements when composing your cityscape:
- Skyscrapers and iconic buildings illuminated against the deep blue sky
- Reflections of lights and structures in bodies of water
- Silhouettes of trees or other natural elements for contrast
- Patterns created by street lamps, traffic signals, or illuminated signs
Experiment with different angles and perspectives to find the most enchanting composition.
Frame Your Composition Creatively
With creative framing, you'll elevate your traffic light trail photos from ordinary to extraordinary. Look for unique architectural elements or urban features to frame your light trails. Use arches, bridges, or building facades to create a natural border around your composition. This technique adds depth and context to your images, drawing the viewer's eye to the light trails.
Don't limit yourself to traditional framing methods. Experiment with foreground elements like street signs, lampposts, or even tree branches to add visual interest. These objects can create intriguing silhouettes against the bright light trails.
Try shooting through fences or grates for a dynamic, textured effect that adds mystery to your photos. Consider using reflective surfaces like puddles or shop windows to frame your light trails. This can create stunning mirror effects and double the impact of your composition.
Play with different angles and perspectives to find unique framing opportunities. Shoot from low angles to incorporate interesting pavement textures, or climb to higher vantage points for a bird's-eye view of the city's light trails framed by surrounding buildings.
Utilize Leading Lines
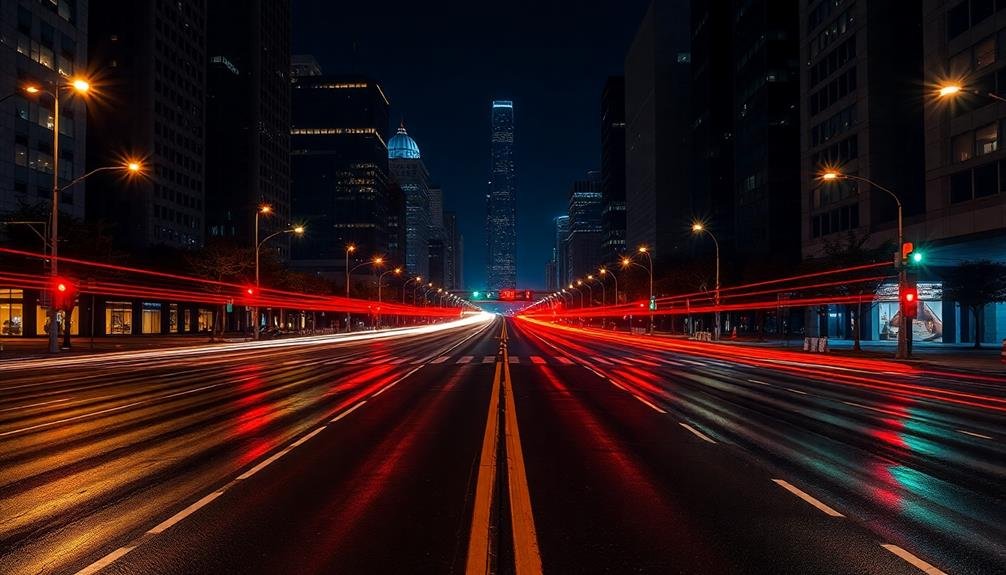
Building on the concept of creative framing, let's explore how leading lines can dramatically enhance your traffic light trail photos.
Leading lines are powerful compositional tools that guide the viewer's eye through your image, creating depth and visual interest. In traffic light trail photography, you'll find numerous opportunities to incorporate leading lines.
Look for elements in your urban environment that naturally create lines:
- Road markings and lane dividers
- Bridges and overpasses
- Sidewalks and pedestrian paths
- Building facades and architectural features
Position yourself to align these elements with the direction of traffic flow. This technique will create a sense of movement and draw the viewer's gaze along the light trails.
Experiment with different angles and perspectives to find the most compelling leading lines. Try shooting from an elevated position to capture sweeping curves of highways, or get low to emphasize road markings.
Master Light Painting Techniques

Now that you've mastered leading lines, it's time to explore light painting techniques. Light painting allows you to create stunning, luminous effects using traffic lights as your brush.
Start by setting your phone's camera to manual mode or using a specialized long exposure app. Place your phone on a stable surface or tripod to avoid camera shake.
Begin with a long exposure of 10-30 seconds, depending on traffic flow. As vehicles move through the frame, their lights will create streaks of color. Experiment with different shutter speeds to achieve varied effects.
For more controlled light painting, use a small flashlight or your phone's flashlight to draw shapes or write words in the air during the exposure.
Try combining multiple techniques in a single shot. For instance, use leading lines to frame your composition, then add light painting elements for extra visual interest.
Don't be afraid to get creative with your light sources – try incorporating glow sticks, LED lights, or even sparklers for unique effects.
Remember to adjust your ISO and aperture settings to balance exposure and maintain image quality in low-light conditions.
Post-Processing for Enhanced Results

After capturing your light trail shots, you'll want to refine them through post-processing.
Start by adjusting the exposure and contrast to enhance the overall impact of your image.
Then, focus on boosting the colors and sharpness to make your light trails pop and create a more visually striking photograph.
Adjust Exposure and Contrast
With your light trail photos captured, it's time to fine-tune their exposure and contrast in post-processing. Start by adjusting the overall exposure to guarantee the light trails are bright and vivid without losing detail in the surrounding elements.
Increase the contrast to make the trails pop against the darker background, but be careful not to overdo it and create an unnatural look.
Pay attention to the highlights and shadows. Boost the highlights to emphasize the brightest parts of the light trails, and lower the shadows to deepen the dark areas, creating a more dramatic effect.
Don't forget to adjust the blacks and whites to fine-tune the overall tonal range of your image.
Use the following techniques to enhance your light trail photos:
- Utilize the curves tool to create a subtle S-curve for improved contrast
- Apply selective adjustments to specific areas using masks or brushes
- Experiment with color temperature to alter the mood of the scene
- Try split toning to add a subtle color cast to highlights and shadows
Enhance Colors and Sharpness
Color enhancement and sharpening are essential steps in post-processing your traffic light trail photos. To make your images pop, start by adjusting the vibrancy and saturation. Increase these settings slightly to enhance the intensity of the light trails, but be careful not to overdo it, as this can lead to unnatural-looking results.
Next, focus on individual color channels. Boost the reds and yellows to make the traffic lights more prominent, while slightly reducing the blues to create a warmer overall tone. Use the HSL (Hue, Saturation, Luminance) sliders in your editing app to fine-tune specific colors without affecting the entire image.
For sharpening, apply a high-pass filter or use the unsharp mask tool. This will bring out the details in the light trails and surrounding elements.
Be cautious not to over-sharpen, as this can introduce noise and artifacts.
Frequently Asked Questions
How Do I Protect My Phone From Theft While Shooting Long Exposures?
You should keep your phone secure while shooting long exposures. Use a sturdy tripod or mount, stay alert to your surroundings, and don't leave your device unattended. Consider using a phone leash or security cable for added protection.
Are There Apps Specifically Designed for Traffic Light Trail Photography?
Yes, you'll find several apps designed for traffic light trail photography. They often include manual controls, long exposure settings, and light trail-specific modes. Try popular options like Slow Shutter Cam, ProCam, or NightCap Camera for your light trail shots.
Can I Achieve Light Trails Using a Smartphone Without Manual Camera Controls?
Yes, you can create light trails with your smartphone without manual controls. Try using long exposure apps like Slow Shutter Cam or ProCam. They'll help you capture stunning light trails even if your phone's native camera app doesn't offer manual settings.
What's the Ideal Weather Condition for Capturing the Best Light Trails?
For the best light trails, you'll want clear, dry nights. Avoid rain or fog, as they can diffuse the lights. Low humidity helps too. You'll get sharper trails when there's no moisture in the air to interfere.
How Do I Avoid Lens Flare When Photographing Traffic Lights at Night?
To avoid lens flare when photographing traffic lights at night, you'll want to use a lens hood or your hand to shield the lens. Try different angles and positions to minimize direct light hitting your camera's front element.
In Summary
You've now got the tools to create stunning traffic light trails with your phone. Don't be afraid to experiment and push your creativity. Remember, practice makes perfect. Keep refining your technique, and you'll soon be capturing mesmerizing light trails that'll wow your followers. Whether you're shooting in the city or on a quiet road, these skills will elevate your night photography game. So grab your phone and start shooting!


Leave a Reply