HDR elevates your mobile landscape photography by capturing a wider range of tones and colors, creating more vibrant and detailed images. It combines multiple exposures to balance highlights and shadows, revealing intricate details in both bright skies and dark foregrounds. You'll overcome challenging lighting conditions, enhance depth, and improve overall composition. HDR is particularly effective for scenes with high contrast, such as sunsets or mountain vistas. It preserves cloud textures, enhances subtle hues, and prevents blown-out areas. By using HDR techniques, you'll produce more balanced, visually striking landscapes that closely resemble what your eyes see. Discover how this technology can transform your mobile photography skills.
Understanding HDR in Mobile Photography

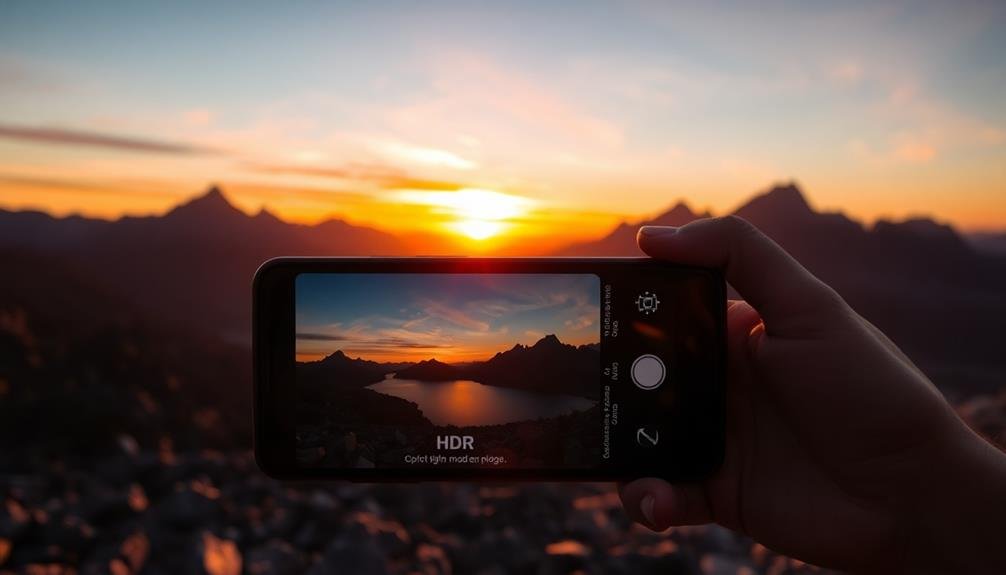
Frequently, mobile photographers encounter scenes with high contrast, where capturing both bright highlights and dark shadows in a single shot becomes challenging. This is where HDR (High Dynamic Range) photography comes into play. HDR allows you to capture a wider range of tones, from the darkest shadows to the brightest highlights, resulting in a more balanced and visually appealing image.
In mobile photography, HDR works by taking multiple exposures of the same scene and combining them into a single image. Your smartphone's camera will typically capture three shots: one underexposed, one properly exposed, and one overexposed. The HDR algorithm then merges these exposures, selecting the best-exposed parts from each to create a final image with improved dynamic range.
Most modern smartphones offer built-in HDR modes, which can be activated manually or set to auto. When using HDR, it's essential to keep your device steady to avoid ghosting or blurring.
HDR is particularly effective for landscape photography, where you often face challenging lighting conditions such as bright skies and shadowy foregrounds. By using HDR, you'll be able to capture more detail and create more impactful landscape images with your mobile device.
Benefits of HDR for Landscapes

HDR techniques offer several advantages for landscape photography on mobile devices. When you're shooting landscapes, you'll often encounter scenes with a wide range of light intensities. HDR helps you capture details in both bright and dark areas, preventing overexposed skies or underexposed foregrounds. This results in images that more closely resemble what your eyes see in real life.
With HDR, you'll be able to showcase the vibrant colors and textures of landscapes more effectively. It enhances the overall dynamic range, bringing out subtle hues in sunsets, highlighting the interplay of light and shadow on mountains, and revealing intricate details in foliage.
HDR also helps you tackle challenging lighting conditions, such as shooting directly into the sun or capturing scenes with strong backlighting.
You'll find that HDR improves the depth and dimensionality of your landscape photos, creating a more immersive viewing experience. It's particularly useful for scenes with reflections, as it can balance the brightness of the sky with the darker water surface.
Capturing Dynamic Range Effectively
To capture dynamic range effectively in mobile landscape photography, you'll need to master a few key techniques.
Start by identifying scenes with high contrast, such as landscapes with bright skies and dark foregrounds. These scenarios are perfect for showcasing HDR's capabilities.
When composing your shot, expose for the highlights to prevent blown-out areas. Most mobile cameras allow you to tap on the screen to adjust exposure.
Take multiple exposures by capturing bracketed shots – one underexposed, one properly exposed, and one overexposed. Many smartphones offer built-in HDR modes that automate this process.
Pay attention to movement within your frame. HDR works best with static subjects, so use a tripod or stabilize your phone to minimize blur between exposures.
If your scene includes moving elements like clouds or water, consider using a longer exposure time to create a sense of motion.
After capturing your images, use HDR processing software or your phone's built-in HDR feature to merge the exposures.
Adjust the final image carefully, maintaining a natural look without over-processing. Remember, the goal is to enhance the scene's dynamic range while preserving its authenticity.
Overcoming Lighting Challenges

When capturing landscapes with your mobile device, you'll often face extreme light contrasts that can challenge your photography skills.
To overcome these lighting hurdles, focus on balancing bright skies with darker foregrounds, while ensuring you capture essential shadow details.
Balancing Extreme Light Contrasts
Landscape photographers often face the challenge of extreme light contrasts, especially when shooting scenes with bright skies and shadowy foregrounds. HDR techniques can help you overcome this issue, allowing you to capture details in both highlights and shadows. By taking multiple exposures and blending them, you'll create a balanced image that closely resembles what your eyes see.
When using HDR for mobile landscape photography, keep these tips in mind:
- Use your phone's built-in HDR mode or a third-party HDR app
- Steady your device with a tripod or stable surface
- Capture at least three exposures: underexposed, normal, and overexposed
- Experiment with manual controls for more precise results
HDR isn't just about balancing light; it's about enhancing the overall mood and atmosphere of your landscape shots. You'll be able to reveal intricate textures in clouds, bring out subtle colors in shadows, and create a more immersive viewing experience.
Capturing Shadow Details
In spite of HDR's ability to balance light, capturing shadow details remains an essential skill for mobile landscape photographers. Even with HDR, you'll often encounter scenes where shadows play a vital role in conveying depth and atmosphere. To master this technique, focus on exposing for the shadows while shooting, then fine-tune the results during post-processing.
When capturing shadow details, consider these key factors:
| Technique | Effect | Best Use Case |
|---|---|---|
| Bracketing | Preserves highlights | High contrast scenes |
| Exposure compensation | Lightens shadows | Backlit subjects |
| Fill light | Reduces contrast | Portraits in shade |
| Reflectors | Bounces light | Close-up shots |
| HDR mode | Balances exposure | Dynamic landscapes |
Enhancing Sky Elements
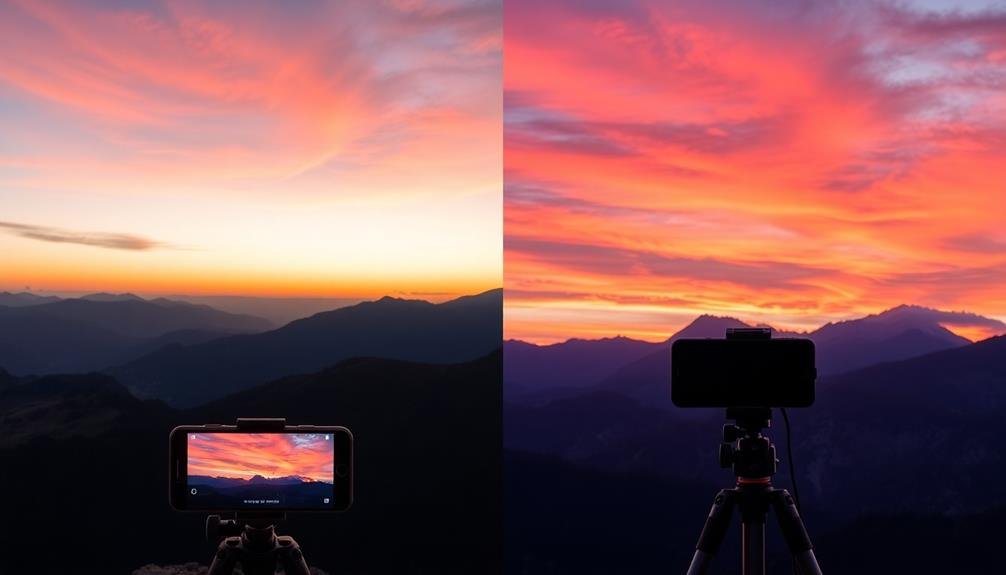
The sky often presents one of the biggest challenges in mobile landscape photography. With HDR, you'll capture a more balanced and dynamic sky, enhancing your overall composition. By combining multiple exposures, HDR allows you to preserve detail in both bright and dark areas of the sky, creating a more realistic representation of what your eyes see.
When shooting landscapes with HDR, you'll be able to:
- Capture vibrant sunsets without losing detail in the foreground
- Retain cloud textures in bright, overcast conditions
- Showcase dramatic storm clouds without underexposing the landscape
- Reveal subtle color gradients in the sky that might be lost in a single exposure
HDR technique helps you overcome the limitations of your mobile phone's camera sensor, which often struggles to capture the full range of light in a scene.
By using HDR, you'll bring out the nuances in cloud formations, preserve the delicate hues of a sunrise, and maintain the rich blues of a clear sky. This results in more compelling and true-to-life landscape images that stand out from typical mobile photography.
Remember to use HDR judiciously, as overdoing it can lead to unnatural-looking skies.
Enhancing Details in Shadows

Shadows often conceal intricate details that can elevate your mobile landscape photos. HDR technology helps you reveal these hidden elements, revealing textures and features that would otherwise remain obscured. By capturing multiple exposures, HDR guarantees that even the darkest areas of your image retain visual information.
When you use HDR for enhancing shadow details, you'll notice a significant improvement in the overall depth and dimensionality of your landscapes. Rock formations, tree bark, and foliage in shaded areas become more defined, adding richness to your composition. You'll be able to discern subtle variations in color and texture that were previously lost in darkness.
HDR also helps balance the contrast between bright and dark areas, preventing shadows from appearing as flat, featureless zones. This technique is particularly useful when photographing scenes with high dynamic range, such as forests with dappled sunlight or canyons with deep recesses.
Preserving Highlights in Bright Scenes

When capturing bright landscape scenes, you'll want to focus on preserving highlight details, especially in the sky.
To avoid blown-out areas, use your mobile device's HDR mode or manually adjust exposure settings to balance the extremes of light and shadow.
Capturing Sky Details
Capturing stunning sky details in bright landscape scenes can be a challenge for mobile photographers. HDR technology can help you overcome this hurdle by combining multiple exposures to create a well-balanced image. When you're faced with a bright sky and darker foreground, HDR guarantees you don't lose those beautiful cloud formations or subtle color gradients.
To make the most of HDR for sky details:
- Enable HDR mode in your camera app before shooting
- Keep your phone steady or use a tripod for sharper results
- Experiment with different angles to find the best composition
- Consider using a lens filter to further enhance sky details
HDR excels at revealing intricate textures in clouds, capturing the subtle hues of a sunset, and preserving the depth of a dramatic stormy sky.
It's particularly useful when shooting against the sun, allowing you to maintain detail in both the bright sky and shadowed landscape elements.
By using HDR, you'll be able to produce images that more closely resemble what your eyes see, with a wider range of tones and colors in the sky.
This technique can transform an ordinary landscape shot into an enchanting image that truly showcases the beauty of the sky.
Avoiding Blown-Out Areas
One of the biggest challenges in mobile landscape photography lies in preserving highlights within bright scenes. When you're faced with a high-contrast landscape, your phone's camera often struggles to capture both the bright sky and darker foreground elements. This can result in blown-out areas, where details are lost in overexposed sections of the image.
HDR technology comes to the rescue by combining multiple exposures. It allows you to capture a wider range of tones, effectively maintaining details in both highlights and shadows. Here's how HDR helps you avoid blown-out areas:
| Technique | Benefit | Application |
|---|---|---|
| Bracketing | Captures multiple exposures | Guarantees full tonal range |
| Tone Mapping | Balances bright and dark areas | Creates natural-looking results |
| Local Contrast | Enhances edge details | Improves overall image sharpness |
Balancing Exposure Extremes
Balancing exposure extremes presents a significant challenge in mobile landscape photography, particularly when it comes to preserving highlights in bright scenes. HDR techniques can help you capture a wider range of tones, ensuring you don't lose detail in the brightest or darkest areas of your image.
When shooting landscapes with bright skies and darker foregrounds, you'll often find that a single exposure can't capture both effectively.
HDR allows you to:
- Retain cloud detail in bright skies
- Preserve shadow details in foreground elements
- Capture the full range of colors in sunrise or sunset scenes
- Balance reflections in water against bright surroundings
By taking multiple exposures and combining them, you're able to create a final image that more closely resembles what your eye sees.
This is especially useful when photographing scenes with backlighting or strong contrasts. You'll be able to maintain the vibrant colors of a sunset sky while still revealing the textures and details in shadowed areas.
Creating Balanced Exposures

Once you've mastered the basics of HDR photography, it's time to focus on creating balanced exposures. The key is to capture a range of shots that encompass both the brightest highlights and darkest shadows in your landscape scene.
Start by taking a properly exposed base image, then bracket your shots by adjusting the exposure compensation. Typically, you'll want to capture at least three images: one underexposed, one properly exposed, and one overexposed.
Pay attention to your histogram to guarantee you're capturing the full dynamic range. When shooting, keep your camera steady or use a tripod to avoid misalignment between shots. Many mobile HDR apps now offer automatic alignment, but it's best to minimize movement.
After capturing your bracketed shots, use your HDR app to merge them. Fine-tune the result by adjusting contrast, saturation, and detail.
Be careful not to overprocess; aim for a natural look that enhances the scene without appearing artificial. Remember, the goal is to create a balanced image that reveals details in both highlights and shadows, closely mimicking what your eyes see in real life.
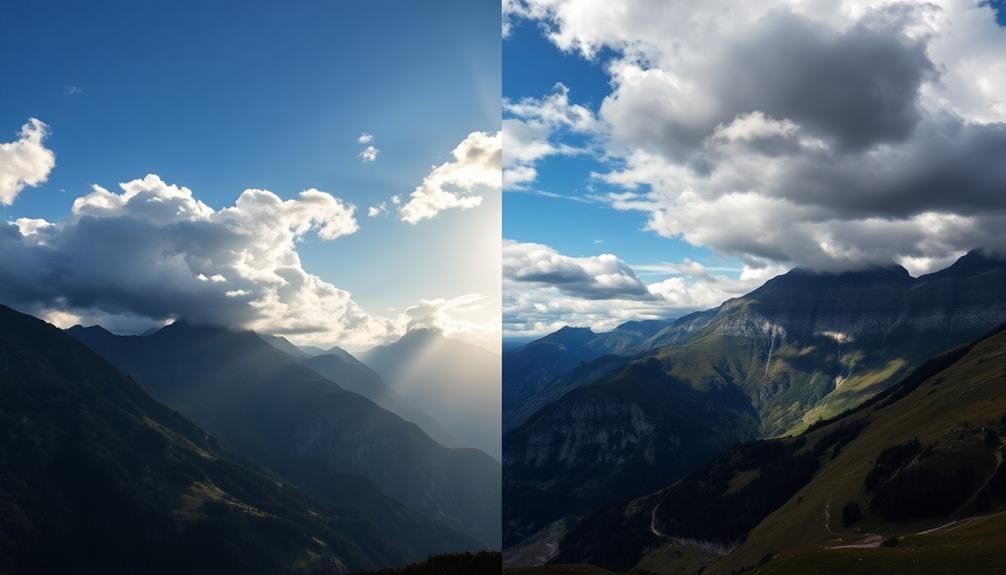
HDR Techniques for Different Landscapes

While creating balanced exposures is fundamental to HDR photography, you'll need to adapt your techniques for different landscapes. Each scene presents unique challenges and opportunities for capturing stunning HDR images with your mobile device.
For coastal landscapes, focus on balancing the bright sky with darker foreground elements like rocks or sand. In forest scenes, pay attention to the interplay of light filtering through the canopy and the shadowy understory. When shooting mountain vistas, endeavor to maintain detail in both the bright peaks and shadowy valleys.
Here are four key HDR techniques to apply across various landscapes:
- Bracket your exposures: Take multiple shots at different exposure levels
- Use manual mode: Control your camera settings for consistent results
- Align your shots: Minimize movement between frames for crisp images
- Experiment with HDR strength: Adjust the effect to suit each scene's mood
Avoiding Common HDR Pitfalls
HDR photography can be a double-edged sword. While it can enhance your landscape photos, it's easy to fall into common pitfalls that detract from your image's quality. To avoid these, you'll need to be mindful of several key aspects.
First, resist the temptation to overprocess. Excessive HDR can lead to unrealistic colors and halos around objects, giving your image an artificial look. Instead, aim for a subtle enhancement that maintains the scene's natural appearance.
Second, watch out for ghosting, which occurs when objects move between exposures. Use your phone's burst mode or a tripod to minimize this issue.
Third, be cautious with contrast. Over-reducing contrast can result in flat, lifeless images. Maintain some shadows to preserve depth and dimensionality.
Another pitfall is ignoring composition. Don't rely on HDR to make an uninteresting scene compelling. Focus on framing and subject matter first.
Post-Processing HDR Landscape Images

Once you've captured your HDR landscape images, it's time to refine them through post-processing.
You'll want to start by adjusting exposure and contrast to achieve a balanced look.
Then enhance colors and tones to bring out the vibrancy of the scene.
Adjust Exposure and Contrast
Now that you've captured your HDR landscape images, how do you bring out their full potential? The key lies in adjusting exposure and contrast during post-processing.
Start by fine-tuning the overall exposure of your merged HDR image. You'll want to strike a balance between highlights and shadows, ensuring no details are lost in either extreme.
Next, focus on enhancing contrast to add depth and dimension to your landscape. Use the contrast slider carefully, as too much can result in an unnatural look. Instead, consider adjusting the blacks and whites independently for more control. This approach allows you to create a punchy image without losing subtle tones.
When working on exposure and contrast, keep these tips in mind:
- Use the histogram as a guide to avoid clipping highlights or shadows
- Experiment with local adjustments to target specific areas of the image
- Apply subtle gradients to enhance the sky or foreground separately
- Utilize tone curves for precise control over shadows, midtones, and highlights
Enhance Colors and Tones
Color and tone enhancement breathes life into your HDR landscape images. After merging your exposures, it's time to fine-tune the colors and tones to create a stunning final result.
Start by adjusting the overall saturation, but be careful not to overdo it. Aim for natural-looking colors that pop without appearing artificial.
Next, focus on individual color channels. Boost the blues in the sky, enhance the greens in foliage, or warm up golden hour tones. Use selective color adjustments to target specific hues without affecting others.
Don't forget to tweak the white balance to guarantee accurate color representation across the entire image.
Pay attention to the tonal range of your HDR landscape. Adjust highlights, shadows, and midtones to create depth and dimension.
Use curves or levels to fine-tune contrast and bring out subtle details. Consider applying a gentle vignette to draw the viewer's eye to the center of the image.
Fine-Tune Details and Sharpness
After enhancing colors and tones, it's time to focus on the finer details of your HDR landscape image. This step is essential for creating a sharp, crisp photo that truly captures the scene's essence.
Use your mobile editing app's sharpening tool judiciously, applying it to areas that need definition without overdoing it and creating unwanted noise.
Pay close attention to the following elements when fine-tuning details and sharpness:
- Texture: Bring out the intricate patterns in rocks, foliage, and water surfaces
- Edges: Enhance the boundaries between different elements in your composition
- Clarity: Boost mid-tone contrast to add depth and dimension to your image
- Noise reduction: Minimize any graininess that may have resulted from merging exposures
As you work on these aspects, zoom in to check your adjustments at the pixel level. This guarantees you're not introducing artifacts or over-sharpening.
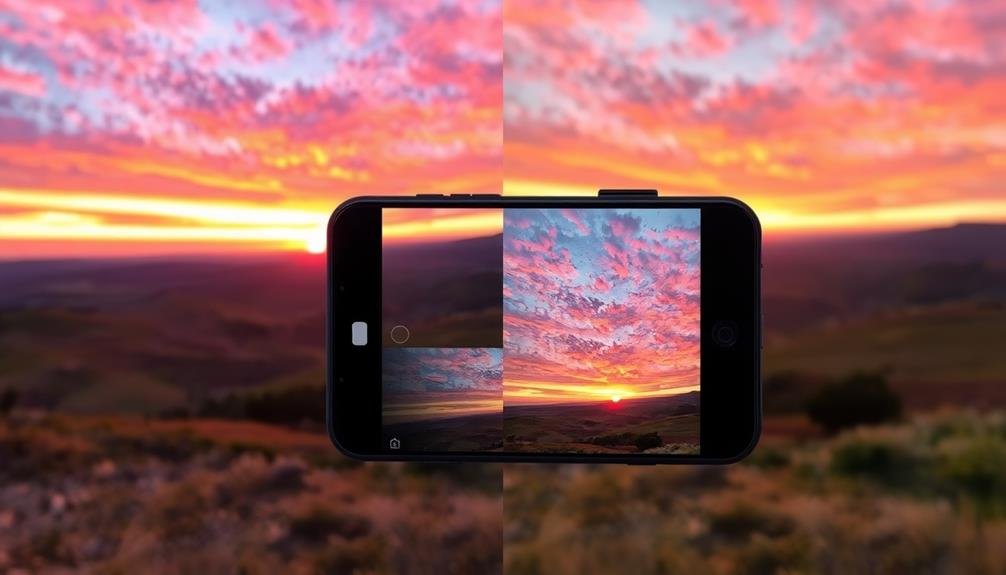
Comparing HDR and Non-HDR Results
Three key differences emerge when comparing HDR and non-HDR results in mobile landscape photography.
First, dynamic range: HDR images showcase a broader range of tones from shadows to highlights, revealing details that might be lost in a single exposure. You'll notice deeper blacks, brighter whites, and more nuanced midtones in HDR shots.
Second, color vibrancy: HDR techniques often produce more saturated and lifelike colors. This enhancement can make your landscapes pop, bringing out the richness of blue skies, lush greens in foliage, and warm hues in sunsets. However, be cautious not to overdo it, as excessive saturation can look unnatural.
Lastly, texture and detail: HDR images typically display improved texture and detail across the entire frame. You'll see more defined clouds, sharper rock formations, and intricate patterns in water surfaces. Non-HDR images might struggle to capture these fine details, especially in challenging lighting conditions.
When comparing your HDR and non-HDR results, pay attention to these aspects. You'll likely find that HDR images offer a more balanced, detailed, and visually striking representation of the landscape, provided you've applied the technique judiciously.
Frequently Asked Questions
Can HDR Be Used for Night Landscape Photography on Mobile Devices?
Yes, you can use HDR for night landscape photography on your mobile device. It'll help capture more details in shadows and highlights, reducing noise and improving overall image quality in low-light conditions. Give it a try!
How Does HDR Affect Battery Life When Shooting Landscape Photos?
HDR can drain your battery faster when shooting landscapes. It's capturing multiple images and processing them, which requires more power. You'll notice a quicker battery decline, especially if you're taking numerous HDR shots in succession.
Are There Any Weather Conditions Where HDR Should Be Avoided?
You should avoid HDR in heavy rain or snow, as it can damage your camera. It's also less effective in low-contrast scenes or very windy conditions where movement between exposures can cause ghosting artifacts.
Can HDR Be Combined With Other Mobile Camera Features Like Panorama Mode?
Yes, you can combine HDR with panorama mode on many mobile devices. You'll get wider shots with improved dynamic range. Just be careful of movement between frames, as it might cause stitching issues in the final image.
Does Using HDR Mode Increase the File Size of Landscape Photos?
Yes, HDR mode typically increases file sizes of your landscape photos. You'll notice larger files because HDR combines multiple exposures into one image, capturing more data. However, the improved dynamic range often justifies the extra storage space.
In Summary
You've now got the tools to take your mobile landscape photography to new heights with HDR. By mastering this technique, you'll capture stunning scenes with balanced exposure, rich details, and vibrant colors. Remember to experiment with different HDR settings and post-processing methods to find your unique style. Don't be afraid to push the boundaries, but always aim for natural-looking results. With practice, you'll soon be creating breathtaking landscape images that truly stand out.


Leave a Reply