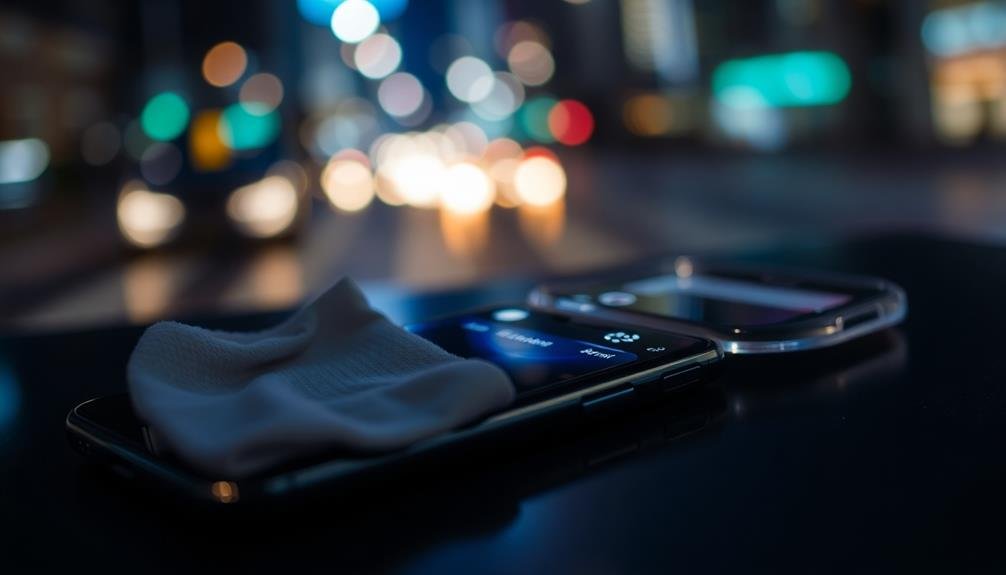
To capture stunning night photos with your phone, start by thoroughly cleaning your camera lens. Power off your device and remove any protective cases. Gently wipe the lens with a microfiber cloth to remove smudges and debris that can scatter light and ruin your shots. For stubborn dirt, use a small amount of lens cleaner or distilled water. Inspect the lens under bright light to confirm it's spotless. Once clean, reattach your case and test your camera's performance in low-light conditions. Establish a regular cleaning routine to maintain peak image quality. With a sparkling clean lens, you'll be ready to access your phone's full night photography potential.
Importance of Clean Phone Cameras

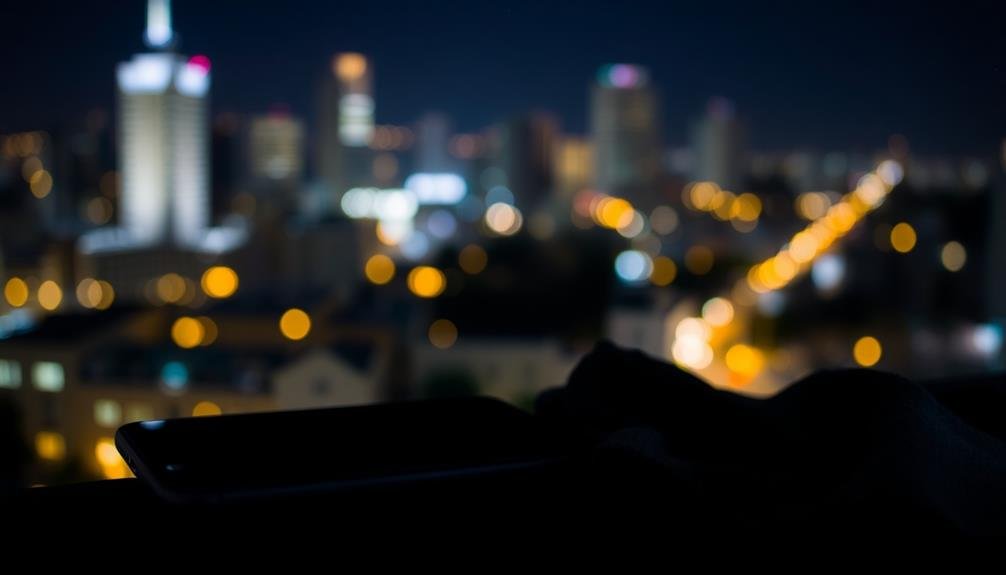
A smudged lens can ruin your night photography. When you're trying to capture stunning low-light images, every speck of dirt or fingerprint on your phone's camera lens becomes a potential obstacle. These imperfections scatter light, creating unwanted flares, blurs, and distortions that greatly degrade image quality.
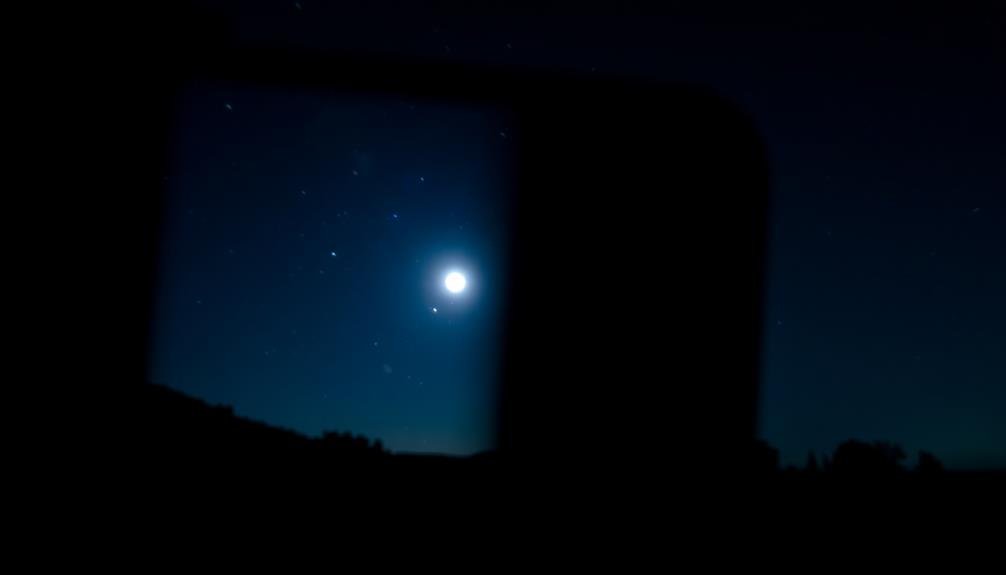
Clean lenses are vital for maintaining sharpness and clarity in your night shots. They allow more light to reach the sensor, resulting in brighter, more detailed images with less noise. This is especially important when photographing city lights, stars, or other dimly lit scenes where every photon counts.
By keeping your phone's camera lens clean, you'll also improve its autofocus performance. Smudges can confuse the focusing system, leading to missed shots or blurry images. Regular cleaning guarantees your camera can quickly and accurately lock onto your subject, even in challenging low-light conditions.
Don't overlook the importance of a clean lens when shooting at night. It's a simple yet effective way to noticeably improve your phone photography results, allowing you to capture the magic of nighttime scenes with stunning clarity and detail.
Gather Your Cleaning Supplies

To clean your phone camera effectively, you'll need to assemble a few key items.
Your essential cleaning kit should include microfiber cloths, cotton swabs, and a small brush designed for electronics.
For safe cleaning solutions, you can use distilled water or a specially formulated lens cleaner, but avoid harsh chemicals that might damage your device.
Essential Cleaning Kit Items
Before diving into the cleaning process, you'll need to gather a few essential items for your phone camera cleaning kit. Start with a microfiber cloth, which is gentle on your lens and won't leave scratches or lint behind.
You'll also want to pick up some pre-moistened lens cleaning wipes designed specifically for camera lenses and screens. For stubborn smudges, invest in a small bottle of lens cleaning solution. Make sure it's compatible with your phone's camera lens coating.
Include a soft-bristled brush, like a makeup brush or specialized lens brush, to remove dust particles gently. Don't forget about compressed air, which can blast away debris from hard-to-reach areas around your camera.
Consider adding a UV filter to your kit. It protects your lens from scratches and is easier to clean than the actual camera glass.
Finally, grab some cotton swabs for precision cleaning of edges and corners. With these items on hand, you'll be well-equipped to keep your phone's camera crystal clear for those stunning night shots.
Remember to store your cleaning kit in a clean, dry place to maintain its effectiveness.
Safe Cleaning Solutions
Now that you've assembled your cleaning kit, let's focus on the safe cleaning solutions you'll need. For routine cleaning, distilled water is your best friend. It's free from minerals and impurities that could potentially scratch your lens.
Mix it with a small amount of mild, unscented dish soap to create an effective cleaning solution.
Isopropyl alcohol (70% concentration) is excellent for removing stubborn smudges and fingerprints. However, use it sparingly and always dilute it with distilled water. A 50/50 mixture is typically safe for most phone camera lenses.
For a gentler option, consider using a solution of equal parts distilled water and white vinegar. This mixture is particularly effective at removing water spots and mineral deposits.
Avoid harsh chemicals like ammonia, bleach, or window cleaners. These can damage your phone's protective coatings and even etch the lens surface.
Also, steer clear of compressed air, as it can force dust and debris further into your device's crevices.
Remember to always test any new cleaning solution on a small, inconspicuous area first to guarantee it doesn't cause any adverse reactions.
Power Off Your Device

One essential step before cleaning your phone's camera is powering off the device. This precaution protects both you and your phone from potential electrical issues and accidental damage.
When your device is powered on, there's a risk of short-circuiting if cleaning solutions come into contact with internal components. Additionally, an active touchscreen might interpret your cleaning motions as unwanted inputs, potentially changing settings or opening apps.
To properly power off your device, don't just put it to sleep or in standby mode. Instead, use the phone's power button to fully shut it down. On most smartphones, you'll need to press and hold the power button for a few seconds, then swipe or tap the "Power Off" option on the screen.
Wait until the screen goes completely dark and the device stops vibrating before proceeding with cleaning.
If you're using a phone case, remove it to guarantee thorough cleaning of the camera lens and surrounding areas.
Once powered off and uncased, your phone is ready for a safe and effective cleaning process, maximizing the quality of your night photos.
Remove Protective Cases

With your phone powered off, the next step is to remove any protective cases or covers.
These accessories, while great for daily protection, can interfere with your camera's performance, especially in low-light conditions. Cases may block the camera lens or flash, reducing the quality of your night photos.
Start by carefully detaching your phone case, being mindful of any dust or debris that might've accumulated between the case and your device.
If you're using a screen protector, consider removing it as well, as it can affect the clarity of your front-facing camera shots.
Once you've removed the case, inspect your phone's camera lens and surrounding area.
You'll likely notice fingerprints, smudges, or dust that weren't visible before.
This is precisely why removing the case is essential – it allows you to thoroughly clean all parts of your camera.
Inspect Camera Lenses

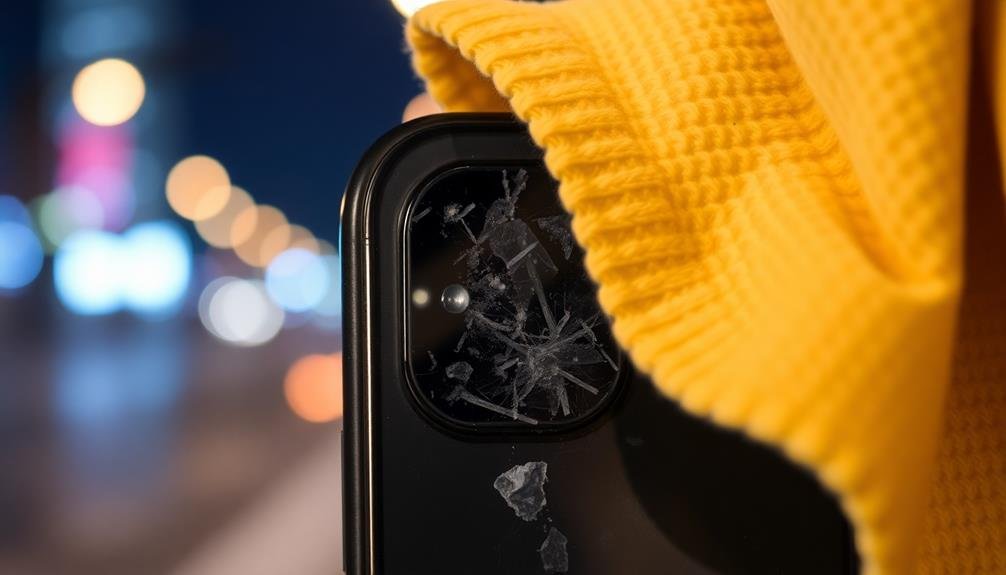
When inspecting your phone's camera lenses, you'll want to check for any scratches that could affect image quality.
Next, carefully remove any dirt or smudges using a microfiber cloth to guarantee a clear view.
Check for Lens Scratches
Inspecting your phone's camera lenses for scratches is an essential step in ensuring ideal night photography results. Even minor scratches can greatly impact image quality, especially in low-light conditions. To check for scratches, gently wipe the lens clean with a microfiber cloth and examine it under bright light from various angles.
Use this table to understand the impact of different types of scratches:
| Scratch Type | Visibility | Effect on Photos |
|---|---|---|
| Micro | Barely visible | Slight loss of sharpness |
| Surface | Visible lines | Noticeable blurring |
| Deep | Obvious grooves | Severe distortion |
| Cracked | Web-like pattern | Unusable images |
If you spot any scratches, assess their severity. Minor surface scratches might not greatly affect your photos, but deeper ones could cause noticeable issues. For severe scratches or cracks, consider professional repair or lens replacement. In some cases, you can minimize the impact of minor scratches by adjusting your shooting angle or using post-processing techniques. Remember, a scratch-free lens is essential for capturing crisp, clear night photos, so make this inspection a regular part of your phone camera maintenance routine.
Remove Dirt and Smudges
After checking for scratches, it's important to remove any dirt and smudges from your phone's camera lenses. These imperfections can greatly impact your night photos, causing blurry images or unwanted light artifacts.
To clean your lenses effectively, start by using a microfiber cloth designed for optical surfaces. Gently wipe the lenses in a circular motion, being careful not to apply too much pressure.
If the microfiber cloth isn't enough to remove stubborn smudges, you can slightly dampen it with distilled water or a lens cleaning solution. Be sure to use only a tiny amount of liquid, as excess moisture can damage your phone. After cleaning, use a dry part of the cloth to remove any remaining moisture.
For hard-to-reach areas around the lens, use a soft-bristled brush or compressed air to dislodge dust particles.
Don't forget to clean the front-facing camera as well, especially if you plan on taking night selfies.
Regularly cleaning your phone's camera lenses will guarantee top performance in low-light conditions, allowing you to capture crisp, clear night photos without unwanted distortions or blurriness.
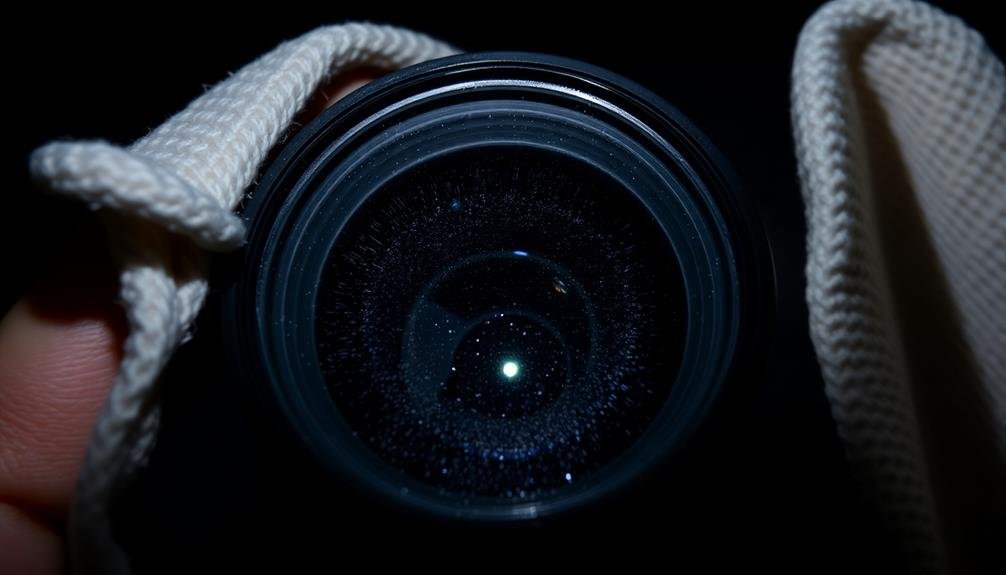
Assess Lens Coating Condition
Many modern smartphone camera lenses have special coatings that enhance their performance, particularly in low-light conditions. These coatings help reduce glare, improve light transmission, and minimize reflections.
Over time, however, these coatings can wear down or become damaged, affecting your phone's ability to capture crisp night photos.
To assess your lens coating's condition, you'll need to inspect it closely. Find a well-lit area and angle your phone so light reflects off the lens. Look for any signs of wear, such as scratches, peeling, or discoloration.
If you notice rainbow-like patterns or a hazy appearance, it could indicate coating damage.
You can also test your lens coating's effectiveness by taking a series of night photos in various lighting conditions. Compare these images to older photos taken with the same device.
If you see a significant decrease in quality, especially regarding clarity and light handling, your lens coating might be compromised.
Don't attempt to repair or replace the coating yourself, as this requires specialized equipment.
If you suspect coating damage, consult a professional or consider upgrading your device for the best night photography results.
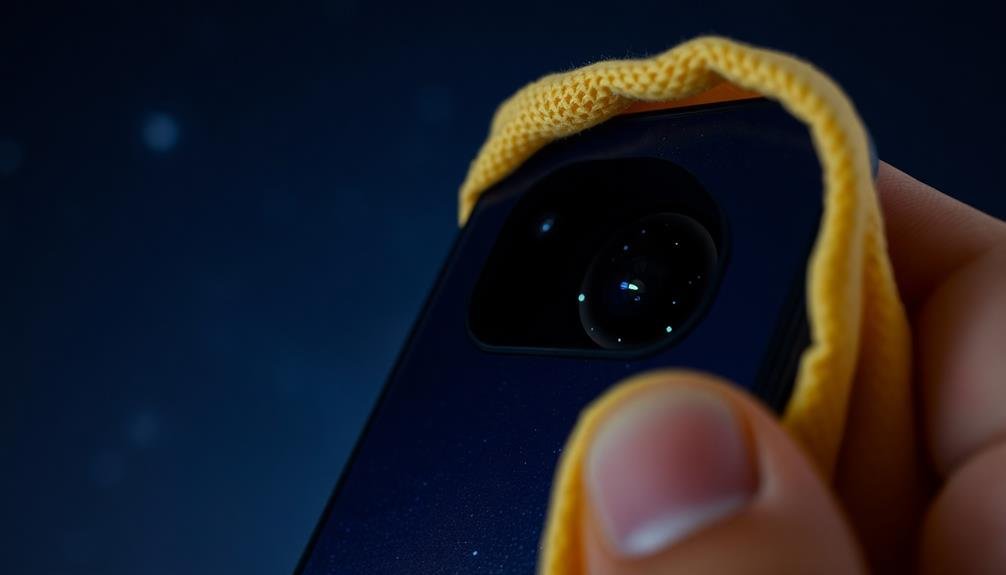
Gently Wipe Lenses

A gentle touch is crucial when cleaning your phone's camera lenses. Use a microfiber cloth specifically designed for camera lenses to avoid scratching the delicate surface.
Start by lightly brushing away any loose debris or dust particles. Then, breathe a small amount of warm air onto the lens to create a slight fog. This moisture helps loosen stubborn smudges.
Begin wiping the lens in a circular motion from the center outward. Apply minimal pressure to prevent damaging the lens coating. If there's a particularly stubborn spot, don't increase pressure. Instead, use a specialized lens cleaning solution. Apply a tiny drop to your microfiber cloth, never directly on the lens. Continue wiping gently until the lens is clean and streak-free.
For multi-lens setups, clean each lens individually, paying attention to the small spaces between them. Don't forget to clean the flash and any sensors near the camera.
After cleaning, inspect the lenses under good lighting to verify you haven't missed any spots. If streaks persist, repeat the process with a fresh section of your microfiber cloth.
Regular, gentle cleaning will help maintain your phone's camera quality for stunning night photos.
Clean Camera Housing
Clean your phone's camera housing to improve your night photography.
Remove dust and smudges from the housing using a soft, lint-free cloth to prevent debris from interfering with your shots.
Don't forget to sanitize both the lens and housing with a disinfectant wipe to maintain cleanliness and peak performance.
Remove Dust and Smudges
While your camera lens is essential for capturing clear night photos, the surrounding housing also plays an important role. Dust and smudges on the camera housing can scatter light, causing unwanted flares and reducing image quality.
To remove these imperfections, you'll need a few simple tools and a gentle touch.
Start by inspecting your phone's camera area in good lighting. Look for any visible dust particles, fingerprints, or smudges.
Then, follow these steps to clean the housing:
- Use a soft-bristled brush or compressed air to remove loose dust particles. Hold your phone at an angle to prevent dust from falling back onto the lens.
- Dampen a microfiber cloth with a small amount of distilled water or lens cleaning solution. Gently wipe the camera housing in circular motions, being careful not to get moisture on the lens itself.
- Dry the area with a clean, dry microfiber cloth, ensuring no streaks or lint remain.
Don't forget to clean the flash and any sensors near the camera. These elements can affect your night photos' quality and should be free from dust and smudges.
Regular cleaning will help maintain your phone's camera performance for stunning nighttime shots.
Sanitize Lens and Housing
Keeping your phone's camera sanitized is vital for maintaining image quality and protecting your health. To effectively sanitize your camera lens and housing, start by using a microfiber cloth dampened with a mixture of 70% isopropyl alcohol and 30% distilled water.
Gently wipe the lens and surrounding area, being careful not to apply too much pressure or let excess liquid seep into crevices.
For stubborn grime, use a cotton swab dipped in the alcohol solution to clean hard-to-reach areas around the lens and flash.
Don't forget to sanitize the camera housing, including buttons and edges, as these areas can harbor bacteria and affect your grip when taking night photos.
After cleaning, use a dry microfiber cloth to remove any remaining moisture.
It's important to avoid using harsh chemicals, abrasive materials, or excessive liquid, as these can damage your phone's delicate components.
Make it a habit to sanitize your phone camera weekly, or more frequently if you're in dusty or dirty environments.
This routine will guarantee your night photos remain crisp and clear, while also keeping your device hygienic for everyday use.
Address Stubborn Dirt
For stubborn dirt that won't budge with gentle cleaning, you'll need to step up your approach. While it's essential to remain cautious, you can use slightly more aggressive methods to remove persistent grime from your phone's camera lens and housing.
Start by creating a solution of equal parts distilled water and isopropyl alcohol. Dip a microfiber cloth into this mixture and gently work on the stubborn areas using small, circular motions.
If that doesn't do the trick, try using a specialized lens cleaning pen designed for camera equipment. These pens often have soft bristles or microfiber tips that can help dislodge stubborn particles without scratching the lens.
For extremely persistent dirt, consider this three-step process:
- Apply a small amount of lens cleaning fluid to a microfiber cloth
- Gently press the cloth against the stubborn spot for 10-15 seconds
- Wipe away the loosened dirt with a clean portion of the cloth
Remember to be patient and avoid applying excessive pressure, as this could damage your phone's delicate camera components.
If these methods don't work, it's best to seek professional help rather than risk damaging your device.
Sanitize Camera Area

Sanitizing your phone's camera area is essential for maintaining hygiene and preventing the spread of bacteria. To effectively sanitize this area, use a microfiber cloth lightly dampened with a mixture of 70% isopropyl alcohol and water. Gently wipe the camera lens, flash, and surrounding areas, being careful not to let any liquid seep into the phone's openings.
For a more thorough cleaning, use specialized electronic device wipes or UV-C sanitizers designed for smartphones. These methods can eliminate up to 99.9% of germs and bacteria without damaging your device. If you're using UV-C sanitizers, follow the manufacturer's instructions carefully to guarantee proper exposure time and safety.
Don't forget to clean the phone case as well, as it can harbor bacteria that may transfer to the camera area. Remove the case and clean it separately using soap and water or disinfectant wipes.
Establish a regular cleaning routine, sanitizing your phone's camera area at least once a week or more frequently if you're using it in high-risk environments. This practice won't only keep your device hygienic but also help maintain the quality of your night photos by guaranteeing a clear, unobstructed lens.
Dry Thoroughly

After cleaning, you'll want to dry your phone camera thoroughly.
Use a soft microfiber cloth to gently wipe away any remaining moisture, ensuring you don't leave any fibers behind.
Allow your device to air dry completely before use, and don't use heat sources like hair dryers, which can damage your phone's delicate components.
Use Microfiber Cloth
The microfiber cloth is your secret weapon for a pristine phone camera lens. It's gentle yet effective, removing smudges and oils without scratching your delicate lens.
After you've dried your phone's camera area, grab your microfiber cloth and get ready to polish.
Start by folding the cloth into a small, manageable square. This'll give you a clean surface to work with and prevent transferring dirt from one area to another.
Now, use gentle, circular motions to wipe the lens. Don't press too hard; let the cloth's fibers do the work. Pay special attention to the corners and edges where grime often accumulates.
For stubborn spots, you might need to dampen the cloth slightly. Here's a quick process:
- Breathe on the lens to create a light mist
- Wipe immediately with the dry part of the cloth
- Follow up with a final polish using a clean, dry section
Air Dry Completely
Once you've cleaned your phone's camera lens, it's crucial to confirm it's completely dry before use. Any remaining moisture can cause smudges, streaks, or even water droplets that will ruin your night photos.
To guarantee thorough drying, gently shake your phone to remove excess water, then use a clean, dry microfiber cloth to absorb any visible moisture.
Next, leave your phone in a well-ventilated area for about 15-20 minutes. Don't rush this process, as trapped moisture can lead to condensation inside the lens. Avoid using heat sources like hair dryers, as they can damage your phone's delicate components. Instead, let it air dry naturally.
If you're in a hurry, you can use compressed air to speed up the drying process. Hold the can upright and spray in short bursts from about 6 inches away. Be careful not to tilt the can, as this can release liquid propellant onto your device.
Once you're confident the lens is completely dry, inspect it under good lighting. Look for any remaining smudges or moisture and address them if necessary. Your phone's camera is now ready for capturing stunning night photos.
Avoid Heat Sources
Frequently, people make the mistake of using heat sources to dry their phone's camera lens. This can be detrimental to your device and affect the quality of your night photos. Instead of using heat, let your phone air dry naturally after cleaning the camera.
Heat sources can cause several problems for your phone's camera:
- Warping of the lens or surrounding components
- Damage to the delicate camera sensors
- Condensation forming inside the lens, leading to foggy images
You'll want to avoid using hair dryers, radiators, or even leaving your phone in direct sunlight to dry. These methods might seem quick, but they can potentially harm your device.
If you're in a hurry, gently pat the camera area with a soft, lint-free cloth to remove excess moisture.
Check for Residue
After cleaning your phone's camera lens, it's crucial to check for any remaining residue. Even small traces of dirt, oil, or cleaning solution can greatly impact your night photos' quality. To inspect for residue, hold your phone under a bright light and tilt it at various angles. Look for any smudges, streaks, or particles that may have been missed during the initial cleaning.
If you spot any residue, don't panic. Use a microfiber cloth to gently wipe the lens in a circular motion. For stubborn spots, slightly dampen the cloth with distilled water or a specialized lens cleaner. Be careful not to use too much liquid, as it can seep into your phone's internals.
Pay special attention to the corners and edges of the lens, where debris often accumulates. Also, check the surrounding area, including the flash and any additional lenses your phone may have.
Once you're satisfied that all residue has been removed, give the lens a final wipe with a dry microfiber cloth to confirm it's completely clean and dry before taking your night photos.
Reattach Protective Cases
With your phone's camera lens now clean and free of residue, it's time to reattach any protective cases or covers. Before doing so, verify that both the phone and the case are completely dry to prevent moisture from getting trapped.
Carefully align the case with your device, making sure the camera cutout matches perfectly with the lens position.
As you reattach the case, pay attention to these key points:
- Check for any debris or lint inside the case, especially around the camera area.
- Gently press the edges of the case to secure it without applying excessive force.
- Verify that the case doesn't obstruct the camera lens or flash in any way.
Once the case is securely in place, give your phone a final inspection. Verify that the camera lens remains unobstructed and that there are no gaps between the case and the phone that could allow dust or dirt to enter.
If you're using a screen protector, make sure it's properly aligned and doesn't interfere with the front-facing camera.
With your phone now protected and the camera lens clean, you're ready to capture stunning night photos without any unwanted obstructions or smudges affecting your shots.
Test Camera Performance
The final step in ensuring your phone's camera is ready for night photography is to test its performance.
Take your phone to a dimly lit area and snap a few test shots. Pay attention to how well it captures details in low light and how much noise appears in the images.
Try different camera modes, such as night mode or pro mode, to see which produces the best results.
Next, experiment with manual settings if your phone allows it. Adjust the ISO, shutter speed, and focus to see how they affect the image quality.
Don't forget to test the flash as well, comparing photos taken with and without it.
If you're planning to shoot specific subjects, like cityscapes or star trails, try to replicate those conditions during your test.
This will give you a better idea of how your phone will perform in real-world scenarios.
Establish Regular Cleaning Routine

Consistency is key when it comes to maintaining your phone's camera for ideal night photography. Establish a regular cleaning routine to guarantee your lens is always ready to capture stunning low-light images. Make it a habit to clean your camera lens at least once a week, or more frequently if you're in dusty or humid environments.
To create an effective cleaning routine, follow these steps:
- Choose a specific day and time each week for cleaning
- Set a reminder on your phone to prompt you
- Keep cleaning supplies easily accessible
Use a microfiber cloth to gently wipe the lens, removing fingerprints, dust, and smudges. For stubborn dirt, lightly dampen the cloth with distilled water or a specialized lens cleaning solution. Be careful not to use harsh chemicals or abrasive materials that could damage the lens coating.
Don't forget to clean the entire camera module, including any additional lenses or sensors. Pay attention to the edges where dirt can accumulate.
Frequently Asked Questions
Can I Use Household Cleaners to Clean My Phone Camera?
You shouldn't use household cleaners on your phone camera. They can damage the lens coating. Instead, use a microfiber cloth or lens cleaning solution specifically designed for electronics. Gently wipe the lens to remove smudges and dirt.
How Often Should I Clean My Phone Camera for Optimal Performance?
You should clean your phone camera at least once a week for best performance. If you're taking lots of photos or using your phone in dusty environments, clean it more frequently. Don't forget to gently wipe the lens before important shots.
Will Cleaning My Phone Camera Void Its Warranty?
You shouldn't worry about voiding your warranty by cleaning your phone camera. It's generally safe if you're careful. Use gentle methods like microfiber cloths and avoid harsh chemicals. Always check your manufacturer's guidelines for specific instructions.
Can Scratches on the Camera Lens Be Removed During Cleaning?
You can't remove scratches on your phone's camera lens through regular cleaning. They're permanent damage to the glass. If you've got scratches, you'll need to replace the lens or seek professional repair services for potential solutions.
Is It Necessary to Clean the Front-Facing Camera as Well?
Yes, it's necessary to clean your front-facing camera too. You'll want clear selfies and video calls, right? Don't forget to gently wipe it with a microfiber cloth. It collects dust and smudges just like the main camera.
In Summary
You've now got the tools to keep your phone camera pristine for those perfect night shots. Remember, a clean lens is essential for capturing clear, crisp images in low light. Make it a habit to check and clean your camera regularly. With these simple steps, you'll guarantee your phone's always ready to snap stunning nighttime photos. Don't let a smudged lens ruin your next masterpiece. Happy shooting!


Leave a Reply