
Transform your landscape photos into breathtaking masterpieces with these pro editing tips. Start by adjusting white balance for accurate colors, then enhance sky tones and boost overall contrast. Sharpen details selectively to avoid artifacts, and correct lens distortions for clean lines. Remove distracting elements and apply graduated filters to balance exposure. Experiment with HDR techniques for dynamic range, and fine-tune shadows and highlights to reveal hidden details. Don't forget to crop for compelling compositions using the rule of thirds and leading lines. These techniques will elevate your landscapes from ordinary to extraordinary, but there's always more to uncover in the art of photo editing.
Adjust White Balance

When it comes to editing landscape photos, adjusting the white balance is essential. This step helps guarantee your images accurately reflect the colors you saw in real life.
Start by examining your photo's overall color temperature. Is it too warm, with an orange or yellow cast? Or does it appear too cool, with a blue tint?
Most editing software offers preset white balance options like "daylight," "cloudy," or "shade." These can serve as starting points, but don't hesitate to fine-tune manually.
Use the temperature slider to shift between warm and cool tones. The tint slider adjusts the balance between green and magenta.
For landscape photos, pay special attention to natural elements like the sky, water, and foliage. These should look realistic and true to your memory of the scene.
If you're working with a RAW file, you'll have more flexibility to adjust white balance without losing image quality.
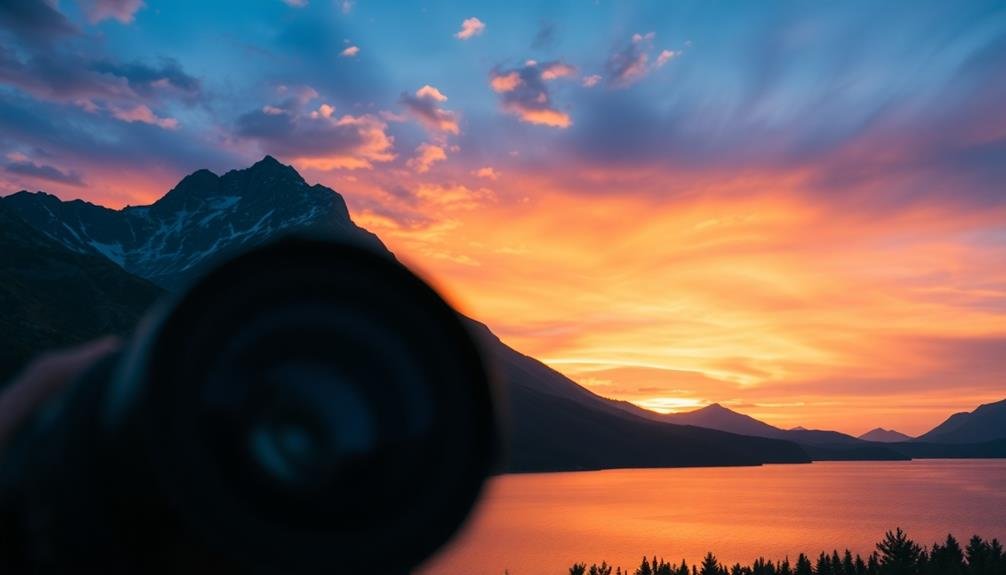
Enhance Sky Colors

After fine-tuning your white balance, it's time to focus on the sky. The sky often plays an essential role in landscape photography, and enhancing its colors can dramatically improve your image. Start by adjusting the saturation and vibrancy of the blue tones. Be careful not to overdo it, as this can make the sky look unnatural.
Next, work on the clouds. Use the highlights and whites sliders to bring out cloud detail. For sunsets or sunrises, experiment with the temperature slider to accentuate warm hues. Don't forget to use graduated filters to balance exposure between the sky and foreground.
Here's a quick guide to sky enhancement techniques:
| Technique | Purpose | Best For | Caution |
|---|---|---|---|
| Saturation | Intensify colors | Clear skies | Avoid oversaturation |
| Clarity | Enhance cloud detail | Cloudy skies | Can increase noise |
| Graduated filter | Balance exposure | Bright skies | Blend edges carefully |
| HSL adjustments | Target specific hues | Sunsets/sunrises | Maintain natural look |
| Dehaze | Reduce atmospheric haze | Misty scenes | Can alter overall contrast |
Sharpen Details

When sharpening landscape photos, you'll want to focus on selective techniques to enhance key areas without affecting the entire image.
Be cautious not to over-sharpen, as this can create unsightly artifacts that detract from your photo's natural beauty.
You'll need to strike a balance between crisp details and noise reduction, ensuring your landscape remains sharp yet realistic.
Selective Sharpening Techniques
Many landscape photographers overlook the power of selective sharpening techniques, but they're essential for enhancing image details. Instead of applying sharpening uniformly across your entire photo, focus on specific areas to draw attention and create depth.
Start by identifying the key elements in your landscape that deserve emphasis. Use masking tools to isolate these areas, such as the foreground rocks, tree branches, or distant mountain ridges. Apply sharpening selectively to these regions, adjusting the intensity to suit each element's texture and importance.
For foreground objects, increase sharpness to bring out intricate details and textures. In midground areas, apply moderate sharpening to maintain a balance between detail and smoothness. For distant elements, use a lighter touch to avoid introducing noise or artifacts.
Experiment with different sharpening methods like unsharp mask, high pass filter, or frequency separation. Each technique offers unique advantages for various landscape features.
Don't forget to sharpen the edges between contrasting elements to enhance overall image clarity.
Always zoom in to 100% while sharpening to verify you're not over-processing. Subtle, targeted sharpening will elevate your landscape photos without compromising their natural beauty.
Avoid Over-Sharpening Artifacts
The temptation to over-sharpen can lead to unsightly artifacts in your landscape photos. To avoid this common pitfall, you'll need to exercise restraint and pay close attention to the details.
When sharpening, focus on enhancing the natural textures and edges in your image without creating artificial-looking halos or noise. Start by using a light touch with your sharpening tools. Zoom in to 100% view to closely examine the effects of your adjustments.
Look for telltale signs of over-sharpening, such as exaggerated edges, increased noise in smooth areas, or unnatural-looking textures. If you notice these artifacts, dial back your sharpening settings.
Consider using masking techniques to apply sharpening selectively. This allows you to sharpen only the areas that need it, like rocky surfaces or tree bark, while leaving smoother areas untouched.
You can also use different sharpening methods for various parts of your image. For instance, apply more aggressive sharpening to foreground elements and lighter sharpening to distant objects.
Balancing Sharpness and Noise
With landscape photography, striking the right balance between sharpness and noise is essential for achieving a polished, professional look. As you sharpen your images to bring out details, you'll inevitably introduce some noise. The key is to find the sweet spot where your photo appears crisp without compromising overall image quality.
Start by applying sharpening selectively. Focus on areas that require more definition, such as rock formations or tree lines. Use masks or adjustment brushes to target specific regions, leaving smoother areas like skies untouched. This approach helps maintain a natural look while enhancing vital elements.
Consider these techniques for balancing sharpness and noise:
| Technique | Pros | Cons |
|---|---|---|
| High-pass filter | Precise control | Time-consuming |
| Unsharp mask | Quick results | Can affect color |
| Frequency separation | Preserves texture | Complex workflow |
Remember that different images require different approaches. High-contrast scenes may need less sharpening, while softer scenes might benefit from more aggressive techniques. Always zoom in to check for artifacts and adjust accordingly. By mastering the art of balancing sharpness and noise, you'll elevate your landscape photos to a professional level.
Correct Lens Distortion

When correcting lens distortion in your landscape photos, you'll first need to identify the type of distortion present, such as barrel or pincushion.
Next, apply lens corrections using your editing software's built-in profiles for your specific camera and lens combination.
Identify Distortion Types
Identifying and correcting lens distortion is a crucial step in refining your landscape photos. To effectively address this issue, you'll need to recognize the different types of distortion that can affect your images. The most common forms are barrel, pincushion, and mustache distortion.
Barrel distortion causes straight lines to curve outward, creating a bulging effect at the center of the image. It's often seen in wide-angle lenses and can make buildings appear to bow outward.
Pincushion distortion, on the other hand, causes lines to curve inward, creating a pinched look. This type is more common in telephoto lenses.
Mustache distortion is a combination of both barrel and pincushion effects, resulting in a wavy appearance along the edges of the frame.
To identify these distortions, look for straight lines in your landscape that should be parallel to the frame's edges. If they appear curved or warped, you're likely dealing with lens distortion.
Pay close attention to horizons, shorelines, and architectural elements. Once you've identified the type of distortion, you can apply the appropriate correction tools in your editing software to straighten lines and restore the natural look of your landscape.
Apply Lens Corrections
After identifying the type of distortion in your landscape photos, it's time to apply lens corrections. Most modern editing software offers built-in lens correction tools that can automatically fix many common distortions.
Start by selecting your camera and lens model from the software's database, which will apply pre-configured corrections.
For barrel distortion, use the correction tool to push the curved edges outward, straightening vertical and horizontal lines. In cases of pincushion distortion, pull the edges inward to achieve the same effect.
Adjust the distortion slider carefully, finding the right balance without overcorrecting.
Address chromatic aberration by using the defringe tool or adjusting the purple and green fringe sliders. This will eliminate color fringes along high-contrast edges in your image.
For vignetting, use the vignette correction slider to brighten darkened corners, but be cautious not to overdo it, as some vignetting can add artistic flair to your landscape.
If your software doesn't have an automatic lens correction feature, manually adjust distortion, chromatic aberration, and vignetting sliders.
Always zoom in to check the results, ensuring you've corrected the distortion without introducing new issues to your landscape photo.
Fine-Tune Manual Adjustments
While automatic lens corrections are helpful, you'll often need to fine-tune these adjustments manually for the best results.
Start by examining the image's horizon line and vertical elements. If they appear curved or tilted, use the distortion correction tool to straighten them. Pay close attention to buildings, trees, or other structures that should be perfectly vertical.
Next, address any remaining vignetting issues. Adjust the vignette slider to brighten or darken the corners of your image as needed. Be subtle with this effect, as excessive vignetting can look unnatural.
Check for chromatic aberration, which appears as colored fringes along high-contrast edges. Use the defringe tool to remove any remaining color artifacts not corrected by automatic adjustments.
Boost Contrast and Saturation

The magic of landscape photography often lies in its vibrant colors and striking contrasts. To enhance these elements, you'll want to boost contrast and saturation in your editing process.
Start by adjusting the overall contrast of your image, increasing the difference between light and dark areas. This will add depth and dimensionality to your landscape.
Next, focus on saturation. Increase it gradually to bring out the rich hues in your scene, but be careful not to overdo it. Pay attention to specific color channels, like blues for skies or greens for foliage, and adjust them individually for a more nuanced result.
You can also use the vibrance tool, which boosts less saturated colors while preserving skin tones and already vibrant areas.
Don't forget about shadows and highlights. Boost shadow details to reveal textures in darker areas, and reduce highlights to recover detail in bright spots like clouds.
Use clarity or texture sliders to enhance the crispness of your image, bringing out fine details in rocks, trees, or water.
Crop for Compelling Composition

When cropping your landscape photos, consider applying the Rule of Thirds to create a more balanced and visually appealing composition.
You'll also want to look for leading lines within the image that can guide the viewer's eye through the scene.
Don't forget to pay attention to negative space, as it can enhance the main subject and add a sense of scale to your landscape.
Rule of Thirds
One of the most powerful composition techniques in photography is the rule of thirds. This principle involves dividing your image into a 3×3 grid and placing key elements along these lines or at their intersections.
When editing your landscape photos, you can apply this rule by cropping your image to align with these guidelines.
To effectively use the rule of thirds in your landscape edits:
- Align the horizon with either the top or bottom horizontal line
- Position prominent features, like trees or mountains, along vertical lines
- Place points of interest at grid intersections for maximum impact
- Use negative space to create balance and draw attention to your subject
Leading Lines Technique
Building on the rule of thirds, another powerful composition technique for landscape photos is the use of leading lines. These lines guide the viewer's eye through the image, creating depth and drawing attention to key elements. When editing your landscape photos, look for natural or man-made lines that can serve this purpose.
To effectively use leading lines:
- Identify potential lines in your image (roads, rivers, fences)
- Adjust your crop to emphasize these lines
- Guarantee the lines lead to a focal point or area of interest
- Experiment with different angles to maximize the impact
Consider these common types of leading lines and their effects:
| Line Type | Effect | Examples |
|---|---|---|
| Straight | Direct, bold | Roads, piers |
| Curved | Gentle, natural | Rivers, paths |
| Converging | Depth, perspective | Railroad tracks |
| Diagonal | Dynamic, energetic | Mountain ridges |
| S-Curve | Graceful, flowing | Winding roads |
When applying the leading lines technique, don't force it if it's not naturally present. Instead, focus on enhancing existing lines through careful cropping and subtle adjustments to contrast and clarity. This will help create a more compelling and visually engaging landscape photograph.
Balance Negative Space
Balancing negative space is a crucial aspect of creating compelling landscape compositions. When editing your photos, carefully consider the empty areas surrounding your main subject. These spaces can enhance the overall impact of your image by providing contrast and drawing attention to the focal point.
Effective use of negative space can create a sense of tranquility, emphasize scale, or evoke emotions in your viewers.
To balance negative space in your landscape photos:
- Crop strategically: Adjust your composition to create a harmonious balance between the subject and surrounding empty areas.
- Use the rule of thirds: Place your main subject off-center to create more interesting negative space arrangements.
- Experiment with minimalism: Sometimes, less is more. Try removing distracting elements to emphasize the power of negative space.
- Play with symmetry: Use reflections or natural elements to create balanced compositions with negative space.
When editing, pay attention to how negative space interacts with your subject. It shouldn't overpower the main focus but rather complement it.
Remove Distracting Elements

While capturing breathtaking landscapes, you'll often find unwanted elements creeping into your frame. These distractions can detract from your image's impact, but don't worry – you can easily remove them during post-processing.
Start by identifying the distracting elements in your photo. Common culprits include power lines, trash, stray people, or vehicles. Once you've pinpointed these unwanted objects, use your editing software's removal tools to erase them. The clone stamp, healing brush, or content-aware fill tools are excellent options for this task.
When removing elements, pay attention to the surrounding areas to maintain a natural look. Blend the edited areas seamlessly with the rest of the image to avoid any obvious signs of manipulation. Here's a quick guide to removing common distractions:
| Element | Tool | Technique |
|---|---|---|
| Power lines | Clone stamp | Sample nearby sky |
| Trash | Healing brush | Blend with surroundings |
| People | Content-aware fill | Let AI do the work |
| Vehicles | Patch tool | Replace with similar terrain |
Apply Graduated Filters
Graduated filters are a powerful tool in landscape photo editing, allowing you to selectively adjust different parts of your image.
They're particularly useful for balancing exposure between bright skies and darker foregrounds, creating a more natural-looking result.
To apply a graduated filter effectively, start by selecting the tool in your editing software. Then, drag it across your image, adjusting the placement and angle to match the horizon or boundary point in your scene.
You can fine-tune the filter's intensity and feathering to achieve a seamless blend.
Graduated filters offer various adjustment options, including:
- Exposure: Brighten or darken specific areas
- Color temperature: Adjust the warmth or coolness of a section
- Clarity and texture: Enhance details in selected regions
- Saturation: Boost or reduce color intensity in targeted areas
Don't limit yourself to just one filter per image. You can apply multiple graduated filters to address different areas or achieve more complex effects.
Experiment with overlapping filters or using them in conjunction with other editing tools to create a balanced, polished final result.
Remember to use graduated filters subtly. Your goal is to enhance the image naturally, not create an obviously edited look.
Experiment With HDR Techniques

HDR (High Dynamic Range) techniques offer another powerful way to enhance your landscape photos, especially when dealing with scenes that have a wide range of light and dark areas. To experiment with HDR, you'll need to capture multiple exposures of the same scene, typically three or more, varying from underexposed to overexposed.
Once you've got your exposures, use HDR software or your editing program's HDR merge feature to combine them. Adjust the settings to find the right balance between natural-looking results and the enhanced dynamic range you're after. Don't overdo it – subtle HDR can create stunning images, while excessive processing often leads to unrealistic results.
Here's a quick guide to common HDR effects and when to use them:
| Effect | Best Used For | Tips |
|---|---|---|
| Tone Mapping | Balancing exposures | Start subtle, increase gradually |
| Detail Enhancement | Bringing out textures | Use sparingly on smoother areas |
| Contrast Adjustment | Enhancing depth | Be careful not to crush shadows |
| Color Saturation | Boosting vibrancy | Avoid oversaturation, especially in skies |
Fine-tune Shadows and Highlights

Mastering shadow and highlight adjustments can dramatically improve your landscape photos. These tools allow you to bring out details in dark areas and tame overly bright spots, creating a more balanced and visually appealing image.
Start by adjusting the overall exposure, then focus on fine-tuning shadows and highlights separately.
When working with shadows, aim to reveal hidden details without making the image look unnatural. Gradually increase the shadow slider until you achieve the desired effect. For highlights, reduce their intensity to prevent overexposure and maintain texture in bright areas like clouds or reflections.
Here are some key tips for fine-tuning shadows and highlights:
- Use the histogram as a guide to guarantee you're not clipping important details
- Apply local adjustments with brushes or gradient filters for more precise control
- Experiment with clarity and dehaze tools to enhance contrast and depth
- Don't overdo it; subtle adjustments often yield the most natural-looking results
Remember to maintain a balance between shadows and highlights to preserve the image's overall mood and atmosphere.
Frequently Asked Questions
What Equipment Is Essential for Capturing High-Quality Landscape Photos?
You'll need a reliable camera, wide-angle lens, sturdy tripod, and neutral density filters. Don't forget a remote shutter release and polarizing filter. Pack extra batteries and memory cards. A weather-resistant backpack is essential for outdoor shoots.
How Can I Protect My Camera Gear in Harsh Outdoor Environments?
You'll want to invest in weatherproof camera bags, lens covers, and protective filters. Use rain sleeves in wet conditions, and keep silica gel packs handy. Don't forget to clean your gear regularly and avoid sudden temperature changes.
What's the Best Time of Day to Shoot Landscape Photography?
You'll get the best results during the "golden hours" – just after sunrise and before sunset. These times offer soft, warm light that enhances colors and creates long shadows. Don't forget to explore midday for unique lighting opportunities too.
How Do I Choose the Right Focal Length for Landscape Shots?
Consider your desired composition when choosing focal length. Wide-angle lenses (16-35mm) capture expansive scenes, while standard lenses (35-70mm) offer natural perspectives. Telephoto lenses (70mm+) compress distant elements. Experiment to find what suits your vision best.
Are There Any Post-Processing Techniques Specific to Night Sky Landscapes?
For night sky landscapes, you'll want to focus on noise reduction, enhancing star visibility, and balancing exposure. Try stacking multiple images, adjusting white balance for cooler tones, and using masks to selectively brighten the Milky Way.
In Summary
You're now equipped with powerful techniques to transform your landscape photos. Don't be afraid to experiment and develop your unique style. Remember, editing is an art form, and practice makes perfect. As you apply these tips, you'll see your images come alive with vibrant colors, sharp details, and balanced compositions. Keep refining your skills, and soon you'll be creating breathtaking landscape photos that captivate viewers and showcase nature's beauty.


Leave a Reply