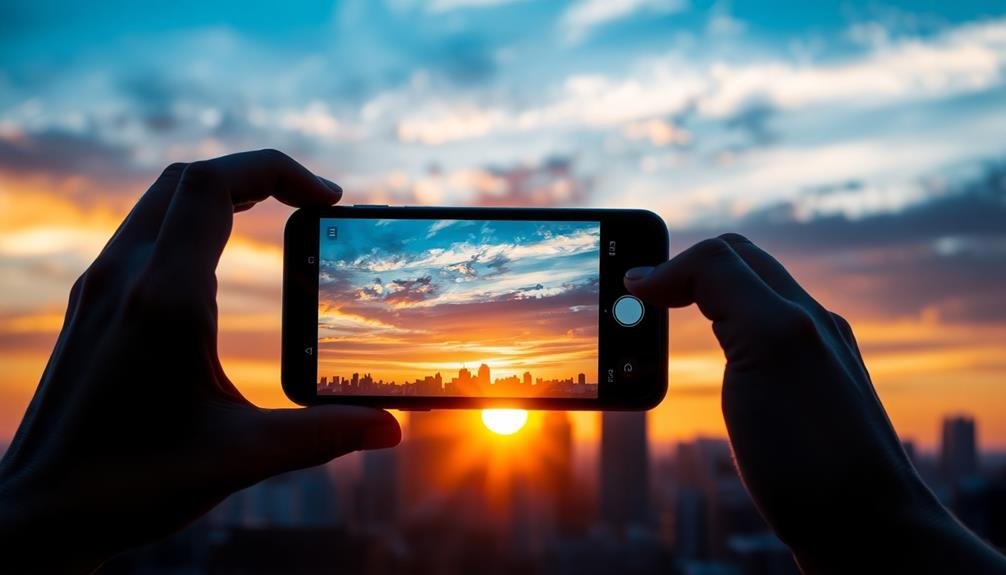
To elevate your mobile HDR photos, start by mastering exposure bracketing techniques. Use dedicated HDR apps like ProCamera (iOS) or Camera FV-5 (Android) for precise control. Choose high-contrast scenes like landscapes or architectural shots, and compose with the rule of thirds for balance. Avoid overprocessing by making subtle adjustments to highlights and shadows. Stabilize your phone using a tripod or steady surface for sharper results. In low-light situations, experiment with longer exposures and creative effects. By combining these pro techniques, you'll capture stunning HDR images that showcase a wider range of tones and details. Dive deeper to reveal even more advanced HDR secrets.
Understanding Mobile HDR Photography
Frequently, mobile photographers encounter challenging lighting situations where a single exposure can't capture the full range of brightness in a scene. This is where High Dynamic Range (HDR) photography comes into play. HDR combines multiple exposures of the same scene to create a single image with a broader range of tones.
Mobile HDR works by taking several photos in quick succession, each with different exposure settings. Your phone's software then merges these images, selecting the best-exposed parts from each to create a final composite. This technique allows you to capture details in both the brightest highlights and darkest shadows that might otherwise be lost.
While many smartphones offer automatic HDR modes, understanding the principles behind this technology can help you use it more effectively. You'll need to evaluate factors like subject movement, camera stability, and the contrast range of your scene.
Essential HDR Camera Apps
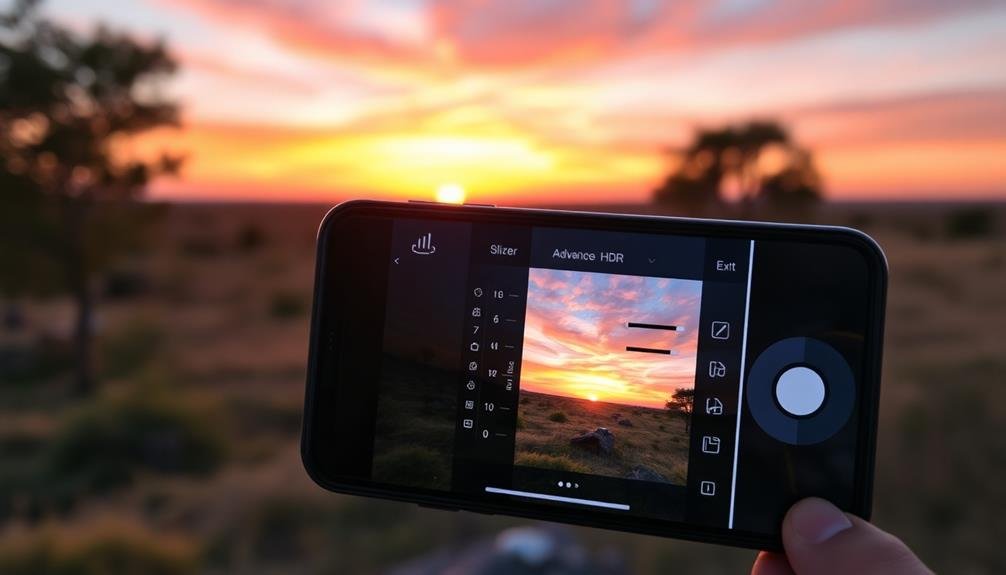
While understanding HDR principles is valuable, having the right tools at your disposal can make a significant difference in your mobile HDR photography. Several powerful HDR camera apps can enhance your mobile photography experience.
ProCamera is a top choice for iOS users, offering manual controls and a dedicated HDR mode. It allows you to adjust exposure bracketing and provides real-time HDR preview.
For Android users, Camera FV-5 is an excellent option. It offers DSLR-like manual controls and supports RAW capture, giving you more flexibility in post-processing.
Adobe Lightroom Mobile is another versatile app for both iOS and Android, featuring built-in HDR capabilities and powerful editing tools.
If you're looking for a user-friendly option, try Snapseed. It's available on both platforms and offers a simple HDR Scape filter that can quickly enhance your images.
For more advanced users, HDR Camera+ (Android) and ProHDR X (iOS) provide extensive control over HDR settings and output.
Mastering Exposure Bracketing
To master exposure bracketing, you'll need to understand ideal bracket settings for different scenarios.
You can choose between manual and auto bracketing, each offering unique benefits for your HDR photography.
These techniques will help you capture stunning images in challenging lighting conditions, from high-contrast landscapes to dimly lit interiors.
Optimal Bracket Settings
When it comes to mastering exposure bracketing for mobile HDR photography, understanding ideal bracket settings is crucial. Most smartphones allow you to adjust exposure compensation (EV) in increments of 1/3 or 1/2 stops. For best results, aim for a three-shot bracket with -2EV, 0EV, and +2EV. This range typically captures enough detail in shadows and highlights for most scenes.
In high-contrast situations, you might need a five-shot bracket: -2EV, -1EV, 0EV, +1EV, and +2EV. This wider range guarantees you capture all the tonal information in extremely bright or dark areas.
However, remember that more brackets mean longer processing times and potential alignment issues if there's movement in the scene.
For scenes with moderate contrast, a two-stop range (-1EV, 0EV, +1EV) might suffice. Experiment with different bracket settings to find what works best for your specific smartphone and typical shooting conditions.
Pay attention to your histogram to guarantee you're capturing the full dynamic range of the scene. If you notice clipping in the shadows or highlights, adjust your bracket settings accordingly.
With practice, you'll develop an intuition for the best settings in various lighting situations.
Manual vs. Auto Bracketing
Understanding the difference between manual and auto bracketing is key to mastering exposure bracketing in mobile HDR photography.
With manual bracketing, you're in complete control of each exposure's settings. You'll adjust the shutter speed, ISO, or both for each shot in your sequence. This method offers precise control but requires more time and expertise.
Auto bracketing, on the other hand, lets your phone's camera do the work. You'll set the number of shots and the exposure value (EV) difference between each frame, and the camera will automatically capture the sequence. It's faster and more convenient, especially for moving subjects or handheld shots.
When choosing between manual and auto, consider your subject and shooting conditions. For static scenes where you have time to set up, manual bracketing can yield superior results. You can fine-tune each exposure for ideal detail in shadows and highlights.
For fast-moving subjects or when you're shooting without a tripod, auto bracketing is often the better choice. It minimizes camera shake and guarantees you don't miss the moment.
Experiment with both methods to determine which works best for your style and subjects.
Capturing Difficult Lighting Scenes
Mastering exposure bracketing is vital when capturing difficult lighting scenes with your mobile device. When faced with high-contrast environments, you'll need to adjust your technique to guarantee all elements are properly exposed. Start by identifying the darkest and brightest areas in your frame, then set your camera to capture multiple exposures.
For challenging scenes, consider using a wider bracket range. Instead of the standard -2, 0, +2 EV, try -3, -1, +1, +3 EV for more flexibility in post-processing. Remember to keep your device steady or use a tripod for consistent framing across all exposures.
| Scene Type | Bracket Range | Number of Shots | Tips |
|---|---|---|---|
| Sunset | -2 to +2 EV | 3 to 5 | Focus on sky colors |
| Interiors | -3 to +3 EV | 5 to 7 | Use a tripod |
| Cityscapes | -2 to +2 EV | 3 to 5 | Capture during blue hour |
| Night | -4 to +4 EV | 5 to 9 | Long exposure for base shot |
When shooting sunsets or sunrise, prioritize capturing the sky's colors while maintaining detail in the foreground. For interiors with bright windows, use a wider bracket range to balance the interior and exterior lighting. In cityscapes, timing is vital – shoot during the blue hour for a balanced exposure between buildings and sky.
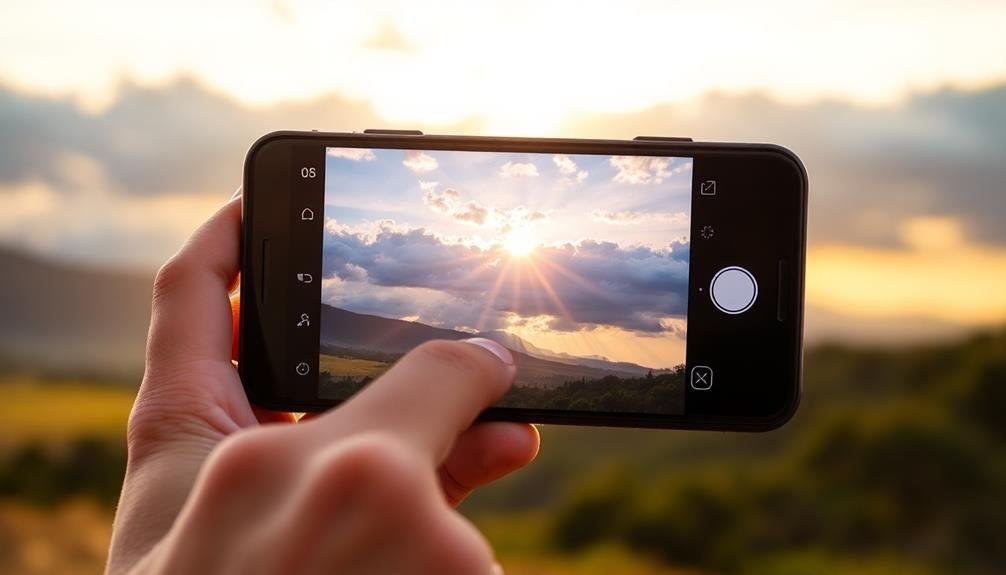
Choosing Ideal HDR Subjects
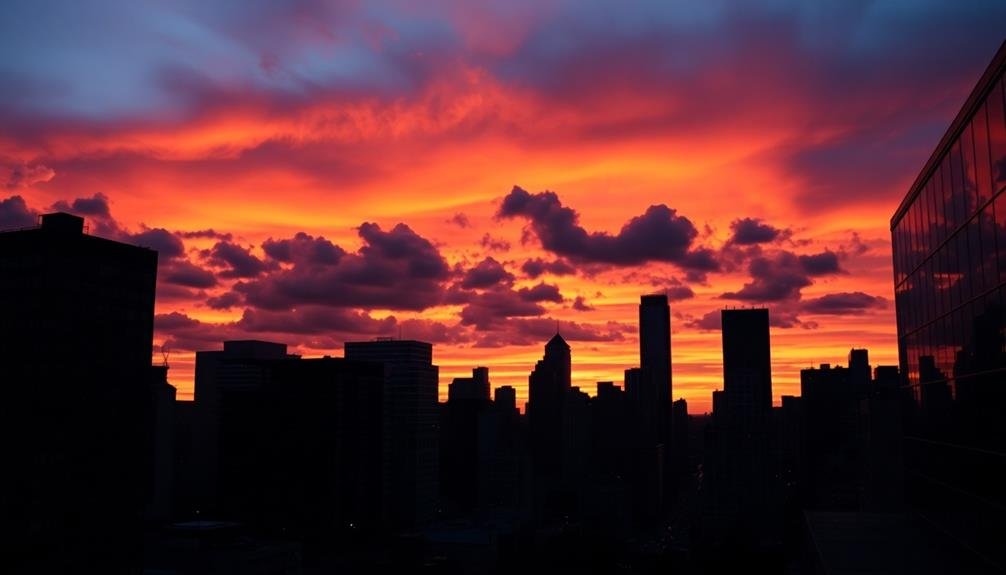
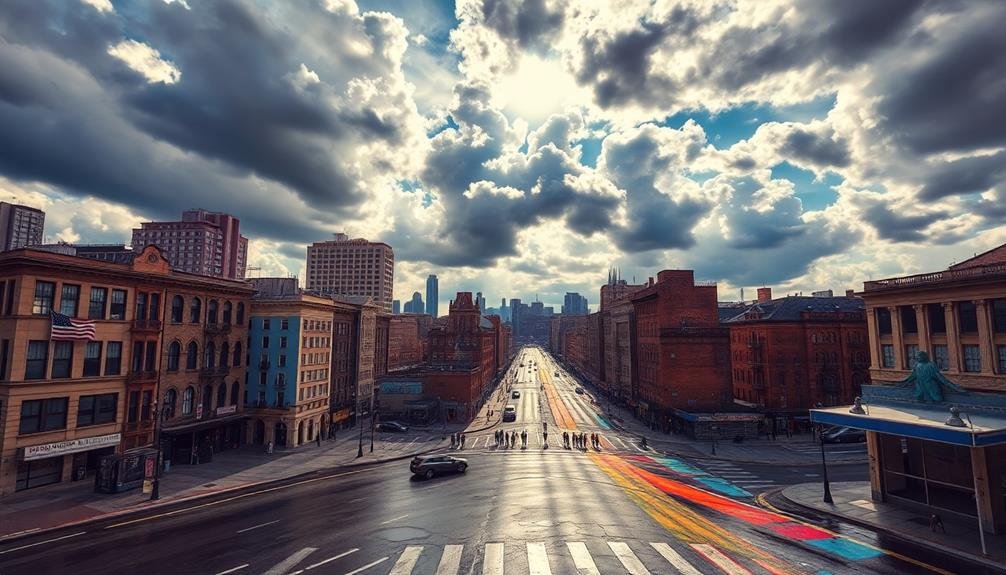
While any subject can potentially benefit from HDR techniques, some scenes are particularly well-suited for this method. Look for scenes with high contrast between light and dark areas, such as landscapes with bright skies and shadowy foregrounds.
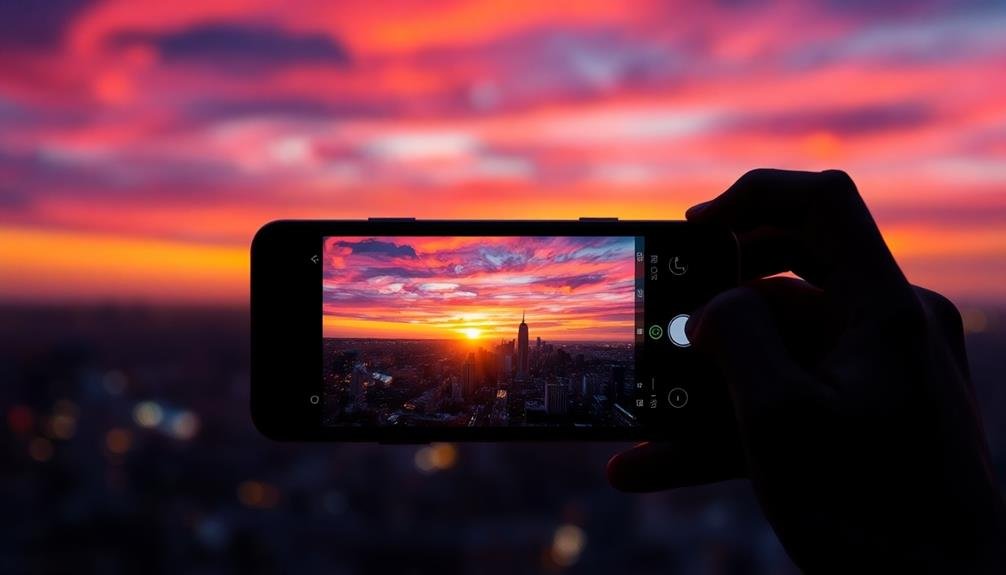
Architectural shots, especially interiors with windows, are ideal as they often have extreme brightness differences. Sunsets and sunrises offer perfect opportunities for HDR, allowing you to capture both the vibrant sky and detailed foreground.
Night scenes with artificial lighting, like cityscapes or illuminated buildings, can be dramatically enhanced using HDR. When shooting nature, seek out subjects with intricate textures and varying light conditions, such as forests or rocky terrain.
Avoid using HDR for moving subjects or scenes with rapid light changes, as this can lead to ghosting or unnatural results. Instead, focus on static subjects where you can take multiple exposures without movement.
Composition Techniques for HDR
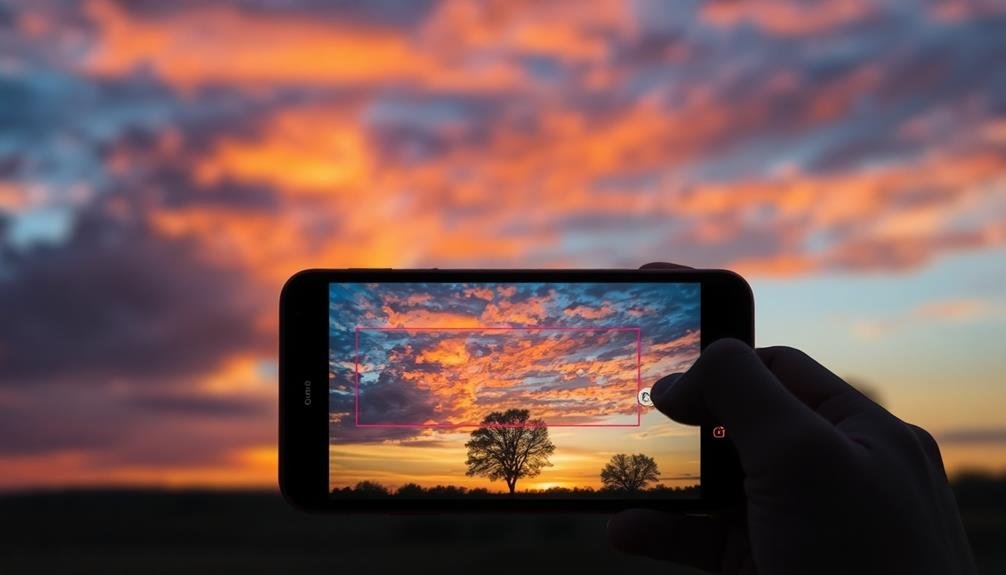
HDR-friendly composition techniques can elevate your mobile photography to new heights. When framing your shot, use the rule of thirds to create balance and visual interest. Place key elements along the grid lines or at their intersections to draw the viewer's eye.
For HDR landscapes, include a strong foreground element to add depth and dimension to your image. Incorporate leading lines to guide the viewer's gaze through the frame. These can be natural elements like rivers or man-made structures like roads. In HDR photography, leading lines can help emphasize the contrast between light and dark areas.
Consider symmetry and reflections, which work particularly well in HDR images. Look for opportunities to capture mirror-like surfaces such as calm water or glass buildings. Frame your shot to include both the subject and its reflection for a striking composition.
Don't forget about negative space. In HDR photos, areas of high contrast can be visually intense, so balance them with calmer regions. This gives the viewer's eyes a place to rest and enhances the overall impact of your image.
Handling Motion in HDR Shots
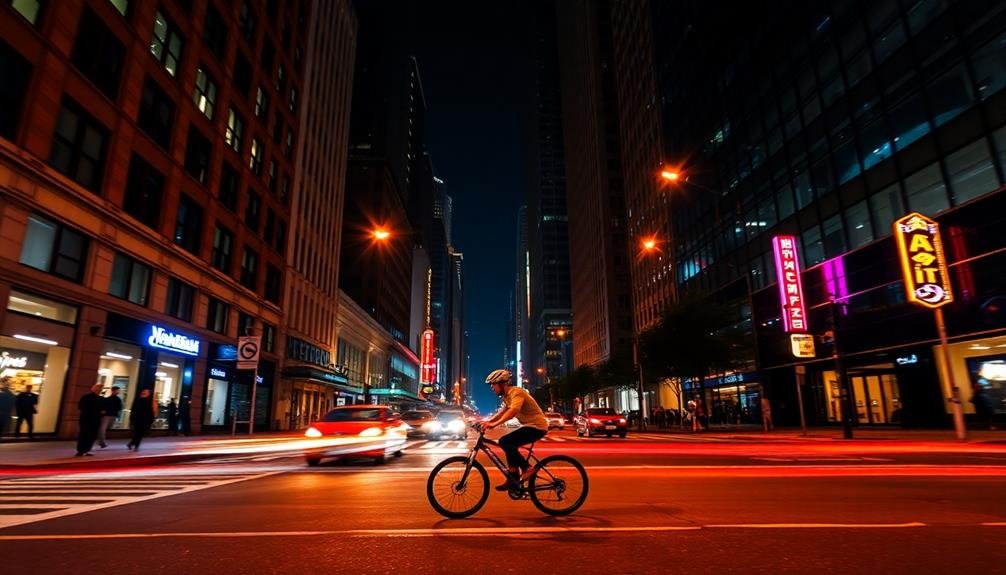
When capturing HDR shots with motion, you'll need to decide between freezing action or embracing blur for creative effect.
To freeze motion, use faster shutter speeds and rely on your phone's burst mode or HDR-specific features.
For intentional blur or when shooting in low light, consider using a tripod or stabilization method to keep your phone steady while capturing multiple exposures.
Freeze vs. Blur Techniques
Motion presents a unique challenge in HDR photography, especially when shooting with mobile devices. When capturing multiple exposures for HDR, you'll need to decide whether to freeze or blur the motion in your scene.
Freezing motion requires faster shutter speeds, which can be achieved by increasing your ISO or using burst mode on your smartphone. This technique works well for capturing sharp details in fast-moving subjects like sports or wildlife.
On the other hand, blurring motion can create a sense of dynamism and flow in your HDR images. To achieve this effect, use slower shutter speeds or enable long exposure mode on your mobile device. You'll want to stabilize your phone using a tripod or stable surface to avoid camera shake.
Blurring techniques are ideal for scenes with flowing water, moving clouds, or busy city streets.
Consider the story you want to tell with your image when choosing between freezing and blurring. Experiment with both techniques to see which best conveys your intended mood and message.
Remember that HDR processing can sometimes exaggerate motion artifacts, so be mindful of your subject's movement when composing your shot.
Tripod and Stabilization Methods
Stability is essential for capturing sharp, well-aligned HDR images with your mobile device. While built-in image stabilization helps, using external support can greatly improve your results. A compact tripod or smartphone mount is invaluable for keeping your device steady during multiple exposures.
If you don't have a tripod, lean against a wall or brace your elbows on a stable surface to minimize camera shake.
For handheld HDR shots, practice proper technique:
- Hold your phone with both hands, keeping your elbows close to your body
- Use your phone's volume buttons as a shutter release to avoid tapping the screen
- Take a deep breath and exhale slowly while capturing the images
- Enable your camera app's grid feature to help maintain consistent framing
When shooting in low light or with longer exposures, a tripod becomes essential. Many lightweight, portable options are available specifically for smartphones.
If you're using a regular tripod, invest in a smartphone adapter to securely attach your device. Remember, even slight movements between exposures can result in ghosting or misalignment in your final HDR image, so prioritize stability for the best results.
Avoiding Common HDR Pitfalls
Four common pitfalls can derail your mobile HDR photography efforts if you're not careful.
First, avoid overprocessing your images. While HDR can enhance details, excessive processing leads to unnatural-looking photos with halos and oversaturated colors. Stick to subtle adjustments that maintain a realistic appearance.
Second, watch out for ghosting artifacts caused by moving subjects. When capturing multiple exposures, any movement can result in blurry or misaligned elements. Choose static scenes or use your app's deghosting feature to mitigate this issue.
Third, don't neglect proper composition. HDR shouldn't be a crutch for poor framing or uninteresting subjects. Focus on creating compelling compositions that benefit from the expanded dynamic range.
Lastly, avoid using HDR in every situation. It's not always necessary or appropriate, especially in scenes with minimal contrast. Learn to recognize when HDR will genuinely improve your image and when it's better to stick with a single exposure.
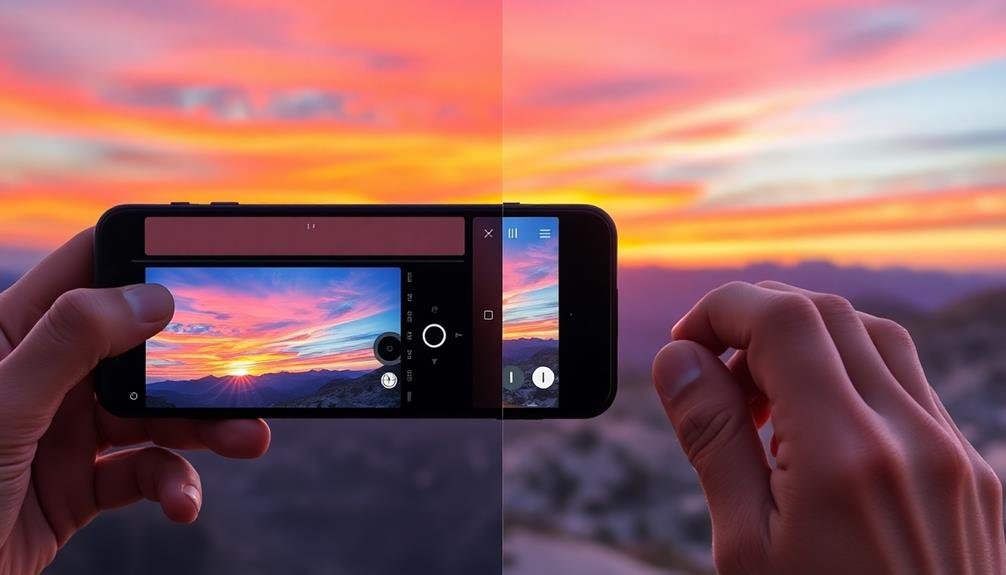
Advanced HDR Editing Tools
While understanding common pitfalls is important, mastering advanced HDR editing tools can elevate your mobile photography to new heights.
Today's smartphones offer sophisticated editing capabilities that rival desktop software. You'll find a range of apps specifically designed for HDR processing, each with unique features to enhance your images.
To make the most of these tools, focus on:
- Tone mapping: Adjust highlights, shadows, and mid-tones to create a balanced exposure across your image.
- Color grading: Fine-tune color saturation, temperature, and tint to achieve your desired mood and style.
- Selective adjustments: Use brush tools or masks to apply edits to specific areas of your photo, preserving details where needed.
- Noise reduction: Minimize graininess in shadow areas while maintaining sharpness in well-lit regions.
Experiment with apps like Snapseed, Adobe Lightroom Mobile, or Affinity Photo for iPad. These powerful tools offer advanced features like curve adjustments, lens corrections, and even AI-powered enhancements.
Don't be afraid to push the boundaries of your editing skills. With practice, you'll develop a keen eye for subtle adjustments that can transform your HDR photos from good to extraordinary.
Balancing Highlights and Shadows

Balancing highlights and shadows stands out as an essential skill in HDR photography. It's the key to creating images with depth, detail, and visual impact. When you're working with HDR photos on your mobile device, you'll need to pay close attention to these elements to achieve a natural-looking result.
Start by examining your image's histogram. It'll show you the distribution of tones from shadows to highlights. Aim for a balanced spread across the range, avoiding spikes at either end. Use your app's adjustment tools to bring down overly bright areas and lift dark shadows.
Be careful not to push too far, as this can lead to an unnatural, flat look. Focus on preserving detail in both highlights and shadows. You'll want to see texture in bright clouds and definition in shadowy areas. Use selective adjustments to target specific parts of your image.
Gradients can help you manage shifts between light and dark areas smoothly. Remember, your goal is to create a balanced image that closely resembles what your eye sees in real life, with a touch of enhanced drama.
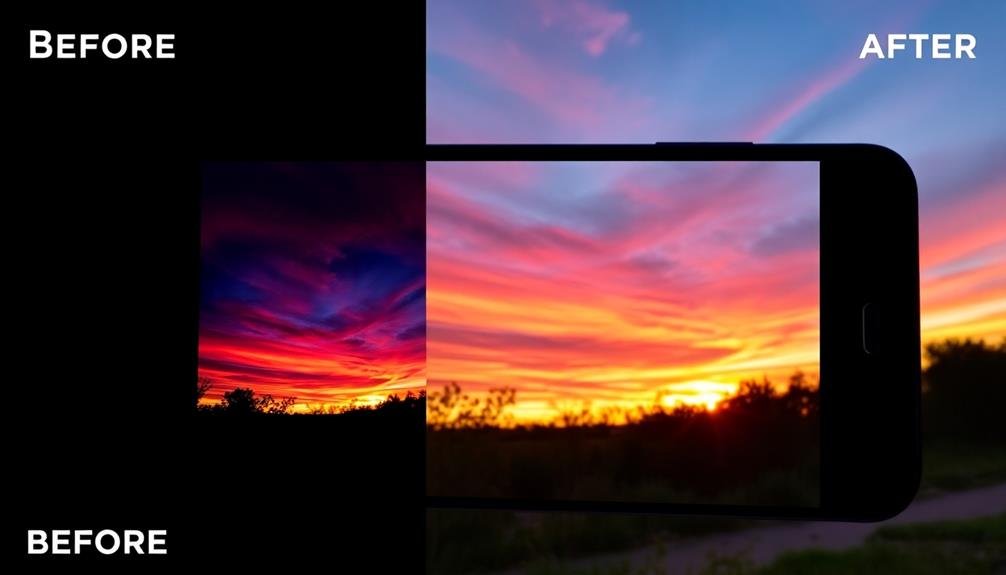
Creating Natural-Looking HDR Images
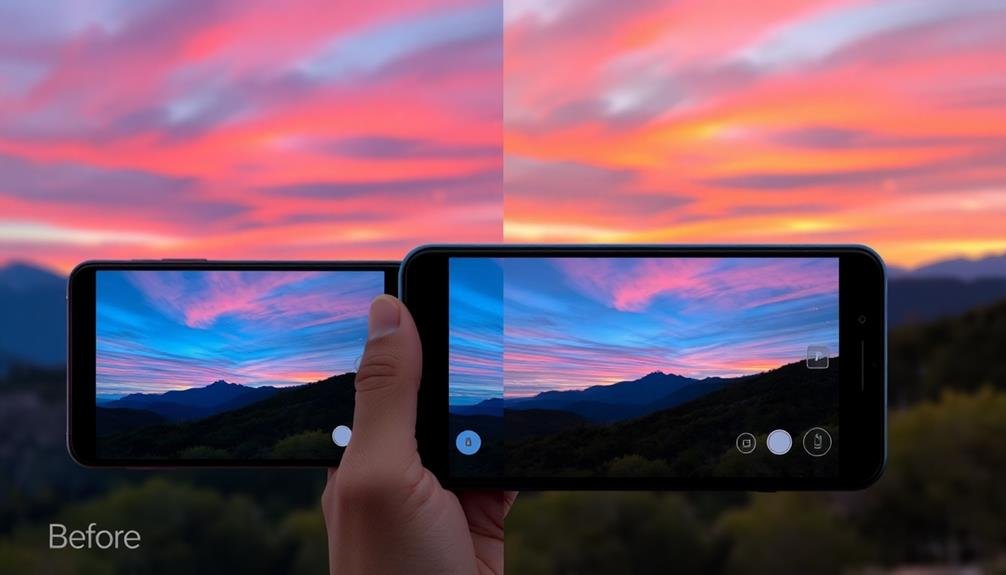
When creating natural-looking HDR images on your mobile device, focus on balancing exposure levels across your merged shots.
You'll want to avoid pushing the editing too far, as overprocessing can lead to unrealistic results.
Aim for a subtle blend that enhances the dynamic range while maintaining the scene's authentic appearance.
Balancing Exposure Levels
The key to creating stunning HDR photos on your mobile device lies in balancing exposure levels. When you're capturing multiple exposures, it's essential to guarantee that each shot covers the full range of tones in your scene.
Start by setting your camera app to bracket mode, which automatically captures a series of photos at different exposures.
To achieve well-balanced exposures, follow these steps:
- Identify the darkest and brightest areas in your scene.
- Set your base exposure for the midtones.
- Adjust the exposure compensation for your darkest and brightest shots.
- Review your results and fine-tune as needed.
Remember that the goal is to capture detail in both shadows and highlights without pushing the exposures too far. Overexposed highlights or underexposed shadows can lead to unnatural-looking results.
As you practice, you'll develop an eye for determining the right balance of exposures for each scene.
When merging your exposures, use your HDR app's tools to fine-tune the balance between highlights, midtones, and shadows. Aim for a natural look that preserves the scene's original contrast while revealing details that might be lost in a single exposure.
Avoiding Overprocessed Appearances
One of the biggest challenges in HDR photography is avoiding an overprocessed look. To create natural-looking HDR images, you'll need to exercise restraint and focus on subtlety. Start by capturing a well-balanced set of exposures, then use a light touch when blending them.
When editing, pay close attention to contrast, saturation, and sharpness. Avoid pushing these elements too far, as they can quickly lead to an artificial appearance. Instead, aim for a balanced image that retains its realism while enhancing dynamic range.
Here's a quick guide to help you maintain a natural look:
| Element | Natural Look | Overprocessed Look | How to Avoid |
|---|---|---|---|
| Contrast | Soft shadows | Harsh shifts | Use gradual blending |
| Color | Realistic | Oversaturated | Adjust selectively |
| Details | Subtle | Exaggerated | Reduce clarity/texture |
| Edges | Smooth | Haloed | Minimize sharpening |
HDR for Low-Light Situations
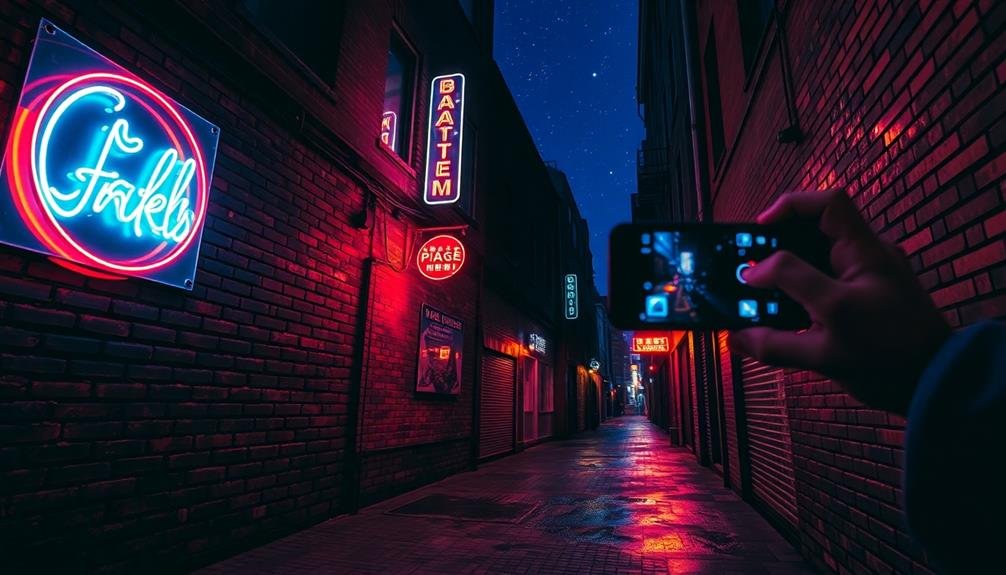
Despite challenging conditions, HDR techniques can greatly enhance your low-light photography. When shooting in dim environments, you'll often encounter high contrast between light sources and shadows. HDR can help balance these extremes, revealing details in both bright and dark areas that might otherwise be lost. By capturing multiple exposures, you're able to preserve highlights without sacrificing shadow detail.
To make the most of HDR in low-light situations, consider these tips:
- Use a stable surface or tripod to minimize camera shake during longer exposures.
- Experiment with manual exposure settings to guarantee proper bracketing.
- Pay attention to moving subjects, as ghosting can be more noticeable in low light.
- Adjust your HDR software's tone mapping to achieve a natural look.
Remember that HDR isn't always necessary for low-light shots. In some cases, embracing shadows and contrast can create a moody atmosphere.
However, when you need to capture a wider range of tones, HDR can be a powerful tool. It's particularly useful for interior shots with mixed lighting or nighttime cityscapes where you want to retain both street lights and building details.
Experimenting With Artistic HDR Effects
While HDR can solve technical challenges in low-light photography, it also opens up a world of creative possibilities. You can use HDR techniques to create surreal, dream-like images or to emphasize textures and details in ways that aren't possible with standard photography.
Start by experimenting with different exposure brackets. Instead of the typical -2, 0, +2 EV, try more extreme variations like -3, 0, +3 or even -4, 0, +4. This will produce more dramatic results, enhancing shadows and highlights beyond what's naturally visible.
Play with HDR-specific settings in your mobile app. Adjust parameters like contrast, saturation, and detail enhancement to push the boundaries of realism. Don't be afraid to create images that look deliberately stylized or painterly.
Try combining HDR with other techniques. Use selective focus or motion blur in one of your bracketed shots to create unique effects when merged. You can also experiment with different color profiles or black-and-white conversions on your HDR images.
Frequently Asked Questions
Can HDR Photography Damage My Smartphone's Camera Sensor Over Time?
No, HDR photography won't damage your smartphone's camera sensor. It's a software-based technique that combines multiple exposures. You're not putting extra strain on the hardware, so you can use HDR worry-free on your device.
How Does HDR Affect Battery Life When Shooting Extensively?
HDR can drain your battery faster when you're shooting extensively. It's processing multiple exposures and combining them, which requires more power. You'll notice your battery level dropping quicker compared to regular photo-taking sessions.
Are There Any Legal Issues With Using HDR in Photojournalism or Documentary Work?
You should be cautious when using HDR in photojournalism. While it's not explicitly banned, it can raise ethical concerns about image manipulation. Always check your publication's guidelines and prioritize accurate representation of the scene you're documenting.
Can HDR Techniques Be Applied to Videos on Mobile Devices?
Yes, you can apply HDR techniques to videos on your mobile device. Many modern smartphones offer HDR video recording capabilities. You'll get improved dynamic range, better contrast, and more vibrant colors in your mobile video footage.
How Do Weather Conditions Like Fog or Rain Impact Mobile HDR Photography?
Weather conditions like fog or rain can considerably impact your mobile HDR photography. You'll find these elements add atmosphere but may reduce contrast. Adjust your exposure settings and embrace the mood to capture stunning, moody shots in challenging conditions.
In Summary
You've now got the tools to take your mobile HDR photography to the next level. Remember, it's all about balance and subtlety. Don't overdo it; aim for realistic results that enhance, not distort. Keep practicing with different subjects and lighting conditions. Experiment with apps, exposure bracketing, and composition techniques. As you refine your skills, you'll create stunning HDR images that capture the world's full dynamic range right from your smartphone.


Leave a Reply