Elevate your HDR street photography on mobile devices with these tricks. Master exposure bracketing to capture detail in highlights and shadows. Utilize HDR-specific apps for streamlined workflow and improved results. Focus on dynamic light and shadows to create striking images. Seek high-contrast scenes for dramatic visual tension. Experiment with different HDR styles, from natural to surreal. Edit your HDR images post-capture to fine-tune the effect. Try manual exposure blending for precise control. Optimize your camera settings for HDR. Time your shots strategically, especially during golden and blue hours. By exploring these techniques, you'll reveal the full potential of HDR street photography on your mobile device.
Master Exposure Bracketing

To master exposure bracketing, you'll need to understand its core concept: capturing multiple shots of the same scene at different exposure levels. This technique allows you to combine these images later, creating a high dynamic range (HDR) photo with enhanced detail in both highlights and shadows.
Start by enabling your phone's HDR or exposure bracketing mode. If your device doesn't have a built-in feature, download a third-party app that offers manual controls. Set your camera to capture at least three exposures: one properly exposed, one underexposed, and one overexposed.
When shooting, keep your phone as steady as possible or use a tripod to guarantee alignment between shots. Focus on scenes with high contrast, like streets with bright sunlight and deep shadows. Experiment with different exposure values to find the best range for your specific scene.
After capturing your bracketed shots, use HDR merging software on your phone or computer to combine the images. Adjust the resulting HDR photo to achieve a natural look, avoiding over-processing that can make your street photography appear artificial.
With practice, you'll develop an eye for scenes that benefit most from exposure bracketing, elevating your mobile street photography to new heights.
Use HDR-Specific Apps

While mastering exposure bracketing is a valuable skill, dedicated HDR apps can streamline your workflow and offer advanced features. These apps are designed specifically for creating high dynamic range images, often with more control and better results than your phone's built-in HDR mode.
Popular HDR apps like Aurora HDR, ProHDR X, and HDR Camera+ provide intuitive interfaces and powerful tools. They'll automatically capture multiple exposures and blend them seamlessly, saving you time in post-processing.
Many of these apps offer manual controls for fine-tuning your HDR images, including adjustment sliders for contrast, saturation, and tone mapping. Look for apps that allow you to adjust ghost reduction, which helps eliminate motion artifacts in your street scenes.
Some apps even offer AI-powered features to enhance details and reduce noise. Don't forget to explore the presets and filters included in these apps, as they can provide quick and stylish results for your street photography.
When choosing an HDR app, consider its compatibility with your device, user reviews, and whether it offers features like RAW support and the ability to import existing images for HDR processing.
Capture Dynamic Light and Shadows

HDR's ability to capture a wider range of light can dramatically enhance the contrast in your street photography.
You'll be able to bring out details in both shadows and highlights, creating more dynamic and visually striking images.
Use this technique to showcase urban light patterns, such as the interplay between sunlight and building shadows or the glow of street lamps against a darkening sky.
Enhance Contrast With HDR
Ever wondered how to make your street photos pop with stunning contrast? HDR (High Dynamic Range) is your secret weapon for enhancing contrast in street photography. This technique combines multiple exposures to capture a wider range of light and dark tones, resulting in images with greater depth and visual impact.
To use HDR effectively, start by enabling your phone's built-in HDR mode. When composing your shot, look for scenes with high contrast, such as sunlit buildings against shadowy streets or backlit subjects.
Frame your image carefully, ensuring you've got a mix of bright and dark areas. Hold your phone steady as you take the shot, as HDR requires multiple exposures.
Once captured, fine-tune the HDR effect using your phone's editing tools or a third-party app. Adjust highlights, shadows, and contrast sliders to achieve the desired look.
Be careful not to overdo it, though. Aim for a natural-looking result that enhances the scene's mood and atmosphere.
With practice, you'll master the art of using HDR to create striking street photographs that capture the essence of urban life in all its vibrant contrasts.
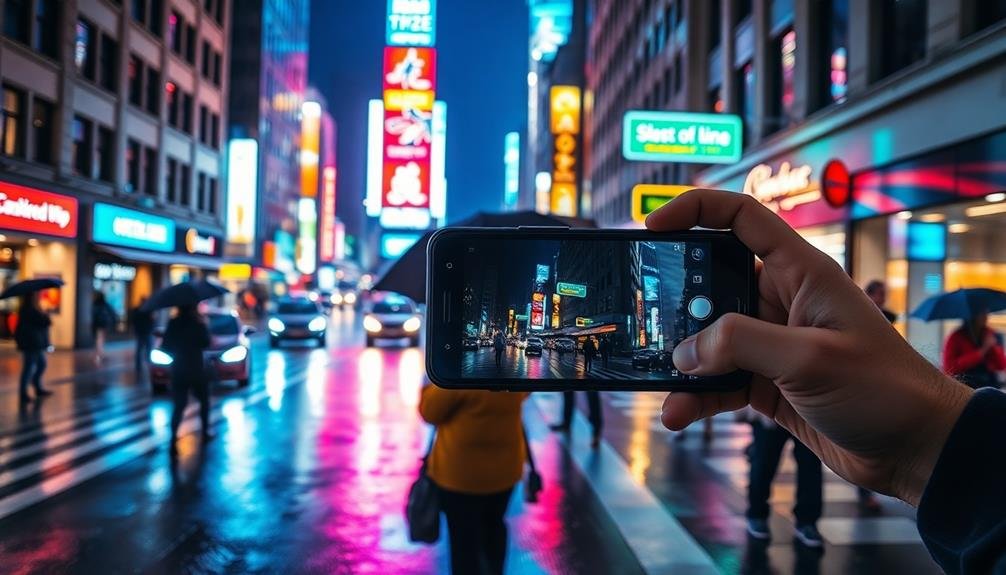
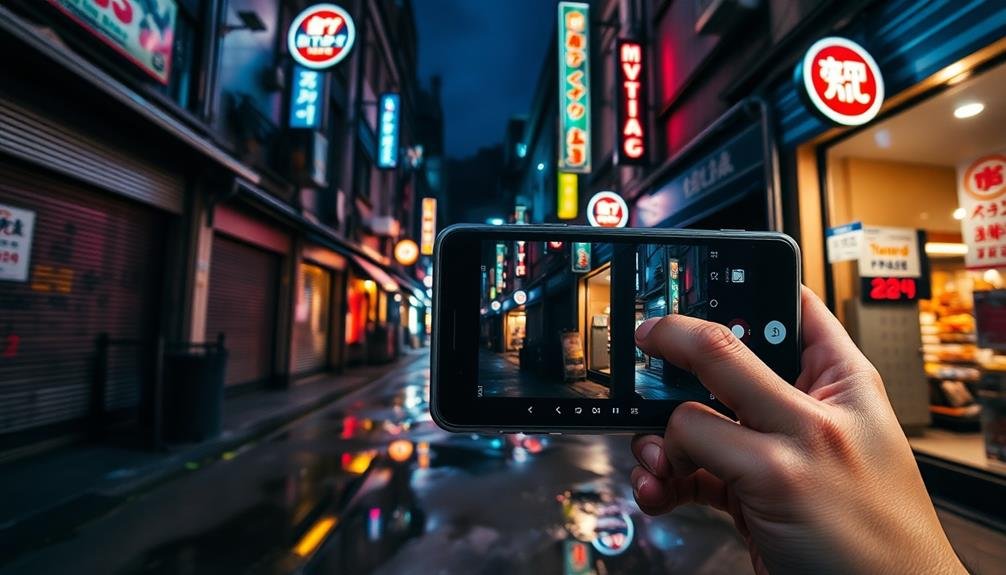
Highlight Urban Light Patterns
Street photography's charm often lies in its ability to capture the interplay of light and shadow in urban environments. HDR techniques can help you highlight these dynamic patterns, creating striking images that draw viewers in.
When you're out shooting, look for scenes where light and shadow create interesting contrasts. This could be sunlight filtering through buildings, neon signs reflecting off wet streets, or the glow of streetlights at dusk.
To make the most of urban light patterns using HDR:
- Use your phone's HDR mode to capture a wider range of tones
- Look for high-contrast scenes with bright highlights and deep shadows
- Experiment with different times of day to capture varied lighting conditions
- Focus on reflective surfaces like glass, water, or polished metal
- Frame your shots to include both light sources and shadowy areas
When editing your HDR street photos, don't be afraid to push the contrast and adjust the highlights and shadows. This can help emphasize the light patterns you've captured.
Focus on High-Contrast Scenes

When shooting HDR street photography with your mobile device, zero in on high-contrast scenes for maximum impact. Look for areas where bright light meets deep shadows, creating dramatic visual tension.
Seek out subjects backlit by strong sunlight, or capture scenes with stark differences between light and dark areas. Use your phone's HDR mode to capture details in both highlights and shadows.
Frame your shot to include elements in direct sunlight alongside those in shade. This contrast will showcase your device's HDR capabilities. Pay attention to architectural features that create interesting shadow patterns, especially during golden hour or harsh midday light.
Consider including human subjects in your high-contrast scenes. A person walking through a patch of sunlight surrounded by shadows can create a compelling image.
Experiment with silhouettes against bright backgrounds or subjects partially illuminated by strong directional light. Don't shy away from challenging lighting situations.
HDR excels in these conditions, allowing you to capture details that might be lost in standard exposures. Practice balancing exposure between bright and dark areas to achieve the most striking results in your street photography.
Experiment With Different HDR Styles

Explore the spectrum of HDR styles to find your preferred aesthetic in street photography.
You can opt for a natural look that subtly enhances details, or go for a dramatic effect that amplifies contrasts and colors.
Don't hesitate to try soft HDR for flattering portraits, or push the boundaries with surreal HDR cityscapes that transform familiar urban scenes into otherworldly landscapes.
Natural vs. Dramatic HDR
HDR photography offers two distinct approaches: natural and dramatic.
Natural HDR aims to recreate what your eyes see, balancing light and shadow for a realistic look. It's ideal for capturing scenes with subtle contrasts and preserving details in both highlights and shadows.
Dramatic HDR, on the other hand, pushes the boundaries of realism, creating bold, eye-catching images with exaggerated contrasts and vivid colors.
When choosing between natural and dramatic HDR for your street photography, consider:
- The mood you want to convey
- The lighting conditions of your scene
- Your subject matter and its inherent contrast
- Your personal style and artistic vision
- The expectations of your target audience
Experiment with both styles to find what works best for each situation.
Natural HDR can be perfect for documenting everyday life, while dramatic HDR can add a surreal or cinematic quality to your shots.
Remember, you can always adjust the intensity of your HDR effect in post-processing. Start with a more subtle approach and gradually increase the effect until you achieve your desired result.
Soft HDR for Portraits
While dramatic HDR can create striking street scenes, it's not always the best choice for portraits. Soft HDR techniques can enhance your subject's features without making them look unnatural or over-processed. When shooting portraits on the street, you'll want to strike a balance between capturing the environment and flattering your subject.
To achieve soft HDR portraits, start by adjusting your mobile device's HDR settings to a more subtle level. Many apps offer HDR intensity sliders or presets. Experiment with these to find the right balance for your style. Remember, the goal is to enhance, not overwhelm.
Here's a quick guide to soft HDR portrait techniques:
| Technique | Effect | Best For |
|---|---|---|
| Highlight Recovery | Reduces blown-out areas | Bright backgrounds |
| Shadow Lift | Brightens dark areas | Backlit subjects |
| Contrast Reduction | Softens harsh lines | Older subjects |
| Color Boost | Enhances skin tones | Dull lighting |
| Selective HDR | Applies effect to specific areas | Complex scenes |
Surreal HDR Cityscapes
Surreal cityscapes can transform ordinary urban scenes into dreamlike vistas with HDR techniques. To create these otherworldly images, you'll need to push your mobile device's HDR capabilities to their limits.
Start by finding a cityscape with a mix of shadows and highlights, ideally during the golden hour or blue hour. Experiment with extreme HDR settings to heighten the contrast and bring out hidden details in the shadows and highlights.
Don't be afraid to oversaturate colors for a more surreal effect. Look for reflective surfaces like glass buildings or puddles to add an extra layer of visual interest.
To enhance your surreal HDR cityscapes, consider these techniques:
- Use leading lines to draw the viewer's eye through the image
- Incorporate unusual angles or perspectives
- Include silhouettes or stark contrasts
- Blend multiple exposures for an even more dramatic effect
- Add lens flares or light leaks for a dreamy atmosphere
Stabilize Your Mobile Device

Before capturing stunning HDR street photos, it is crucial to stabilize your mobile device. Shaky hands can ruin even the best-composed shots, especially in HDR photography where multiple exposures are combined. To combat this, adopt a stable stance with your feet shoulder-width apart and your elbows tucked close to your body.
Consider using physical supports like mini tripods, selfie sticks, or even leaning against a wall or streetlight. If you're without accessories, try the two-handed grip technique: hold your phone horizontally with both hands, using your thumbs to tap the shutter button.
For extra stability, use your device's built-in features. Many smartphones offer image stabilization options in their camera settings. Enable these for sharper results. Additionally, try using the volume buttons or voice commands to trigger the shutter, reducing the risk of camera shake from tapping the screen.
| Stabilization Method | Indoor | Outdoor | Low Light | Bright Light |
|---|---|---|---|---|
| Two-handed grip | ✓ | ✓ | ✓ | ✓ |
| Tripod | ✓ | ✓ | ✓ | ✓ |
| Leaning support | ✓ | ✓ | ✓ | ✓ |
| Image stabilization | ✓ | ✓ | ✓ | ✓ |
Edit HDR Images Post-Capture

After capturing your HDR street photos, post-processing is key to achieving the best results. You'll want to fine-tune your images to bring out the rich details and dynamic range that HDR offers.
Start by adjusting the exposure and contrast to balance the highlights and shadows. Don't be afraid to experiment with the HDR slider in your editing app to find the sweet spot between natural and dramatic.
Pay attention to color saturation and vibrance, as HDR can sometimes oversaturate images. Use selective editing tools to enhance specific areas of your photo without affecting others. Remember to straighten horizons and correct any lens distortions for a polished look.
Here are some essential editing steps for HDR street photography:
- Adjust exposure and contrast
- Fine-tune highlights and shadows
- Correct white balance for accurate colors
- Reduce noise in darker areas
- Apply sharpening selectively
When editing, always keep the original mood and atmosphere of the street scene in mind. Don't overprocess your images to the point where they lose their authenticity.
Subtle adjustments often yield the most impactful results. With practice, you'll develop your own editing style that complements your HDR street photography.
Blend Multiple Exposures Manually
While mobile HDR modes are convenient, manually blending multiple exposures can give you even more control over your street photography. To achieve this, you'll need to capture multiple shots of the same scene at different exposure levels. Typically, you'll want to take at least three images: one underexposed, one properly exposed, and one overexposed.
Once you've captured your exposures, use a photo editing app that supports layering, such as Snapseed or Adobe Lightroom Mobile. Import your images as separate layers and align them carefully. Then, use layer masks to blend the best parts of each exposure, revealing details in highlights and shadows.
| Exposure | Purpose | Key Areas to Focus On |
|---|---|---|
| Under | Preserve highlights | Bright skies, reflections |
| Normal | Base exposure | Mid-tones, overall scene |
| Over | Reveal shadow details | Dark alleys, shaded areas |
| +1 Stop | Enhance shadow detail | Deepest shadows |
| -1 Stop | Refine highlight detail | Brightest highlights |
Experiment with different blending modes and opacity levels to fine-tune your result. Pay attention to edges where exposures meet, ensuring smooth changes. With practice, you'll develop an eye for which parts of each exposure work best together, creating stunning HDR street photos that capture the full dynamic range of urban scenes.
Optimize Camera Settings

Getting the most out of your mobile device's camera for HDR street photography starts with optimizing your camera settings.
You'll want to fine-tune these settings to capture the best possible range of light and detail in your urban scenes.
First, enable HDR mode if your device has it. This will automatically capture multiple exposures and blend them. If you're using a manual HDR approach, set your camera to burst mode or use an app that allows rapid-fire shooting.
Next, adjust your exposure compensation. For HDR, you'll typically want to underexpose slightly to preserve highlights. Set your ISO as low as possible to minimize noise, and choose a shutter speed that's fast enough to freeze motion but slow enough to capture enough light.
Here are some additional tips to optimize your camera settings:
- Use grid lines to improve composition
- Enable RAW capture for maximum editing flexibility
- Turn off flash to avoid harsh lighting
- Experiment with different white balance settings
- Lock focus and exposure on your main subject
Time Your Shots Strategically

To elevate your HDR street photography, you'll want to master the art of timing your shots strategically.
Start by identifying the best lighting conditions for your scene, whether it's the golden hour or dramatic shadows cast by midday sun.
As you navigate urban landscapes, learn to capture motion effectively by anticipating and framing dynamic elements like passing vehicles or pedestrians.
Best Lighting Conditions
Capturing stunning HDR street photography on your mobile device hinges on timing your shots strategically. The best lighting conditions for HDR street photography occur during the golden and blue hours. These periods offer a perfect balance of light and shadow, allowing your mobile device's HDR feature to shine.
During the golden hour, just after sunrise or before sunset, you'll find warm, soft light that adds depth and dimension to your street scenes. The blue hour, occurring shortly before sunrise or after sunset, provides a cooler, more ethereal atmosphere that can create moody, dramatic shots.
To make the most of these lighting conditions:
- Scout locations in advance to plan your shots
- Use apps to predict golden and blue hour times
- Experiment with different angles to capture unique perspectives
- Look for scenes with high contrast to maximize HDR effects
- Be patient and wait for the perfect moment to capture your shot
While these times offer ideal lighting, don't shy away from shooting during other parts of the day. Harsh midday sun can create interesting shadows and highlights, while overcast days provide soft, even lighting that's ideal for capturing details in both highlights and shadows.
Capture Motion Effectively
Motion is the heartbeat of street photography, and capturing it effectively with HDR on your mobile device requires strategic timing. You'll need to anticipate movement and be ready to snap at the perfect moment. Try panning with moving subjects to create a sense of speed while keeping them in focus. For stationary subjects, wait for interesting elements to enter the frame, like passing vehicles or pedestrians.
When using HDR, remember that it takes multiple exposures. This means you'll need to hold your device steady or use a mobile tripod for crisp results. Experiment with different shutter speeds to achieve various motion effects:
| Shutter Speed | Effect | Best For |
|---|---|---|
| 1/1000s | Freeze | Sports, fast action |
| 1/250s | Sharp | Walking, cycling |
| 1/60s | Blur | Light trails, crowds |
| 1s+ | Streaks | Night traffic, water |
To capture motion blur intentionally, use your device's manual mode or a third-party camera app. Focus on a stationary object and let moving elements create streaks of color and light. This technique works especially well in low-light situations, adding dynamism to your HDR street scenes.
Anticipate Key Moments
Anticipation sets exceptional street photographers apart from the rest. By learning to predict and prepare for key moments, you'll capture more engaging HDR street photos with your mobile device. Train yourself to observe patterns in human behavior, street activities, and lighting conditions. This heightened awareness will help you position yourself strategically and have your camera ready before the perfect shot presents itself.
To improve your anticipation skills:
- Study the flow of pedestrians and traffic in busy areas
- Watch for interesting interactions between people or with their environment
- Notice how light changes throughout the day and affects your subjects
- Identify potential backdrops that could frame dynamic scenes
- Look for recurring events or routines in your chosen location
As you develop these skills, you'll find yourself reacting faster and missing fewer opportunities. Remember that HDR photography requires multiple exposures, so timing is essential.
By anticipating key moments, you'll have a better chance of capturing all the necessary frames before the scene changes. Practice patience and stay alert, as the most enthralling street photos often arise from unexpected situations.
With time and experience, you'll develop an instinct for recognizing and capturing those fleeting, decisive moments that define great street photography.
Frequently Asked Questions
How Does HDR Affect Battery Life on Mobile Devices?
HDR can drain your battery faster because it's processing multiple exposures and combining them into one image. You'll notice increased power consumption, especially when using HDR frequently. It's best to use it sparingly if you're concerned about battery life.
Can HDR Be Used Effectively for Night Street Photography?
Yes, you can use HDR effectively for night street photography. It'll help you capture more detail in shadows and highlights, balancing bright lights and dark areas. However, you'll need a steady hand or tripod to avoid blurry images.
Are There Any Ethical Concerns With Using HDR in Street Photography?
You should consider ethical concerns when using HDR in street photography. It can alter reality, potentially misrepresenting scenes or people. Always respect your subjects' privacy and be transparent about your techniques if asked. Don't manipulate images deceptively.
How Do Weather Conditions Impact HDR Results in Street Scenes?
You'll find weather greatly affects HDR street scenes. Bright sun creates harsh contrasts, while overcast skies soften shadows. Rain can add reflections and drama. Fog diffuses light, creating moody atmospheres. Always adjust your HDR settings to match conditions.
What Are the Limitations of HDR When Capturing Moving Subjects?
When you're capturing moving subjects with HDR, you'll face challenges like motion blur and ghosting. Fast-moving objects can appear distorted or fragmented. You'll need to use faster shutter speeds or consider single-exposure techniques for better results with dynamic scenes.
In Summary
You've now got the tools to elevate your mobile street photography with HDR techniques. Don't be afraid to experiment and push boundaries. Remember, practice makes perfect, so get out there and start shooting. As you apply these tricks, you'll develop your unique style and capture stunning, dynamic images that stand out. Keep exploring, refining your skills, and sharing your vision with the world. The streets are your canvas – make them come alive!


Leave a Reply