
To capture stunning sunset HDR photos on your mobile, start by mastering exposure bracketing. Take multiple shots at different exposures to capture both highlights and shadows. Use manual mode for greater control, keeping ISO low and adjusting shutter speed for vibrant colors. Compose your shot using the rule of thirds and include interesting foreground elements. Choose a powerful HDR app like Adobe Lightroom Mobile or ProCamera for precise adjustments. During post-processing, fine-tune contrast, saturation, and sharpness while avoiding an overprocessed look. Don't forget essential accessories like a tripod for stability. With these secrets, you'll be well on your way to creating awe-inspiring sunset masterpieces.
Understanding HDR Photography Basics

Let's explore HDR photography basics. HDR, or High Dynamic Range, is a technique that combines multiple exposures of the same scene to capture a wider range of light than a single photo can.
It's particularly useful for sunset shots, where there's often a stark contrast between bright skies and darker foregrounds.
To create an HDR image, you'll need to take at least three photos: one underexposed, one properly exposed, and one overexposed. Many smartphone cameras now offer an HDR mode that automates this process.
When shooting manually, use exposure bracketing to capture these varying exposures.
The key to successful HDR is balancing the exposures to create a natural-looking image. You're aiming to reveal details in both highlights and shadows without making the photo appear artificial.
Pay attention to moving elements in your scene, as they can create ghosting effects in the final image.
Post-processing is essential in HDR photography. You'll need to merge your exposures using HDR software or your phone's built-in HDR processing.
Adjust tone mapping to fine-tune contrast, saturation, and detail. Remember, subtlety is often more effective than overly dramatic results.
Choosing the Right Mobile App
A plethora of mobile apps exists for enhancing your smartphone photography, but choosing the right one can be overwhelming. When it comes to HDR photography, you'll want an app that offers manual controls and robust HDR capabilities. Look for apps that allow you to adjust exposure, shutter speed, and ISO independently.
Popular choices include Adobe Lightroom Mobile, ProCamera, and Halide. These apps offer advanced features like RAW capture and HDR bracketing, which are essential for creating stunning sunset HDR photos. Adobe Lightroom Mobile stands out for its powerful editing tools and seamless integration with desktop software.
Consider your skill level when selecting an app. If you're a beginner, opt for user-friendly options like Snapseed or VSCO, which offer preset HDR filters and simple adjustments. As you progress, graduate to more advanced apps that give you greater control over your images.
Don't forget to read user reviews and compare features before committing to an app. Many offer free trials, so test them out to find the one that best suits your needs and workflow.
Ideal Camera Settings for Sunsets
Capturing stunning sunset photos with your smartphone requires mastering the ideal camera settings. Start by switching your camera to Pro or Manual mode, which gives you more control over exposure settings. Set your ISO to the lowest possible value, typically 100 or 200, to minimize noise in your images.
Adjust the shutter speed to around 1/30 or 1/60 of a second to capture the vibrant colors without overexposing the sky. For the best results, use exposure compensation to slightly underexpose the image by -0.3 to -0.7 stops. This preserves the rich colors and prevents the sky from appearing washed out.
Enable HDR mode if available, as it helps balance the bright sky with darker foreground elements. Focus on the horizon or a prominent element in the scene to guarantee sharpness throughout the image.
If your phone has a wide-angle lens, switch to it for a more dramatic composition. Experiment with white balance settings, trying both "daylight" and "cloudy" options to see which renders the most accurate colors.
Composition Techniques for Stunning Sunsets

When capturing stunning sunset photos on your mobile device, mastering composition is key.
Start by applying the Rule of Thirds, dividing your frame into a 3×3 grid and placing the horizon along one of the horizontal lines.
You can elevate your shots further by incorporating natural elements like trees or rocks to frame the sunset, adding depth and interest to your images.
Rule of Thirds
Imagine dividing your smartphone screen into a 3×3 grid. This simple visualization is the foundation of the Rule of Thirds, a powerful composition technique that'll elevate your sunset photos from ordinary to extraordinary.
By aligning key elements along these gridlines or at their intersections, you'll create more balanced, dynamic, and visually appealing images.
When capturing a sunset, position the horizon along the upper or lower horizontal line, depending on whether you want to emphasize the sky or foreground. Place the sun at one of the grid's intersections for a striking focal point.
Don't be afraid to experiment with different placements to find what works best for each scene.
The Rule of Thirds isn't just about placement; it's about creating a sense of movement and flow in your photos. Use leading lines, such as a beach shoreline or a row of trees, to guide the viewer's eye through the image.
To master the Rule of Thirds and create emotionally impactful sunset photos:
- Embrace asymmetry to add visual interest
- Capture the golden hour's warm, ethereal light
- Include silhouettes for dramatic contrast
- Incorporate reflections to double the sunset's beauty
Framing Natural Elements
While the Rule of Thirds helps you structure your sunset shots, framing natural elements takes your composition to the next level. Look for objects in your environment that can create a natural frame around the sunset. Trees, branches, rocks, or architectural features can all serve this purpose.
Position yourself so these elements border the edges of your frame, drawing the viewer's eye to the vibrant colors of the sky. When framing with natural elements, pay attention to balance. Don't let the framing overpower the sunset itself. Instead, use it to complement and enhance the main subject.
Experiment with different angles and distances to find the perfect balance between frame and sunset. Consider using silhouettes as framing elements. A dark foreground object against a bright sunset sky can create striking contrast and depth.
Try incorporating people or animals into your frame for added interest and scale. Remember to keep your horizons straight when framing. Use your phone's grid feature to align the horizon with the frame's edges.
This attention to detail will elevate your sunset photos from good to stunning, creating images that capture the awe-inspiring beauty of nature's daily spectacle.
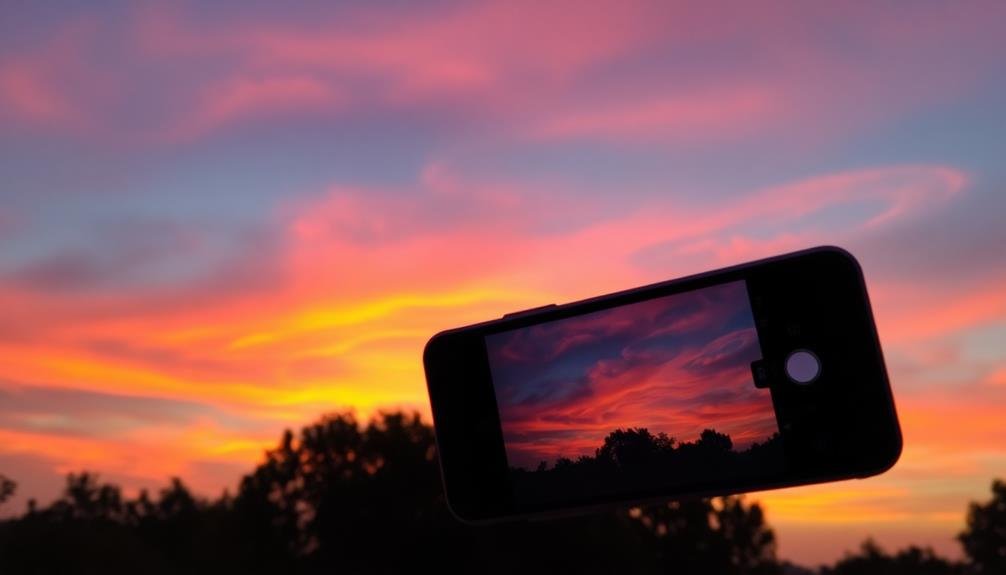
Bracketing Exposures on Mobile Devices
Bracketing exposures, a technique long used by professional photographers, has now made its way to mobile devices. This powerful tool allows you to capture multiple shots at different exposure levels, ensuring you don't miss the perfect balance of light and shadow in your sunset photos.
Most modern smartphones offer built-in HDR (High Dynamic Range) modes, but manual bracketing gives you more control over the final image.
To bracket exposures on your mobile device, start by finding the exposure compensation settings in your camera app. Take a series of photos, adjusting the exposure value (EV) for each shot. Typically, you'll want to capture at least three images: one at normal exposure, one underexposed, and one overexposed.
These can then be combined in post-processing to create a stunning HDR image.
Here's why bracketing exposures can transform your sunset photos:
- Captures details in both highlights and shadows
- Preserves the vibrant colors of the sky
- Adds depth and dimension to your images
- Allows for creative control in post-processing
Mastering Manual HDR Capture
To master manual HDR capture on your mobile device, you'll need to understand exposure bracketing techniques and utilize specialized HDR apps with their various settings.
You can start by taking multiple shots at different exposures, then combine them using your phone's built-in HDR feature or a third-party app.
Once you've captured your HDR images, you'll want to fine-tune them through post-processing to achieve the desired balance of highlights and shadows.
Exposure Bracketing Techniques
One of the most powerful techniques in mobile photography is exposure bracketing, a method that allows you to capture a wider dynamic range than your phone's camera can typically handle in a single shot.
By taking multiple photos at different exposure levels, you're able to capture details in both the highlights and shadows that might otherwise be lost.
To practice exposure bracketing, start by setting your camera to manual mode.
Take your first shot at the camera's recommended exposure, then adjust the shutter speed to capture underexposed and overexposed versions.
Aim for at least three shots: one normal, one underexposed, and one overexposed.
When using exposure bracketing for sunset photos, consider these emotional impacts:
- Awe-inspiring skies with vibrant colors and dramatic cloud formations
- Silhouetted landscapes that evoke a sense of mystery and wonder
- Reflections in water that create a serene, dream-like atmosphere
- Subtle details in shadows that add depth and intrigue to your image
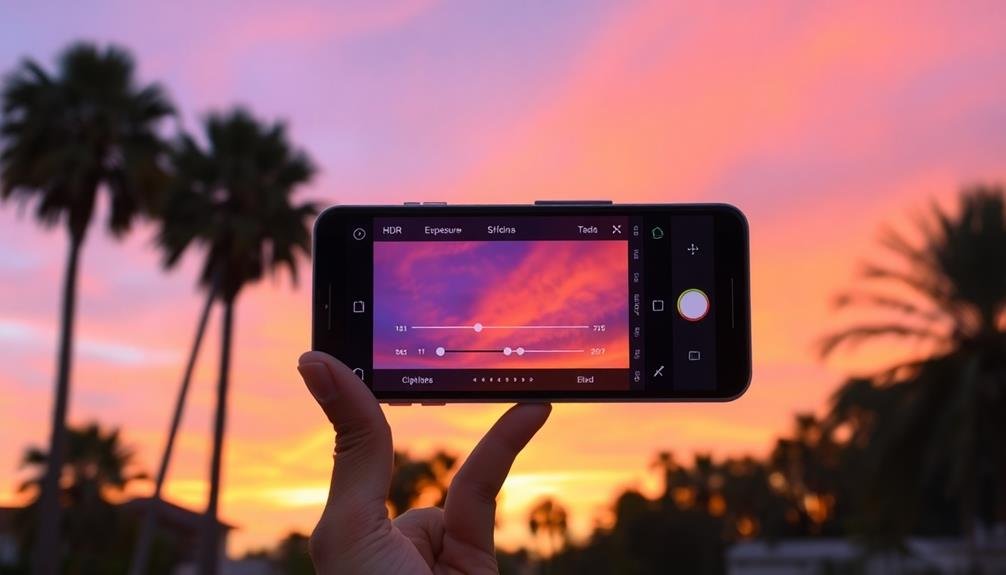
HDR Apps and Settings
High Dynamic Range (HDR) photography has become increasingly accessible through mobile apps and built-in camera settings. To capture stunning sunset HDR photos, you'll need to master manual HDR capture techniques.
Start by exploring your phone's native camera app for built-in HDR options. Many smartphones offer automatic HDR modes, but for more control, look for manual HDR settings.
If your phone's native app doesn't offer advanced HDR features, consider third-party apps like ProCamera, Lightroom Mobile, or Snapseed. These apps provide manual controls for exposure, allowing you to capture multiple shots at different exposure levels.
When shooting, focus on the brightest part of the scene and take three to five exposures, adjusting the shutter speed or exposure compensation between shots.
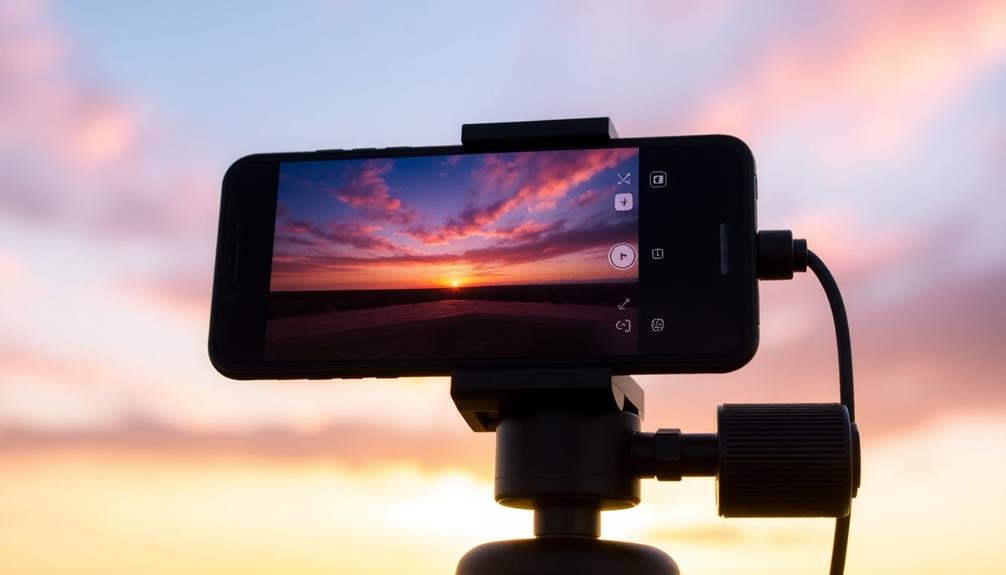
For the best results, use a tripod or stabilize your phone against a steady surface. This guarantees your images align properly during post-processing.
Experiment with different exposure values, typically ranging from -2 to +2 EV. Once you've captured your bracketed shots, use HDR merging features in your chosen app to combine the exposures.
Fine-tune the final image by adjusting contrast, saturation, and highlight/shadow details to create a balanced, eye-catching sunset photo.
Post-Processing HDR Images
After capturing your bracketed exposures, it's time to plunge into the post-processing phase of HDR photography.
Begin by importing your images into your preferred HDR software, such as Aurora HDR, Photomatix, or Lightroom. Align and merge the exposures, carefully adjusting the tone mapping settings to achieve a balanced, natural-looking result. Pay close attention to highlights and shadows, ensuring you don't overprocess the image and create an artificial appearance.
Once you've blended your exposures, fine-tune the image by adjusting contrast, saturation, and sharpness. Use local adjustments to enhance specific areas of the photo, such as brightening the foreground or deepening the sky's colors.
Don't forget to remove any ghosting or alignment issues caused by moving objects between exposures.
To elevate your HDR sunset photos, consider these emotional touchpoints:
- Amplify the golden hour glow to evoke warmth and nostalgia
- Emphasize dramatic cloud formations for a sense of awe and wonder
- Enhance silhouettes to create mystery and intrigue
- Balance cool and warm tones to convey a serene, peaceful atmosphere
Post-Processing HDR Images on Smartphones

Once you've captured stunning HDR images on your smartphone, post-processing can elevate them to the next level. Start by adjusting the exposure and contrast to guarantee your image's highlights and shadows are well-balanced. Use the curves tool to fine-tune the tonal range, bringing out details in both bright and dark areas.
Next, focus on color correction. Adjust the white balance to achieve accurate colors, and use saturation and vibrancy tools to enhance the sunset's warm hues. Don't overdo it; aim for natural-looking results.
Apply selective adjustments to specific areas of your image. Use brush tools or graduated filters to enhance the sky's colors or brighten foreground elements. Experiment with clarity and texture sliders to add depth and dimension to your HDR photo.
Consider using noise reduction to smooth out any graininess, especially in darker areas. Finally, apply subtle sharpening to enhance details without introducing artifacts.
Many smartphone apps offer advanced HDR editing features. Explore options like Snapseed, Lightroom Mobile, or your phone's built-in editing tools.
Remember to save your edits as you go, and don't hesitate to create multiple versions of your image to compare results.
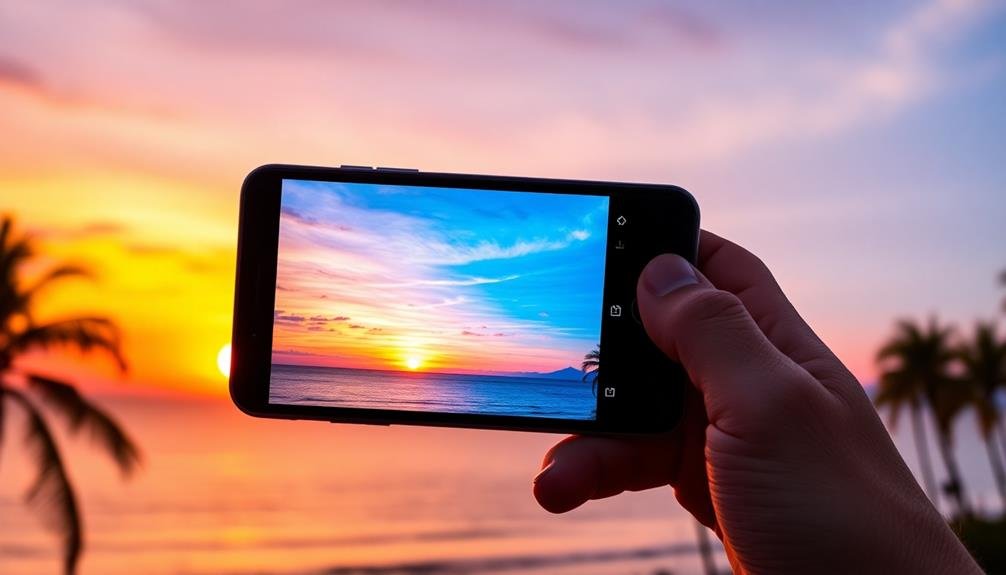
Enhancing Colors in Sunset Photos

Capturing the vibrant hues of a sunset is just the beginning. To truly enhance the colors in your sunset photos, you'll need to master a few post-processing techniques.
Start by adjusting the white balance to emphasize the warm tones typically associated with sunsets. Don't be afraid to experiment with temperature and tint sliders to achieve the perfect balance.
Next, focus on boosting the saturation and vibrance of your image. Be careful not to overdo it, as this can lead to an unnatural look. Instead, use selective adjustments to target specific areas of your photo, such as the sky or reflections on water.
To add depth and drama to your sunset photos, try these techniques:
- Increase contrast to make the colors pop
- Use graduated filters to balance exposure between sky and foreground
- Enhance shadows and highlights to reveal hidden details
- Apply a subtle vignette to draw attention to the center of the image
Avoiding Common HDR Pitfalls
When using HDR on your mobile device, you'll want to steer clear of common mistakes that can ruin your shots.
To prevent an overprocessed, artificial look, focus on balancing highlights and shadows carefully rather than pushing the effect too far.
You should also be mindful of ghosting and artifacts, which can occur when capturing moving subjects or when your hand isn't steady during the multiple exposures.
Prevent Overprocessed, Artificial Look
As HDR photography grows in popularity, it's easy to fall into the trap of overprocessing your images. The result can be an artificial, almost cartoonish look that detracts from the natural beauty of your sunset scenes.
To prevent this, you'll need to exercise restraint and maintain a delicate balance between enhancing details and preserving realism.
Start by adjusting your HDR settings conservatively. Use subtle increases in contrast and dynamic range, rather than pushing the sliders to their extremes. Pay close attention to the edges of objects in your image, as overly aggressive HDR can create unsightly halos or outlines.
When blending multiple exposures, aim for a seamless shift between light and dark areas.
To evoke emotion in your audience while maintaining a natural look:
- Capture the warmth of golden hour light without oversaturating colors
- Preserve the soft, ethereal quality of clouds without making them appear too defined
- Enhance the texture of landscapes without creating an unrealistic sharpness
- Maintain the delicate balance between shadows and highlights to convey depth and atmosphere
Balance Highlights and Shadows
Balancing highlights and shadows is at the heart of successful HDR photography. When capturing sunset scenes, you'll often face extreme contrasts between bright skies and dark foregrounds. To achieve a natural-looking HDR image, you need to carefully blend these elements.
Start by taking multiple exposures, focusing on different light levels. Then, use your phone's HDR mode or a third-party app to merge these shots. The key is to preserve details in both bright and dark areas without creating an unrealistic effect.
Here's a quick guide to balancing highlights and shadows:
| Area | Underexposed | Balanced | Overexposed | Goal |
|---|---|---|---|---|
| Sky | Rich colors | Natural tones | Washed out | Retain color |
| Clouds | Dark, moody | Defined edges | Blown out | Show texture |
| Midtones | Too dark | Visible detail | Too bright | Maintain contrast |
| Shadows | Black areas | Subtle detail | Unnatural | Preserve depth |
Minimize Ghosting and Artifacts
One of the biggest challenges in HDR photography is avoiding ghosting and artifacts. These unwanted effects can ruin an otherwise stunning sunset photo, detracting from its beauty and impact. Ghosting occurs when objects move between exposures, creating a blurred or transparent appearance.
Artifacts, on the other hand, are unnatural-looking elements that appear due to processing errors or misalignment of images. To minimize these issues, you'll need to be mindful of your shooting technique and post-processing approach.
Use a tripod whenever possible to keep your phone steady, and if you're shooting handheld, enable any built-in stabilization features. When capturing your bracketed exposures, do it quickly to reduce the chance of movement between shots.
In post-processing, use alignment tools to correct any slight shifts between frames, and be selective with your HDR settings to avoid an over-processed look.
Here are four emotional reasons to master HDR techniques:
- Capture breathtaking sunsets that transport viewers to magical moments
- Create images that evoke a sense of wonder and awe in your audience
- Share the raw beauty of nature in a way that touches people's hearts
- Develop a unique artistic voice that sets your photography apart
Handling Challenging Lighting Conditions

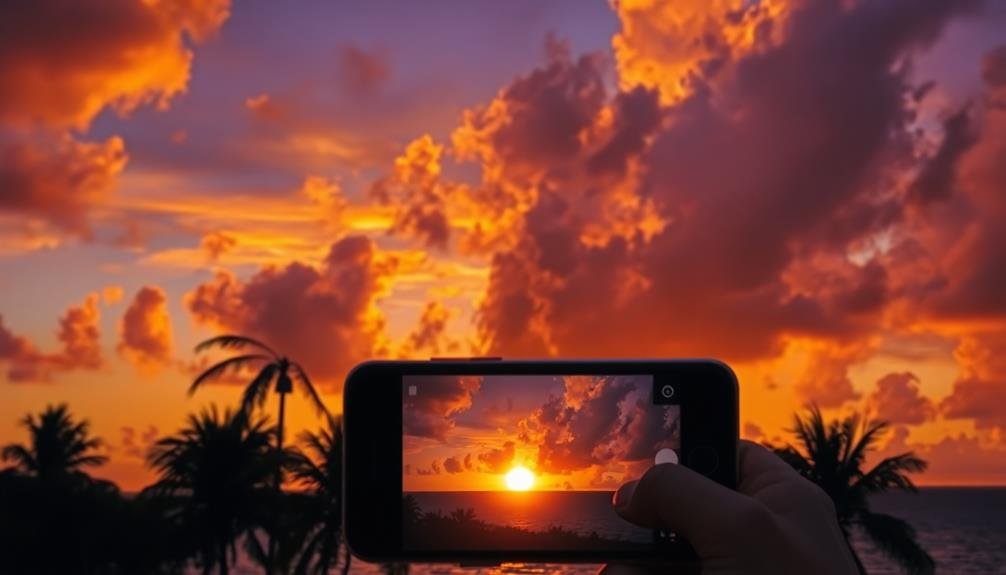
Mastery in mobile photography often hinges on your ability to handle challenging lighting conditions. When shooting sunsets, you'll face extreme contrasts between bright skies and dark foregrounds. To overcome this, use HDR mode on your phone, which captures multiple exposures and blends them for a balanced result.
If your device lacks HDR, try exposure bracketing manually by taking separate shots for highlights, midtones, and shadows.
Position the sun strategically in your frame; placing it off-center often yields more interesting compositions. Use the rule of thirds as a guide. To avoid lens flare, shield your camera with your hand or a nearby object. If you want to include lens flare creatively, experiment with different angles.
For silhouettes, expose for the sky and let your subject become a dark shape against the colorful backdrop. To capture detail in both sky and foreground, use a graduated neutral density filter app or adjust highlights and shadows in post-processing.
Don't forget about the "golden hour" – the period just before sunset when light is soft and warm. This time offers ideal conditions for capturing stunning colors and textures in your sunset photos.
Accessories for Better Mobile HDR
Frequently, enhancing your mobile HDR photography requires more than just your smartphone. To capture stunning sunset HDR photos, you'll want to contemplate investing in some key accessories.
A sturdy tripod is essential for keeping your phone stable during multi-exposure shots, ensuring crisp images even in low light. Look for a compact, lightweight tripod that's easy to carry and set up quickly.
External lenses can expand your creative possibilities, allowing you to capture wider angles or zoom in on distant subjects. Choose high-quality lenses that attach securely to your phone without causing distortion.
A remote shutter release, whether wireless or wired, helps eliminate camera shake when triggering exposures.
Don't forget about lighting accessories. A small, portable LED light can help fill in shadows or add creative highlights to your sunset scenes. Some models even offer adjustable color temperature, allowing you to match or contrast with the warm tones of the setting sun.
Here are four emotions these accessories can evoke in your audience:
- Awe at the breathtaking details captured in your HDR sunset photos
- Excitement about expanding their creative possibilities
- Confidence in their ability to take professional-quality images
- Inspiration to explore new photography techniques and styles
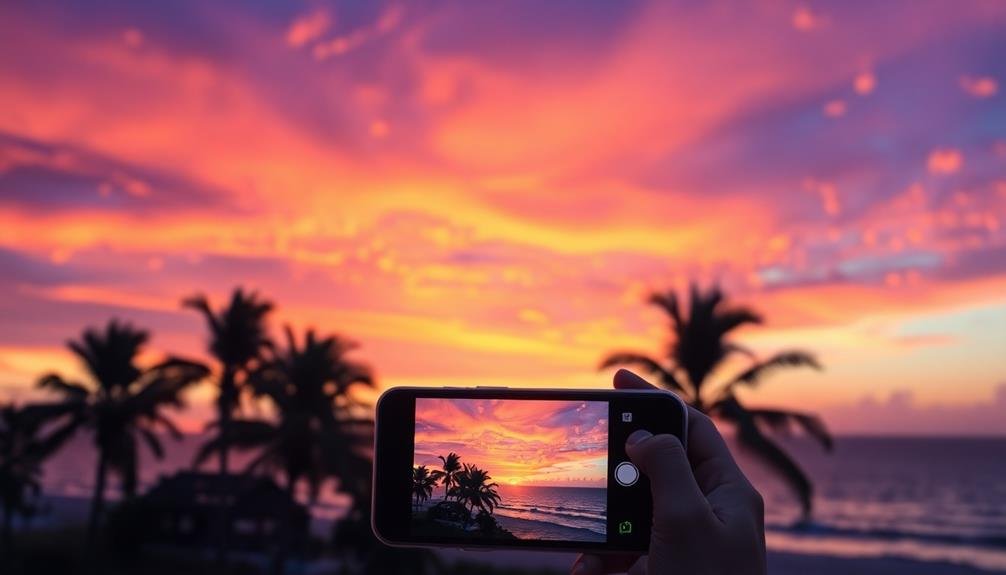
Sharing Your HDR Sunset Masterpieces

After capturing stunning HDR sunset photos, it's time to share your masterpieces with the world. Choose the right platform to showcase your work, considering your audience and goals. Instagram is ideal for visual impact and reaching a broad audience, while 500px caters to photography enthusiasts. Flickr offers more storage and detailed EXIF data sharing.
Before posting, edit your photos to enhance their appeal. Use mobile editing apps like Snapseed or VSCO to fine-tune colors, contrast, and sharpness. Don't overdo it; maintain the natural beauty of your sunset shots.
When sharing, include relevant hashtags to increase visibility. Popular options include #HDRsunset, #mobilephotography, and #goldenhour.
Engage with your audience by responding to comments and participating in photography communities. Share your techniques and camera settings to help others improve their skills. Consider creating a dedicated photography blog or website to display your best work and tell the stories behind your images. This can help you build a following and potentially monetize your passion.
Remember to watermark your images to protect your copyright, especially if you're sharing high-resolution versions.
Frequently Asked Questions
How Can I Protect My Phone's Camera From Sun Damage While Shooting Sunsets?
To protect your phone's camera from sun damage while shooting sunsets, you'll want to avoid pointing it directly at the sun. Use filters, shoot from angles, or frame the sun behind objects. Don't leave your phone exposed unnecessarily.
Are There Specific Locations Known for Producing the Most Dramatic HDR Sunset Photos?
You'll find breathtaking HDR sunset photos at coastal areas, mountain ranges, and deserts. Don't overlook urban skylines or reflective bodies of water. Popular spots include Santorini, Grand Canyon, and Maui. Research local viewpoints for the best results.
How Do I Handle Lens Flare in HDR Sunset Photography?
To handle lens flare in HDR sunset photography, you'll want to use a lens hood or your hand to block direct sunlight. You can also embrace flare creatively, repositioning yourself or adjusting your composition for artistic effect.
Can HDR Techniques Be Applied to Sunrise Photography as Well?
Yes, you can absolutely apply HDR techniques to sunrise photography. You'll capture a wider range of light and colors, enhancing the dramatic sky and landscape. Just like with sunsets, you'll need to bracket exposures and merge them later.
What's the Best Way to Include People in HDR Sunset Photos?
To include people in HDR sunset photos, you'll want to position them as silhouettes against the colorful sky. Have them stand still during bracketed shots. Alternatively, use single-exposure HDR and ask subjects to pose naturally.
In Summary
You've now revealed the secrets to capturing breathtaking HDR sunset photos with your mobile device. Armed with the right apps, settings, and techniques, you're ready to create stunning images that'll wow your audience. Remember to practice, experiment, and have fun with your newfound skills. Don't be afraid to push boundaries and develop your unique style. With dedication and these tips, you'll soon be sharing jaw-dropping sunset masterpieces that rival professional shots.


Leave a Reply