To capture stunning glass reflection photos, start by choosing the right glass surface and cleaning it thoroughly. Find the perfect lighting angle, often during golden hour. Use manual focus to control sharpness and experiment with different compositions, including symmetry and the rule of thirds. Play with smartphone camera filters for creative effects, and try capturing reflections in water droplets for unique macro shots. Don't forget to edit your photos to enhance the reflections and overall impact. With practice, you'll master these techniques and create enchanting images that transform ordinary scenes into extraordinary art. Discover even more tricks to elevate your reflection photography skills.
Choose the Right Glass Surface

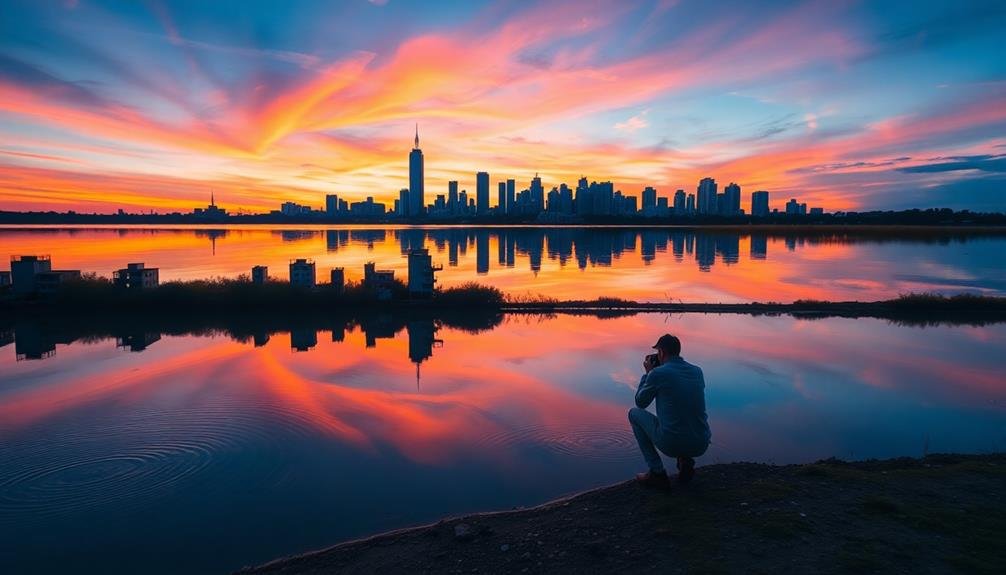
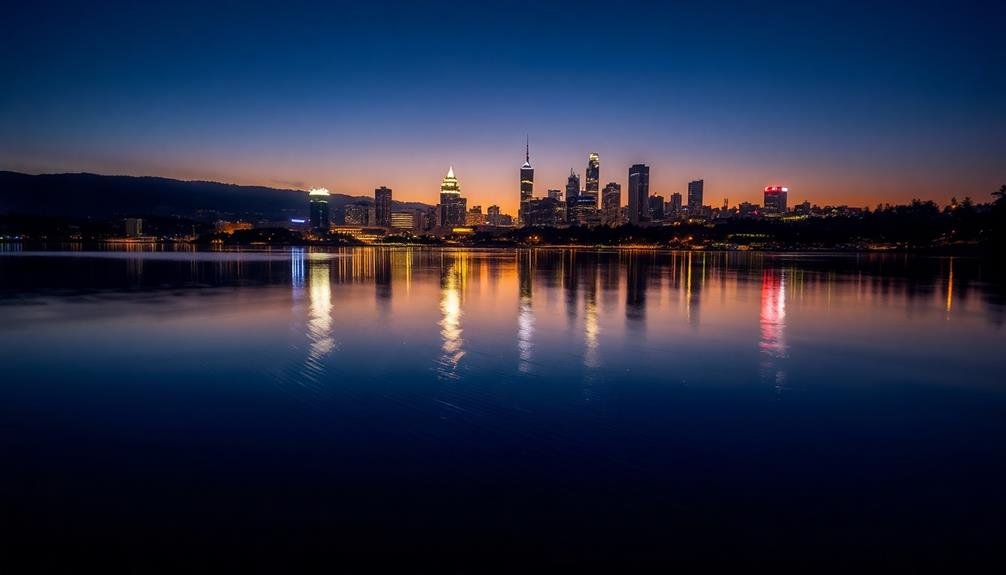
Selecting the perfect glass surface is essential for capturing stunning reflection photos. You'll want to look for clean, smooth surfaces that can act as natural mirrors. Windows are often your best bet, especially those on tall buildings or storefronts. They provide large, uninterrupted areas for reflections.
Consider the time of day and lighting conditions when choosing your glass surface. Early morning or late afternoon light can create dramatic reflections on building windows. For night shots, illuminated interiors behind glass can offer interesting contrasts.
Don't overlook unconventional glass surfaces. Car windshields, sunglasses, or even puddles can provide unique reflection opportunities. Experiment with different angles and distances to find the most compelling composition.
Pay attention to the surroundings reflected in the glass. Urban environments often offer intriguing architectural elements, while natural settings can provide softer, more organic reflections. Look for interesting juxtapositions between the reflected image and the scene beyond the glass.
Remember that cleaner glass generally produces sharper reflections. If possible, choose surfaces that are well-maintained and free from dirt or smudges.
However, sometimes imperfections can add character to your shot, so don't dismiss slightly flawed surfaces entirely.
Find the Perfect Lighting Angle

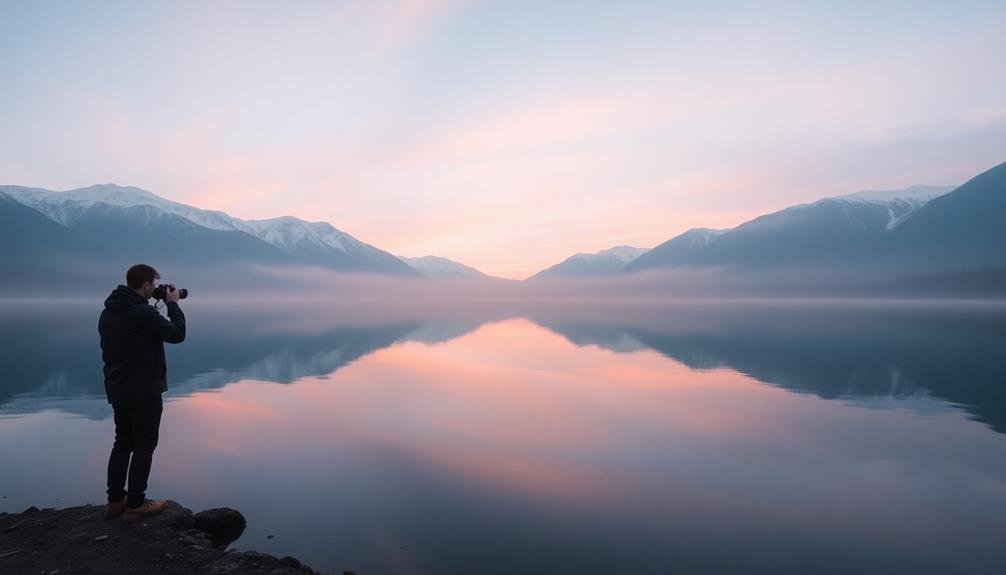
Once you've found the ideal glass surface, your next challenge is mastering the lighting angle. The way light interacts with glass can make or break your reflection photo. Experiment with different angles to find the sweet spot that creates the most fascinating effect. Remember, even slight adjustments can dramatically change the outcome.
Reflect on the time of day and natural light sources. Early morning or late afternoon often provide softer, more flattering light for reflections. If you're shooting indoors, use artificial lighting to your advantage. Position lamps or studio lights at various angles to see how they affect the reflection.
Here are some key points to remember when finding the perfect lighting angle:
- Look for the Brewster's angle, where reflections are most intense
- Use a polarizing filter to control glare and enhance reflections
- Experiment with backlighting for a dreamy, ethereal effect
- Try side lighting to create depth and texture in the reflection
- Don't forget to reflect on the angle of your camera relative to the glass
Clean Your Glass Thoroughly

A spotless surface is essential for capturing stunning glass reflection photos. You'll want to guarantee your glass is free from any smudges, fingerprints, or dust particles that could mar the reflection.
Start by using a microfiber cloth to gently wipe down the entire surface. For stubborn marks, create a solution of equal parts white vinegar and water, and use this to clean the glass thoroughly.
Don't forget to clean both sides of the glass, as even the slightest imperfection can be visible in your final image. Pay special attention to corners and edges where dirt tends to accumulate.
If you're working with larger glass surfaces, such as windows or mirrors, consider using a squeegee to achieve a streak-free finish.
Once you've cleaned the glass, avoid touching it with your bare hands. Use gloves if necessary to prevent new fingerprints from appearing.
Before shooting, take a final look at the glass from different angles to guarantee you haven't missed any spots.
Use Manual Focus Mode

Why rely on autofocus when manual focus can give you precise control over your glass reflection photos?
Manual focus allows you to pinpoint exactly where you want the sharpest part of your image to be, ensuring that both the reflections and the glass surface are crisp and clear.
To use manual focus effectively, switch your camera to manual focus mode and turn the focus ring on your lens.
Look through your viewfinder or use live view on your camera's LCD screen to zoom in on the area you want to focus on.
Slowly adjust the focus ring until you achieve the sharpest possible image.
Here are some key benefits of using manual focus for glass reflection photography:
- Precise control over focus point
- Ability to focus on reflections rather than the glass surface
- Improved sharpness in low-light conditions
- Easier to achieve creative effects like selective focus
- Consistency across multiple shots
Experiment With Different Compositions

Photographers who master glass reflection shots know that composition is key. When experimenting with different compositions, don't be afraid to try unconventional angles and perspectives.
Start by placing your subject at various distances from the reflective surface to see how it affects the overall image. You'll find that closer subjects create larger reflections, while distant ones appear smaller and more ethereal.
Try positioning your camera at different heights. Shooting from a low angle can create a unique perspective, emphasizing the reflection and making it appear more prominent. Conversely, a higher angle might capture interesting patterns or textures in the reflective surface itself.
Explore the rule of thirds by placing your subject or the reflection's edge along these imaginary lines. This technique can add balance and visual interest to your shots.
Don't forget to experiment with negative space, using the reflection to fill empty areas of your frame creatively. Consider incorporating leading lines or symmetry in your compositions.
Reflections naturally create symmetrical images, so use this to your advantage by centering your subject or creating a mirror-like effect. Remember, the most enchanting glass reflection photos often come from unexpected compositions, so keep pushing your creative boundaries.
Adjust Exposure for Reflections

When capturing glass reflections, you'll often need to adjust your camera's exposure settings.
Try underexposing your shots to preserve detail in the reflections, as they're typically brighter than the surrounding scene.
If you're struggling to balance the exposure, consider bracketing your shots to create a high dynamic range (HDR) image, allowing you to retain both highlight and shadow details.
Underexpose for Reflection Detail
Mastery of exposure is essential when capturing stunning glass reflection photos. When it comes to reflections, underexposing your shots can yield remarkable results. By slightly darkening your image, you'll enhance the contrast and detail within the reflected surfaces, creating a more dramatic and enthralling photograph.
To underexpose for reflection detail, start by setting your camera's exposure compensation to -1 or -2 stops. This will darken the overall image, bringing out the intricacies in the reflective surfaces. You'll notice that shadows become more pronounced, and highlights are less likely to be blown out. Experiment with different levels of underexposure to find the perfect balance for your specific scene.
Here are some key benefits of underexposing for reflection detail:
- Increased contrast in reflective surfaces
- Enhanced visibility of textures and patterns
- Reduced risk of overexposed highlights
- More dramatic and moody atmosphere
- Improved color saturation in reflections
Remember to shoot in RAW format when underexposing, as this will give you more flexibility to adjust exposure in post-processing if needed.
Bracket Exposures for HDR
Bracketing exposures for HDR can take your glass reflection photos to the next level. This technique involves capturing multiple shots of the same scene at different exposures, typically one underexposed, one correctly exposed, and one overexposed.
By doing this, you'll capture a wider range of tones and details in both the reflections and the surrounding environment.
To bracket exposures, set your camera to Aperture Priority mode and use the Auto Exposure Bracketing (AEB) feature if available. If not, manually adjust your shutter speed between shots.
Start with a base exposure, then take one shot at -2 EV and another at +2 EV. You can fine-tune these settings based on the scene's lighting conditions.
Once you've captured your bracketed shots, combine them using HDR software or your camera's built-in HDR function. This process merges the best-exposed parts of each image, resulting in a photo with enhanced dynamic range.
You'll notice more detail in the reflections, better-preserved highlights, and richer shadows. Remember to adjust the HDR settings carefully to maintain a natural look and avoid an over-processed appearance in your final image.
Play With Smartphone Camera Filters
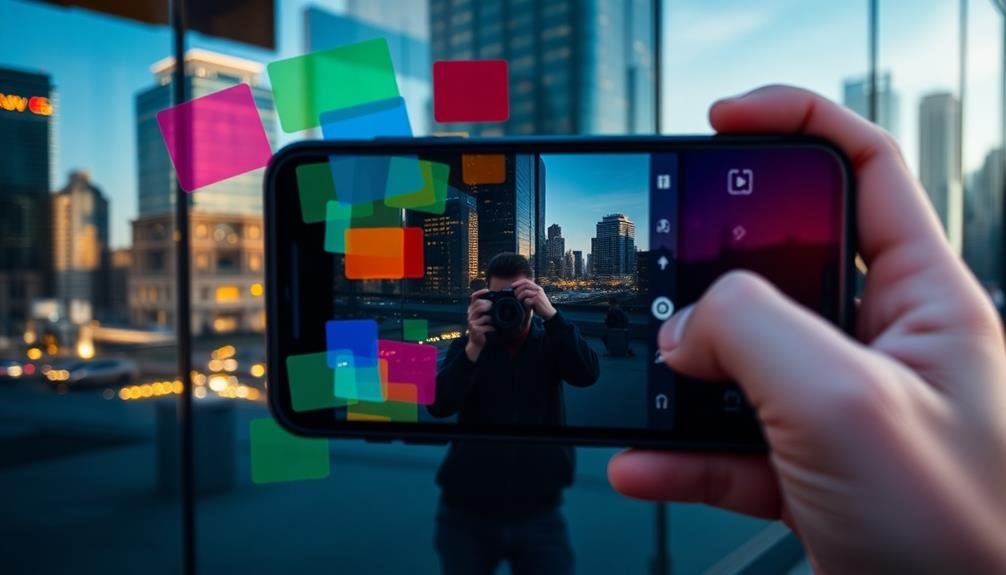
Creativity knows no bounds when it comes to smartphone camera filters. These built-in tools can transform your glass reflection photos from ordinary to extraordinary. By experimenting with different filters, you'll discover unique ways to enhance the mood, color, and overall impact of your images.
Don't be afraid to try out various filters and see how they affect your glass reflection shots. Some filters can intensify the colors of the reflection, while others may create a dreamy, ethereal atmosphere.
You'll often find that a filter that works well for one scene mightn't suit another, so it's vital to keep exploring and adjusting.
Here are some popular filter types to experiment with:
- Black and white for timeless, dramatic reflections
- Sepia for a vintage, nostalgic feel
- High contrast for bold, striking images
- Soft focus for a romantic, dreamy effect
- Color pop to emphasize specific hues in the reflection
Capture Reflections in Water Droplets
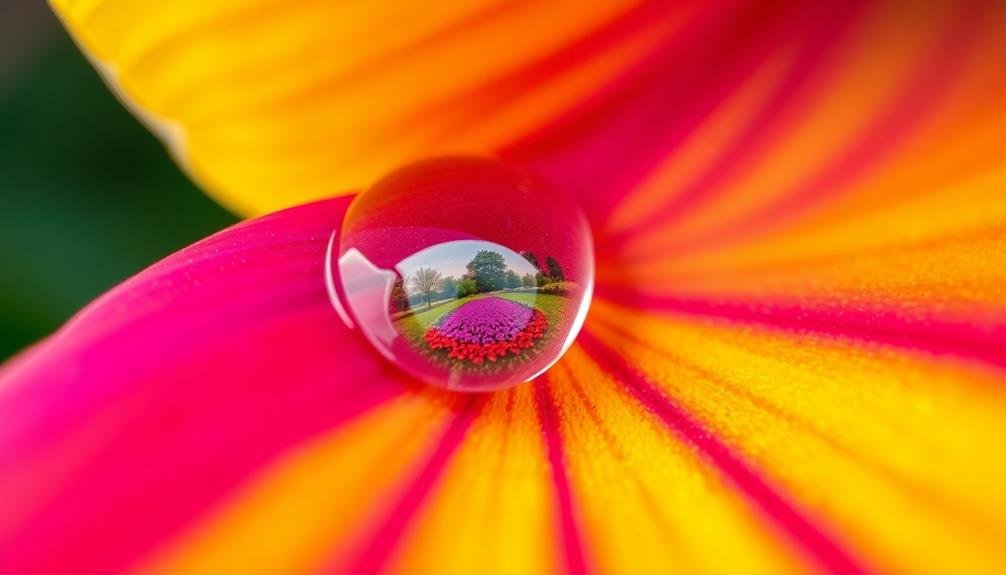
For a unique twist on glass reflection photography, try capturing reflections in water droplets. This technique requires patience and precision but can yield stunning results.
Start by finding a clean, smooth glass surface and creating small water droplets using a spray bottle or eyedropper. Position your subject behind the glass, ensuring it's well-lit and colorful.
Use a macro lens or your camera's macro mode to get close to the droplets. Focus carefully on the reflection within the droplet, not the droplet itself. Experiment with different angles to find the best composition. You'll often need to adjust your position slightly to capture the entire reflection within the curved surface of the droplet.
Control your depth of field by adjusting your aperture. A wider aperture (lower f-number) will blur the background, isolating the droplet, while a narrower aperture will keep more of the scene in focus.
Don't forget to stabilize your camera with a tripod to avoid shake at such close distances. With practice, you'll be able to create mesmerizing miniature worlds within these tiny liquid spheres, adding an enchanting dimension to your glass reflection photography.
Create Symmetry With Reflections
You can create striking symmetry in your glass reflection photos by carefully framing perfect mirror images.
Use reflective surfaces to balance your composition, placing key elements strategically on both sides of the reflection line.
Frame Perfect Mirror Images
When capturing glass reflection photos, framing perfect mirror images can elevate your shots to stunning works of art. To achieve this, position your camera at the precise angle where the reflection appears symmetrical. Experiment with different heights and distances to find the sweet spot that creates a flawless mirror effect.
Pay attention to the composition of both the real subject and its reflection. Aim to create a balanced image where both halves complement each other. Use the rule of thirds or symmetrical framing to guide your composition choices. Clean the glass surface thoroughly to minimize distractions and guarantee a crisp reflection.
Consider using a polarizing filter to reduce glare and enhance the reflection's clarity. In post-processing, fine-tune the contrast and colors to make the mirror image pop.
Here are five key tips for framing perfect mirror images:
- Align your camera parallel to the reflective surface
- Use a tripod for stability and precise adjustments
- Experiment with different focal lengths
- Wait for calm water or still surfaces for clearer reflections
- Include interesting elements in both the subject and its reflection
Balance Composition With Reflections
Creating symmetry with reflections is a powerful technique to balance your glass reflection photos. To achieve this, position your subject so it's mirrored perfectly in the reflective surface. Align the horizon or other strong horizontal lines at the center of your frame, dividing the image into two equal parts. This creates a visually striking effect that draws the viewer's eye.
Experiment with different angles to find the most balanced composition. Sometimes, a slight tilt can add interest while maintaining overall symmetry. Use leading lines in both the real scene and its reflection to guide the viewer's gaze through the image.
Pay attention to the Rule of Thirds, placing key elements at intersection points for added visual appeal.
Don't be afraid to break symmetry occasionally for dynamic results. Include an asymmetrical element in one half of the frame to create tension and intrigue. This can be a person, animal, or object that stands out from the perfectly mirrored background.
Remember to keep the overall composition balanced, even when introducing asymmetrical elements. By mastering these techniques, you'll create enchanting glass reflection photos that hold viewers' attention and showcase your artistic vision.
Edit Photos for Enhanced Reflections
Editing plays an essential role in transforming good reflection photos into stunning masterpieces. With the right post-processing techniques, you can enhance the clarity, contrast, and overall impact of your glass reflection images.
Start by adjusting the exposure and contrast to bring out the details in both the reflection and the surrounding elements. Use the highlights and shadows sliders to fine-tune the balance between light and dark areas.
Next, focus on color correction and saturation. Boost the vibrancy of colors in the reflection while maintaining a natural look. Consider using selective color adjustments to emphasize specific hues that complement the overall composition.
Don't forget to sharpen the image, paying extra attention to the edges of the reflected objects.
To create truly eye-catching reflection photos, try these advanced editing techniques:
- Use radial filters to draw attention to the reflection's focal point
- Apply graduated filters to balance exposure between sky and foreground
- Experiment with split-toning to add depth and mood
- Create a subtle vignette to frame the reflection
- Use the dehaze tool to enhance the clarity of distant reflections
Frequently Asked Questions
What Camera Settings Are Best for Capturing Glass Reflections?
To capture glass reflections, you'll want to use a small aperture (f/8 to f/16) for sharpness, a low ISO for minimal noise, and a slower shutter speed. Don't forget to use a tripod for stability.
How Can I Minimize Glare When Photographing Reflective Surfaces?
To minimize glare on reflective surfaces, you'll want to use a polarizing filter. Adjust your angle, avoid direct sunlight, and try diffused lighting. You can also experiment with different times of day for softer light conditions.
Are There Specific Types of Lenses Recommended for Glass Reflection Photography?
You'll want to use wide-angle lenses for expansive reflections or telephoto lenses for compressed, abstract shots. A tilt-shift lens can help control perspective. Don't forget macro lenses for close-up details in glass reflections.
Can I Create Artificial Reflections in Post-Processing for Added Effect?
You can certainly create artificial reflections in post-processing. Use tools like Photoshop or GIMP to add mirror effects, adjust opacity, and blend layers. However, be cautious not to overdo it, as natural reflections often look more authentic.
What Safety Precautions Should I Take When Photographing Reflections in Public Spaces?
When photographing reflections in public, you'll want to stay aware of your surroundings. Don't block walkways or traffic, respect private property, and be mindful of people's privacy. Always ask permission if you're including identifiable individuals in your shots.
In Summary
You've now got the tools to create enchanting glass reflection photos. Don't be afraid to experiment with different surfaces, angles, and techniques. Remember to keep your glass clean and use manual focus for precision. Play with composition and symmetry to add depth to your images. With practice and these tips, you'll be capturing stunning reflections in no time. So grab your camera and start exploring the magical world of glass reflections!


Leave a Reply