To capture stunning minimalist food photos on your mobile, focus on clean backgrounds and embrace negative space. Use natural light to enhance colors and textures, positioning your dish near windows or in well-lit outdoor areas. Simplify your composition by concentrating on a single main subject and avoiding clutter. Opt for neutral color palettes and highlight intricate food textures through close-up shots. Experiment with various angles and perspectives to add visual interest. When editing, make subtle adjustments to preserve authenticity. Develop a consistent style by establishing a specific color palette and composition approach. Mastering these techniques will elevate your food photography to new heights.
Choose a Clean Background
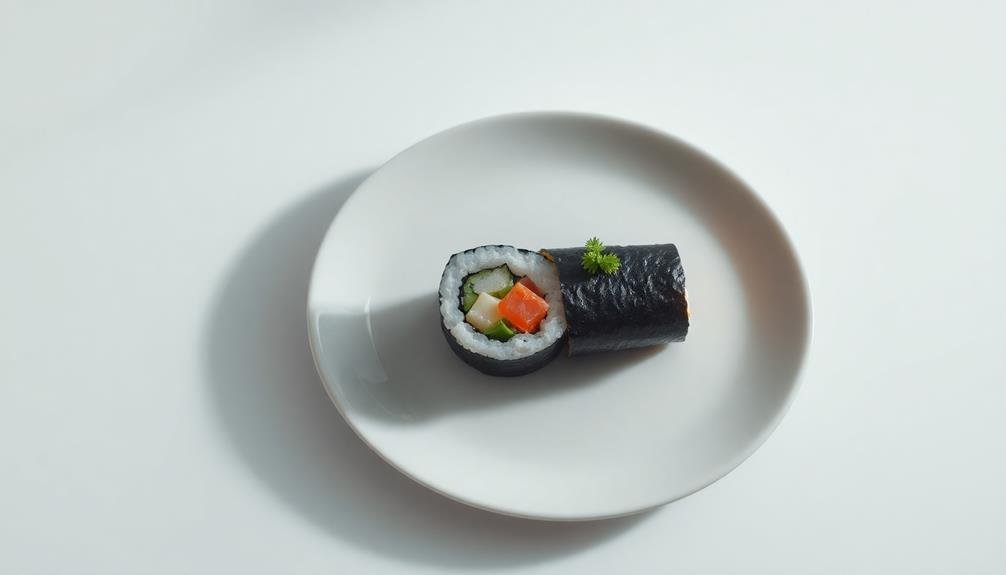
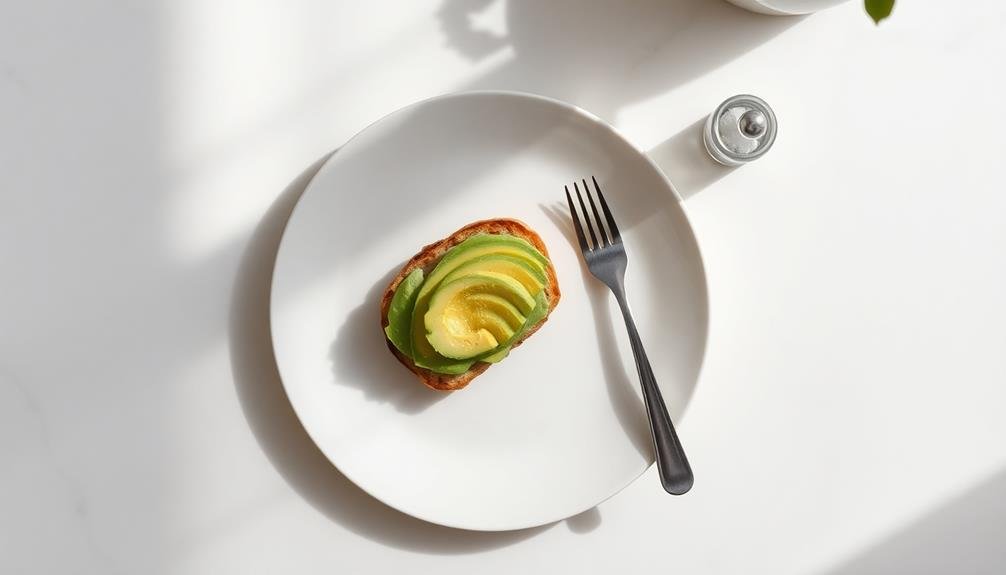
A clean background is essential for capturing stunning food photos on your mobile device. When selecting a backdrop, opt for simplicity to keep the focus on your culinary creation. Solid-colored surfaces work best, with white, light gray, or pastel hues being popular choices. These neutral tones won't compete with your food's colors and textures.
Consider using plain tabletops, wooden boards, or even a sheet of white paper as your canvas. If you're shooting at home, scout for uncluttered areas with good natural light. Remove any distracting elements from the frame, such as utensils, napkins, or busy patterns.
For a more professional look, invest in a few small backdrops or placemats specifically for food photography. These can be easily stored and provide versatility in your shots.
When shooting outdoors or in restaurants, look for clean, simple surfaces or use a portable backdrop.
Focus on Negative Space

Negative space, the empty area surrounding your main subject, plays an essential role in mobile food photography. It's a powerful tool that can elevate your images from cluttered to clean and professional.
When you're shooting food with your smartphone, deliberately incorporate negative space to create a sense of balance and draw attention to your dish.
To effectively use negative space, position your food off-center. This technique, known as the rule of thirds, allows you to leave empty areas that enhance the overall composition.
Don't be afraid of blank spaces; they give your main subject room to breathe and stand out. Experiment with different angles and distances to find the perfect balance between your food and the surrounding emptiness.
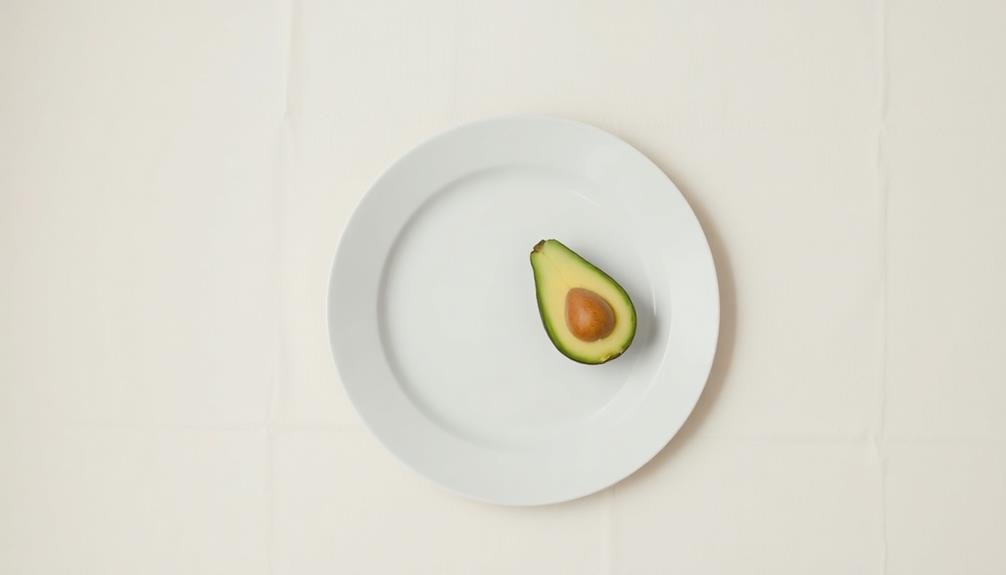
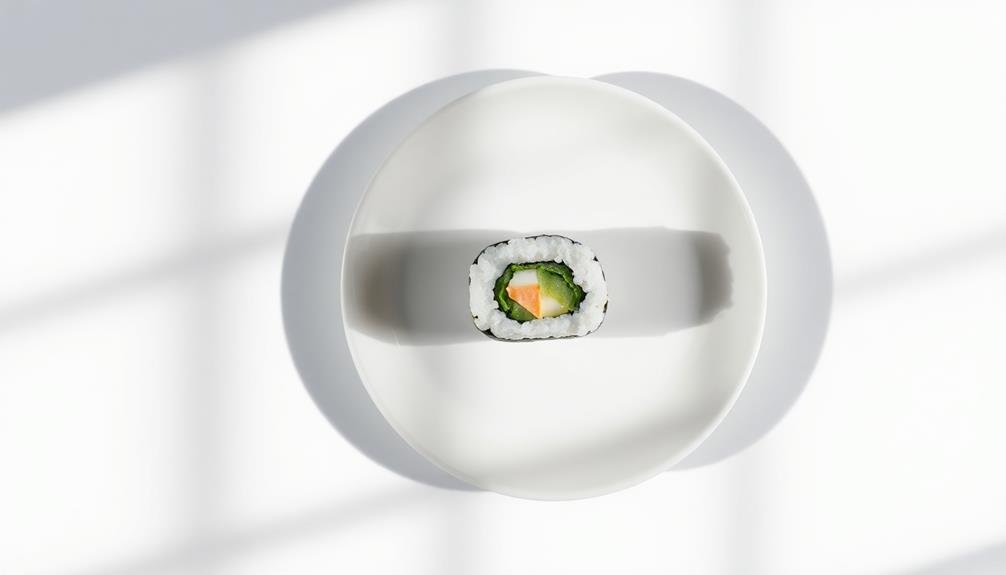
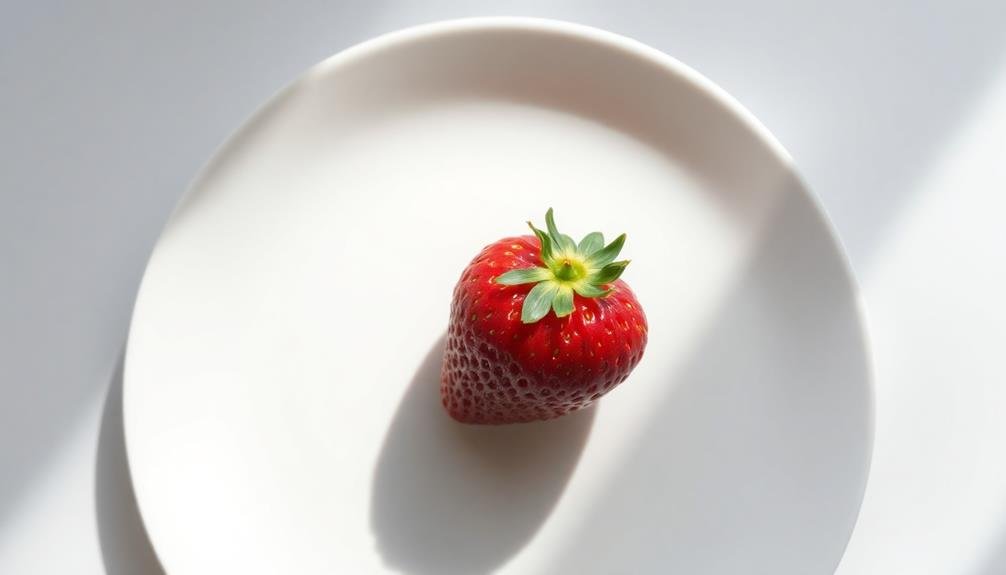
Consider using plain backgrounds like white plates or neutral tablecloths to maximize negative space. These simple backdrops won't compete with your food for attention.
As you compose your shot, pay attention to the edges of your frame. Confirm there's enough empty space around the subject to create a visually pleasing border.
Embrace Natural Light
Natural light is the secret weapon for stunning mobile food photography. It's readily available and creates a soft, flattering glow that enhances the natural colors and textures of your dishes. To harness its power, position your food near a window or in a well-lit outdoor area.
Avoid direct sunlight, which can cast harsh shadows and overexpose your images. Instead, opt for diffused light that filters through curtains or on an overcast day.
When shooting indoors, turn off artificial lights to prevent color casts. Place your dish at a 45-degree angle to the light source to create depth and dimension. If one side of your subject is too dark, use a white foam board or sheet of paper as a reflector to bounce light back onto the shadows.
Experiment with different times of day to capture various moods. Early morning and late afternoon offer warm, golden hues, while midday provides bright, clean light.
Don't be afraid to move your setup around to find the best lighting conditions. With practice, you'll develop an eye for identifying and utilizing natural light to elevate your mobile food photography.
Simplify Your Composition
When composing your food photo, concentrate on a single main subject to create a clear focal point.
You'll want to avoid cluttering the frame with unnecessary elements that might distract from your star dish.
Use negative space strategically around your subject to draw the viewer's eye and create a more impactful, professional-looking image.
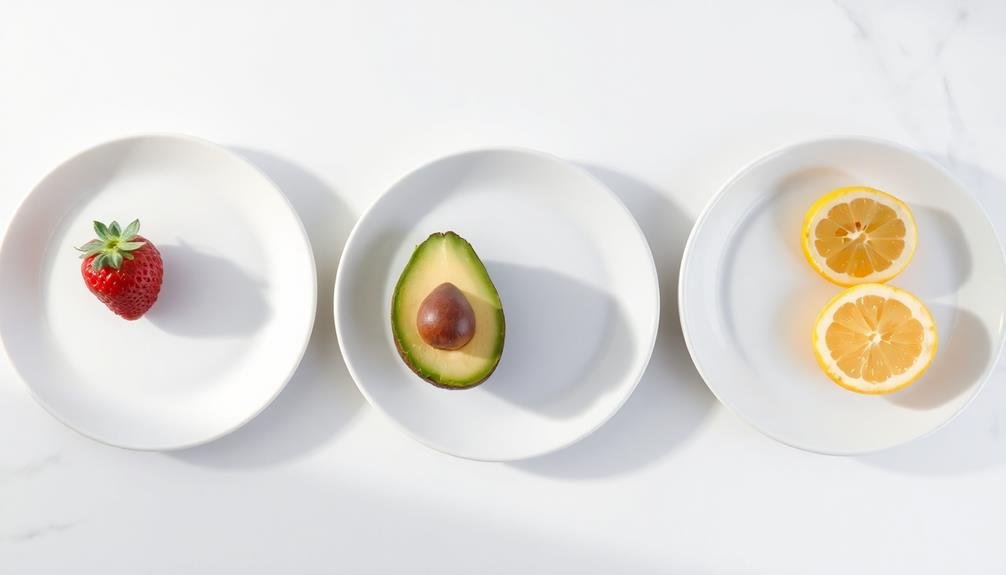
Focus on One Subject
Zooming in on a single dish or ingredient, you'll create more impactful food photos for mobile platforms. This approach eliminates distractions and allows viewers to focus on the star of the show. Choose your subject carefully, considering its visual appeal and how it represents the overall meal or recipe.
When selecting your focal point, look for interesting textures, colors, or shapes that will stand out on a small screen. Position your subject slightly off-center for a more dynamic composition, using the rule of thirds as a guide. Remove any unnecessary elements from the frame that might compete for attention.
Consider the background carefully. A plain surface or blurred backdrop can help your subject pop. If you're shooting an ingredient, try placing it on a complementary surface that enhances its natural beauty without overpowering it.
Use depth of field to your advantage by adjusting your camera's focus. A shallow depth of field can create a soft, blurred background that further emphasizes your main subject.
Experiment with different angles and perspectives to find the most flattering view of your chosen food item.
Use Negative Space Effectively
Negative space plays a powerful role in mobile food photography, complementing the focus on a single subject. It's the empty area surrounding your main dish or ingredient, and when used effectively, it can dramatically enhance your image's impact.
To utilize negative space, position your food subject off-center, leaving ample room around it. This approach draws the viewer's eye to the food while creating a sense of simplicity and elegance.
When composing your shot, look for clean, uncluttered backgrounds. A plain white plate, a minimal table setting, or a neutral surface can serve as excellent negative space.
Don't be afraid to leave large portions of your frame empty; this emptiness can actually make your subject stand out more. Experiment with different angles to maximize the use of negative space. For instance, shooting from above can create a striking contrast between your food and the surrounding area.
Remember, negative space isn't just empty; it's an active element in your composition. It can convey mood, direct attention, and provide balance.
Use Neutral Color Palettes
Neutral color palettes play an essential role in food photography. They create a calm, sophisticated backdrop that allows the food to take center stage.
When you're aiming for a minimalist style, neutral colors help maintain a clean, uncluttered look that draws attention to your dish's colors, textures, and details.
To effectively use neutral color palettes in your mobile food photos:
- Choose muted backgrounds like white, beige, or light gray
- Opt for simple, neutral-colored plates and utensils
- Incorporate natural materials like wood or stone for added texture
- Use soft, diffused lighting to enhance the neutral tones
- Balance warm and cool neutral shades for visual interest
Highlight Textures and Details
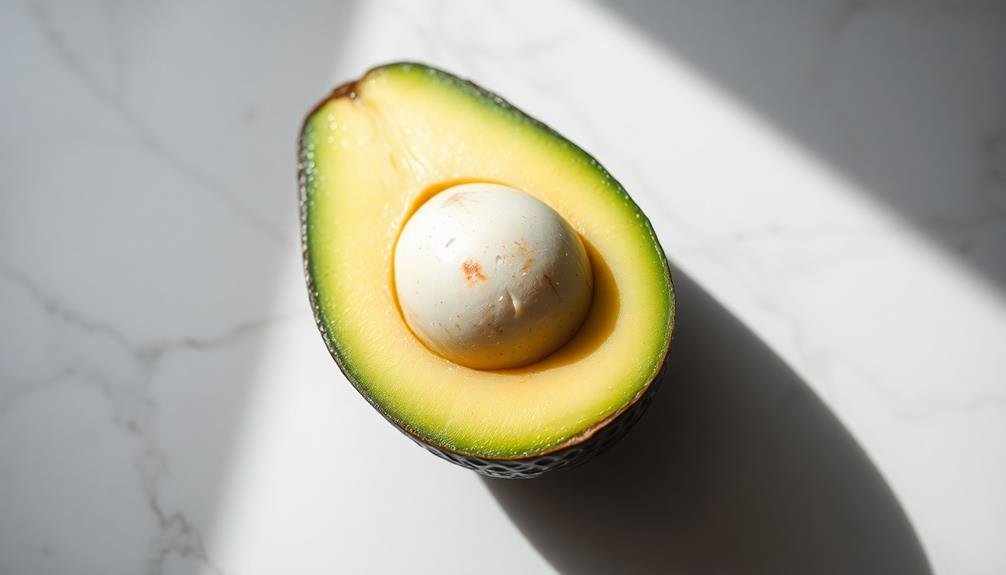
Within the domain of mobile food photography, highlighting textures and details is essential for creating enthralling images. To capture these elements effectively, focus on close-up shots that showcase the intricate features of your food. Use your phone's macro mode or get as close as possible to the subject without losing focus.
Pay attention to the natural textures of ingredients like the flakiness of pastry, the marbling of meat, or the glistening of sauces. Experiment with lighting angles to create shadows that enhance these textures. Side lighting can be particularly effective in bringing out the depth and dimensionality of your food.
Don't overlook small details that add character to your image. Crumbs, droplets, or steam can make your photo more dynamic and appetizing.
When editing, use tools to subtly increase contrast and clarity, which can further emphasize textures without appearing unnatural.
Experiment With Angles
Experiment with different angles to add visual interest to your food photos.
Try shooting from low angles to emphasize height and create a sense of grandeur, or use high angles for a bird's-eye view that showcases the entire dish.
Incorporate diagonal composition techniques to guide the viewer's eye through the image and create a dynamic, engaging photo.
Low vs. High Angles
From above or down low, the angle you choose can dramatically change the appearance of your food photos. Low angles create a sense of grandeur, making dishes appear larger and more imposing. They're great for showcasing tall items like burgers, layered desserts, or stacked pancakes.
High angles, on the other hand, offer a bird's-eye view, perfect for flat layouts, table spreads, or dishes with intricate toppings. When deciding between low and high angles, consider your subject's strengths. Low angles highlight texture and depth, while high angles emphasize patterns and composition.
Experiment with both to find what works best for each dish. Don't be afraid to try extreme angles – they can lead to unique and eye-catching results.
Here's a quick guide to help you choose:
- Use low angles for: Towering burgers, multi-layered cakes, stacked items
- Use high angles for: Pizza, salads, elaborate plating designs
- Try eye-level for: Drinks, soups, or to capture steam
- Go for 45-degree angles for: A balanced view of height and surface
- Experiment with tilted angles for: Dynamic, energetic compositions
Diagonal Composition Techniques
While low and high angles offer distinct perspectives, diagonal composition techniques add dynamism and visual interest to your food photos. To create diagonal lines, try placing your dish at an angle on the table or tilting your phone slightly when taking the shot. This approach leads the viewer's eye through the image, creating a sense of movement and depth.
Experiment with arranging utensils, garnishes, or ingredients diagonally across the frame. You can also use the rule of thirds to position your main subject along imaginary diagonal lines. Don't be afraid to rotate your phone to capture unique angles that emphasize diagonal elements in your dish.
For multi-course meals or ingredient spreads, arrange items in a diagonal pattern across the table. This technique works particularly well for flat lays, adding visual interest to overhead shots.
When photographing long, thin foods like asparagus or breadsticks, position them diagonally to create a dynamic composition that fills the frame effectively.
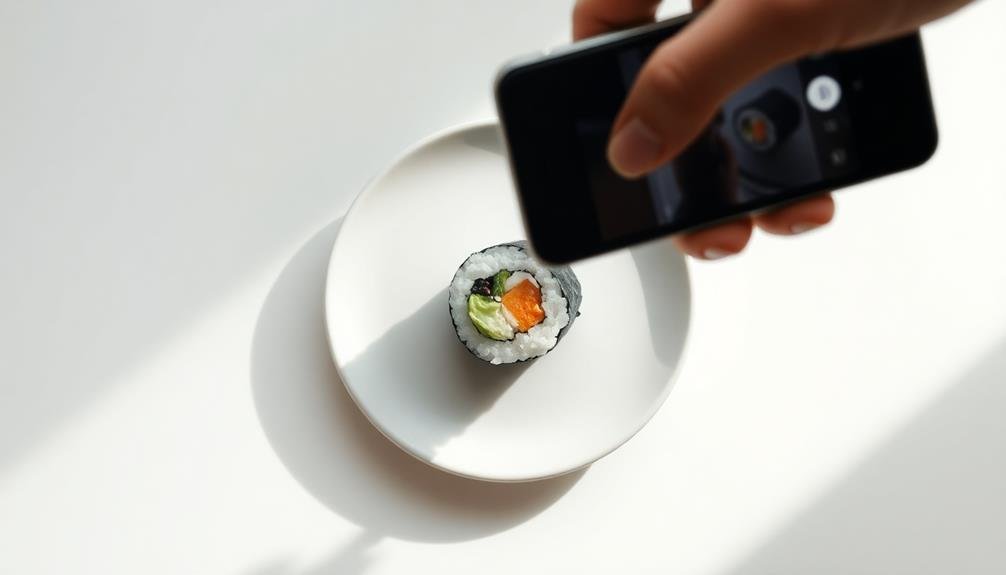
Edit With Restraint
Two key principles guide photo editing for mobile food shots: subtlety and authenticity.
When editing your food photos, resist the urge to over-process. Your goal is to enhance the natural beauty of the dish, not transform it into something unrecognizable. Start with basic adjustments like brightness, contrast, and saturation. Fine-tune these settings to bring out the food's true colors and textures without exaggeration.
Consider using presets or filters sparingly. If you do, opt for ones that mimic natural lighting conditions rather than dramatic effects. Remember, you're aiming for a clean, minimalist look that showcases the food's inherent appeal.
Here are five key tips for restrained editing:
- Adjust exposure to highlight the food's natural colors
- Use selective editing to emphasize specific areas
- Maintain realistic color balance
- Avoid heavy vignettes or borders
- Preserve texture details without over-sharpening
Master Symmetry and Balance

How can you elevate your food photos from good to great? The key lies in mastering symmetry and balance. These elements create visually appealing compositions that draw the viewer's eye and make your food look irresistible.
Start by placing your main dish in the center of the frame. This creates a focal point and establishes symmetry. Use the rule of thirds to guide your composition, placing key elements along the gridlines or at their intersections.
Don't be afraid to experiment with off-center compositions for a more dynamic look.
Balance your shot by distributing visual weight evenly. If you've got a large dish on one side, counterbalance it with smaller elements on the other. Consider color balance too – mix warm and cool tones for a harmonious image.
Pay attention to negative space. It's not just about the food, but also about what surrounds it. Use empty areas to create breathing room and draw attention to your subject.
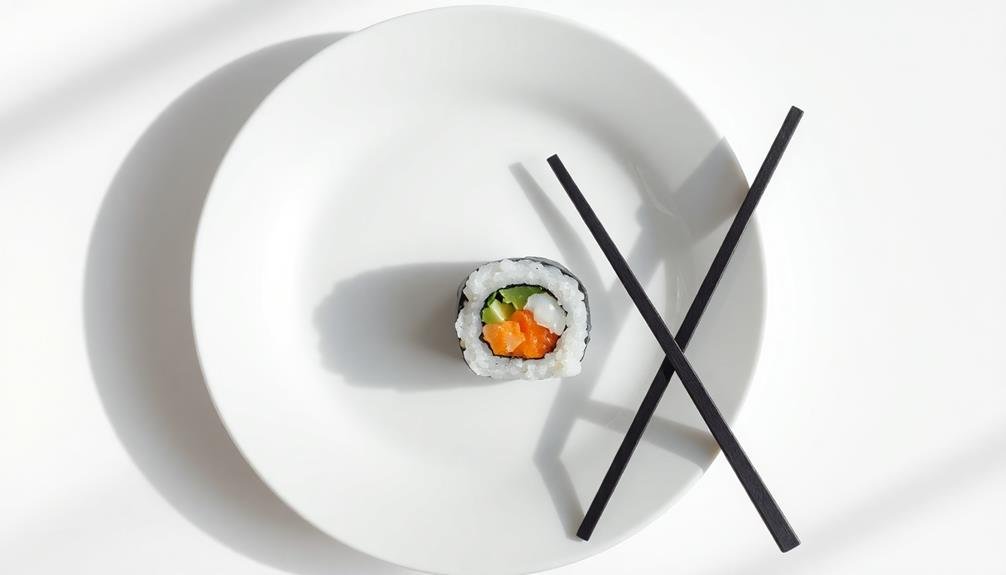
Incorporate Minimal Props
Props can elevate your food photography, but less is often more. When incorporating minimal props, focus on items that complement your dish without overshadowing it. Choose props that enhance the story you're trying to tell through your image. A well-placed utensil, a simple napkin, or a carefully selected backdrop can add depth and context to your shot without cluttering the frame.
Consider these minimal prop ideas to enhance your food photos:
- A single, elegant utensil
- A textured napkin or placemat
- A small dish of ingredients used in the recipe
- A vintage plate or unique serving vessel
- A sprig of fresh herbs or a garnish
When selecting props, opt for neutral colors and simple designs that won't compete with your main subject. Remember, the food should always be the star of the show.
Use props sparingly to create balance and interest in your composition. Experiment with different arrangements, but be ruthless in editing your choices. If a prop doesn't add value to the image, remove it.
Develop a Consistent Style
Consistency is key when it comes to mobile food photography. Developing a signature style will help your images stand out and create a cohesive feed that attracts followers. Start by choosing a specific color palette that complements your food subjects. Stick to warm tones for cozy, inviting images or cool tones for a fresh, modern look.
Next, decide on a preferred lighting style. Whether you opt for bright and airy or moody and dramatic, maintain this lighting approach across your photos. Choose a consistent background, like a specific table surface or plain wall, to create a unified look.
Establish a go-to composition style, such as overhead shots or 45-degree angles, and use it regularly. Apply the same editing techniques to all your images, including consistent filters or presets. This doesn't mean every photo should be identical, but rather that they should share a common visual thread.
Lastly, consider your plating and presentation style. Whether you prefer minimalist arrangements or more elaborate setups, keep it consistent to reinforce your unique aesthetic.
Frequently Asked Questions
How Do I Achieve a Bokeh Effect in Minimalist Food Photography?
To achieve bokeh in minimalist food photography, use a wide aperture (f/1.8-f/2.8) on your lens. Position your subject close to the camera and guarantee there's distance between it and the background. This creates a soft, blurred effect.
What's the Best Mobile App for Editing Minimalist Food Photos?
You'll find VSCO, Snapseed, and Lightroom Mobile are top choices for editing minimalist food photos. They offer clean filters, precise adjustments, and tools to enhance your images while maintaining a simple, elegant aesthetic. Try them out!
How Can I Make Food Look Appetizing in a Minimalist Style?
You can make food look appetizing in a minimalist style by focusing on clean plating, using negative space, and highlighting vibrant colors. Choose simple backgrounds, natural lighting, and minimal props. Don't overcrowd the frame; let the food shine.
Are There Specific Plating Techniques for Minimalist Food Photography?
You'll want to focus on clean lines and negative space. Use simple white plates, arrange food asymmetrically, and keep garnishes minimal. Don't overcrowd the plate. Stick to one or two colors for a truly minimalist look.
How Do I Create Depth in Minimalist Food Photos Without Cluttering?
You can create depth in minimalist food photos by using strategic shadows, layering ingredients, and varying focus. Play with angles, utilize negative space, and incorporate subtle textures. Don't overdo it; remember, less is more in minimalist photography.
In Summary
You've now got the tools to create stunning minimalist food photos with your mobile phone. Remember, less is more. Keep your backgrounds clean, embrace negative space, and let natural light work its magic. Simplify compositions, stick to neutral colors, and edit with a light touch. Aim for balance and symmetry, use props sparingly, and develop a consistent style. With practice, you'll soon be capturing mouthwatering minimalist food shots that'll make your followers drool.


Leave a Reply