
To capture stunning food textures, employ side lighting to create depth and shadows. Use manual focus and selective depth-of-field to emphasize specific elements. Experiment with macro mode for intricate details and try various angles to showcase layers. Choose backgrounds that complement or contrast with your dish's texture. Utilize props strategically to add context and interest. Play with composition techniques like the rule of thirds and negative space. Highlight ingredient textures through close-up shots and raw vs. cooked comparisons. Don't forget post-processing to enhance contrast and clarity. These tricks will elevate your food photography, but there's always more to explore in the world of mouthwatering imagery.
Use Side Lighting

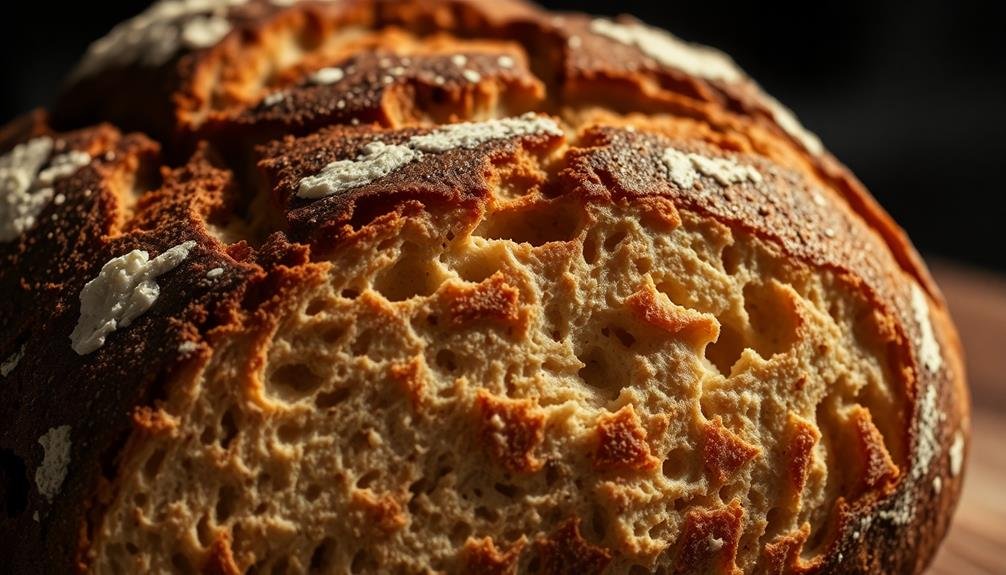
When it comes to food photography, side lighting is your secret weapon. It's a powerful technique that can greatly enhance the texture and depth of your food shots. By positioning your light source to the side of your subject, you'll create shadows that accentuate the food's surface details.
To implement side lighting, place your main light source at a 90-degree angle to your camera. This setup will cast shadows across the food's surface, highlighting its contours and crevices. You'll notice how this technique brings out the crispy edges of fried foods, the flakiness of pastries, and the juicy texture of fruits.
Experiment with the angle of your light source. Slightly adjusting it forward or backward can remarkably change the mood and emphasis of your shot.
Don't be afraid to use reflectors or bounce cards on the opposite side to fill in harsh shadows and balance the overall exposure.
Adjust Focus for Depth

To enhance texture in your food photos, mastering focus adjustment is essential.
You'll want to experiment with manual focus techniques and selective depth-of-field to highlight specific areas of your dish.
Consider using focus stacking for images that require sharpness throughout, combining multiple shots to achieve ideal clarity from foreground to background.
Manual Focus Techniques
Many food photographers overlook the power of manual focus techniques, but they're essential for creating depth and visual interest in your shots. By switching to manual focus, you'll gain precise control over which parts of your food are sharp and which are softly blurred.
Start by identifying the focal point of your dish. It could be a specific ingredient, texture, or detail you want to highlight. Set your camera to manual focus mode and adjust the focus ring until that element is tack-sharp. This technique works particularly well for close-up shots, where you can emphasize intricate textures or tiny details.
To create a sense of depth, try focusing on the front edge of the dish and letting the background fall out of focus. Alternatively, focus on an element in the middle of the frame, allowing both foreground and background to blur slightly.
Experiment with different aperture settings to control the depth of field and the amount of blur.
Don't be afraid to get creative with manual focus. Try deliberately blurring certain elements to draw attention to others, or use selective focus to guide the viewer's eye through the image.
Selective Depth-Of-Field
Through selective depth-of-field, you can create stunning food photos that draw the viewer's eye exactly where you want it. This technique involves adjusting your camera's aperture to control which parts of the image are in sharp focus and which are blurred. A wide aperture (low f-number) creates a shallow depth-of-field, perfect for isolating a specific element of your dish.
To master selective depth-of-field, experiment with different aperture settings and focal lengths. Here's a quick guide to help you:
| Aperture | Depth-of-Field | Best For |
|---|---|---|
| f/1.8 | Very Shallow | Single ingredient |
| f/4 | Moderate | Small dish |
| f/8 | Deep | Entire table setting |
Focus Stacking Benefits
While selective depth-of-field can create stunning effects, it's not always ideal for capturing every detail in a complex dish. That's where focus stacking comes in. This technique allows you to combine multiple images taken at different focus points to create a single photo with edge-to-edge sharpness.
To use focus stacking, you'll need a tripod and software like Photoshop or Helicon Focus. Take several shots of your food, adjusting the focus slightly for each image. Start with the closest point and work your way to the farthest.
Then, use your software to merge these images, creating a final photo with everything in crisp focus. This method is particularly useful for dishes with varying heights or intricate details throughout.
It's perfect for showcasing layered desserts, elaborate charcuterie boards, or dishes with multiple components. Focus stacking guarantees that every texture, from the crunchy toppings to the sauce at the bottom, is rendered with precision.
You'll capture the flakiness of pastries, the juiciness of fruits, and the delicate garnishes all in one shot, giving viewers a thorough look at your culinary creation.
Employ Macro Mode

You'll unfasten a world of textural detail by employing macro mode on your camera.
This setting allows you to capture intricate surface details and enhance tiny food elements that might otherwise go unnoticed.
With macro mode, you'll reveal hidden textural nuances that can make your food photos truly stand out.
Capture Intricate Surface Details
Macro mode photography opens up a world of intricate details in food shots. By getting up close and personal with your subject, you'll reveal textures that are invisible to the naked eye. This technique is perfect for capturing the delicate crystalline structure of sugar, the fine ridges on a raspberry, or the intricate patterns on a slice of citrus.
To make the most of macro mode, focus on these key aspects:
- Lighting: Use soft, diffused light to avoid harsh shadows that can obscure textures.
- Stability: Employ a tripod or steady surface to eliminate camera shake.
- Focus: Experiment with manual focus for precise control over your focal point.
- Depth of field: Adjust your aperture to control how much of the subject is in sharp focus.
When shooting in macro mode, pay attention to the smallest details. Look for interesting patterns, textures, and colors that might go unnoticed at a distance.
You'll be amazed at how a seemingly ordinary food item can transform into a mesmerizing landscape of textures and shapes.
Don't be afraid to get creative with your compositions – sometimes the most striking images come from unexpected angles or unconventional framing.
Enhance Tiny Food Elements
Taking macro photography a step further, you can enhance tiny food elements to create enchanting images that draw viewers in. Employ your camera's macro mode or use a dedicated macro lens to capture minute details that often go unnoticed. This technique works wonders for showcasing seeds, spices, or intricate textures on fruits and vegetables.
To maximize the impact, focus on a single small element within your dish. Position your camera close to the subject, typically within a few inches. Adjust your aperture to achieve a shallow depth of field, blurring the background while keeping your chosen element sharp. This creates a dreamy, artistic effect that emphasizes the texture and detail of your focal point.
Experiment with different angles to find the most visually appealing perspective. Sometimes, shooting from slightly above or at eye level with the tiny element can yield stunning results.
Don't forget about lighting – use a diffused light source to avoid harsh shadows and bring out the subtle textures. If needed, employ a tripod to guarantee sharpness, as macro shots are particularly sensitive to camera shake.
With practice, you'll master the art of highlighting these small yet fascinating food details.
Reveal Hidden Textural Nuances
Countless hidden textures in food remain invisible to the naked eye, but macro mode can reveal these fascinating details. By switching to macro mode on your camera or smartphone, you'll uncover a world of intricate patterns, delicate structures, and surprising textures that add depth to your food photography.
To make the most of macro mode and reveal hidden textural nuances:
- Get close: Position your lens as near to the subject as possible without losing focus.
- Use a tripod: Steady your camera to capture sharp, clear images of minute details.
- Experiment with lighting: Play with different angles and intensities to highlight textural elements.
- Focus manually: For ultimate control, switch to manual focus to pinpoint specific areas.
When shooting in macro mode, look for interesting surfaces like the crystalline structure of sugar, the fibrous patterns in fruit flesh, or the microscopic bubbles in beverages.
You'll be amazed at how ordinary ingredients transform into extraordinary subjects. Don't forget to experiment with different apertures to control the depth of field, allowing you to emphasize specific textural elements while artfully blurring others.
With practice, you'll develop an eye for spotting and showcasing these hidden textural nuances in your food photography.
Experiment With Angles

From above and below to side-on and diagonal, experimenting with angles can transform your food photography. Each angle reveals different textural elements, so don't be afraid to move around your subject.
Overhead shots are great for flat lays and showcasing intricate patterns in dishes like pizzas or salads. They'll emphasize the overall texture composition.
For three-dimensional foods like burgers or cakes, try a 45-degree angle. This perspective highlights layers and depth while still showing the top of the dish.
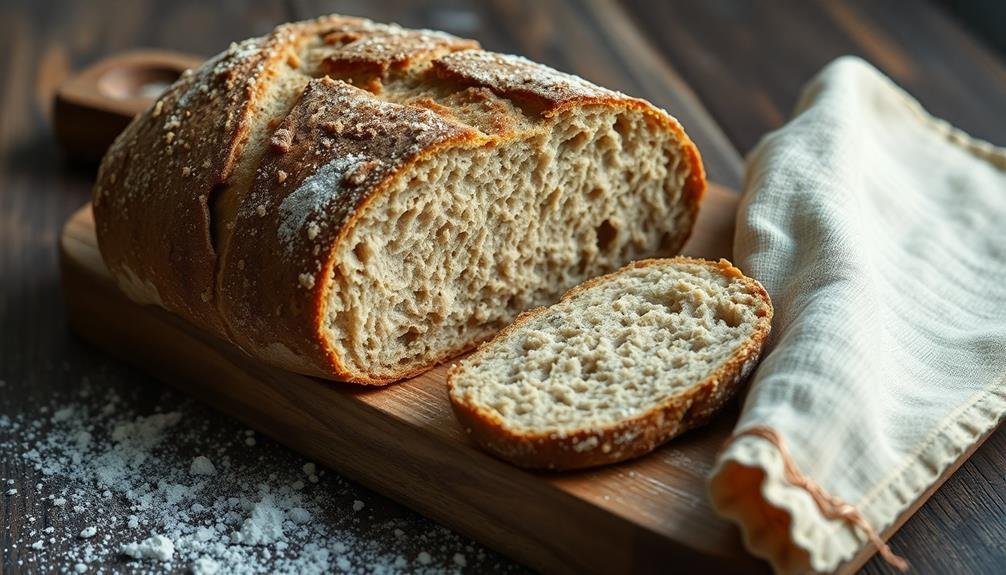
Side-on shots are perfect for sandwiches, parfaits, or anything with distinct layers. They'll accentuate the contrasting textures between ingredients.
Don't forget about extreme close-ups. Get in tight to capture the minute details of a crispy crust or the bubbles in a foam.
Low angles can make food appear more imposing and dramatic, great for tall dishes or stacked items. They'll emphasize height and vertical textures.
Create Contrasting Backgrounds

How can you make your food's texture truly pop? Create a contrasting background that enhances your dish's visual appeal. The right backdrop can emphasize textures, making them more pronounced and enticing to viewers.
Choose a background that complements your food's color and texture. For smooth, creamy dishes, opt for rough or textured surfaces like rustic wood or stone. Conversely, pair crunchy or crispy foods with sleek, glossy backgrounds for maximum contrast.
Don't be afraid to experiment with various materials:
- Fabric: Linen, burlap, or silk for a soft touch
- Tiles: Ceramic or mosaic for geometric patterns
- Paper: Craft paper or parchment for a minimalist look
- Natural elements: Leaves, pebbles, or sand for organic textures
Consider the color contrast as well. Dark backgrounds can make light-colored foods stand out, while lighter backdrops work well for richly colored dishes.
Remember to keep the focus on the food by using simple, uncluttered backgrounds. Avoid patterns or textures that compete with your dish's intricate details.
Capture Steam and Moisture

While contrasting backgrounds enhance texture visually, capturing steam and moisture can bring your food photos to life. These elements add a sense of freshness, warmth, and appetite appeal to your images.
To capture steam, use a dark background and side lighting to make it more visible. Shoot quickly when the food is piping hot, or create artificial steam using a handheld steamer or even a cigarette.
For moisture, mist your food lightly with water or glycerin to create appetizing droplets. Focus on areas where moisture naturally occurs, like the surface of fruits or the edges of a cold drink. Use a macro lens or close-up filter to highlight these tiny details.
Experiment with backlighting to make water droplets glisten and create a mouth-watering effect.
Don't overdo it, though. Too much steam or moisture can make food look unappetizing or soggy. Aim for a subtle, natural look that enhances the food's texture without overwhelming it.
Enhance With Editing Apps
The power of post-processing can elevate your food photography to new heights. With the right editing apps, you'll enhance textures and make your dishes look irresistibly appetizing. Start by adjusting basic elements like contrast, brightness, and saturation to bring out the natural textures of your food.
Then, focus on specific tools designed to amplify texture details.
Many editing apps offer features that can help you emphasize food textures:
- Clarity or structure sliders: These increase local contrast, making textures pop
- Sharpening tools: Use sparingly to enhance crisp edges and fine details
- Texture-specific filters: Apply preset adjustments tailored for food photography
- Selective editing: Target specific areas to highlight particular textures
When enhancing textures, remember that subtlety is key. Overprocessing can make your food look artificial or unappetizing. Aim for a natural, mouth-watering appearance that maintains the authentic look of the dish.
Experiment with different apps and tools to find the perfect balance for your style. With practice, you'll develop a keen eye for which adjustments work best for various types of food textures, from crispy crusts to creamy sauces.
Utilize Props Strategically
Strategically chosen props can greatly enhance the texture appeal of your food photos. When selecting props, consider items that complement or contrast with the food's texture. For smooth dishes, add rough-textured props like burlap or weathered wood to create visual interest. Conversely, pair crisp foods with sleek, polished surfaces for a striking contrast.
Use utensils to highlight texture. A fork breaking into a flaky pastry or a spoon sinking into a creamy dessert can emphasize the food's consistency. Incorporate fabric elements like linen napkins or textured placemats to add depth to your composition.
Don't overlook the power of ingredients as props. Scatter herbs, spices, or raw ingredients around the dish to provide context and texture variety. For instance, place whole coffee beans around a cappuccino or fresh berries next to a fruit tart.
Experiment with different surfaces. Marble, slate, or distressed metal can serve as eye-catching backdrops that accentuate the food's texture.
Play With Composition

Composing your food photo is just as important as selecting the right props. When you're aiming to highlight texture, strategic composition can make all the difference.
Consider the rule of thirds, placing your main subject off-center to create visual interest. Experiment with different angles to showcase the food's textural elements. Overhead shots work well for dishes with multiple components, while a 45-degree angle can emphasize layers and depth.
Don't be afraid to get up close and personal with your food. Macro shots can reveal intricate details that might otherwise go unnoticed. Play with negative space to draw attention to specific textures. Remember, less is often more when it comes to composition.
Here are some composition techniques to try:
- Use leading lines to guide the viewer's eye
- Create depth by staggering elements in the foreground and background
- Experiment with symmetry or asymmetry
- Incorporate patterns or repetition for visual impact
Showcase Ingredient Textures

Bring out the unique textures of your ingredients with strategic close-up shots.
You'll capture the fine details that make each component special, from the delicate veins of a leaf to the crisp edges of a cracker.
Try showcasing the transformation of textures by comparing raw and cooked versions of the same ingredient side by side.
Close-Up Ingredient Shots
Close-up ingredient shots are a powerful tool in your food photography arsenal. They allow you to showcase the intricate details and textures of individual components, creating visual interest and depth in your images. By zooming in on specific ingredients, you'll draw attention to their unique characteristics, whether it's the crisp skin of an apple or the delicate veins of a leaf.
To capture stunning close-up shots:
- Use a macro lens or extension tubes for extreme detail
- Experiment with different angles to find the most appealing perspective
- Play with lighting to enhance textures and shadows
- Focus on the most interesting part of the ingredient
When shooting close-ups, pay attention to the composition. Fill the frame with your subject, leaving little to no negative space. This technique creates a sense of intimacy and allows viewers to appreciate the ingredient's finer details.
Don't be afraid to get creative with your shots – try capturing water droplets on fresh produce or the marbling in a cut of meat. Remember, close-up ingredient shots aren't just about showcasing texture; they also tell a story about the quality and freshness of the food, enticing viewers to imagine its taste and aroma.
Raw vs. Cooked Comparisons
Showcasing the stark contrast between raw and cooked ingredients can create visually compelling food photographs. You'll want to capture the transformation that occurs during the cooking process, highlighting the textural changes.
For raw ingredients, focus on their natural, unaltered state. Capture the glossy sheen of a raw egg, the rough skin of a potato, or the vibrant colors of fresh vegetables.
When photographing cooked ingredients, emphasize the changes in texture and appearance. Show how a raw egg becomes fluffy when scrambled, how a potato's skin crisps up when roasted, or how vegetables soften and caramelize when sautéed. Use side-by-side comparisons to illustrate these differences effectively.
Lighting plays a vital role in emphasizing textures. Experiment with different angles and light sources to enhance the contrast between raw and cooked textures.
Soft, diffused light can bring out the smoothness of raw ingredients, while directional lighting can accentuate the crispy edges of cooked foods. Don't forget to adjust your camera settings to capture the fine details in both raw and cooked textures, ensuring your images showcase the full range of transformations that occur during cooking.
Frequently Asked Questions
How Does Camera Sensor Size Affect Texture Capture in Food Photography?
You'll find larger camera sensors capture more detail in food textures. They've got better light sensitivity and less noise, giving you sharper images. Smaller sensors might struggle with fine details, especially in low-light conditions.
What Are the Best Lens Filters for Enhancing Food Textures?
You'll find polarizing filters most effective for enhancing food textures. They reduce glare and increase contrast, revealing intricate details. For a softer look, try diffusion filters. Avoid color filters, as they can alter food's natural appearance.
How Can I Prevent Food From Wilting During Long Photo Shoots?
To prevent food wilting, you'll want to keep it cool. Use ice packs underneath dishes, mist lightly with water, and work quickly. Don't forget to style with fresh ingredients just before shooting. Proper lighting helps too.
Are There Specific ISO Settings Recommended for Capturing Food Textures?
You'll want to keep your ISO as low as possible, typically between 100-400, to maintain image quality. Higher ISOs can introduce noise, which might obscure fine textures. Adjust other settings like aperture and shutter speed accordingly.
How Do Different Types of Artificial Lighting Impact Food Texture Representation?
You'll find different artificial lights impact food texture representation uniquely. Soft diffused lighting can flatten textures, while harsh direct light emphasizes them. LED lights often enhance colors, and warm incandescent bulbs can create appetizing golden hues on textures.
In Summary
You've now got a toolkit of techniques to make your food photos pop with texture. Don't be afraid to experiment and combine these tricks. Remember, it's all about capturing the details that make your dish look irresistible. With practice, you'll develop an eye for highlighting the perfect crunch, creaminess, or flakiness in every shot. Keep refining your skills, and soon you'll be creating mouth-watering images that leap off the screen.


Leave a Reply