In mobile portrait photography, less is more because simplicity amplifies impact. By embracing negative space and decluttering backgrounds, you'll draw attention to your subject's essence. Focus on mastering single-light setups and capturing authentic expressions to create depth and emotion. Employ minimalist composition techniques, like the rule of thirds, to craft visually striking images. Experiment with silhouettes, reflections, and shadows to add intrigue without complexity. Remember, every element should serve a purpose. By stripping away distractions, you'll produce clean, crisp portraits that resonate with viewers. As you refine your approach, you'll discover the power of restraint in crafting memorable mobile portraits.
Embracing Negative Space

Why is negative space so important in mobile portrait photography? It's a powerful tool that can transform your images from cluttered and confusing to striking and impactful. Negative space refers to the empty areas surrounding your subject, and when used effectively, it draws attention to your main focus while creating a sense of balance and simplicity.
To embrace negative space, you'll need to change your perspective. Instead of trying to fill the frame, look for opportunities to isolate your subject. Use plain backgrounds like blank walls, clear skies, or expansive landscapes to create contrast. This technique works particularly well with mobile photography, as you can easily move around to find the perfect composition.
When shooting, position your subject off-center to create interesting negative space. Experiment with different angles and distances to find the right balance. Remember, the goal is to let your subject breathe within the frame.
Simplifying Backgrounds for Impact

Building on the concept of negative space, simplifying backgrounds is another key technique in mobile portrait photography. When you're capturing portraits with your smartphone, a cluttered background can distract from your subject and diminish the overall impact of your image.
To create more powerful portraits, focus on simplifying the background elements. Start by looking for clean, uncluttered areas to position your subject. Solid-colored walls, open spaces, or blurred natural settings can serve as excellent backdrops.
If you can't find an ideal location, try adjusting your angle or moving closer to your subject to minimize distracting elements. Use your phone's portrait mode or manually adjust the aperture (if available) to create a shallow depth of field.
This will blur the background, making it less prominent and drawing attention to your subject. Additionally, consider using editing apps to further simplify backgrounds by removing unwanted objects or adjusting colors and tones.
Mastering Single-Light Setups

You'll find that mastering single-light setups can greatly elevate your mobile portrait photography.
With just one light source, you're able to create a wide range of looks, from dramatic to soft and ethereal.
Versatility of One Light
Photographers often underestimate the power of a single light source. When it comes to mobile portrait photography, mastering the versatility of one light can elevate your images to new heights. You'll find that a single light setup offers endless possibilities for creating stunning portraits.
By adjusting the position, angle, and distance of your light source, you can dramatically alter the mood and atmosphere of your shots. Experiment with placing the light at different heights and angles relative to your subject. You'll discover how subtle changes can create various effects, from dramatic shadows to soft, flattering illumination.
Don't forget to explore light modifiers. Softboxes, umbrellas, and reflectors can transform the quality of light, allowing you to achieve anything from harsh, contrasty looks to smooth, wrap-around lighting.
You can even use everyday objects like curtains or frosted glass to diffuse your light source.
Color gels offer another layer of creativity. By changing the color temperature of your light, you can evoke different emotions or match specific environments. With just one light, you have the tools to create a diverse portfolio of enchanting mobile portraits.
Maximizing Shadows and Highlights
One of the most powerful techniques in single-light portrait photography is mastering the interplay between shadows and highlights. By strategically positioning your light source, you can create depth, dimension, and drama in your mobile portraits.
Start by placing your subject at a 45-degree angle to the light. This angle allows you to sculpt the face, emphasizing bone structure and creating interesting shadows. Experiment with raising or lowering the light to alter the shadow patterns on the face. A higher light source can create more dramatic shadows under the cheekbones and chin, while a lower light source can soften features.
To maximize highlights, consider using a reflector or a light-colored surface to bounce light back onto the shadowed side of the face. This technique helps maintain detail in the shadows without losing the dramatic effect.
Don't be afraid of deep shadows. They can add mystery and mood to your portraits. However, verify that you're not losing important details in the darkest areas.
Use your phone's exposure compensation to fine-tune the balance between shadows and highlights, preserving both without overexposing the image.
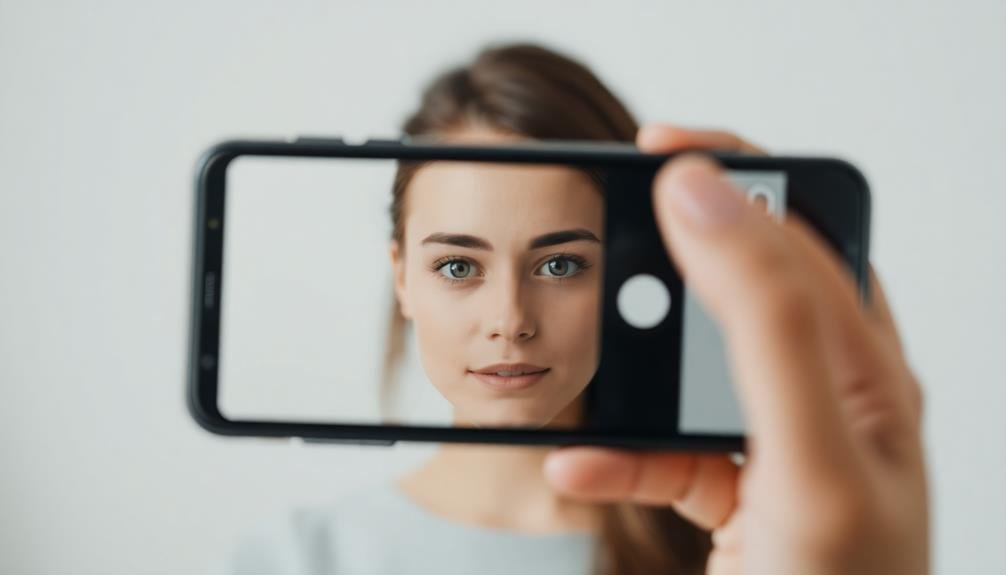
Focusing on Facial Expressions

When capturing portraits with your mobile device, you'll want to prioritize facial expressions to create compelling images.
Focus on eliciting genuine emotions from your subject, ensuring their eyes convey the intended feeling and maintaining strong eye contact.
Capturing Genuine Emotions
Authenticity lies at the heart of capturing genuine emotions in mobile portrait photography. To achieve this, you'll need to create a comfortable environment for your subject.
Engage in light conversation to help them relax and forget about the camera. Watch for natural reactions and be ready to capture those fleeting moments of genuine expression.
Avoid directing your subject too much, as this can lead to forced or unnatural emotions. Instead, encourage them to be themselves and express their true feelings. You might ask them to think about a happy memory or a loved one to evoke real emotions.
Timing is essential. Be patient and observant, waiting for those split-second changes in expression that reveal true emotions. Use your phone's burst mode or continuous shooting feature to capture a series of shots, increasing your chances of catching the perfect moment.
Pay attention to the eyes, often called the windows to the soul. A genuine smile or expression will typically involve the eyes, creating subtle creases and a sparkle that can't be faked.
Minimizing Background Distractions
Shifting our focus from capturing emotions to highlighting them, let's consider how to minimize background distractions in mobile portrait photography. Your goal is to draw attention to your subject's facial expressions, not the clutter behind them.
Start by finding simple, clean backgrounds like plain walls, solid-colored surfaces, or blurred natural settings. If you can't change locations, use portrait mode on your smartphone to create a shallow depth of field, blurring the background.
Position your subject away from busy areas, and ask them to take a few steps forward if necessary. This separation helps isolate them from distracting elements.
Pay attention to lines, shapes, and colors in the frame that might pull focus from the face. Adjust your composition to minimize or eliminate these elements.
When editing, consider slightly darkening or desaturating the background to make your subject pop. Don't overdo it, though – subtle adjustments are key.
Highlighting Eye Contact
Eye contact is the soul-window of portrait photography. When capturing portraits with your mobile device, focusing on your subject's eyes can create a powerful connection between the viewer and the image.
To highlight eye contact, position your camera at eye level with your subject. This perspective allows you to capture the most natural and engaging expression.
Encourage your subject to look directly into the lens, but don't force it if they're uncomfortable. Natural, relaxed eye contact often yields the best results. Use your phone's tap-to-focus feature to guarantee the eyes are sharp and in focus. If your device has a portrait mode, utilize it to create a shallow depth of field, further emphasizing the eyes.
Experiment with different angles and compositions to find the most flattering eye contact. Sometimes, a slight tilt of the head or a subtle shift in gaze can dramatically alter the mood of the portrait.
Pay attention to the catchlights in the eyes – these small reflections add life and dimension to the image. Finally, don't be afraid to crop tightly around the eyes in post-processing to create an even more intimate and impactful portrait.
Minimalist Composition Techniques

While many photographers aim for complex compositions, minimalist techniques can create powerful and striking mobile portraits. By simplifying your frame, you'll draw attention to your subject and create a more impactful image.
Start by identifying a single focal point, typically your subject's face or eyes. Remove any distracting elements from the background, either by changing your position or using portrait mode to blur the surroundings.
Embrace negative space to isolate your subject. This can be achieved by positioning them against a plain wall or sky. Experiment with off-center compositions using the rule of thirds, placing your subject to one side of the frame.
Play with symmetry and balance by centering your subject or using reflections. Consider using a monochromatic color palette to further simplify your image. This can be done by choosing clothing and backgrounds in similar tones or converting your photo to black and white.
Pay attention to lines and shapes in your composition, using them to guide the viewer's eye towards your subject. Remember, in minimalist portraits, every element should have a purpose. If it doesn't contribute to the image, remove it.
Monochromatic Color Schemes

Monochromatic color schemes can transform your mobile portraits into striking, cohesive images. By focusing on variations of a single color, you'll create a powerful visual impact that draws viewers in.
Start by choosing a dominant hue that complements your subject's skin tone or clothing. Then, look for backgrounds and props that feature different shades and tints of that color.
When shooting, pay attention to how light and shadow affect the color intensity. Use your phone's exposure compensation to fine-tune the overall brightness and preserve color nuances.
Don't be afraid to experiment with contrast within your chosen color family—pair light and dark versions of the same hue for added depth.
In post-processing, adjust the saturation and vibrance to enhance the monochromatic effect. Consider desaturating other colors slightly to make your chosen hue stand out even more.
You can also play with split-toning to add subtle color variations to highlights and shadows.
Utilizing Natural Light Effectively
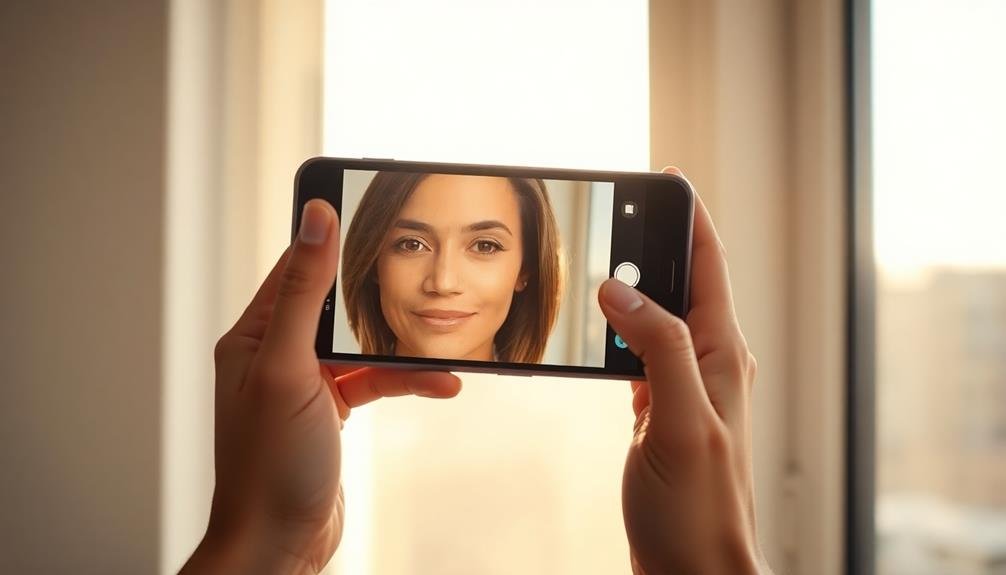
Mastering natural light is essential for creating stunning mobile portraits. You'll want to seek out soft, diffused light for the most flattering results. Early morning or late afternoon offer the best conditions, with golden hour providing warm, gentle illumination.
Avoid harsh midday sun, which casts unflattering shadows and causes squinting. Position your subject facing the light source or at a slight angle to it. This illuminates their features evenly and creates a gentle catchlight in their eyes.
For more dramatic effects, try backlighting, where the sun is behind your subject. This creates a beautiful halo effect but requires careful exposure adjustment.
When shooting indoors, place your subject near a window. The larger the window, the softer the light. Cloudy days are perfect for outdoor portraits, as they provide even, diffused light across the entire scene.
If you're dealing with harsh sunlight, seek out shaded areas or use natural reflectors like walls or light-colored pavements to bounce light onto your subject's face.
Emphasizing Textures and Details
How can you bring out the intricate details and textures in your mobile portraits? Focus on capturing the essence of your subject by highlighting specific features that tell a story.
Use your phone's macro mode or get close to your subject to reveal subtle textures like skin pores, fabric weaves, or hair strands. Experiment with different angles and lighting conditions to accentuate these details.
When emphasizing textures and details, consider these techniques:
- Adjust your camera's exposure compensation to prevent overexposure and maintain texture visibility
- Use manual focus to precisely control which areas are sharp and in focus
- Apply selective editing tools to enhance specific areas without affecting the entire image
Perfecting the Rule of Thirds

To master the rule of thirds in mobile portrait photography, you'll need to understand balanced composition techniques.
Place your subject's key features at the intersections of imaginary grid lines to create a more engaging focal point.
You can also use negative space strategically to draw attention to your subject and create a more dynamic image.
Balanced Composition Techniques
The rule-of-thirds principle forms the backbone of balanced composition in mobile portrait photography. By dividing your frame into a 3×3 grid, you'll create natural focal points where the lines intersect. Place your subject at these points to achieve a visually pleasing balance.
Beyond the rule of thirds, you can employ other techniques to enhance your portrait's composition:
- Symmetry: Center your subject for a bold, striking effect. This works well with reflections or architectural backgrounds.
- Leading lines: Use natural lines in the environment to guide the viewer's eye towards your subject.
- Framing: Incorporate elements like doorways, arches, or foliage to create a natural frame around your subject.
Don't be afraid to break the rules occasionally. Sometimes, placing your subject dead center or in an unconventional position can create a powerful image.
Experiment with negative space to add drama and focus attention on your subject.
Focal Point Placement
Three key aspects elevate your use of the rule of thirds in mobile portrait photography.
First, place your subject's eyes along the upper third line. This creates a natural focal point that draws viewers in and establishes a connection. Experiment with positioning the eyes at different intersections to achieve varying effects.
Second, use negative space strategically. Don't feel compelled to fill every grid section. Leaving empty areas can create a sense of balance and direct attention to your subject. Try positioning your subject off-center, allowing the surrounding environment to complement rather than compete.
Negative Space Utilization
Building on the strategic use of negative space mentioned earlier, let's explore how to perfect this aspect of the rule of thirds. When composing your mobile portrait, consider the empty areas around your subject as valuable real estate. These spaces aren't just blank areas; they're powerful tools for enhancing your subject's impact.
To effectively utilize negative space in your portraits:
- Place your subject off-center, allowing empty space to occupy two-thirds of the frame.
- Use the surrounding environment to create interesting shapes or lines in the negative space.
- Experiment with different angles to maximize the effect of empty areas.
Capturing Silhouettes and Shadows
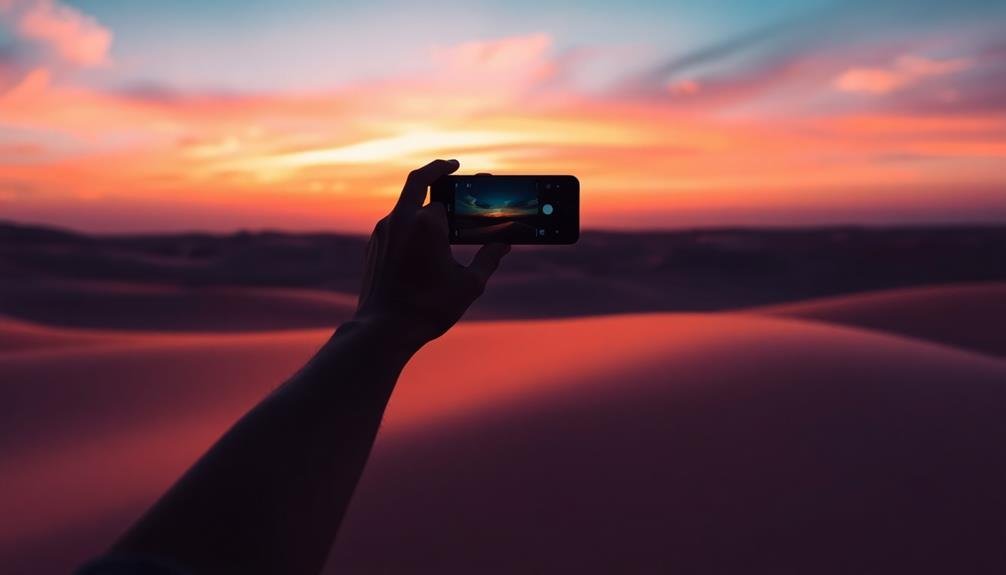
Mobile photography's versatility shines when capturing silhouettes and shadows. These techniques add depth, mystery, and drama to your portraits, creating visually striking images with minimal elements.
To capture silhouettes, position your subject in front of a bright light source, like the setting sun or a window. Expose for the background, letting your subject become a dark, outlined shape. This technique emphasizes form and gesture, stripping away distracting details.
For shadow play, look for interesting patterns cast by objects or structures. Use harsh sunlight or artificial lighting to create strong shadows. Experiment with angles to elongate or distort shadows for creative effects. You can also incorporate your subject's shadow into the composition, adding an extra layer of visual interest.
When shooting, focus on clean lines and simple backgrounds to enhance the impact of silhouettes and shadows. Use your phone's HDR mode sparingly, as it might reduce contrast. Instead, adjust exposure manually or use editing apps to fine-tune contrast and brightness post-capture.
Experimenting With Reflections

Reflections offer a unique way to add depth and intrigue to your mobile portraits. They create visual interest by adding symmetry, contrast, and a touch of surrealism to your images.
When experimenting with reflections, look for reflective surfaces like mirrors, windows, puddles, or even shiny metal objects. Position your subject near these surfaces and play with angles to capture both the person and their reflection.
To make the most of reflections in your mobile portraits:
- Use the rule of thirds to place your subject off-center, allowing the reflection to fill the remaining space
- Experiment with partial reflections for a more abstract and artistic effect
- Try capturing multiple reflections in a single frame for a complex, layered look
Don't be afraid to get creative with your compositions. You can use reflections to tell a story, create optical illusions, or simply add a unique twist to your portraits.
Remember to focus on the main subject while using the reflection as a complementary element. By mastering the art of reflections, you'll elevate your mobile portrait photography and create engaging images that stand out from the crowd.
Editing for Clean, Crisp Results
Perfection in mobile portrait photography extends beyond the capture to the editing process. When editing your portraits, focus on enhancing the image's natural qualities rather than drastically altering it.
Start by adjusting the exposure and contrast to bring out the subject's features. Carefully tweak the highlights and shadows to add depth without losing detail.
Next, fine-tune the color balance to guarantee skin tones appear natural and pleasing. Don't oversaturate; instead, aim for subtle adjustments that maintain a realistic look. Use the sharpening tool sparingly to enhance clarity without introducing digital noise.
Pay attention to the eyes, making them pop with slight adjustments to brightness and contrast. Consider using selective editing to draw attention to your subject. Slightly blur the background or vignette the edges to create depth.
Remove any distracting elements or blemishes, but be careful not to overdo it. Your goal is to present a clean, crisp image that looks polished yet natural. Remember, less is more in mobile portrait editing.
Aim for a result that enhances your subject's best features without appearing heavily processed or artificial.
Frequently Asked Questions
How Can I Achieve Bokeh Effects in Mobile Portrait Photography?
To achieve bokeh in mobile portraits, you'll want to use portrait mode if available. Keep your subject close and the background far away. Tap to focus on your subject. Experiment with lighting to enhance the effect.
What Are the Best Apps for Advanced Mobile Portrait Editing?
You'll find excellent portrait editing options in apps like Snapseed, VSCO, and Lightroom Mobile. They offer advanced tools for retouching, adjusting lighting, and enhancing skin tones. Don't forget Facetune for specific portrait touch-ups you might need.
How Do I Handle Zoom Limitations in Mobile Portrait Photography?
To handle zoom limitations, you'll want to move closer to your subject instead of using digital zoom. You can also use add-on lenses for your smartphone or experiment with creative framing techniques to achieve the desired composition.
Can I Use External Lenses With My Smartphone for Portrait Photography?
Yes, you can use external lenses with your smartphone for portrait photography. They'll expand your creative options, allowing for wider angles or more zoom. Just make sure to choose lenses compatible with your specific phone model.
What's the Ideal Distance Between Subject and Camera for Mobile Portraits?
For mobile portraits, you'll want to be about 3-6 feet from your subject. This range allows you to capture facial details while maintaining a natural perspective. Experiment within this distance to find what works best for your shots.
In Summary
You've discovered the power of simplicity in mobile portrait photography. By embracing minimalism, you'll create striking images that capture the essence of your subject. Remember, less really is more. Focus on clean compositions, expressive faces, and thoughtful lighting. Don't be afraid to experiment with negative space, shadows, and reflections. As you refine your skills, you'll find that restraint often leads to the most impactful and memorable portraits. Keep practicing, and watch your mobile photography soar.


Leave a Reply