
To capture pro-level mobile food photos, you'll need more than just your smartphone. Invest in a high-quality phone camera with manual controls and multiple lenses. Add portable lighting, a tripod, and lens attachments to enhance your setup. Don't forget backdrops, surfaces, and styling props to create eye-catching compositions. Reflectors and diffusers will help you perfect your lighting, while editing apps allow for professional post-processing. Keep your gear powered with a portable charger. With these essential tools, you'll be well-equipped to elevate your food photography game. The right combination of gear and techniques can transform your shots from amateur to professional.
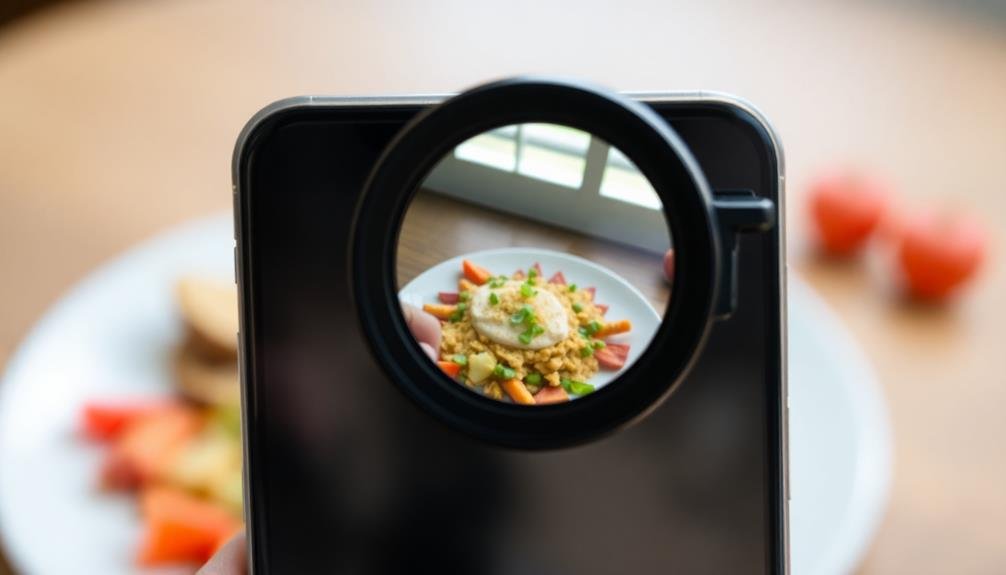
High-Quality Smartphone Camera

Almost every modern smartphone comes equipped with a high-quality camera, making it the most essential tool for mobile food photography. When choosing a smartphone for food photos, prioritize devices with advanced camera features.
Look for models with multiple lenses, including wide-angle and macro options, which allow you to capture diverse food shots. High megapixel counts guarantee crisp, detailed images, while larger sensors improve low-light performance for dimly lit restaurant settings.
Consider phones with manual controls, allowing you to adjust settings like ISO, shutter speed, and white balance. This flexibility helps you adapt to various lighting conditions and achieve your desired aesthetic.
Portrait mode can create a pleasing bokeh effect, drawing focus to your main dish. HDR capabilities balance exposure in high-contrast scenes, preserving details in both bright and dark areas.
Don't overlook the importance of a good display. A high-resolution, color-accurate screen helps you assess your shots accurately on-site.
Portable Lighting Kit

With proper lighting, even the best smartphone camera can't capture stunning food photos in dimly lit environments. That's why a portable lighting kit is essential for pro-level mobile food photography.
You'll want to invest in a compact, versatile setup that's easy to carry and quick to set up. Consider a small, rechargeable LED light panel with adjustable brightness and color temperature. This will allow you to control the intensity and warmth of your light source, adapting to various settings.
Look for models with diffusers to soften harsh shadows and create a more natural look. A foldable reflector is another vital tool. It'll help you bounce light and fill in shadows, adding depth to your images.
Choose a multi-surface reflector with white, silver, and gold options for different effects. Don't forget a small tripod or phone mount. This will keep your device steady and free up your hands to adjust the lighting.
Some kits include clamps or flexible arms to position your lights precisely. With these tools, you'll be prepared to create professional-looking food photos anywhere, anytime.
Tripod or Stabilizing Mount

While handheld shots can work in a pinch, a tripod or stabilizing mount is essential for consistently sharp, professional-looking food photos. These tools eliminate camera shake, allowing you to capture crisp images even in low-light conditions or when using slower shutter speeds.
For mobile photography, compact and versatile options are key. Look for a lightweight, portable tripod that can easily fit in your bag. Some models feature flexible legs that can wrap around objects, giving you more creative angles.
Alternatively, consider a tabletop tripod for stability when shooting on flat surfaces.
If you're tight on space, a phone-specific stabilizing mount might be your best bet. These typically attach to your device via a clamp or magnetic system and offer a sturdy grip for smoother handheld shots. Some mounts double as mini tripods or come with built-in remote shutters for added convenience.
When choosing your stabilizing gear, consider factors like compatibility with your phone model, weight capacity, and ease of use.
Don't forget to check if it allows for both horizontal and vertical orientation to accommodate various composition styles. With the right tripod or mount, you'll greatly improve the quality and consistency of your mobile food photography.
Backdrop and Surface Options

Now that you've got your camera steady, let's focus on what's behind and beneath your food. The right backdrop and surface can elevate your mobile food photography from amateur to professional. You'll want a variety of options to suit different dishes and moods.
For backdrops, consider using textured walls, colored papers, or fabric. Surfaces can range from rustic wood to sleek marble. Always keep in mind the color and texture of your food when selecting these elements. They should complement, not overpower, your subject.
Here's a quick guide to backdrop and surface options:
| Material | Backdrop | Surface |
|---|---|---|
| Wood | Rustic, warm | Versatile, natural |
| Marble | Elegant, cool | Luxurious, smooth |
| Fabric | Soft, varied | Textured, flexible |
Invest in a few key pieces that you can mix and match. Portable backdrops and surface boards are available, designed specifically for food photography. They're lightweight and easy to store, perfect for on-the-go shoots. Don't forget about everyday items like placemats, napkins, and tablecloths – they can add depth and interest to your compositions.
Lens Attachments for Smartphones
You'll find various types of lens attachments for your smartphone, including macro, wide-angle, and fisheye options.
These attachments can greatly enhance your food photography by allowing for close-up details, wider compositions, or unique distortions.
When choosing lens attachments, consider their mounting mechanism and compatibility with your specific smartphone model to guarantee a secure fit and ideal performance.
Types of Lens Attachments
Enhance your smartphone's camera capabilities with lens attachments designed specifically for mobile devices. These accessories can transform your phone into a more versatile photography tool, perfect for capturing stunning food images.
Wide-angle lenses are ideal for capturing entire table spreads or restaurant interiors. They'll help you fit more into the frame, showcasing the ambiance alongside your dish.
Macro lenses allow you to get incredibly close to your subject, revealing intricate details of food textures and garnishes that might otherwise go unnoticed.
Telephoto lenses are great for achieving a shallow depth of field, creating that coveted blurred background effect that makes your food pop. They're also useful for capturing distant subjects without losing quality.
Fisheye lenses offer a unique, ultra-wide perspective that can add a creative twist to your food photography, especially for overhead shots of circular dishes or table arrangements.
Some manufacturers offer multi-lens kits that include various attachments in one package. These kits typically feature a combination of wide-angle, macro, and telephoto lenses, giving you flexibility in your shooting options.
When choosing lens attachments, verify they're compatible with your specific smartphone model for the best results.
Enhancing Image Quality
While lens attachments expand your creative options, they also play a considerable role in enhancing image quality. Macro lenses allow you to capture intricate food details, bringing out textures and colors that might otherwise be missed.
Wide-angle lenses help you showcase entire table settings or restaurant interiors, providing context for your food shots. Telephoto lenses let you zoom in on distant subjects without losing quality, perfect for capturing chef's actions in open kitchens.
Fisheye lenses create unique, distorted perspectives that can add a playful touch to your food photography. When choosing lens attachments, opt for high-quality glass to maintain image sharpness and minimize distortion.
To further boost image quality, consider using a clip-on polarizing filter. It reduces glare and reflections on shiny surfaces like plates or glasses, enhancing color saturation and contrast.
Don't forget to clean your lens attachments regularly to prevent smudges and dust from affecting your shots. With the right combination of lens attachments and proper care, you'll considerably elevate the quality of your mobile food photography, creating professional-looking images that stand out on social media and in your portfolio.
Mounting and Compatibility
Selecting the right mounting system for your smartphone lens attachments is essential for seamless integration and ideal performance. When choosing lens attachments, verify they're compatible with your specific phone model. Many manufacturers offer universal clips or model-specific cases that securely hold lenses in place over your phone's camera.
Consider the ease of attaching and detaching lenses. Some systems use magnetic mounts, allowing for quick lens swaps, while others rely on threaded connections for a more secure fit. If you frequently switch between lenses, opt for a system that allows rapid changes without compromising stability.
Check if the mounting system interferes with your phone's other functions, such as flash or additional cameras. Some mounts may block sensors or buttons, so choose one that maintains full access to your device's features.
For versatility, look for mounting systems that work with multiple lens types from the same manufacturer. This allows you to expand your lens collection without investing in different mounting solutions for each new lens.
Additionally, confirm the mount is sturdy enough to support heavier lenses without sagging or misalignment, which could affect image quality.
Remote Shutter Release

A remote shutter release is a game-changer for your mobile food photography.
You'll eliminate camera shake, ensuring crisp images even in low-light conditions.
This handy tool also allows you to take self-portraits with your culinary creations and capture shots from challenging angles that might otherwise be awkward or impossible.
Eliminates Camera Shake
Often overlooked, a remote shutter release is an invaluable tool for eliminating camera shake in your food photography. When you tap your phone's screen to take a photo, you risk introducing unwanted movement, resulting in blurry images. A remote shutter release solves this problem by allowing you to trigger the camera without physically touching your device.
You'll find various options available, from Bluetooth-enabled buttons to wired remotes that plug into your phone's headphone jack or charging port. Some even offer additional features like adjustable delays or interval shooting. By using a remote, you'll maintain a steady hand position while framing your shot, ensuring crisp, clear images every time.
This accessory is particularly useful in low-light situations or when using slower shutter speeds, where even the slightest vibration can impact image quality. It's also beneficial when working with tripods or in tight spaces where reaching your phone's screen might be challenging.
Enables Self-Portraits
Remote shutter releases open up a world of possibilities for self-portraits in food photography. They allow you to step away from your phone and capture images of yourself interacting with your culinary creations. Whether you're plating a dish, taking a bite, or simply posing with your food, a remote shutter gives you the freedom to compose your shot without awkwardly stretching your arm.
You'll find various types of remote shutters on the market. Bluetooth-enabled devices are popular, as they're easy to pair with your smartphone and offer a range of up to 30 feet. Some even come with additional features like interval shooting or time-lapse capabilities.
Alternatively, you might opt for a wired remote that plugs directly into your phone's headphone jack or charging port.
When using a remote shutter, consider investing in a sturdy phone tripod to guarantee your device stays steady. This setup allows you to experiment with different angles and compositions while maintaining consistent image quality.
Remember to frame your shot before stepping into the frame, and use the remote to take multiple photos, giving you plenty of options to choose from during editing.
Improves Awkward Angle Shots
Flexibility is key when capturing food photos from challenging angles, and a remote shutter release can be your secret weapon. This small, portable device allows you to trigger your smartphone's camera from a distance, giving you more freedom to position your phone in unconventional spots.
When you're trying to capture an overhead shot of a beautifully plated dish, you won't have to stretch or strain to reach the shutter button. Simply set up your phone on a tripod or stabilizer above the food, step back, and use the remote to take the shot. This technique is especially useful for flat-lay compositions or when you want to include your hands in the frame without awkwardly contorting yourself.
For low-angle shots that add drama to your food photos, a remote shutter release is invaluable. You can place your phone on the table or even on the floor, then trigger the camera without having to crouch down or disturb the setup. This allows for smooth, steady shots that capture the food's texture and height from an impressive perspective.
Reflectors and Diffusers

Reflectors and diffusers can dramatically enhance your mobile food photography by manipulating light. These versatile tools allow you to control shadows, highlight textures, and create a more balanced exposure in your food shots.
Reflectors bounce light back onto your subject, filling in shadows and adding a subtle glow. You can use small, portable reflectors designed for mobile photography or even DIY options like white foam board or aluminum foil. Position the reflector opposite your main light source to brighten dark areas and reveal more detail in your food.
Diffusers, on the other hand, soften harsh light by scattering it evenly across your subject. They're especially useful when shooting in direct sunlight or with strong artificial lighting. A translucent white umbrella or a piece of parchment paper can serve as an effective diffuser. Hold it between your light source and the food to create a softer, more flattering illumination.
When using reflectors and diffusers, experiment with different angles and distances to achieve the desired effect. You'll find that these simple tools can greatly improve the quality of your mobile food photos, giving them a more professional look without the need for complex lighting setups.
Props and Styling Tools

While lighting tools enhance your photos, the right props and styling accessories can elevate your mobile food photography to new heights. Consider investing in a variety of backgrounds, including wooden boards, marble slabs, and textured fabrics. These will add depth and interest to your shots. Don't forget about utensils, plates, and bowls in various sizes and styles to complement different dishes.
For food styling, you'll need tweezers, small brushes, and pipettes to perfect the smallest details. Keep a spray bottle filled with water handy to add freshness to produce or create appetizing droplets. Glycerin mixed with water can create longer-lasting "condensation" on cold drinks.
Here's a quick reference table for essential props and styling tools:
| Props | Styling Tools |
|---|---|
| Wooden boards | Tweezers |
| Marble slabs | Small brushes |
| Textured fabrics | Pipettes |
| Assorted plates | Spray bottle |
| Various utensils | Glycerin mixture |
| Unique bowls | Cotton swabs |
| Vintage linens | Scissors |
| Interesting glassware | Food-safe glue |
Editing Apps and Software

Once you've captured your mouthwatering shots, it's time to enhance them with powerful editing apps and software. Your smartphone's built-in editing tools can be a good starting point, but for truly professional results, you'll want to explore dedicated photo editing apps.
These apps offer a wide range of features, from basic adjustments to advanced color grading and special effects.
Some top-rated editing apps for food photography include:
- Snapseed: A versatile, free app with powerful tools for adjusting exposure, color, and sharpness
- VSCO: Known for its film-like filters and advanced editing capabilities
- Lightroom Mobile: Adobe's professional-grade editing software, now available on mobile devices
- Foodie: Specifically designed for food photography, with custom filters and tools
When editing your food photos, focus on enhancing the natural colors and textures of the dishes. Adjust the white balance to guarantee accurate color representation, and use selective editing tools to highlight key elements of the composition.
Don't overdo it with filters or effects – aim for a natural, appetizing look that makes viewers' mouths water. With practice, you'll develop your own editing style that complements your photography skills.
Portable Power Bank

When you're out capturing food photos, a portable power bank is essential to keep your devices running.
Look for high-capacity options that'll provide multiple full charges for your smartphone or tablet, ensuring you can shoot all day without interruption.
Consider models that support fast-charging to quickly top up your battery during short breaks, allowing you to maximize your time behind the camera.
High-Capacity for Longevity
In light of your mobile photography adventures, a high-capacity portable power bank is essential for keeping your devices charged throughout the day.
When selecting a power bank, opt for one with at least 20,000mAh capacity. This will guarantee you can recharge your smartphone multiple times and even power up other devices like tablets or cameras.
Look for power banks that offer fast charging capabilities, such as Quick Charge or Power Delivery. These technologies can greatly reduce the time it takes to recharge your devices, allowing you to get back to capturing those perfect food shots quickly.
Additionally, consider a power bank with multiple output ports, enabling you to charge several devices simultaneously.
To maximize the longevity of your high-capacity power bank, follow these best practices:
- Store it in a cool, dry place when not in use
- Avoid exposing it to extreme temperatures
- Charge it fully before long photography sessions
- Use high-quality, manufacturer-approved cables
Fast-Charging Compatible Options
For fast-charging compatible power banks, you'll want to look for models that support the latest quick charge technologies. Options like Qualcomm Quick Charge, USB Power Delivery (PD), and proprietary fast-charging protocols from smartphone manufacturers are crucial. These technologies can greatly reduce charging times for your mobile devices, keeping you powered up and ready to capture more food photos.
When selecting a fast-charging power bank, check its input and output specifications. Look for power banks with USB-C ports that support PD, as these can often charge your devices at higher wattages. Some models offer multiple fast-charging ports, allowing you to juice up several devices simultaneously.
Pay attention to the power bank's own recharge time, too. Fast-charging input capabilities mean you can quickly replenish the power bank itself between photo shoots. This feature is particularly useful when you're on location or traveling.
Remember to verify compatibility between your power bank and your specific mobile devices. While many fast-charging technologies are becoming universal, some smartphones may require brand-specific chargers for peak performance.
Always use high-quality, certified cables to maximize charging speeds and protect your devices.
Frequently Asked Questions
How Do I Handle Food That Melts or Wilts Quickly During Photo Shoots?
To handle melting or wilting food, you'll need to work quickly. Use a stand-in for setup, then swap in the real food at the last moment. Keep items chilled until needed and have backup portions ready.
What's the Best Way to Transport Delicate Food Items for On-Location Shoots?
You'll want to use insulated containers or coolers to maintain temperature. Pack items separately and cushion them with bubble wrap or towels. For extra-delicate foods, consider assembling on-site. Don't forget ice packs for cold items.
Are There Any Legal Considerations When Photographing Food in Public Spaces?
You'll need to contemplate privacy laws and property rights when photographing food in public spaces. Always get permission on private property, respect people's privacy, and be aware of local regulations regarding commercial photography in public areas.
How Can I Capture Steam or Smoke Effectively in Food Photography?
To capture steam or smoke effectively, you'll want to use a dark background for contrast. Shoot with a fast shutter speed and side lighting. You can also enhance the effect by using a spray bottle or dry ice.
What's the Ideal Temperature for Photographing Ice Cream and Frozen Desserts?
You'll want to keep frozen desserts at around 10°F (-12°C) for photography. It's cold enough to maintain shape but warm enough to prevent frost. Work quickly, and use a freezer nearby for touch-ups between shots.
In Summary
You're now equipped with the essential gear for pro-level mobile food photography. Remember, it's not just about having the right tools; it's how you use them. Practice with your new equipment, experiment with different setups, and don't be afraid to get creative. As you hone your skills, you'll find your unique style emerging. Keep pushing your boundaries, and soon you'll be capturing mouth-watering shots that'll make everyone's stomachs growl with envy.


Leave a Reply