
To capture stunning star trails with your smartphone, start by finding a dark location away from light pollution. Secure your phone on a sturdy tripod and use a remote shutter or voice command to avoid camera shake. Download a long exposure app for extended shutter speeds and set your ISO low to minimize noise. Optimize your battery life by dimming the screen and closing unnecessary apps. Focus on a bright star and shoot for at least 30 minutes. In post-processing, adjust exposure and reduce noise for crisp trails. Don't forget to incorporate interesting foreground elements for added depth. These tips are just the beginning of your mobile astrophotography journey.
Choose the Right Location

The perfect backdrop can make or break your star trail photography. When choosing a location, prioritize areas with minimal light pollution. Dark sky reserves, remote countryside, and high-altitude spots are ideal.
Look for interesting foreground elements to add depth to your composition, such as trees, mountains, or architectural features.
Consider the direction you'll be shooting. The North Star (Polaris) remains stationary while other stars appear to rotate around it, creating circular trails. For linear trails, face east or west. South-facing shots can produce interesting arced patterns.
Weather plays a significant role. Clear, moonless nights offer the best conditions for capturing star trails. Check the forecast and lunar calendar before planning your shoot.
Be mindful of seasonal changes in star positions and the Milky Way's visibility.
Accessibility and safety are paramount. Confirm you can reach your chosen spot easily and safely at night. Scout the location during daylight hours to familiarize yourself with the terrain and potential hazards.
Bring a friend if possible, and always inform someone of your plans when shooting in remote areas.
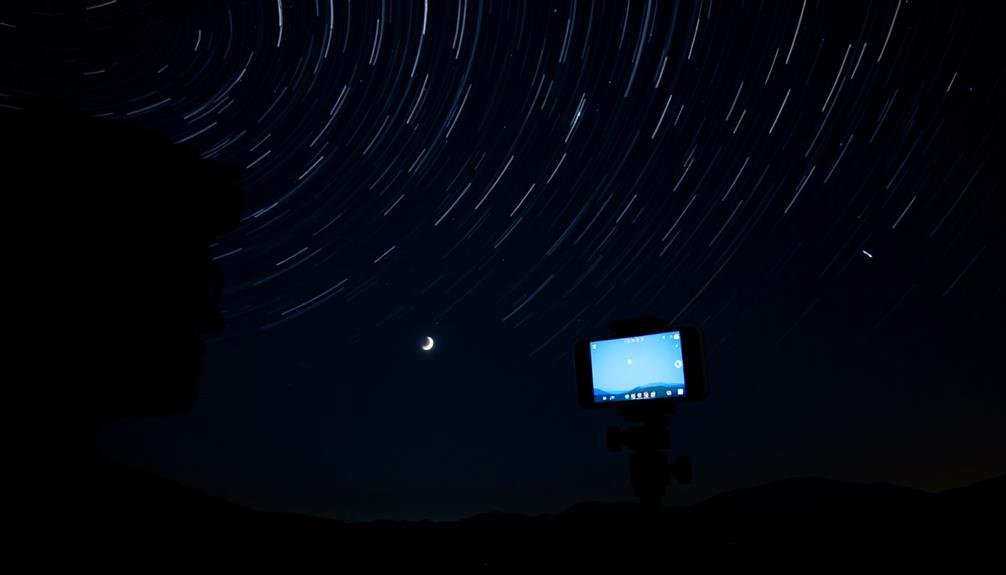
Set Up Your Phone Securely
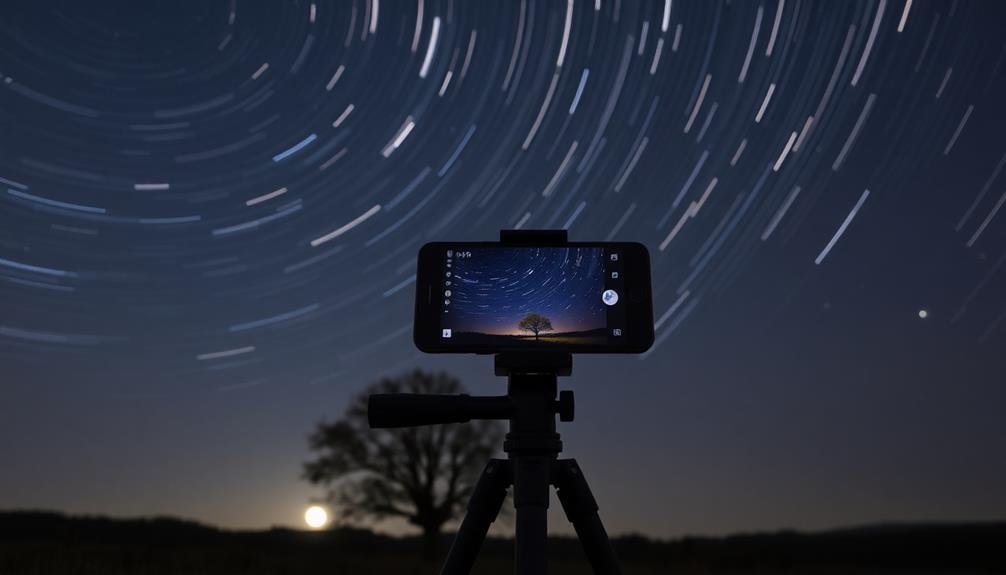
For successful star trail photography, securing your phone is essential. You'll need to keep your device completely still for extended periods, often hours at a time. Any movement during the exposure can ruin your shot and waste your efforts.
To guarantee stability, invest in a sturdy tripod designed for smartphones. Look for one with adjustable legs and a reliable phone mount that can withstand outdoor conditions.
Once you've got your tripod, follow these steps to set up your phone securely:
- Extend the tripod legs fully and press them firmly into the ground.
- Attach your phone to the mount, ensuring it's locked in place.
- Use the tripod's level to guarantee your phone is perfectly horizontal.
- Tighten all knobs and joints to prevent any potential movement.
If you're in a windy area, consider adding weight to your tripod for extra stability. You can hang a bag filled with rocks or sand from the center column.
Additionally, use your phone's voice commands or a bluetooth remote to trigger the shutter, avoiding any accidental movement from touching the screen.
With your phone securely set up, you're ready to capture stunning star trails.
Use Long Exposure Apps
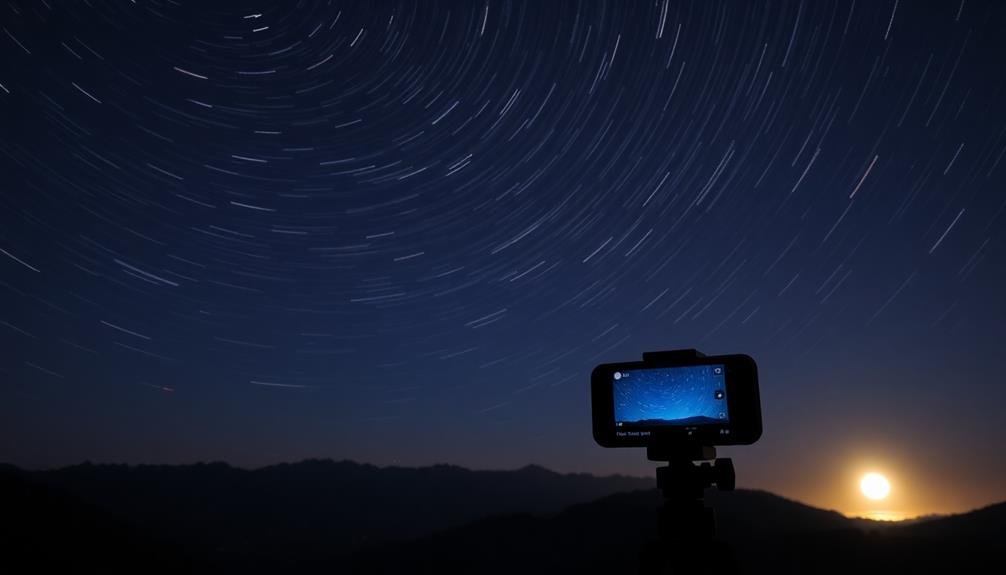
Long exposure apps are essential tools for capturing star trails on your mobile device. These apps allow you to extend your phone's shutter speed beyond its native capabilities, often up to several hours. When choosing an app, look for features like interval shooting, noise reduction, and RAW support.
Popular long exposure apps include NightCap, ProCam, and Slow Shutter Cam. Each offers unique features tailored for astrophotography. Before heading out, familiarize yourself with your chosen app's interface and settings.
| App Name | Key Features | Price |
|---|---|---|
| NightCap | AI scene detection, Star Trails mode | $2.99 |
| ProCam | Manual controls, RAW capture | $8.99 |
| Slow Shutter Cam | Light Trail mode, intervalometer | $1.99 |
To use these apps effectively, start by setting your exposure time. For star trails, aim for at least 30 minutes to an hour. Enable noise reduction if available, as long exposures can introduce digital noise. If your app offers an intervalometer, use it to capture multiple exposures that you can stack later for cleaner results.
Remember to lock your focus on a bright star or distant light source before starting your exposure. This guarantees your star trails remain sharp throughout the capture process.
Optimize Camera Settings
To capture stunning star trails with your smartphone, you'll need to master manual mode essentials.
Experiment with long exposure techniques to allow more light into your camera sensor over time.
Adjust your ISO and aperture settings to balance light sensitivity and depth of field, ensuring crisp, well-defined star trails in your final image.
Manual Mode Essentials
Mastering manual mode is essential for capturing stunning star trails with your mobile phone. You'll need to take full control of your camera's settings to achieve the best results.
Start by familiarizing yourself with your phone's manual mode options, which typically include ISO, shutter speed, and focus adjustments.
To capture star trails effectively, you'll want to:
- Set your ISO as low as possible (usually 100-400) to minimize noise
- Use a long exposure time, typically 15-30 seconds per shot
- Set your focus to infinity or manually focus on a bright star
- Choose a wide aperture (lowest f-number) to let in more light
Long Exposure Techniques
Building on the manual mode basics, optimizing your camera settings for long exposures is key to capturing mesmerizing star trails. Set your ISO as low as possible, typically between 100-400, to minimize noise in your final image. Choose a wide aperture, around f/2.8 to f/4, to allow more light to reach the sensor.
For shutter speed, you'll want to go long – anywhere from 15 seconds to several minutes, depending on your desired trail length. Use your phone's built-in timer or a remote shutter release to avoid camera shake when starting the exposure.
If your phone has a "Pro" or "Manual" mode, look for the option to stack multiple exposures. This technique allows you to combine several shorter exposures into one stunning star trail image, reducing overall noise and battery drain.
Don't forget to enable your phone's long exposure noise reduction feature if available. This helps minimize hot pixels and other artifacts that can appear during extended shoots.
ISO and Aperture Adjustments
Optimizing ISO and aperture settings is essential for capturing crisp, detailed star trails with your mobile device. While most smartphones have limited manual controls, you can still make adjustments to improve your results.
Start by setting your ISO to the lowest possible value, typically between 100 and 400, to reduce noise in your images. If your phone allows aperture control, choose a wider aperture (lower f-number) to let in more light.
For the best star trail photos, follow these tips:
- Use a third-party camera app that offers more manual controls than your phone's default app.
- Experiment with different ISO values to find the sweet spot between light sensitivity and noise reduction.
- If possible, set your aperture to f/2.8 or lower to maximize light gathering.
- Consider using the camera's "pro" or "manual" mode to access more advanced settings.
Remember that higher ISO values can introduce unwanted noise, while a wider aperture may slightly reduce sharpness at the edges of your frame.
Balance these factors to achieve the best results for your specific smartphone and shooting conditions. With practice, you'll find the best settings for capturing stunning star trails on your mobile device.
Manage Battery Life Effectively
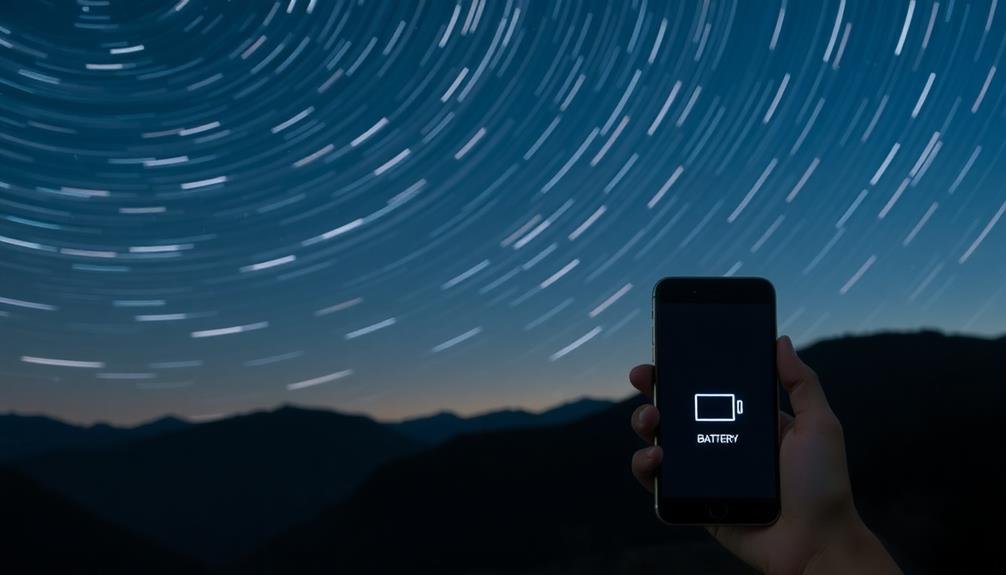
Battery life often becomes a major concern when shooting star trails with your mobile device. To guarantee your phone doesn't die mid-shoot, implement these strategies.
First, fully charge your device before heading out. Consider bringing a portable power bank for extended sessions. Enable your phone's power-saving mode to conserve energy. Dim your screen brightness to its lowest comfortable setting, as the display is a major power drain.
Turn off unnecessary features like Wi-Fi, Bluetooth, and cellular data. If possible, switch to airplane mode. Close all background apps not essential for your photography.
In cold weather, keep your phone warm, as low temperatures can rapidly deplete battery life. Use a phone case that provides insulation.
If your camera app allows it, schedule your shots to begin later, reducing the time your phone needs to stay active. Some apps offer interval shooting, which can be more battery-efficient than continuous recording.
Post-Processing Star Trail Images

After capturing your star trail images, post-processing is essential for bringing out the full potential of your shots. You'll need to use mobile editing apps or transfer your images to a computer for more advanced editing.
Start by adjusting the exposure and contrast to enhance the visibility of the star trails. Then, fine-tune the white balance to achieve a natural-looking sky color.
Next, focus on sharpening the star trails and reducing noise in the darker areas of the image. Many editing apps offer specific tools for noise reduction and detail enhancement.
Don't forget to crop your image if needed, removing any distracting elements around the edges.
Here are four key post-processing techniques to elevate your star trail photos:
- Stack multiple exposures to create longer, more dramatic trails
- Use curves adjustment to boost contrast and make stars pop
- Apply selective color adjustments to enhance the Milky Way or airglow
- Experiment with blending modes to combine foreground and sky exposures
Experiment With Foreground Elements

To elevate your star trail images, you'll want to incorporate interesting foreground elements.
Try capturing silhouettes of trees, buildings, or mountains to add dramatic contrast and depth to your shots.
You can also experiment with light painting techniques or use natural framing elements like rock formations or branches to create engaging compositions.
Silhouettes for Added Drama
How can you add an extra layer of intrigue to your star trail photos? Incorporating silhouettes into your compositions can dramatically enhance the visual impact of your night sky images. By placing dark, shadowy forms against the swirling star trails, you'll create a striking contrast that draws the viewer's eye and adds depth to your shots.
To capture compelling silhouettes in your mobile star trail photography:
- Scout locations with interesting foreground elements like trees, rock formations, or buildings.
- Position yourself so the subject is between your phone and the night sky.
- Adjust your camera app's exposure settings to underexpose the foreground.
- Use the rule of thirds to place your silhouetted subject off-center for a more dynamic composition.
Experiment with different shapes and sizes of silhouettes to find what works best for your scene. Try capturing a lone tree on a hilltop, a person gazing at the stars, or the outline of a mountain range.
Light Painting Techniques
Creativity flourishes when you combine star trail photography with light painting techniques. To experiment with foreground elements, you'll need a flashlight or other portable light source.
Start by setting up your phone on a sturdy tripod and composing your shot with an interesting foreground subject. Once you've begun your long exposure, use your light source to "paint" the foreground elements. Move the light slowly and steadily across the subject, illuminating its details.
Try different angles and intensities to create depth and texture. You can even use colored lights or gels for added interest. Remember, less is often more with light painting. Subtle illumination can create a mysterious, ethereal effect that complements the star trails.
Experiment with different durations of light painting within your exposure. You might find that brief bursts of light produce the best results. Don't be afraid to get creative with your light source. Use sparklers for a magical effect, or try a small LED panel for even illumination.
You can even use your phone's flashlight in a pinch. Just be sure to shield any stray light from hitting your camera lens directly.
Natural Framing Elements
When composing your mobile star trail photos, natural framing elements can dramatically enhance your compositions. These elements add depth, context, and visual interest to your images, drawing the viewer's eye to the star trails. Look for trees, rock formations, or architectural features that can frame the night sky. Position yourself to include these elements in the foreground or along the edges of your frame.
Consider experimenting with different perspectives and angles to create unique compositions. You might try:
- Shooting through tree branches to create a natural arch
- Using a lone tree or rock formation as a silhouette against the starry sky
- Incorporating reflections in still water to double the impact of your star trails
- Framing your shot with man-made structures like archways or windows
Remember that your phone's wide-angle lens can capture a broader view, allowing you to include more framing elements. However, be mindful of distortion at the edges of the frame.
You can use apps with manual controls to adjust your exposure settings, ensuring both the framing elements and star trails are properly exposed. Don't be afraid to try unconventional framing techniques – sometimes the most striking images come from unexpected compositions.
Frequently Asked Questions
Can I Capture Star Trails During a Full Moon?
You can capture star trails during a full moon, but it'll be challenging. The moon's brightness will overpower many stars. Try using a neutral density filter, shorter exposures, and focusing on brighter stars for the best results.
How Do I Avoid Light Pollution in Urban Areas?
To avoid light pollution in urban areas, you'll need to travel away from the city. Find dark sky locations, use light pollution filters, and shoot during new moon phases. You can also try rooftops or elevated areas for clearer views.
What's the Ideal Duration for a Star Trail Photograph?
You'll want to shoot for at least 30 minutes to capture visible star trails. However, longer exposures of 1-2 hours can create more dramatic results. Experiment with different durations to find your preferred aesthetic.
Are Some Phone Models Better for Star Trail Photography?
Yes, some phones are better for star trails. You'll want a model with manual camera controls, good low-light performance, and long exposure capabilities. Look for phones with larger sensors and wider apertures for the best results.
How Can I Reduce Noise in Long-Exposure Shots on My Phone?
To reduce noise in long-exposure shots on your phone, you'll want to use the lowest ISO setting possible, enable noise reduction if available, and shoot in RAW format. Clean your lens and keep your phone cool during exposure.
In Summary
You've now got the tools to capture stunning star trails with your phone. Remember, practice makes perfect. Don't be discouraged if your first attempts aren't flawless. Keep experimenting with different locations, settings, and techniques. Soon, you'll be creating breathtaking images that showcase the night sky's beauty. Share your results and inspire others to explore mobile astrophotography. The stars are waiting – so get out there and start shooting!


Leave a Reply