
To capture stunning mobile timelapse landscapes, start by choosing a dynamic location with moving elements like clouds or water. Stabilize your device using a tripod or gimbal for smooth footage. Optimize your camera settings, using manual mode for full control over exposure. Experiment with shutter speeds to achieve desired motion blur effects, and select appropriate intervals based on your subject's movement. During post-processing, adjust exposure, color balance, and add subtle changes to enhance your footage. Don't forget creative composition techniques like the rule of thirds and leading lines. By mastering these pro tips, you'll elevate your mobile timelapse game and create breathtaking visual stories.
Choosing the Perfect Location
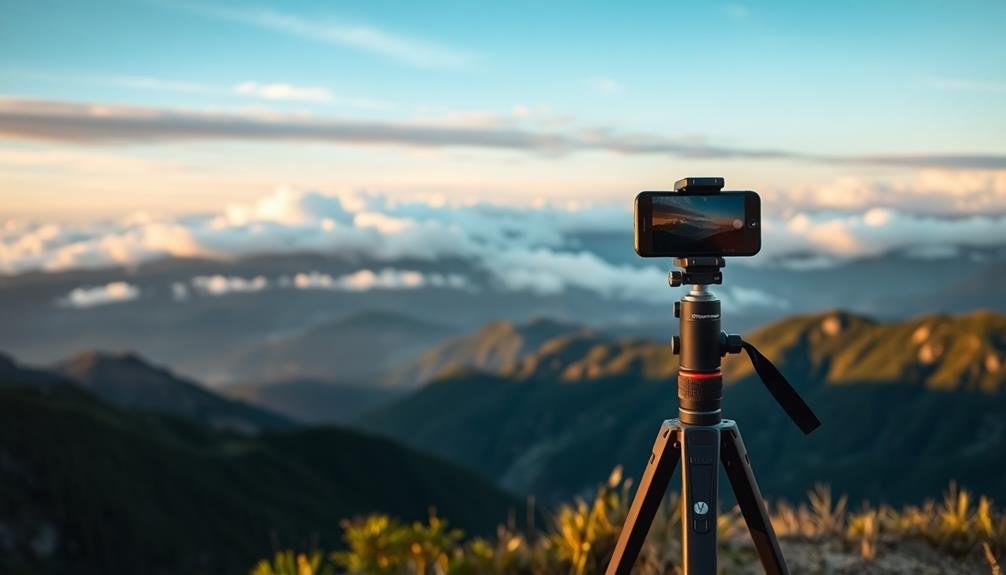
The perfect location can make or break your mobile timelapse. When scouting for spots, look for areas with dynamic elements that change over time. Consider places with moving clouds, flowing water, or shifting shadows. Urban locations with bustling traffic or construction sites can also yield compelling results.
Research your chosen location beforehand. Check the weather forecast, sunrise and sunset times, and any potential obstructions. You'll want to arrive early to set up and test your equipment. Look for elevated positions that offer unobstructed views and interesting foreground elements to add depth to your composition.
Safety is paramount, so confirm you're not trespassing or putting yourself in danger. Stable ground is essential for smooth footage, so avoid areas prone to vibrations from passing vehicles or wind. If you're shooting in nature, be mindful of wildlife and leave no trace.
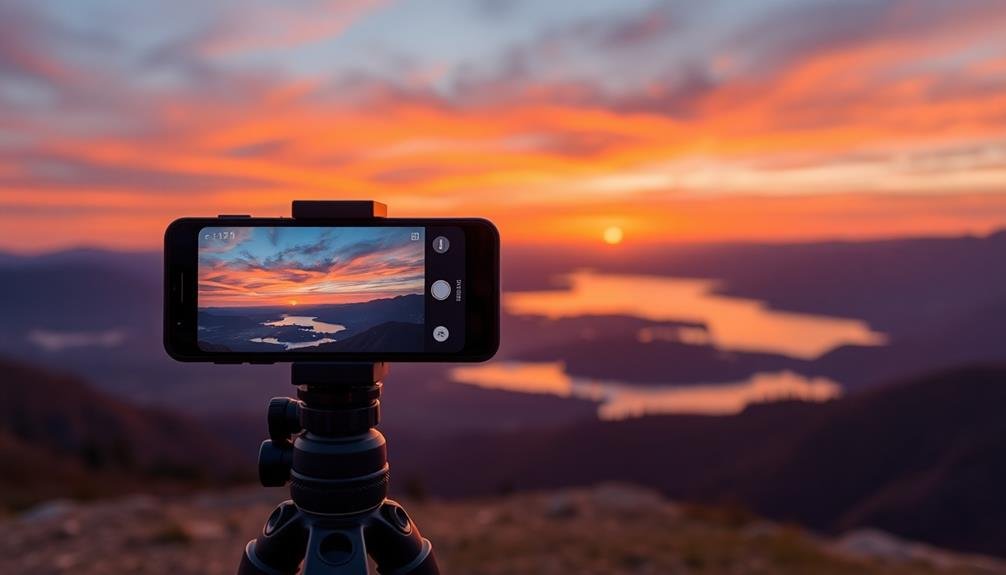
Consider the direction of light throughout your planned shooting duration. Golden hour and blue hour often provide the most dramatic lighting conditions. However, don't overlook the potential of midday sun for creating stark contrasts or nighttime for capturing star trails and city lights.
Stabilizing Your Mobile Device
When creating a mobile timelapse, you'll need to keep your device steady for the best results.
You can explore various tripod mounting techniques to secure your smartphone, or invest in specialized smartphone stabilizer options for added versatility.
If you're on a budget, you might consider trying some DIY stabilization solutions using common household items.
Tripod Mounting Techniques
Three essential techniques for mounting your mobile device on a tripod can make or break your timelapse shots.
First, use a dedicated smartphone tripod mount. These clamps securely hold your device and attach to standard tripod threads. Ascertain the mount is tight and your phone doesn't wobble. For added stability, consider a mount with rubberized grips.
Second, position your device correctly. Place it in landscape orientation for wider shots, unless you're specifically aiming for a vertical composition. Align the camera lens with the tripod's center axis to minimize parallax issues during panning shots.
Lastly, balance your setup. If you're using a larger smartphone or attaching additional lenses, adjust the tripod's counterweights or extend its legs asymmetrically to prevent tipping. For windy conditions, hang a weight from the tripod's center column to increase stability.
Don't forget to disable your phone's auto-rotation and vibration features. These can cause unwanted movement during long exposures.
With these mounting techniques, you'll create rock-solid timelapses that showcase your landscape's beauty without distracting camera shake or misalignments.
Smartphone Stabilizer Options
How can you elevate your mobile timelapse game beyond basic tripod mounting? Enter smartphone stabilizers, the next level in achieving smooth, professional-looking timelapses. These devices offer enhanced stability and control, reducing unwanted camera shake and vibrations.
Handheld gimbals are a popular choice, using motorized axes to keep your phone level and steady. They're ideal for dynamic timelapses where you want to introduce subtle movement. Look for models with dedicated timelapse modes and programmable motion paths.
For static shots, consider a motorized pan-tilt head. These attach to your tripod and allow for precise, controlled movements in both horizontal and vertical planes. They're perfect for capturing sweeping landscape alterations or tracking celestial bodies.
If you're on a budget, a smartphone clamp with a ball head can greatly improve stability over handheld shooting. Pair it with a mini tripod for a compact, versatile setup.
When choosing a stabilizer, consider factors like battery life, payload capacity, and compatibility with your phone model.
DIY Stabilization Solutions
Creativity and resourcefulness can lead to effective DIY stabilization solutions for your mobile timelapse projects. When you're in a pinch or on a budget, try using everyday items to keep your smartphone steady. A simple bean bag can serve as a versatile support, allowing you to position your device on uneven surfaces. You can also repurpose a plastic bottle by cutting a phone-sized slot in it, creating an instant stand.
For longer timelapses, consider building a basic wooden rig with a threaded bolt to securely hold your phone. You'll need minimal tools and materials, and it's an excellent way to customize your setup. Don't overlook the power of tape; gaffer's tape can temporarily secure your device to various surfaces without leaving residue.
Here's a quick comparison of DIY stabilization methods:
| Method | Cost | Portability | Versatility |
|---|---|---|---|
| Bean Bag | Low | High | Medium |
| Bottle Stand | Very Low | High | Low |
| Wooden Rig | Medium | Medium | High |
| Tape Mount | Low | High | High |
| Car Mount | Low | Medium | Medium |
Optimizing Camera Settings

To capture stunning mobile timelapses, you'll need to master your camera's exposure and interval settings.
Experiment with different shutter speeds to achieve the desired motion blur effect in your shots.
Exposure and Interval Settings
Camera settings are the backbone of a great timelapse. When it comes to exposure and interval settings, you'll need to strike a balance between capturing enough light and maintaining smooth motion in your final video.
For exposure, start by setting your camera to manual mode. This guarantees consistent lighting throughout your timelapse. Choose an aperture that provides the desired depth of field, typically f/8 to f/11 for landscapes. Set your ISO as low as possible to minimize noise, ideally 100 or 200. Adjust your shutter speed to achieve proper exposure, but keep it at least twice your interval time to avoid choppy motion.
Interval settings depend on the speed of your subject. For slow-moving clouds or sunsets, try 10-30 second intervals. Fast-moving subjects like people or traffic may require 1-5 second intervals. Remember, shorter intervals mean more frames and smoother motion, but they'll also drain your battery faster and fill up storage space quickly.
To calculate your final video length, divide the number of frames by your desired frame rate (typically 24 or 30 fps). Adjust your settings accordingly to achieve the desired duration and effect in your timelapse.
Shutter Speed Techniques
Shutter speed plays an essential role in determining the look and feel of your timelapse. It controls the amount of motion blur in each frame, which can dramatically affect the final result. For landscape timelapses, you'll want to experiment with different shutter speeds to achieve the desired effect.
When choosing your shutter speed, consider these key factors:
- Motion blur: Slower shutter speeds create more motion blur, which can add a dreamy, flowing effect to moving elements like clouds or water.
- Light conditions: In low light, you'll need longer exposures to capture enough detail, while bright scenes allow for faster shutter speeds.
- Subject movement: Fast-moving subjects may require quicker shutter speeds to avoid excessive blurring, while slow-moving elements benefit from longer exposures.
Try using the 180-degree rule as a starting point: set your shutter speed to double your frame rate (e.g., 1/50s for 25fps). For smoother motion, use even slower shutter speeds, like 1/15s or 1/8s.
In bright conditions, use neutral density filters to achieve longer exposures without overexposure. Remember, there's no one-size-fits-all approach – experiment with different shutter speeds to find what works best for your specific scene and creative vision.
Mastering Exposure and Intervals

Diving into the heart of timelapse photography, mastering exposure and intervals is essential for creating stunning results. To nail your exposure, start by using manual mode on your mobile device. This gives you full control over ISO, aperture, and shutter speed.
For landscapes, aim for a lower ISO to reduce noise and a smaller aperture (higher f-number) for greater depth of field.
When it comes to intervals, you'll need to take into account the speed of movement in your scene. For slow-moving subjects like clouds or sunsets, longer intervals of 10-30 seconds work well. For faster scenes like bustling cityscapes, shorter intervals of 1-5 seconds are more appropriate.
Remember, the interval you choose affects the final playback speed of your timelapse.
To calculate the right interval, think about your desired clip length and the duration of your shoot. For example, if you want a 10-second clip at 30 frames per second, you'll need 300 frames.
If you're shooting for an hour, divide 3600 seconds by 300 to get a 12-second interval. Experiment with different intervals to achieve the smooth motion you're after in your final timelapse.
Post-Processing Mobile Timelapse Footage

Once you've captured your timelapse footage, the magic of post-processing begins. Your raw footage likely needs some finesse to truly shine. Start by importing your sequence into a video editing app like LumaFusion or Adobe Premiere Rush. These mobile-friendly tools offer powerful features for enhancing your timelapse.
First, adjust the overall exposure and color balance. Correct any flickering between frames, a common issue in timelapses.
Next, consider applying subtle shifts between scenes if you've stitched multiple sequences together. Don't overdo it; smooth fades often work best.
To elevate your timelapse, try these advanced techniques:
- Add motion with keyframes, creating a Ken Burns effect
- Experiment with speed ramping to emphasize key moments
- Apply LUTs (Look-Up Tables) for a cinematic color grade
Creative Composition Techniques

While post-processing can enhance your timelapse, the foundation of a great shot lies in creative composition. When framing your landscape, consider the rule of thirds. Place key elements along the grid lines or at their intersections to create a balanced and visually appealing image.
Don't be afraid to experiment with unconventional angles or perspectives to add intrigue to your timelapse. Incorporate leading lines into your composition to guide the viewer's eye through the frame. These can be natural elements like rivers, roads, or tree lines.
Use foreground elements to add depth and context to your shot, creating a sense of scale and dimension. Try framing your subject with natural elements like branches or rock formations.
Play with symmetry and patterns in nature to create visually striking timelapses. Reflections in water or geometric shapes in architecture can add a mesmerizing quality to your footage.
Consider the movement within your frame, such as clouds, stars, or traffic, and compose your shot to highlight these dynamic elements. Finally, don't forget to leave room for the unexpected – nature often provides surprising and beautiful moments that can elevate your timelapse to new heights.
Frequently Asked Questions
How Long Should a Typical Mobile Timelapse Video Be?
You'll want to keep your mobile timelapse video between 15 to 60 seconds long. It's short enough to hold viewers' attention but long enough to showcase the scene's progression. Adjust duration based on your subject's pace of change.
Can I Use Filters or Lenses With My Smartphone for Timelapses?
Yes, you can use filters and lenses with your smartphone for timelapses. They'll enhance your shots by reducing glare, adding effects, or changing focal length. Clip-on lenses and ND filters are popular options for mobile photographers.
What Apps Are Best for Creating Timelapses on Mobile Devices?
You'll find several great timelapse apps for your mobile device. Try Lapse It, Hyperlapse, or Framelapse for Android. On iOS, consider Time Lapse Pro or Hyperlapse. Each offers unique features to help you create stunning timelapses.
How Much Storage Space Do I Need for a Timelapse Project?
You'll need ample storage for your timelapse project. It depends on your settings, duration, and quality. Generally, aim for at least 32GB free space. For longer or higher-quality timelapses, consider 64GB or more. Always check your device's capacity beforehand.
Is It Possible to Create a Day-To-Night Transition in Mobile Timelapses?
Yes, you can create day-to-night shifts in mobile timelapses. You'll need to adjust your camera settings as light changes, use manual mode, and employ gradual exposure adjustments. Editing software can help smooth out the shift further.
In Summary
You've now got the tools to create stunning mobile timelapses. Remember to scout locations, stabilize your device, and optimize your settings. Don't forget to experiment with exposure and intervals for the best results. In post-processing, you'll bring your footage to life. Keep practicing creative compositions to make your timelapses truly unique. With these tips, you're ready to capture breathtaking landscape shots that'll wow your audience. So get out there and start shooting!


Leave a Reply