
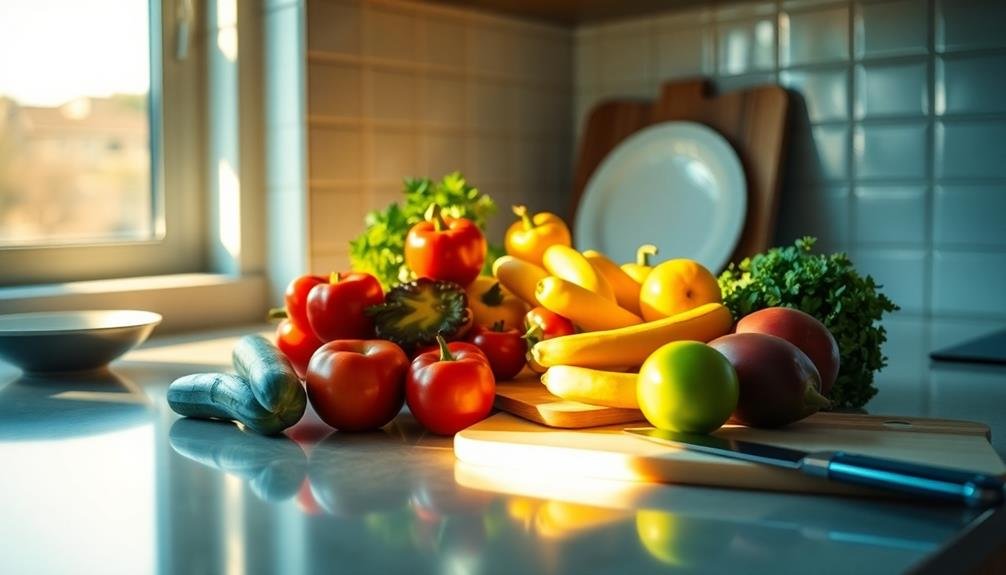
Natural light can make your food photos truly pop by enhancing texture, depth, and color. Position your dish near a window for soft, diffused illumination, and experiment with side lighting to emphasize texture. Use shadows and highlights strategically to create depth and dimension. Pay attention to color temperature, adjusting your white balance to capture the food's true colors. Choose complementary backgrounds that don't overpower the dish, and time your shoot during golden hour for warm, flattering light. By mastering these techniques, you'll elevate your food photography from ordinary to extraordinary. Explore further to reveal the full potential of natural light in your culinary captures.
Positioning for Optimal Light

Natural light's magic lies in proper positioning. To capture stunning food photos, you'll need to master the art of placing your subject in relation to your light source.
Start by identifying the direction of light entering your space. Windows are often your best friend, offering soft, diffused illumination that flatters most dishes.
Position your food near the window, but not directly in harsh sunlight. Aim for the sweet spot where light falls gently across your subject, creating subtle shadows and highlights. Side lighting is particularly effective, as it adds depth and texture to your food. Place your dish at a 45-degree angle to the window for a balanced effect.
If you're dealing with strong, direct sunlight, try using a sheer curtain or white paper to diffuse it. This softens harsh shadows and creates a more even light distribution.
Understanding Color Temperature
While positioning is key, mastering color temperature is equally important in natural light food photography. Color temperature refers to the warmth or coolness of light, measured in Kelvin (K). Understanding this concept will help you create more appealing and appetizing food images.
Natural light sources vary in color temperature throughout the day. Early morning and late afternoon light tends to be warmer, with a golden hue (around 3000K-4000K). Midday light is cooler and bluer (5000K-6500K). You'll want to reflect on how these temperatures affect your food's appearance.
Warmer light can enhance the appeal of comfort foods, baked goods, and dishes with golden or brown tones. Cooler light works well for fresh produce, salads, and dishes with vibrant colors. You can adjust your white balance settings to fine-tune the color temperature in your photos.
If you're shooting indoors near a window, be aware that the light's color temperature can change based on reflections from nearby surfaces. Use a white card or reflector to balance the light and maintain consistent color temperature across your shot.
Utilizing Shadows and Highlights

How can you harness the power of shadows and highlights to elevate your food photography? It's all about creating depth and dimension in your images. Shadows add mystery and intrigue, while highlights draw attention to key elements. To master this technique, you'll need to understand how light interacts with your subject.
Start by positioning your food near a window, allowing natural light to cast shadows. Experiment with the angle of light to create long, dramatic shadows or soft, subtle ones. Use reflectors or diffusers to control the intensity of highlights and fill in harsh shadows.
Here's a quick guide to utilizing shadows and highlights effectively:
| Technique | Shadow Effect | Highlight Effect |
|---|---|---|
| Side lighting | Emphasizes texture | Creates contrast |
| Backlighting | Adds depth | Rim lighting |
| Top lighting | Minimal shadows | Even illumination |
Choosing the Right Background

The background you pick for your food photography can make or break your shot. It's essential to choose a backdrop that complements your dish without overpowering it. Consider the color, texture, and overall mood you want to convey in your image. Neutral backgrounds like white, gray, or light wood often work well, allowing the food to be the star of the show.
When selecting a background, keep these factors in mind:
- Contrast: Make certain there's enough contrast between the food and the background.
- Simplicity: Avoid busy patterns that might distract from the main subject.
- Texture: Subtle textures can add depth and interest to your photos.
- Theme: Choose a background that fits the style of food you're photographing.
Don't be afraid to experiment with different surfaces like marble, slate, or rustic wood. You can also use props like linens, plates, or cutting boards to create a more dynamic background.
Enhancing Texture With Lighting

Lighting plays an essential role in bringing out the texture of food in your photographs. To enhance texture, you'll want to focus on creating depth and dimension through strategic light placement. Side lighting is particularly effective for this purpose, as it casts shadows that accentuate the surface details of your food.
Position your dish near a window and experiment with the angle of light. You'll notice how different angles highlight various textures. For smooth surfaces like sauces or soups, try using softer, diffused light to create a gentle sheen. For crusty breads or textured vegetables, harder light will emphasize their rugged surfaces.
Don't forget about backlighting, which can create a beautiful rim light effect, outlining your subject and separating it from the background. This technique works well for translucent foods like cocktails or slices of citrus fruit.
If you're working with reflective surfaces, such as silverware or glassware, pay attention to unwanted reflections. Use black or white cards to control reflections and enhance the overall texture of your composition.
Mastering White Balance Settings

You'll find that mastering white balance is essential for achieving natural-looking food photos.
Start by experimenting with Kelvin temperature adjustments to fine-tune the overall color tone of your images.
As you become more familiar with different lighting scenarios, consider creating custom white balance presets to streamline your workflow and guarantee consistency across your food photography.
Kelvin Temperature Adjustments
Mastery of white balance settings is essential for capturing natural light food photos with accurate colors. Kelvin temperature adjustments offer precise control over the warmth or coolness of your images. By understanding and manipulating the Kelvin scale, you'll be able to fine-tune your photos to match the ambient light conditions perfectly.
The Kelvin scale ranges from 1000K to 10000K, with lower values producing warmer tones and higher values resulting in cooler hues. To effectively use Kelvin temperature adjustments:
- Start with a neutral setting (around 5500K) and adjust from there
- Observe how different values affect the overall mood of your food photos
- Use a white card or gray card as a reference point for accurate color balance
- Experiment with slight variations to find the perfect temperature for each scene
You'll find that small changes in Kelvin temperature can dramatically impact the appeal of your food photos. Don't be afraid to push the boundaries and create a unique look for your images.
Custom Preset Creation
Creating custom white balance presets can greatly streamline your workflow and secure consistent results across various lighting conditions.
To start, shoot a neutral gray card or white balance target in the specific lighting environment you're working in. Use this image to set a custom white balance in your camera or editing software.
Once you've dialed in the perfect white balance for a particular setting, save it as a preset. Name it descriptively, such as "Overcast Outdoor" or "Kitchen Window Light," so you can easily identify and apply it in future shoots.
Create multiple presets for different lighting scenarios you frequently encounter.
When shooting, you can quickly switch between these custom presets as lighting conditions change. This approach guarantees color accuracy and saves time in post-processing.
Remember to periodically update your presets, as lighting conditions may subtly change over time.
For even more precision, consider creating time-specific presets. For instance, you might've separate presets for morning, midday, and evening light in your favorite shooting locations.
This level of customization will help you achieve consistently natural-looking food photos across all your work.
Timing Your Shoot Effectively

When timing your food photography shoot, you'll find that golden hour offers magical, warm lighting that enhances most dishes.
Midday light presents challenges with harsh shadows, but you can mitigate these using diffusers or by moving your setup indoors near a window.
On overcast days, you'll benefit from soft, even lighting that's perfect for capturing the textures and details of your culinary creations.
Golden Hour Magic
The golden hour lights up the world of food photography with unparalleled beauty. This magical time, occurring just after sunrise or before sunset, bathes your culinary subjects in a warm, soft glow that can transform ordinary dishes into extraordinary works of art.
You'll find that the low angle of the sun during these periods creates long, dramatic shadows and adds depth to your compositions.
To make the most of golden hour for your food photography:
- Plan your shoot in advance, checking local sunrise and sunset times
- Set up your scene before the golden hour begins to maximize shooting time
- Experiment with both backlit and side-lit setups to capture different moods
- Use reflectors or diffusers to fine-tune the light and control shadows
Remember that golden hour doesn't last long, typically only 20-30 minutes. You'll need to work quickly and efficiently to capture the best shots.
As the light changes, adjust your camera settings accordingly, paying particular attention to white balance and exposure. Don't be afraid to increase your ISO slightly if needed to maintain a faster shutter speed.
Midday Light Challenges
Midday light's harsh intensity presents unique challenges for food photographers. You'll find that the strong overhead sun creates hard shadows and washes out colors, potentially ruining your carefully styled dishes. To combat these issues, you'll need to adapt your approach.
One effective strategy is to move your setup indoors near a large window. This allows you to harness natural light while controlling its intensity. Use sheer curtains or diffusers to soften the light, creating a more flattering effect on your food.
If you must shoot outdoors, seek shade under trees or awnings to avoid direct sunlight.
Consider using reflectors or bounce cards to fill in shadows and add dimension to your shots. White foam boards work well for this purpose. You can also experiment with backlight by positioning your subject between the camera and the light source, creating a pleasing rim light effect.
If possible, adjust your shooting schedule to avoid the harshest midday hours. Aim for late morning or early afternoon when the sun is less intense.
Overcast Day Advantages
Contrary to popular belief, overcast days can be a food photographer's best friend. The soft, diffused light creates an even illumination that's perfect for capturing food's textures and colors without harsh shadows or blown-out highlights.
You'll find that overcast conditions provide a longer window of ideal shooting time, allowing you to work more leisurely and experiment with different setups.
When shooting on an overcast day, take advantage of these benefits:
- Reduced contrast, making it easier to capture details in both light and dark areas
- Softer shadows that add depth without overwhelming the subject
- More accurate color representation, as there's no strong warm or cool light bias
- Extended shooting time, as the light remains consistent throughout the day
Position your setup near a large window to maximize the available light.
You'll notice that the soft illumination wraps around your food subjects beautifully, enhancing their natural appeal.
Don't be afraid to increase your ISO slightly if needed, as the even lighting will help minimize noise in your images.
Overcast days offer a unique opportunity to create stunning, professional-looking food photographs with minimal equipment and effort.
Frequently Asked Questions
How Do I Handle Harsh Midday Sunlight When Shooting Food Outdoors?
To handle harsh midday sunlight for outdoor food shots, you'll want to diffuse the light. Use a white umbrella or diffuser panel to soften shadows. Alternatively, seek shade or create it with a portable canopy or large reflector.
What Equipment Is Essential for Natural Light Food Photography?
You'll need a camera, tripod, reflectors, and diffusers for natural light food photography. Don't forget a sturdy table, neutral backgrounds, and various props. A macro lens is great for detailed shots. Good editing software's essential too.
How Can I Create a Consistent Look Across Different Lighting Conditions?
To create a consistent look across lighting conditions, you'll need to master white balance, exposure, and post-processing techniques. Use a gray card, maintain consistent camera settings, and develop a signature editing style for your food photos.
Are There Specific Foods That Photograph Better in Natural Light?
You'll find that colorful, textured foods often shine in natural light. Fresh produce, vibrant salads, and rustic baked goods tend to look especially appetizing. Dishes with varied heights and textures also create appealing shadows and highlights.
How Do I Adjust My Camera Settings for Low-Light Indoor Situations?
To adjust your camera for low-light indoor shots, you'll want to increase ISO, widen aperture, and slow shutter speed. Use a tripod for stability. Consider manual focus and RAW format for better control and post-processing options.
In Summary
You've now got the tools to make your natural light food photos pop. Remember, it's all about positioning, understanding light, and timing. Play with shadows, choose complementary backgrounds, and don't forget to adjust your white balance. With practice, you'll master these techniques and create stunning images that'll make viewers' mouths water. Keep experimenting, and soon you'll be capturing food photos that look good enough to eat!
Leave a Reply