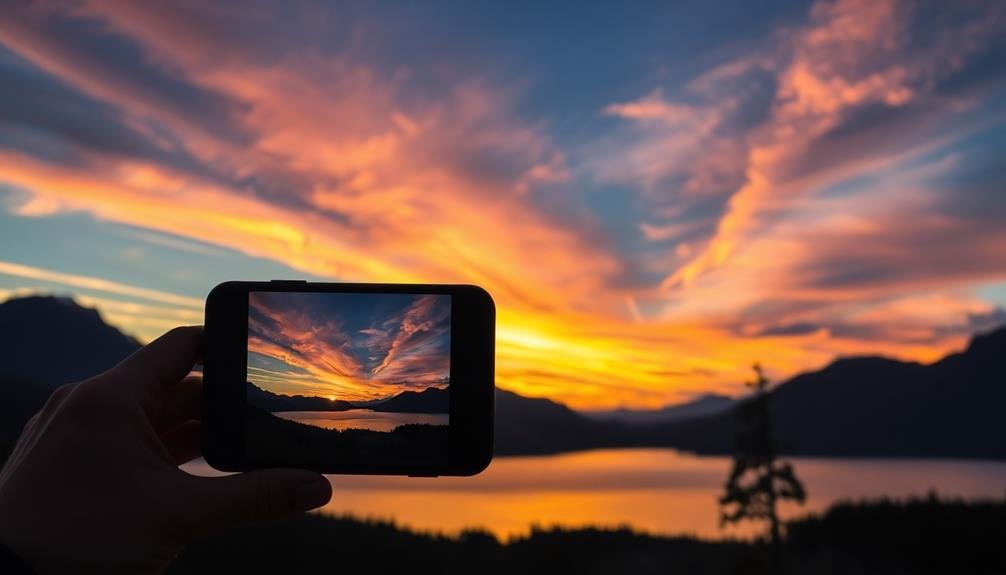
To capture stunning panoramas on your mobile device, start by choosing picturesque locations with expansive views. Prepare your smartphone settings by enabling HDR mode and locking exposure. Master the sweep technique by rotating your body smoothly while keeping the phone steady. Avoid distortion by maintaining a consistent pace and angle. Compose with leading lines and balance foreground and background elements for visual interest. Experiment with vertical panoramas for unique perspectives. Don't forget to edit your shots to enhance contrast and color balance. These pro tips will elevate your panoramic photography, but there's even more to discover about this enchanting technique.
Choose the Right Location

When it comes to capturing stunning mobile panoramas, selecting the right location is essential. Look for expansive views that showcase a wide range of elements, such as cityscapes, landscapes, or seascapes. Seek out elevated positions like hilltops or rooftops to capture sweeping vistas without obstructions.
Consider the time of day and lighting conditions. Golden hour, just after sunrise or before sunset, offers warm, soft light that can enhance your panorama's beauty. Avoid shooting in harsh midday sun, which can create unwanted shadows and blow out highlights.
Scout for locations with interesting foreground elements to add depth and context to your panorama. Think about leading lines, such as roads, rivers, or fences, that can guide the viewer's eye across the image.
Weather can dramatically impact your panorama's mood. Partly cloudy skies can add texture and interest, while clear skies work well for clean, minimalist shots. Don't shy away from challenging weather conditions; stormy skies or fog can create atmospheric and unique panoramas.
Lastly, make sure you have permission to shoot at your chosen location and respect any local regulations or private property restrictions.
Prepare Your Smartphone Settings

Before you start capturing your panorama, adjust your smartphone's camera settings for ideal results.
Enable HDR mode to balance out lighting variations, and lock your exposure settings to maintain consistency across the entire image.
Activate grid lines on your screen to help you keep the horizon level and maintain proper alignment as you pan.
Enable HDR Mode
The HDR mode on your smartphone can considerably enhance your panoramic shots. HDR, or High Dynamic Range, combines multiple exposures to capture a wider range of light and dark tones in your image. This is particularly useful for panoramas, where you're often dealing with varied lighting conditions across a broad scene.
To enable HDR mode, navigate to your camera settings and look for the HDR option. Some phones offer auto HDR, which is a good starting point. However, for more control, switch to manual HDR mode.
When shooting panoramas with HDR, be aware that processing time may increase, so hold your phone steady for a few extra seconds after completing the shot.
HDR is especially beneficial in high-contrast scenes, such as landscapes with bright skies and shadowy foregrounds. It helps balance exposure, prevent blown-out highlights, and retain detail in darker areas.
Remember that HDR mightn't always be necessary, particularly in evenly lit scenes. Experiment with HDR on and off to determine which produces the best results for your specific panoramic subject.
With practice, you'll develop an intuition for when HDR will truly elevate your mobile panoramas.
Lock Exposure Settings
Locking your smartphone's exposure settings is an essential step in capturing stunning panoramas. This technique guarantees consistent lighting across the entire image, preventing jarring shifts between frames. To lock exposure, tap and hold on the brightest area of your scene before starting the panorama. This sets the exposure for the entire shot, maintaining a balanced look throughout.
When locking exposure, consider the following:
- Choose a midpoint between the brightest and darkest areas of your scene
- Avoid extremely bright spots like the sun or reflective surfaces
- Lock focus separately if your phone allows it
By locking exposure, you'll avoid the common pitfall of having some sections of your panorama appear too bright or too dark. This is especially important when shooting scenes with varying light conditions, such as landscapes with both shadowy areas and bright skies.
Remember that locked exposure settings may not always be ideal for every situation. In scenes with extreme contrast, you might need to compromise and allow some areas to be slightly over or underexposed to achieve the best overall result.
Experiment with different exposure points to find the best balance for your specific panorama.
Activate Grid Lines
For ideal panoramic shots, activating grid lines on your smartphone camera is a game-changer. These lines serve as visual guides, helping you maintain a level horizon and consistent framing throughout your panoramic sweep. Most smartphones offer this feature in their camera settings, so take a moment to activate it before you start shooting.
Once activated, you'll see a grid overlay on your camera screen. Use the horizontal lines to keep your phone perfectly level as you pan across the scene. This prevents tilting, which can lead to distorted or misaligned panoramas. The vertical lines are equally important, as they help you maintain a consistent height throughout the capture process.
Pay special attention to the rule of thirds when composing your panorama. Place key elements of your scene along these gridlines or at their intersections for a more visually appealing result.
As you pan, use the grid to guarantee important features aren't cut off at the top or bottom of your frame. This technique will result in well-balanced, professional-looking panoramas that truly showcase the breadth and beauty of your chosen landscape.
Master the Sweep Technique

Mastering the sweep technique is essential for capturing stunning panoramas with your mobile device. When you're ready to shoot, hold your phone vertically and rotate your body smoothly from left to right (or vice versa) while keeping the device level.
Don't move your arms; instead, pivot your entire body to maintain a consistent motion. This technique helps prevent distortion and guarantees a seamless final image.
As you sweep, pay attention to your speed. Move too quickly, and you'll risk blurry shots or gaps in your panorama. Too slow, and you might introduce shake or inconsistencies. Find a steady, moderate pace that allows your phone's camera to capture clear, overlapping images.
To further improve your panoramic shots:
- Practice your sweep in both directions to determine which feels more natural
- Use visual markers in the scene to guide your movement
- Experiment with different speeds to find the best pace for your device
Remember to keep an eye on your phone's panorama guide as you sweep. This on-screen indicator helps you maintain the correct angle and direction throughout the capture process.
With practice, you'll develop muscle memory for the perfect sweep, resulting in breathtaking panoramas that showcase expansive landscapes or cityscapes in all their glory.
Avoid Common Distortion Mistakes

While capturing panoramas can be exciting, it's crucial to avoid common distortion mistakes that can ruin your shot. One of the most frequent issues is parallax error, which occurs when your camera's position shifts during the sweep. To prevent this, rotate around the camera's nodal point, typically located near the lens's center.
Another common problem is uneven exposure across the panorama. To address this, lock your exposure and focus before starting the sweep. This guarantees consistent lighting throughout the image.
Pay attention to moving objects in your frame. People, animals, or vehicles can create ghosting or duplication if they move during the capture process. Either wait for them to pass or incorporate their movement intentionally into your composition.
Here's a quick reference guide to common distortion issues and their solutions:
| Distortion Issue | Cause | Solution |
|---|---|---|
| Parallax Error | Camera position shift | Rotate around nodal point |
| Uneven Exposure | Auto-adjusting settings | Lock exposure and focus |
| Ghosting | Moving objects | Wait or incorporate movement |
| Curved Horizons | Incorrect sweep technique | Keep camera level, use gridlines |
| Misaligned Edges | Poor overlap between shots | Maintain 30-40% overlap in frames |
Compose With Leading Lines

Composition is key when creating enchanting mobile panoramas, and leading lines are a powerful tool in your arsenal. These visual elements guide the viewer's eye through your image, creating depth and interest. When shooting panoramas, look for natural or man-made lines that stretch across your frame, such as roads, rivers, or architectural features.
To effectively use leading lines in your mobile panoramas:
- Identify strong linear elements in your scene
- Position yourself to maximize the line's impact
- Guarantee the line leads to a compelling focal point
As you pan your camera, keep these lines in mind and maintain their continuity throughout the shot. This technique works particularly well in urban environments, where you'll find an abundance of straight lines and geometric shapes.
In natural settings, look for winding paths, tree lines, or shorelines to create a sense of movement and direction.
Remember that leading lines don't always have to be straight. Curved or diagonal lines can add dynamism to your panorama, creating a more engaging visual journey for the viewer.
Balance Foreground and Background Elements

To create enchanting mobile panoramas, you'll want to balance foreground and background elements effectively.
Start by anchoring your shot with a compelling foreground object that draws the viewer's eye. This technique not only creates depth but also adds interest to your panoramic composition, making it more visually engaging.
Anchor With Compelling Foreground
Photographers know that an enchanting panorama doesn't just showcase distant vistas. It's the interplay between foreground and background that truly captivates viewers.
To anchor your mobile panoramas with compelling foreground elements, you'll need to think strategically about composition. Look for interesting objects or features near you that can provide depth and context to your shot. A gnarled tree, a colorful flower patch, or a unique rock formation can serve as an excellent focal point.
Position yourself so that these elements frame the wider landscape without overpowering it.
When incorporating foreground elements, consider these tips:
- Use the rule of thirds to place your anchor point
- Experiment with different heights and angles
- Make sure the foreground complements, not competes with, the background
Create Depth and Interest
Depth is the secret ingredient that transforms a flat panorama into a fascinating scene. To create depth in your mobile panoramas, focus on balancing foreground and background elements.
Start by identifying interesting objects or features in the foreground that can draw the viewer's eye into the image. These could be rocks, flowers, or architectural details.
Position yourself to include these foreground elements in your composition, ensuring they don't overwhelm the scene. As you pan across the landscape, maintain a consistent horizon line to keep the image balanced.
Look for leading lines, such as paths, rivers, or fences, that can guide the viewer's gaze through the panorama.
In the mid-ground and background, include elements that add scale and context to your image. This might be people, buildings, or natural landmarks.
Pay attention to the interplay between these different layers of depth. Use contrasting colors or textures to create visual separation between foreground and background elements.
Experiment With Vertical Panoramas

Two often-overlooked options for panoramic shots are vertical and diagonal compositions. While horizontal panoramas are popular, vertical panoramas can create unique and striking images, especially when capturing tall structures or natural features. They're perfect for showcasing skyscrapers, waterfalls, or towering trees.
To shoot a vertical panorama, hold your phone vertically and pan from bottom to top (or vice versa). Start with the foreground and slowly move upward, maintaining a steady pace. This technique works well for capturing the full height of impressive landmarks or creating a sense of scale in nature shots.
When experimenting with vertical panoramas, consider these tips:
- Look for scenes with interesting elements at different heights
- Use leading lines to guide the viewer's eye through the image
- Incorporate foreground elements for added depth and context
Don't limit yourself to strictly vertical shots; try diagonal panoramas for a dynamic twist. These can add energy and movement to your compositions, especially in urban environments or when capturing winding roads or rivers.
Edit for Maximum Impact

Many panoramic shots benefit from thoughtful editing to truly shine. After capturing your panorama, take the time to enhance it with post-processing techniques.
Start by adjusting the exposure and contrast to bring out details in both highlights and shadows. You'll often find that different sections of your panorama require separate adjustments, so don't hesitate to use selective editing tools.
Next, fine-tune the color balance to guarantee consistency across the entire image. This is especially important if your panorama spans areas with varying lighting conditions.
Consider boosting saturation slightly to make colors pop, but be careful not to overdo it. Crop your panorama if needed to remove any distracting elements or improve the overall composition.
Pay attention to the horizon line and straighten it if necessary. This small adjustment can greatly impact the final result.
Use noise reduction tools judiciously to clean up any graininess, particularly in darker areas. Finally, sharpen your image to enhance details, but be mindful not to create artifacts.
Frequently Asked Questions
Can I Create Panoramas in Low Light Conditions?
Yes, you can create panoramas in low light conditions. You'll need to hold your phone steady, use a tripod if possible, and adjust your camera settings. Slow shutter speeds and higher ISO can help capture more light.
How Do I Stitch Multiple Panoramas Together for a Wider View?
You can stitch multiple panoramas together using photo editing software like Photoshop or Hugin. Start by aligning your images, then blend them seamlessly. Guarantee consistent exposure and color balance across all shots for the best results.
What's the Best Way to Capture Moving Subjects in Panoramas?
To capture moving subjects in panoramas, you'll want to pan quickly and smoothly. Follow your subject's movement as you sweep, ensuring they're in focus. Alternatively, try freezing them in one spot as you pan around them.
Are There Apps That Can Create 360-Degree Panoramas Automatically?
Yes, there are apps that can create 360-degree panoramas automatically. You'll find options like Google Street View, 360 Panorama, and360 Camera for both iOS and Android. They're user-friendly and can produce impressive results with minimal effort.
How Do I Correct Exposure Differences Between Shots in a Panorama?
To correct exposure differences in panorama shots, you'll want to use manual exposure settings. Lock your exposure on an average area, use HDR mode, or bracket your shots. In post-processing, you can blend exposures for seamless results.
In Summary
You've now got the tools to create breathtaking panoramas with your smartphone. Remember, practice makes perfect. Don't be afraid to experiment with different locations, techniques, and compositions. Keep refining your skills, and you'll soon be capturing wide-angle wonders that'll wow your followers. Whether you're shooting landscapes, cityscapes, or interiors, these pro tips will elevate your panoramic game. So get out there, start sweeping, and let your creativity soar!


Leave a Reply