
A stunning wide-angle self-portrait combines technical skill and artistic vision. You'll need to master your lens, understanding its focal length and distortion effects. Choose a visually interesting location that complements your subject without overpowering it. Pay attention to composition, using techniques like the rule of thirds and leading lines. Lighting is essential; experiment with natural and artificial sources to create depth and mood. Your posing should interact with the surroundings, creating a dynamic relationship between you and the landscape. Don't forget post-processing to fine-tune exposure, colors, and correct any lens distortion. With practice, you'll capture breathtaking wide-angle self-portraits that tell a compelling story.
Choose the Right Location
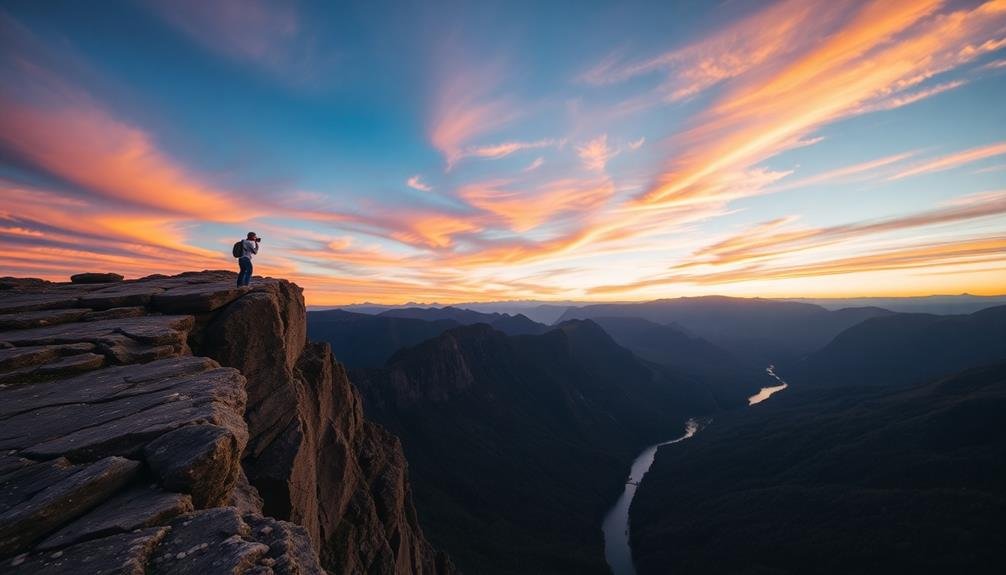
Three key factors should guide your location choice for a stunning wide-angle self-portrait: space, scenery, and lighting.
First, make sure you have ample room to set up your camera and position yourself. Wide-angle lenses require distance to capture expansive scenes, so choose a location that allows for this.
Next, consider the scenery. Look for visually interesting backgrounds that complement your subject (you) without overpowering the image. Natural landscapes, architectural elements, or urban environments can all work well, depending on your desired aesthetic.
Lighting is vital for creating an engaging self-portrait. Opt for locations with flattering natural light, such as during golden hour or in areas with soft, diffused light. Avoid harsh midday sun, which can create unflattering shadows and squinting.
Scout potential locations in advance, visiting at different times of day to assess lighting conditions.
Consider how the location aligns with your artistic vision and the story you want to tell through your self-portrait. Don't be afraid to experiment with unconventional settings that spark your creativity and showcase your unique perspective.
Master Wide-Angle Lens Techniques

With wide-angle lenses, mastering specific techniques is essential for creating compelling self-portraits. First, understand your lens's focal length and how it affects distortion. The wider the angle, the more pronounced the distortion, especially near the edges of the frame. Use this creatively to emphasize certain features or create a unique perspective.
Position yourself carefully within the frame. Avoid placing yourself too close to the edges, where distortion is most severe. Instead, experiment with different distances from the camera to find the sweet spot that balances your presence with the background.
Pay attention to composition. Wide-angle lenses capture more of the scene, so use leading lines, foreground elements, and the rule of thirds to guide the viewer's eye. Consider incorporating interesting elements in the foreground to add depth.
Adjust your aperture strategically. A smaller aperture (higher f-number) will keep more of the scene in focus, while a larger aperture can create a shallow depth of field, separating you from the background.
Composition and Framing Essentials

When composing your wide-angle self-portrait, you'll want to apply key principles like the Rule of Thirds for visual balance.
Position yourself or other elements along these imaginary gridlines to create a more dynamic image.
You can also incorporate leading lines, using natural or man-made features to draw the viewer's eye towards you as the subject.
Rule of Thirds
The Rule of Thirds stands as a fundamental principle in photography composition, guiding photographers to create visually appealing and balanced images. When applying this rule to your wide-angle self-portrait, imagine dividing your frame into a 3×3 grid. Position key elements along these lines or at their intersections to create a more dynamic and engaging composition.
For your self-portrait, consider placing your face or eyes at one of the intersection points rather than centered in the frame. This off-center placement adds visual interest and draws the viewer's eye naturally through the image. Use the remaining grid lines to align other elements in your scene, such as the horizon or background objects.
| Left Third | Center | Right Third |
|---|---|---|
| Face/Eyes | Empty | Background |
| Upper Body | Empty | Scenery |
| Foreground | Empty | Horizon |
| Ground | Empty | Sky |
Leading Lines Technique
Leading lines serve as powerful visual elements in photography, guiding the viewer's eye through your wide-angle self-portrait. These lines can be natural or man-made, such as roads, fences, or architectural features.
When composing your shot, look for strong linear elements that lead towards you, the subject. Position yourself at the end of these lines to create a sense of depth and draw attention to your presence in the frame.
To effectively use leading lines in your wide-angle self-portraits:
- Experiment with different angles and perspectives to find the most intriguing lines
- Incorporate multiple lines converging on you for added visual impact
- Use curves or S-shaped lines to create a more dynamic composition
Remember that leading lines don't always have to be straight. Rivers, winding paths, or even the curve of a shoreline can serve as effective leading lines.
When combined with the wide-angle lens, these lines can create a dramatic sense of scale and emphasize the vastness of your surroundings. Don't be afraid to get creative with your compositions, using unexpected elements as leading lines to craft unique and engaging self-portraits.
Lighting for Dramatic Effects
You'll need to master lighting to create truly dramatic wide-angle self-portraits.
Consider the interplay between natural and artificial light sources, and how you can use shadows and contrast to add depth and mood to your image.
Don't forget to experiment with color temperature manipulation, as it can greatly alter the atmosphere of your self-portrait.
Natural vs. Artificial Sources
Lighting choices can make or break a wide-angle self-portrait, with natural and artificial sources each offering unique advantages. Natural light provides a soft, flattering glow that's hard to replicate artificially. It's ideal for outdoor shoots or when you're near large windows. However, it's unpredictable and changes throughout the day.
Artificial lighting gives you complete control over the intensity, direction, and color of your light. You can create dramatic effects or mimic natural light, depending on your vision.
When choosing between natural and artificial light, consider:
- The mood you want to convey
- The location of your shoot
- The time of day and weather conditions
If you're shooting indoors, you might combine both sources. Use natural light as your main source and supplement with artificial light to fill in shadows or create highlights.
Experiment with different setups to find what works best for your style. Remember, the key to a stunning wide-angle self-portrait isn't just about the light source, but how you use it to shape and enhance your image.
Shadows and Contrast Play
Shadows and highlights dance across the frame in a wide-angle self-portrait, creating depth and drama. To harness this effect, you'll need to master the art of manipulating light and shadow.
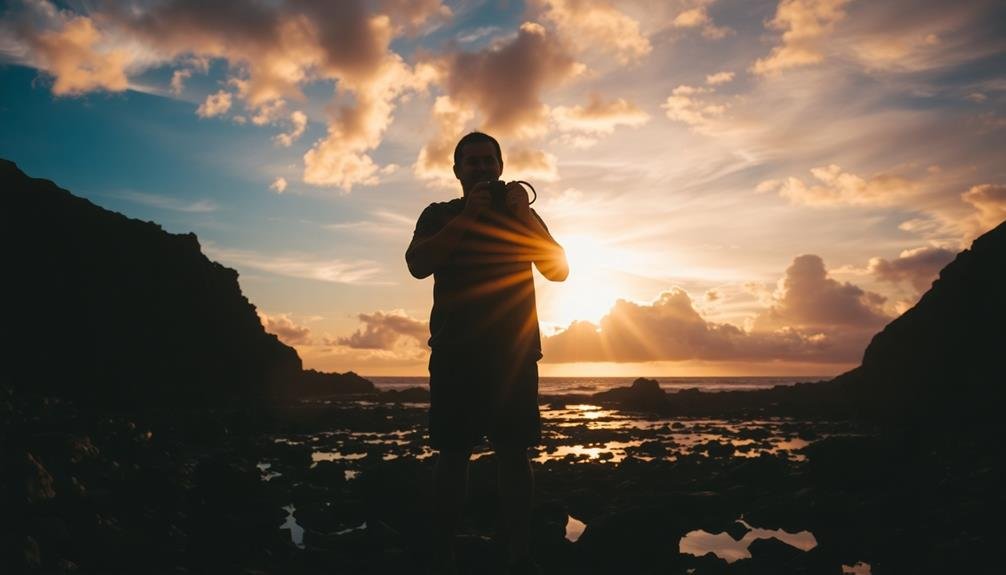
Start by positioning yourself strategically in relation to your light source. Side lighting can accentuate facial features and body contours, while backlighting creates a striking silhouette effect.
Experiment with high-contrast lighting setups to add a cinematic quality to your self-portraits. Use a single, strong light source to cast deep shadows, then selectively fill in areas with reflectors or secondary lights. Don't shy away from embracing dramatic shadows; they can add mystery and intrigue to your image.
Play with the direction and intensity of your light sources to sculpt your face and body. Rim lighting can separate you from the background, while Rembrandt lighting adds a classic, moody touch.
Color Temperature Manipulation
Three key color temperature techniques can transform your wide-angle self-portrait from ordinary to extraordinary. By manipulating the color temperature, you'll create a mood that enhances your image's emotional impact.
Start by adjusting your camera's white balance settings to achieve warmer or cooler tones. Experiment with different Kelvin values to find the perfect balance for your scene.
Next, use colored gels on your light sources to add dramatic hues. Place a blue gel on a backlight for a cool, ethereal glow, or use an orange gel on a key light for a warm, inviting atmosphere.
Don't forget to balance these colors with your camera's white balance for the desired effect.
Lastly, leverage the natural color temperature of different light sources. Combine warm indoor lighting with cool outdoor light for a striking contrast. This technique can create depth and visual interest in your wide-angle self-portrait.
To make the most of color temperature manipulation:
- Use a color temperature meter for precise measurements
- Experiment with mixed lighting scenarios
- Post-process your images to fine-tune color balance
Posing in Panoramic Shots

Mastering the art of posing in panoramic shots can elevate your wide-angle self-portraits from ordinary to extraordinary. When framing yourself in a vast landscape, consider your position carefully. You'll want to strike a balance between showcasing the scenery and maintaining your presence as the subject.
Try positioning yourself off-center to create a more dynamic composition. This allows the viewer's eye to travel across the frame, taking in both you and the surrounding environment. Experiment with different stances: standing tall can convey confidence, while crouching or sitting can make you appear more contemplative.
Use leading lines in the landscape to draw attention to your figure. These could be paths, rivers, or natural formations that guide the eye towards you. Don't be afraid to interact with your surroundings. Reaching out to touch a nearby object or gazing into the distance can add depth to your pose.
Remember that your silhouette matters in wide-angle shots. Ascertain your body creates a clear, identifiable shape against the background. This is especially important if you're shooting during golden hour or in backlit conditions.
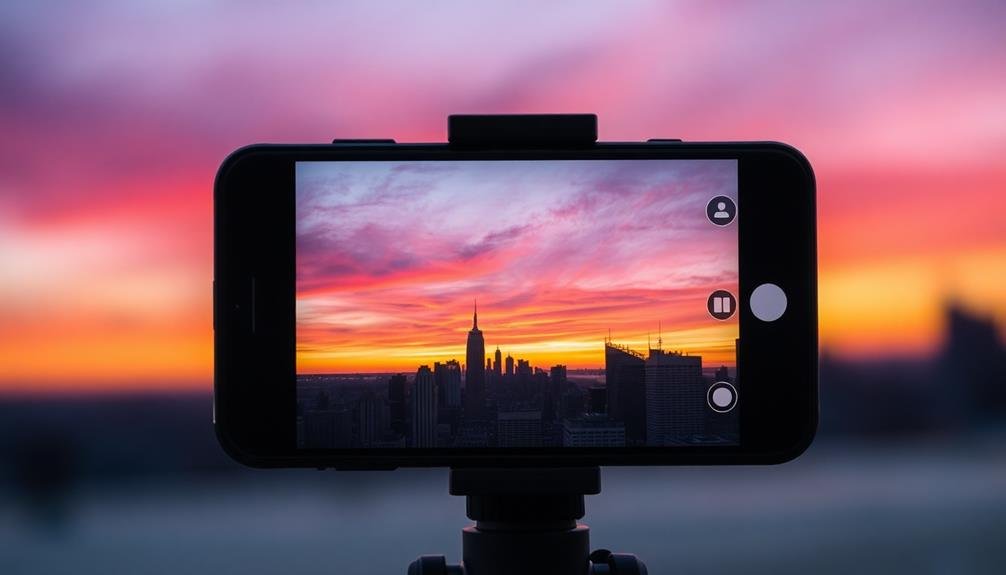
Smartphone Settings for Panoramas

With your pose perfected, it's time to focus on your smartphone's settings for capturing panoramic self-portraits. Most modern smartphones have a built-in panorama mode, which you'll want to activate first. Once in this mode, guarantee your camera is set to the highest resolution possible for maximum detail.
You'll also want to lock your exposure and focus on yourself before starting the sweep.
For the best results, keep these key settings in mind:
- HDR: Enable High Dynamic Range to capture a wider range of light and dark tones.
- Grid lines: Turn on the grid feature to help maintain a level horizon.
- Timer: Use a 3-5 second timer to give yourself time to prepare after pressing the shutter.
When you're ready to shoot, move your phone slowly and steadily from one side to the other. Maintain a consistent speed and distance from your subject (you) throughout the sweep.
If your phone has image stabilization, make sure it's turned on to reduce blur. Remember, practice makes perfect, so don't be discouraged if your first attempts aren't flawless.
With these settings and techniques, you'll soon be capturing stunning wide-angle self-portraits that showcase both you and your surroundings in impressive detail.
Post-Processing Wide-Angle Self-Portraits

Once you've captured your wide-angle self-portrait, it's time to elevate it through post-processing. Start by adjusting the exposure and contrast to guarantee your image has a balanced look. Pay attention to the highlights and shadows, as wide-angle shots often have varying light conditions across the frame.
Next, fine-tune the colors. Enhance the vibrancy of your surroundings while maintaining natural skin tones. Use selective editing to bring out details in specific areas without affecting the entire image. Consider applying a subtle vignette to draw attention to yourself as the subject.
Correct any lens distortion that may have occurred, especially if you're using an ultra-wide-angle lens. Straighten horizons and vertical lines to create a more polished look. If your self-portrait includes multiple shots stitched together, ensure seamless blending between the frames.
Experiment with cropping to improve composition, but be careful not to lose the wide-angle effect. Finally, apply sharpening selectively to enhance details without introducing noise.
Avoiding Common Wide-Angle Pitfalls

While wide-angle self-portraits can be intriguing, they're prone to several common pitfalls. To avoid these, you'll need to be aware of the distortion inherent in wide-angle lenses. This distortion can make your features appear exaggerated, especially if you're too close to the camera. To combat this, position yourself farther from the lens and use the rule of thirds to create a more balanced composition.
Another pitfall is neglecting the background. With a wide-angle lens, you're capturing more of the scene, so verify your surroundings complement your portrait rather than distract from it. Pay attention to lines and shapes in the background, using them to lead the viewer's eye towards you.
Lastly, be mindful of lighting. Wide-angle lenses can create unwanted shadows or highlights, particularly in challenging lighting conditions. Experiment with different light sources and angles to find the most flattering illumination for your self-portrait.
To enhance your wide-angle self-portraits:
- Use a tripod for stability and precise framing
- Experiment with different focal lengths within the wide-angle range
- Incorporate interesting foreground elements to add depth
Frequently Asked Questions
How Do I Prevent Lens Flare in Wide-Angle Self-Portraits?
To prevent lens flare in wide-angle self-portraits, use a lens hood, position yourself to avoid direct sunlight, adjust your angle, or shield the lens with your hand. You can also try shooting during golden hour for softer light.
Can I Use Filters With Wide-Angle Lenses for Self-Portraits?
Yes, you can use filters with wide-angle lenses for self-portraits. They'll help you control light, enhance colors, and create unique effects. Try polarizers to reduce glare, ND filters to balance exposure, or creative filters for artistic flair.
What's the Best Focal Length for Wide-Angle Self-Portraits?
For wide-angle self-portraits, you'll want to use a focal length between 24-35mm. It'll give you a nice balance of background and subject. Don't go too wide, or you'll risk distortion. Experiment to find your sweet spot.
How Do I Capture Motion in Wide-Angle Self-Portraits?
To capture motion in wide-angle self-portraits, you'll want to use a slow shutter speed. Try panning the camera or moving your body during the exposure. Experiment with different speeds to find the right balance of blur and sharpness.
Are There Specific Editing Techniques for Enhancing Wide-Angle Self-Portraits?
You'll want to enhance your wide-angle self-portraits by adjusting lens distortion, balancing exposure, and using selective sharpening. Don't forget to experiment with color grading and vignettes to create depth and draw attention to yourself.
In Summary
You've now got the tools to create enchanting wide-angle self-portraits. Remember, it's all about location, technique, and creativity. Don't be afraid to experiment with different angles, lighting, and poses. Embrace the unique perspective a wide-angle lens offers, and let your surroundings tell a story. With practice, you'll master the art of panoramic selfies. So grab your camera, find an inspiring backdrop, and start capturing your world in stunning wide-angle shots!

Leave a Reply