
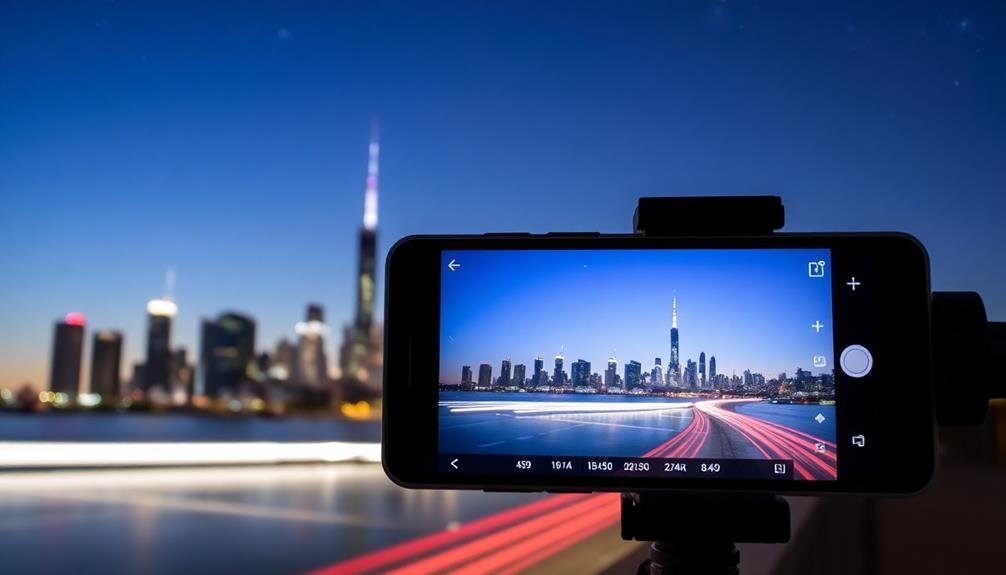
Creating architectural marvels with phone long exposures is easier than you might think. You'll need a steady hand or tripod, a long exposure app, and an eye for composition. Start by scouting interesting buildings or structures, then set up your phone to capture extended shutter speeds. This technique allows you to blur moving elements like clouds or traffic while keeping the architecture sharp. Experiment with different exposure times to achieve the desired effect. Post-processing can enhance contrast and bring out architectural details. With practice, you'll transform ordinary cityscapes into stunning, dreamlike images that showcase the beauty of urban design. Dive deeper to reveal the full potential of your smartphone's camera.
Understanding Long Exposure Photography

Three key elements define long exposure photography: extended shutter speed, steady camera position, and moving subjects.
When you use a longer shutter speed, typically several seconds or more, you allow more light to enter the camera sensor. This technique creates unique effects, especially in low-light conditions or when capturing motion.
To achieve sharp long exposures, you'll need to keep your phone completely still. Use a tripod or find a stable surface to rest your device on. Many phones now offer built-in long exposure modes, but you can also download third-party apps for more control.
Moving subjects are essential for creating interesting long exposure images. Flowing water, passing cars, or swaying trees can produce striking blur effects or light trails. Conversely, stationary elements in your frame will remain sharp, creating a fascinating contrast.
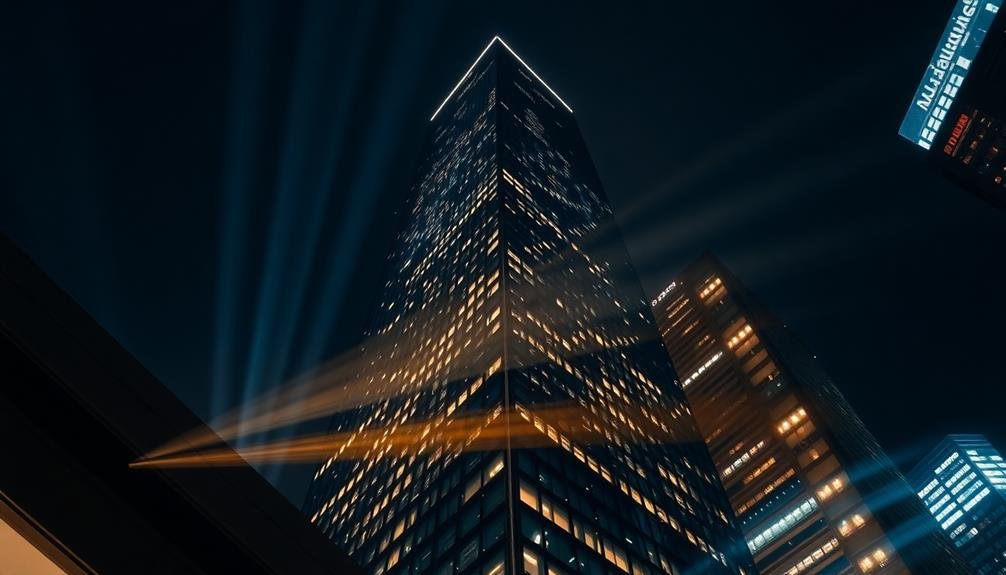
When shooting architecture with long exposures, you can emphasize the building's permanence against a dynamic environment.
Clouds streaking across the sky or blurred pedestrians can add a sense of movement and time to your architectural shots. Experiment with different shutter speeds to achieve your desired effect.
Essential Gear for Phone Photography

While understanding long exposure techniques is important, having the right gear can elevate your phone photography to new heights. You don't need expensive equipment to capture stunning architectural shots, but a few key items can make a significant difference.
First, invest in a sturdy tripod designed for smartphones. This will keep your device steady during long exposures, ensuring sharp images. Next, consider a remote shutter release or use your phone's self-timer to minimize camera shake when triggering the shot.
For more control over your exposures, look into neutral density (ND) filters that attach to your phone's lens. These reduce the amount of light entering the camera, allowing for longer shutter speeds even in bright conditions.
Finally, don't forget about editing apps that can help you fine-tune your images post-capture.
Here's a quick list of essential gear for phone long exposure photography:
- Smartphone tripod with adjustable legs
- Wireless remote shutter or self-timer app
- Clip-on ND filters for your phone's lens
- Editing apps for post-processing adjustments
With these tools in your arsenal, you'll be well-equipped to capture breathtaking architectural long exposures using just your smartphone.
Scouting Architectural Locations

When scouting for architectural long exposure shots, you'll need to decide between iconic landmarks and hidden gems.
Consider the accessibility of your chosen location, ensuring you can safely set up your equipment and shoot without obstructions.
Don't forget to assess potential safety risks, especially if you're planning to shoot at night or in less-frequented areas.
Iconic vs. Hidden Gems
Architectural photography enthusiasts face an essential decision when scouting locations: should they focus on iconic landmarks or seek out hidden gems? Both options offer unique opportunities for creating stunning long exposure shots with your phone.
Iconic landmarks provide instant recognition and a sense of grandeur. They're often well-lit and offer multiple vantage points for capturing diverse compositions. However, these popular spots can be crowded, making it challenging to set up your shot without interruptions.
Hidden gems, on the other hand, allow you to showcase lesser-known architectural wonders. You'll have more freedom to experiment without the pressure of capturing a "classic" shot. These locations often provide a sense of discovery and uniqueness to your portfolio.
Consider these factors when choosing between iconic landmarks and hidden gems:
- Accessibility: Is the location easily reachable?
- Lighting conditions: How does natural and artificial light interact with the structure?
- Crowd factor: Will you have enough space and time to set up your shot?
- Photographic potential: Does the architecture offer interesting lines, shapes, or textures?
Ultimately, a balanced approach incorporating both iconic landmarks and hidden gems will result in a diverse and enchanting architectural photography collection.
Accessibility and Safety Considerations
Safety-first scouting is essential when seeking out architectural locations for long exposure photography. Before you venture out, research the area thoroughly and check for any access restrictions or potential hazards. Always prioritize your well-being and respect private property boundaries.
When exploring potential shooting spots, wear appropriate footwear and clothing for the terrain. Carry a flashlight or headlamp for low-light conditions, and consider bringing a friend for added safety. Be aware of your surroundings, especially in urban environments where traffic or crime may pose risks.
Assess the stability of your shooting location, ensuring you have a secure place to set up your equipment. Avoid precarious positions or unstable surfaces that could lead to accidents. If you're shooting from elevated areas, like rooftops or balconies, confirm that you have proper permission and safety measures in place.
Consider weather conditions and their impact on both your safety and photographic results. Strong winds can destabilize your setup, while rain or snow may damage your equipment.
Always have an exit strategy and be prepared to abandon a shoot if conditions become unsafe.
Setting Up Your Phone Camera
Before diving into long exposure photography, it's crucial to properly set up your phone camera. Start by ensuring your device's software is up-to-date, as newer versions often include improved camera features.
Next, familiarize yourself with your phone's camera settings, particularly the manual or pro mode, which allows for greater control over exposure time, ISO, and aperture.
Clean your camera lens thoroughly to prevent unwanted smudges or dust from affecting your shots. Install a reliable long exposure app if your phone's native camera doesn't support extended shutter speeds. These apps often provide additional features like interval timing and light trail modes.
To maximize stability and minimize camera shake:
- Use a sturdy tripod designed for smartphones
- Employ a remote shutter release or timer function
- Enable your phone's image stabilization feature
- Turn on airplane mode to prevent vibrations from notifications
Experiment with different exposure times, starting with shorter durations and gradually increasing them.
Pay attention to your phone's battery life, as long exposure shots can be power-intensive. Consider carrying a portable charger for extended shooting sessions.
With these preparations, you'll be ready to capture stunning architectural long exposures using just your smartphone.
Mastering Long Exposure Techniques

Capturing stunning long exposure shots of architecture requires mastering several key techniques. First, you'll need to understand how to control your phone's shutter speed. Most modern smartphones offer manual camera modes or third-party apps that allow you to adjust exposure time. Experiment with different durations, typically ranging from 1 to 30 seconds, to achieve the desired effect.
Stability is essential for long exposures. Use a tripod or steady surface to eliminate camera shake. If you don't have a tripod, improvise with everyday objects like books or ledges. Enable your phone's self-timer or use a remote shutter to minimize vibrations when taking the shot.
Pay attention to lighting conditions. Low light situations, such as dusk or dawn, often produce the best results for architectural long exposures. Look for moving elements like clouds, traffic, or water to create dynamic contrasts against static structures.
Composition is key. Use leading lines, symmetry, and the rule of thirds to create visually appealing images. Experiment with different angles and perspectives to highlight unique architectural features.
Don't forget to adjust your ISO and aperture settings to complement your chosen shutter speed for ideal exposure.
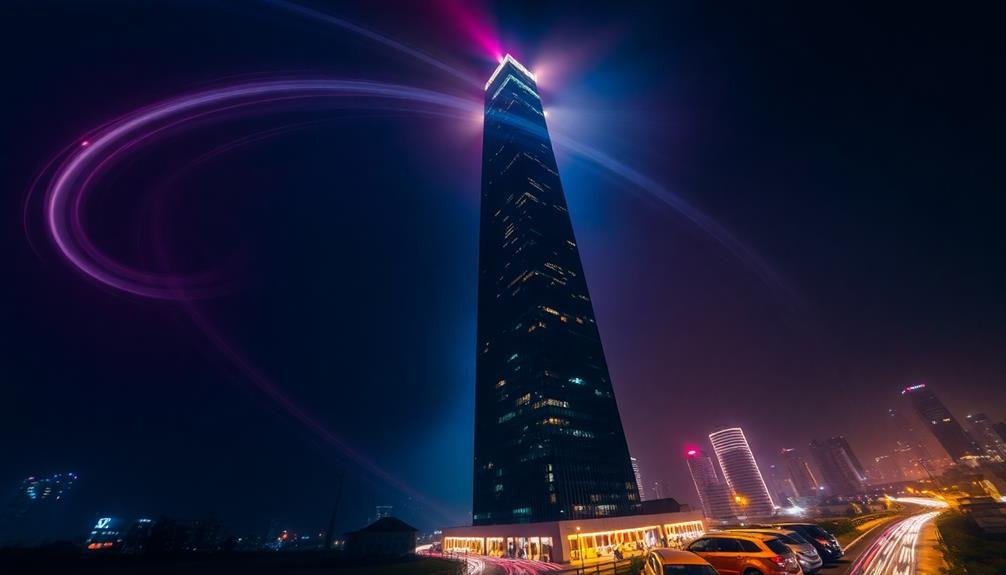
Capturing Light Trails and Motion

One of the most enchanting aspects of architectural long exposures is the ability to capture light trails and motion.
You'll transform ordinary cityscapes into dynamic, ethereal scenes by harnessing the movement of cars, people, and even clouds. In order to achieve this effect, you'll need to find a stable position for your phone and use a long exposure app or night mode.
When shooting light trails, look for busy streets or highways near architectural landmarks. Position yourself to capture both the static elements of buildings and the fluid motion of traffic. For best results, shoot during blue hour when there's still some ambient light in the sky.
Here are four key elements to take into account when capturing light trails and motion:
- Exposure time: Experiment with different durations to achieve desired trail length
- Aperture: Use a smaller aperture for sharper building details
- ISO: Keep it low to minimize noise in dark areas
- Composition: Balance static structures with dynamic light trails
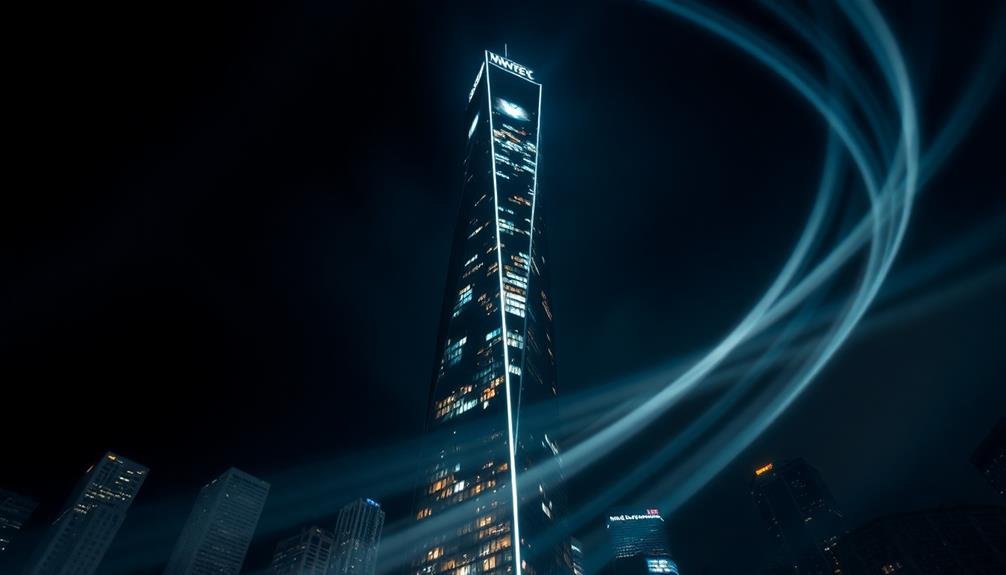
Don't forget to explore other forms of motion, such as flowing water or moving clouds.
These elements can add a dreamy quality to your architectural shots, creating a unique and enchanting image that blends the static and the dynamic.
Enhancing Architectural Details
You'll find that long exposures can beautifully highlight the intricate details of architectural facades.
By using this technique, you're able to capture the fine elements that might otherwise be overlooked in standard photography.
Focus on structural patterns and repeating motifs to create visually striking images that showcase the building's unique design.
Capturing Intricate Facade Elements
Architectural details often hide in plain sight, waiting to be revealed through the lens of long exposure photography. When capturing intricate facade elements, you'll want to focus on the unique textures, patterns, and designs that make a building stand out. Use your phone's long exposure feature to emphasize these details and create stunning visual effects.
To capture intricate facade elements effectively:
- Look for repeating patterns in windows, brickwork, or ornamental designs.
- Focus on contrasting textures, like smooth glass against rough stone.
- Highlight symmetry and geometric shapes in the architecture.
- Isolate unique architectural features, such as gargoyles or cornices.
Position yourself at an angle that best showcases the facade's intricacies. Experiment with different exposure times to achieve the desired effect.
Longer exposures can blur movement, creating a dreamlike quality, while shorter exposures maintain crisp details. Don't forget to stabilize your phone using a tripod or steady surface to guarantee sharp images.
Highlighting Structural Patterns
Explore the world of structural patterns to elevate your architectural photography. Long exposures can help you emphasize the repeating elements and geometric shapes that define a building's character. Focus on lines, shapes, and textures that create visual rhythm and lead the eye through the composition.
When highlighting structural patterns, consider these techniques:
| Technique | Effect | Best Used For |
|---|---|---|
| Vertical lines | Convey height | Skyscrapers |
| Horizontal lines | Suggest stability | Bridges |
| Diagonal lines | Create dynamism | Modern facades |
| Curves | Add softness | Domes, arches |
| Symmetry | Emphasize balance | Classical buildings |
Use your phone's long exposure mode to blur moving elements like clouds or people, which can draw attention to the building's static patterns. Experiment with different angles to find the most compelling view of structural elements. Try low angles to exaggerate perspective or look for reflections in nearby surfaces to double the impact of patterns.
Don't forget to adjust your composition to align with the building's natural geometry. This might mean tilting your phone to match diagonal lines or centering your frame on a symmetrical facade. By focusing on structural patterns, you'll create images that showcase the essence of architectural design.
Post-Processing Long Exposure Images

Post-processing is the final, vital step in transforming your long exposure shots into architectural masterpieces. With the right techniques, you'll enhance the unique qualities of your images and bring out their full potential.
Start by adjusting the exposure and contrast to balance the highlights and shadows. This will help accentuate the architectural details and create a more dynamic image.
Next, focus on sharpening and noise reduction. Long exposures can sometimes introduce unwanted noise, especially in low-light conditions. Use your editing software's noise reduction tools sparingly to maintain image quality while removing any distracting graininess.
Color correction is essential for creating the desired mood and atmosphere. Experiment with white balance, saturation, and vibrancy to achieve the perfect look for your architectural subject.
Finally, consider these advanced techniques to elevate your long exposure images:
- Selective adjustments to highlight specific architectural elements
- Gradient filters to balance exposure between sky and buildings
- Perspective correction to straighten lines and improve composition
- Subtle vignetting to draw attention to the center of the image
Overcoming Common Challenges

While mastering post-processing techniques can greatly improve your long exposure architectural photos, you'll likely encounter several challenges in the field. One common issue is camera shake, which can blur your images. To combat this, use a sturdy tripod or find a stable surface to rest your phone on. You can also use your phone's timer or a remote shutter to avoid touching the device during exposure.
Another challenge is dealing with changing light conditions. As the sun moves or clouds shift, your exposure settings may need adjustment. Keep an eye on your histogram and be prepared to make quick changes to maintain proper exposure.
Wind can also pose problems, causing movement in trees or flags that can create unwanted blurring. Try to time your shots during lulls in the breeze or use faster shutter speeds to freeze motion.
Reflections and glare on glass buildings can be tricky to manage. Use a polarizing filter or adjust your angle to minimize these effects.
Creative Composition for Architectural Shots
When composing architectural shots, you'll want to focus on framing geometric shapes within your image.
Look for strong lines, curves, and patterns that naturally occur in buildings and use them to guide the viewer's eye.
You can also employ the leading lines technique, where you'll use linear elements in the architecture to draw attention to a specific focal point or create a sense of depth in your long exposure photograph.
Framing Geometric Shapes
Architectural photography often thrives on the interplay of geometric shapes within a composition. When framing your shots, you'll want to seek out and emphasize these geometric elements to create visually striking images.
Look for strong lines, curves, and patterns in buildings and their surroundings. Use these shapes to guide the viewer's eye through the frame and create a sense of balance or tension.
Consider how different geometric shapes interact with each other. Contrasting angular and curved elements can create dynamic compositions, while repeating patterns can establish rhythm and harmony.
Don't be afraid to experiment with unconventional angles or perspectives to highlight unique geometric features.
Here are four ways to incorporate geometric shapes in your architectural photography:
- Use leading lines to draw the eye towards a focal point
- Frame your subject with symmetrical elements for a balanced composition
- Capture repeating patterns to create visual rhythm
- Contrast different shapes (e.g., circles against squares) for added interest
Leading Lines Technique
As you explore architectural photography, mastering the leading lines technique can dramatically enhance your compositions. This powerful method uses linear elements within the frame to guide the viewer's eye towards the main subject or focal point. In architectural settings, you'll find an abundance of natural leading lines: staircases, railings, bridges, or even the edges of buildings themselves.
To effectively use leading lines, position yourself to capture these linear elements in a way that draws attention to your intended subject. You can experiment with different angles and perspectives to create more dynamic compositions. Try shooting from a low angle to emphasize the upward sweep of a tall building, or use a wide-angle lens to exaggerate the convergence of parallel lines.
When using long exposures for architectural shots, leading lines become even more impactful. The extended exposure time can transform moving elements like traffic or clouds into streaks of light or motion, creating additional leading lines in your image.
This technique adds a sense of energy and movement to otherwise static architectural scenes, resulting in intriguing and unique photographs that showcase the interplay between structure and time.
Showcasing Your Architectural Marvels
Once you've captured stunning architectural marvels with your phone's long exposure technique, it's time to share your work with the world. Your unique perspective on urban landscapes and iconic structures deserves recognition. Consider various platforms to showcase your art, from social media to dedicated photography websites.
When presenting your architectural long exposures, focus on highlighting the key elements that make each image special. Explain your creative process, including the location, time of day, and camera settings used. This information not only engages your audience but also helps aspiring photographers learn from your experience.
To make your architectural marvels stand out, consider:
- Creating a cohesive portfolio with a consistent editing style
- Writing compelling captions that tell the story behind each image
- Participating in online photography challenges or competitions
- Collaborating with other photographers or architects to gain exposure
Don't be afraid to experiment with different presentation formats, such as before-and-after comparisons or themed series.
Frequently Asked Questions
How Do I Protect My Phone From Weather Conditions During Long Exposures?
To protect your phone during long exposures, you'll want to use a waterproof case or plastic bag. You can also use an umbrella or shelter. Keep your device dry and warm, and avoid extreme temperatures or humidity.
Can I Create Long Exposure Effects Without Using Specialized Apps?
Yes, you can create long exposure effects without specialized apps. Use your phone's manual mode to adjust shutter speed, ISO, and aperture. Alternatively, try burst mode and combine multiple images in post-processing for a similar effect.
What's the Ideal Time of Day for Architectural Long Exposure Photography?
You'll find the best time for architectural long exposure photography is during the "blue hour" just after sunset or before sunrise. It's when you'll capture stunning light contrasts between buildings and the sky. Don't forget your tripod!
How Do I Maintain Image Quality When Enlarging Phone Photos for Prints?
To maintain image quality when enlarging phone photos for prints, you'll want to start with the highest resolution possible. Use RAW format if available, reduce noise, sharpen carefully, and upscale using AI-powered software for best results.
Are There Legal Considerations When Photographing Certain Architectural Landmarks?
Yes, there are legal considerations. You'll need to be aware of copyright laws, property rights, and privacy concerns. Some landmarks may require permits for commercial use. Always research local regulations before photographing and using images of architectural landmarks.
In Summary
You've now got the tools to transform ordinary buildings into architectural marvels through phone long exposures. Don't be afraid to experiment with different techniques and compositions. Remember, practice makes perfect. As you refine your skills, you'll capture stunning images that showcase architecture in a whole new light. Keep pushing your creative boundaries, and soon you'll have a portfolio of breathtaking architectural long exposures that'll impress even seasoned photographers.


Leave a Reply