
To capture stunning shots with your smartphone's portrait mode, master key framing techniques. Start by applying the rule of thirds, positioning your subject along grid lines for visual impact. Utilize negative space to create minimalist compositions that emphasize your focal point. Incorporate leading lines to guide the viewer's gaze and add depth. Experiment with natural frames, symmetry, and layering to enhance your portraits. Don't shy away from unconventional angles – try low or high perspectives for unique results. By combining these techniques with your smartphone's portrait mode capabilities, you'll elevate your photography skills and produce mesmerizing images. The world of smartphone portraiture offers endless creative possibilities.
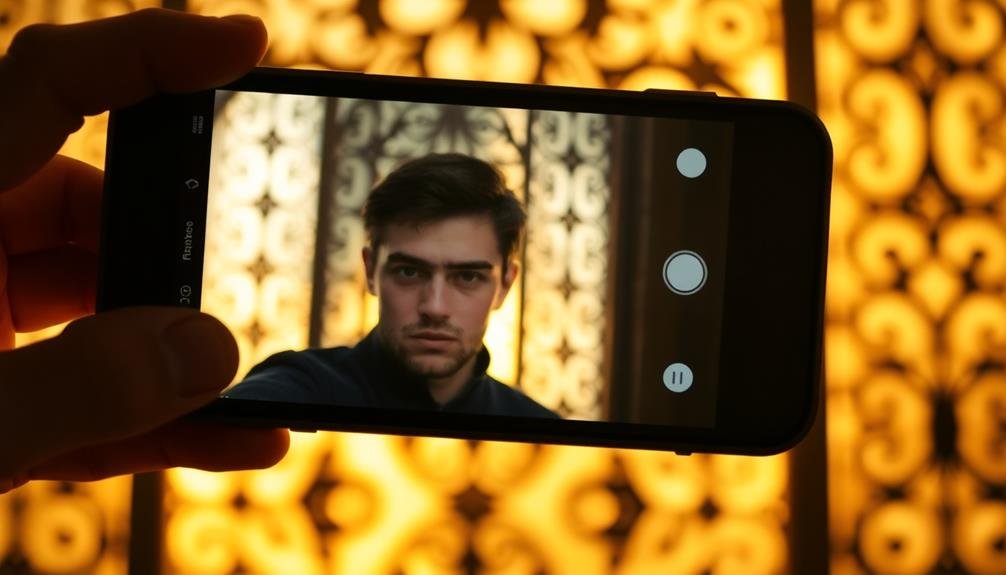
Understanding Smartphone Portrait Mode

Portrait mode has revolutionized smartphone photography, allowing users to capture professional-looking images with a beautifully blurred background. This feature simulates the shallow depth of field typically achieved with high-end DSLR cameras, creating a separation between the subject and the background.
To use portrait mode effectively, you'll need to understand how it works. Your smartphone uses a combination of hardware and software to detect the subject and apply a selective blur to the background. Most devices employ dual-lens systems or depth sensors to gather depth information, while others rely solely on advanced AI algorithms.
When you activate portrait mode, your phone will guide you to position your subject at the ideal distance, usually between 2 to 8 feet away. It's essential to guarantee good lighting conditions, as portrait mode often struggles in low light. The feature works best with a single subject, though some phones can handle multiple subjects or even objects.
Keep in mind that portrait mode isn't perfect. It may struggle with complex edges or hair, sometimes resulting in artifacts or blurring errors.
Experimenting with different angles and compositions will help you achieve the best results.
Rule of Thirds in Portraits

One of the most powerful composition techniques you can apply to your smartphone portraits is the rule of thirds. This principle divides your frame into a 3×3 grid, creating nine equal sections. The key is to place your subject along these lines or at their intersections, rather than centering them in the frame.
To use the rule of thirds effectively, activate your smartphone's grid feature in the camera settings. This overlay will guide your composition without appearing in the final image. When framing your portrait, position your subject's eyes along the upper horizontal line or at one of the top intersections. This creates a more engaging and dynamic composition than simply centering the face.
Don't forget to contemplate the background elements as well. Place interesting features along the grid lines or at intersections to add depth and context to your portrait.
Experiment with different placements to see how they affect the overall mood and story of your image. Remember, the rule of thirds is a guideline, not a strict rule. Once you've mastered it, feel free to break it intentionally for creative effect.
Negative Space for Impact

Negative space can be a powerful tool in your portrait photography arsenal.
By thoughtfully incorporating empty areas around your subject, you'll create a minimalist composition that draws attention to your focal point.
Experiment with creative framing to use space effectively, allowing your subject to stand out and make a strong visual impact.
Emphasize Subject Through Minimalism
A powerful technique in smartphone portrait photography leverages minimalism to create striking images. By reducing elements in your frame, you'll draw attention to your subject and create a more impactful portrait.
Minimalism in portrait mode allows you to tell a story with fewer distractions, emphasizing the subject's emotions, features, or unique characteristics.
To achieve minimalism in your smartphone portraits:
- Choose a simple background: Look for plain walls, clear skies, or uniform textures that won't compete with your subject.
- Remove clutter: Clear the frame of unnecessary objects or distracting elements that don't contribute to the overall composition.
- Use negative space strategically: Position your subject off-center to create balance and visual interest.
- Focus on a single feature: Highlight one aspect of your subject, such as their eyes or hands, to create a powerful focal point.
When employing minimalism, pay attention to lighting and color. Soft, even lighting can enhance the simplicity of your composition, while a limited color palette can further emphasize your subject.
Don't be afraid to experiment with different angles and perspectives to find the most compelling minimalist composition for your smartphone portrait.
Creative Composition With Space
Building on the concept of minimalism, let's explore how creative composition with space can elevate your smartphone portraits. Negative space, the empty areas around your subject, can be a powerful tool for creating impactful images.
To effectively use negative space, position your subject off-center. This creates a sense of balance and draws the viewer's eye to the main focus. Experiment with placing your subject in different thirds of the frame, following the rule of thirds principle.
Use the surrounding environment to your advantage. Look for clean backgrounds like plain walls, clear skies, or expansive landscapes. These elements provide a canvas for negative space, allowing your subject to stand out.
Don't be afraid to leave large portions of the frame empty. This technique can convey emotions like isolation, contemplation, or freedom. It also gives the viewer's eye room to wander and appreciate the overall composition.
Play with symmetry and asymmetry. Centered compositions can create a sense of stability, while off-center placements add dynamism. Try both approaches to see which best suits your subject and desired mood.
Leading Lines in Portraiture

Leading lines can dramatically enhance your smartphone portraits by adding depth and guiding the viewer's gaze.
You'll find these lines in natural and architectural elements, from tree branches to railings or staircases.
Position your subject strategically in relation to these lines to create a powerful visual pathway that draws attention right where you want it.
Create Depth With Lines
To add depth and dimension to your smartphone portraits, incorporating leading lines can dramatically enhance the visual impact of your images. By strategically positioning your subject in relation to lines within the frame, you'll guide the viewer's eye and create a sense of depth.
Look for natural or man-made lines in your environment, such as roads, fences, or architectural features, and use them to your advantage.
When composing your shot, consider these techniques:
- Position your subject at the intersection of leading lines
- Use converging lines to draw attention to your subject's face
- Incorporate diagonal lines for a dynamic, energetic feel
- Experiment with curved lines to add a sense of flow and grace
Don't be afraid to get creative with your compositions. You can use shadows, patterns, or even the subject's own body to create leading lines.
Directing Viewer's Attention
While lines can add depth to your portraits, they serve an even more powerful purpose: directing the viewer's attention. Leading lines in portraiture guide the eye to your subject, creating a more impactful and engaging image. You'll find these lines in natural and urban environments alike, so keep an eye out for opportunities.
Look for diagonal lines in architecture, such as staircases or building edges, that point towards your subject. Use fences, roads, or pathways to draw the viewer's gaze. In nature, tree branches, shorelines, or even shadows can act as leading lines. Position your subject at the end of these lines or where they intersect for maximum effect.
Don't limit yourself to straight lines; curves can be just as effective. A winding path or a curved railing can create a sense of movement and lead the eye naturally.
Remember, leading lines don't always have to be obvious; subtle elements like the direction of your subject's gaze can also guide viewers.
Experiment with different angles and compositions to find the most effective leading lines. By mastering this technique, you'll create portraits that captivate and hold your viewer's attention.
Framing Within the Frame
Smartphone portrait mode's power extends beyond simple background blur. It's a versatile tool for creating visually striking compositions through framing within the frame. This technique uses elements in the foreground or background to create a natural border around your subject, adding depth and context to your portraits.
To effectively frame within the frame, consider these approaches:
- Natural arches: Use tree branches, doorways, or architectural features to create an arch around your subject.
- Windows: Position your subject behind or near a window, using its edges to frame the portrait.
- Foreground elements: Incorporate leaves, flowers, or other objects in the foreground to partially frame the subject.
- Reflections: Utilize mirrors or reflective surfaces to create a frame-like effect around your subject.
When implementing this technique, make certain your framing elements don't overpower the main subject.
Experiment with different angles and distances to find the perfect balance. You'll want the frame to enhance the portrait, not distract from it.
Remember, smartphone portrait mode's depth effect can help separate the framing elements from your subject, creating a more pronounced and professional-looking composition.
With practice, you'll master this technique and elevate your smartphone portraits to new heights.
Symmetry and Balance Techniques

Mastering symmetry and balance can transform your smartphone portraits from ordinary to extraordinary. When composing your shot, look for natural lines and shapes that create symmetry. Align your subject with architectural elements like doorways, arches, or windows to achieve perfect balance. You can also use reflective surfaces like mirrors or water to create symmetrical compositions.
For a more subtle approach, try the rule of thirds. Divide your frame into a 3×3 grid and place your subject along these lines or at their intersections. This creates a sense of balance without perfect symmetry. Experiment with centered compositions too, placing your subject directly in the middle of the frame for a bold, striking effect.
Don't forget about color balance. Use complementary colors to create visual harmony, or deliberately introduce contrasting colors for a more dynamic look.
Pay attention to the distribution of light and dark areas in your frame as well. Aim for an even balance of tones, or intentionally create contrast for dramatic effect.
Depth and Layering Strategies
Beyond the basics of composition, creating depth and layering in your smartphone portraits can elevate them to a new level of artistry. By strategically arranging elements within your frame, you'll add dimension and visual interest to your shots.
Start by considering the foreground, middle ground, and background of your image.
To achieve depth and layering in your smartphone portraits:
- Use leading lines: Incorporate natural lines in the environment to guide the viewer's eye towards your subject.
- Frame within a frame: Position your subject within natural frames like doorways, arches, or foliage to create depth.
- Utilize foreground elements: Place objects in the foreground to add dimension and create a sense of depth.
- Play with focus: Use your phone's portrait mode to blur the background, creating separation between layers.
Experiment with different angles and perspectives to enhance the sense of depth in your portraits.
Don't be afraid to move around your subject, crouching low or finding higher vantage points.
Remember, the key is to create a visual journey for the viewer's eye, guiding them through the various layers of your composition.
With practice, you'll master the art of depth and layering in your smartphone portraits.
Unconventional Angles for Portraits
Breaking away from eye-level shots can dramatically transform your smartphone portraits. Experiment with low-angle shots by crouching or lying on the ground, pointing your camera upwards. This perspective can make your subject appear more powerful or imposing, adding a unique dynamic to the image.
Conversely, try high-angle shots by standing on a step or elevated surface, angling your camera downwards. This can create a sense of vulnerability or intimacy in your portraits.
Don't shy away from Dutch angles, where you tilt your smartphone diagonally. This technique can add tension or excitement to your photos, perfect for capturing energetic personalities.
For a fresh perspective, shoot through objects like leaves, glass, or fabric to frame your subject uniquely. You can also experiment with reflections in mirrors, windows, or water surfaces to add depth and intrigue to your portraits.
Consider capturing your subject from behind or in profile. These angles can tell a different story and highlight unique features.
Frequently Asked Questions
How Do I Adjust Portrait Mode Settings for Different Lighting Conditions?
To adjust portrait mode for different lighting, you'll want to tap on the screen to set focus and exposure. Experiment with the brightness slider, and try using HDR mode for high-contrast scenes. Don't forget to use portrait lighting effects.
Can Portrait Mode Be Used Effectively for Group Shots?
You can use portrait mode for group shots, but it's trickier. Position subjects close together and guarantee they're at similar distances from the camera. It's best for smaller groups, as larger ones may have focus issues.
What's the Ideal Distance Between Subject and Background for Portrait Mode?
For ideal portrait mode shots, you'll want to keep your subject 3-8 feet from the background. This distance allows the camera to create a pleasing blur effect while maintaining sharp focus on your subject.
How Do I Prevent the "Cutout" Effect in Portrait Mode Photos?
To avoid the "cutout" effect in portrait mode, you'll want to soften edges by adjusting blur intensity. Don't place subjects too far from backgrounds, and guarantee there's contrast between them. Experiment with different lighting conditions for natural-looking results.
Are There Any Third-Party Apps That Enhance Smartphone Portrait Mode Capabilities?
You'll find several apps that enhance portrait mode capabilities. Try Focos, Snapseed, or Lightroom for advanced editing. They offer depth control, lighting adjustments, and background blur refinement. Experiment with these to elevate your portrait shots markedly.
In Summary
You've now got a toolkit of framing techniques to elevate your smartphone portrait shots. Don't be afraid to experiment with these methods, mixing and matching as you see fit. Remember, the best portraits often break rules creatively. Trust your eye, and you'll soon develop your unique style. Keep practicing, and you'll be capturing stunning, professional-looking portraits with just your smartphone in no time. Happy shooting!


Leave a Reply