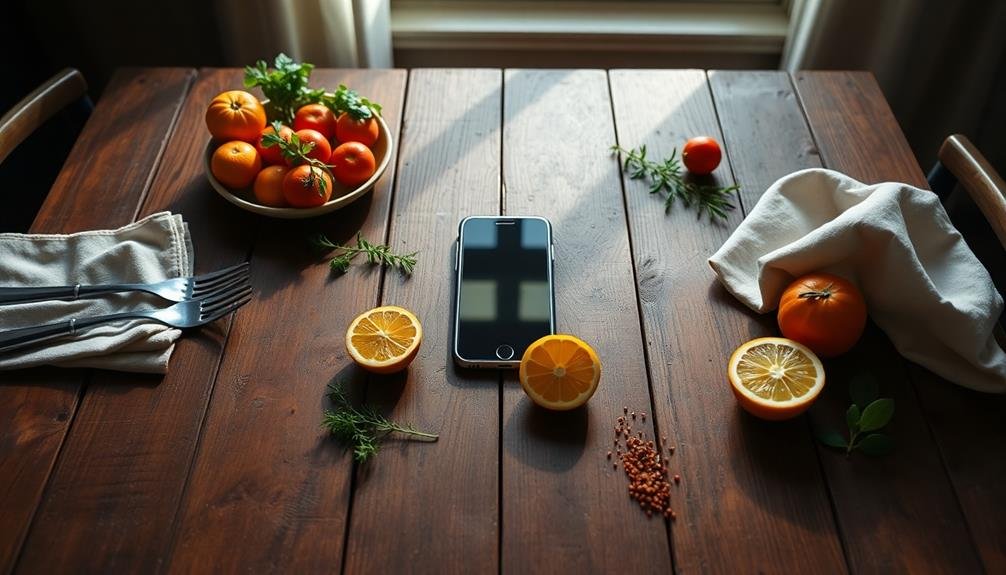
To enhance your mobile food photography, incorporate stylish plates and bowls, rustic wooden boards, and vintage cutlery. Add pops of color with napkins and linens, and use fresh herbs as garnishes for vibrancy. Natural light reflectors can improve lighting, while textured backgrounds create depth. Don't forget complementary food ingredients to tell a story. Experiment with different combinations of these props to create visually appealing compositions that make your dishes shine. By carefully selecting and arranging these elements, you'll transform your food photos from ordinary to extraordinary. Explore further to reveal even more creative possibilities for your culinary captures.
Stylish Plates and Bowls

When it comes to mobile food photography, stylish plates and bowls are essential props. They provide the foundation for your culinary creations and can greatly enhance the overall aesthetic of your shots. Opt for dishes with clean lines, matte finishes, and neutral colors to avoid distracting from the food itself. White plates are versatile and make colors pop, while black dishes can create dramatic contrasts.
Consider investing in a variety of sizes and shapes to suit different types of dishes. Shallow bowls work well for pasta and salads, while deeper ones are perfect for soups and stews.
Don't forget about textured plates, which can add depth to your images. Rustic ceramic dishes can lend a homey feel, while sleek modern designs create a more upscale vibe.
Mix and match different styles to create interesting compositions, but make sure they complement each other. Remember, the goal is to showcase the food, not overshadow it.
When selecting plates and bowls, think about how they'll interact with your typical shooting surfaces and backgrounds. Choose props that will elevate your food photography and help you create stunning, Instagram-worthy images.
Rustic Wooden Boards

Another popular prop for mobile food photography, rustic wooden boards add warmth and texture to your shots.
These versatile surfaces come in various shapes, sizes, and finishes, allowing you to create diverse looks for your food compositions.
When selecting a rustic wooden board, opt for one with interesting grain patterns or knots to add visual interest.
Weathered or distressed boards can lend a charming, vintage feel to your images.
You'll find that lighter woods like pine or oak work well for brighter, airier shots, while darker woods such as walnut or mahogany create a more dramatic, moody atmosphere.
To use wooden boards effectively, consider the contrast between the food and the surface.
Light-colored foods often pop against darker woods, while darker foods stand out on lighter boards.
Experiment with different angles and lighting to highlight the board's texture.
You can also use wooden boards as backdrops or to create depth in your composition.
Remember to clean and maintain your boards regularly to keep them looking their best.
With proper care, these rustic props will serve as timeless additions to your mobile food photography toolkit.
Vintage Cutlery and Utensils

With a touch of nostalgia, vintage cutlery and utensils can elevate your mobile food photography to new heights. These timeless pieces add character and depth to your shots, creating a sense of history and craftsmanship that modern utensils often lack.
When selecting vintage cutlery, look for items with unique patterns, ornate handles, or interesting textures. Tarnished silver, brass, or copper utensils can create a beautiful patina that adds visual interest to your images.
Don't limit yourself to just forks and spoons; consider including vintage serving pieces like cake servers, sugar tongs, or butter knives.
To incorporate vintage utensils effectively, try placing them strategically in your composition. Use them to frame your subject, create leading lines, or add a pop of color. You can also feature them as the main subject, showcasing their intricate details and worn surfaces.
Remember to clean your vintage pieces thoroughly before use, and be mindful of any potential food safety concerns. If you're worried about using authentic antiques, you can find modern reproductions that offer a similar aesthetic without the associated risks.
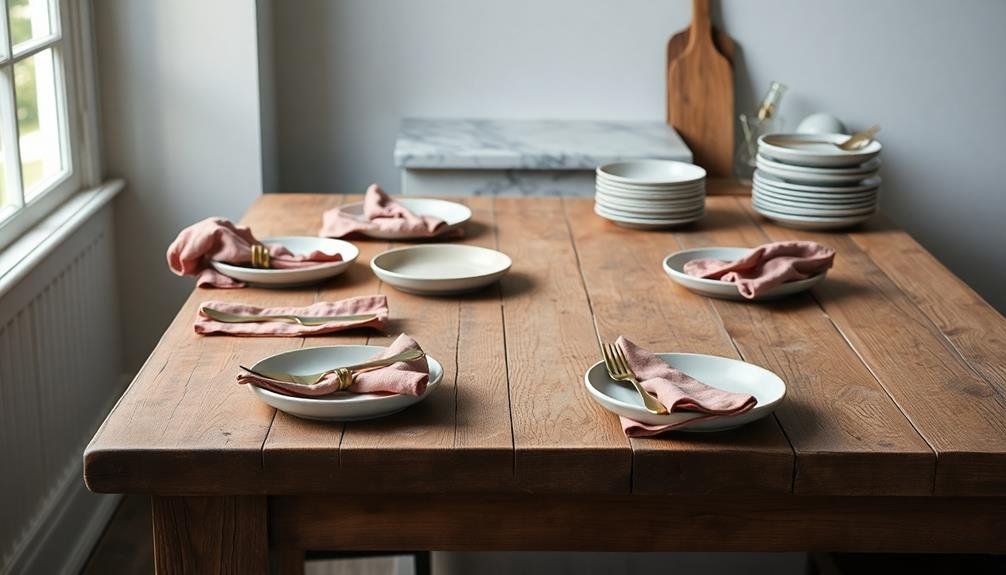
Colorful Napkins and Linens

When styling your food photos, don't overlook the impact of colorful napkins and linens.
You'll find they add texture and visual interest to your shots, especially when you choose hues that complement your dish and backdrop.
Experiment with different folding and arrangement techniques to create unique shapes and layers that enhance your overall composition.
Texture and Visual Interest
Colorful napkins and linens are essential tools for adding texture and visual interest to your mobile food photography. They provide a backdrop that can complement or contrast with your food, enhancing its appeal.
When selecting napkins or linens, consider the color, pattern, and material to create depth and dimension in your shots. You'll want to experiment with different folds and arrangements to find what works best for each dish.
Crumpled napkins can add a casual, rustic feel, while neatly pressed linens create a more formal atmosphere. Don't be afraid to mix and match textures, like pairing a rough linen napkin with a smooth ceramic plate.
To maximize texture and visual interest in your food photos:
- Layer different fabrics, such as a tablecloth, placemat, and napkin, to create depth.
- Use napkins with subtle patterns or textures to add complexity without overwhelming the food.
- Incorporate wrinkled or rumpled linens for a lived-in, authentic look.
Complementary Color Selection
Selecting complementary colors for your napkins and linens can dramatically enhance your food photography. When choosing these props, consider the color wheel and opt for hues that contrast with your dish. For example, if you're shooting a vibrant red tomato salad, use a blue or teal napkin to make the food pop. Purple grapes will stand out against a yellow backdrop, while green herbs shine on a red surface.
Don't limit yourself to solid colors; experiment with patterns and textures that complement your food without overwhelming it. Stripes, polka dots, or subtle floral prints can add visual interest without stealing the spotlight. Remember that neutral tones like white, beige, or gray can serve as versatile backgrounds for almost any dish.
Consider the mood you want to convey in your photo. Warm colors like oranges and reds can create a cozy, inviting atmosphere, while cool blues and greens might evoke a fresh, light feeling.
You can also use color to emphasize seasonal themes – think earthy tones for fall dishes or bright pastels for spring. By carefully selecting your napkins and linens, you'll create a cohesive and visually appealing composition that enhances your food's natural beauty.
Folding and Arrangement Techniques
Once you've chosen the perfect napkins and linens, mastering folding and arrangement techniques will elevate your food photography to the next level.
Start by experimenting with different folds to create texture and depth in your shots. A simple triangle fold can add a clean, modern touch, while a more intricate fan fold creates a sense of elegance. Don't be afraid to crumple or wrinkle your linens slightly for a casual, lived-in look.
When arranging your napkins and linens, consider their placement in relation to your main subject. You can use them to frame the dish, create leading lines, or add a pop of color to an otherwise neutral composition. Remember that less is often more – a strategically placed corner of a napkin can be just as effective as a fully visible one.
Here are three key techniques to enhance your food photography:
- Use the rule of thirds to position your napkins off-center
- Layer different textures by combining smooth and rough fabrics
- Create depth by folding napkins at varying heights around the dish
Experiment with these techniques to find what works best for your style and the mood you're trying to convey in your mobile food photography.
Fresh Herbs and Garnishes
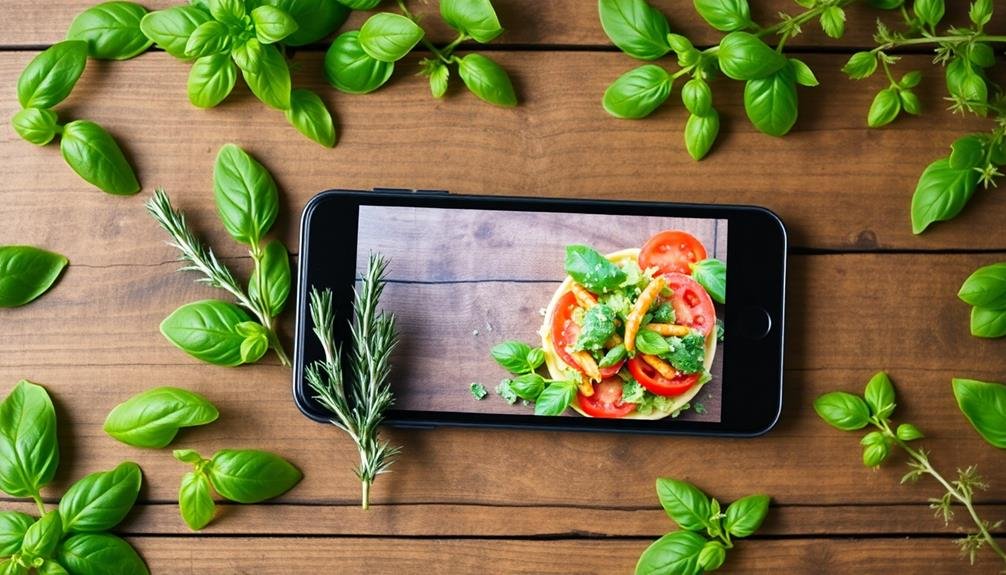
Fresh herbs and garnishes can elevate your food photography from ordinary to extraordinary. They add vibrant colors, textures, and a sense of freshness to your images. When selecting herbs, opt for those with crisp leaves and bright hues. Basil, cilantro, mint, and parsley are versatile choices that complement a wide range of dishes.
To keep herbs looking their best, store them in water or wrap them in damp paper towels before use. When it's time to garnish, consider sprinkling chopped herbs over the dish or placing whole sprigs strategically. For a more dynamic look, try scattering herb leaves across the frame or creating a herb border around the plate.
Don't limit yourself to just herbs; other garnishes can enhance your photos too. Lemon wedges, edible flowers, microgreens, and even a light dusting of spices can add visual interest.
Remember to use garnishes that complement the dish's flavors and aesthetics. Experiment with different combinations and placements to find what works best for each shot. With the right herbs and garnishes, you'll create appetizing images that make viewers want to reach through their screens.
Natural Light Reflectors

After mastering the art of garnishing, it's time to focus on lighting. Natural light reflectors are essential props for enhancing your mobile food photography. These simple tools can dramatically improve the quality of your shots by bouncing light onto your subject, eliminating harsh shadows and creating a more balanced, appetizing image.
You don't need to invest in expensive equipment to achieve great results. Common household items can serve as effective light reflectors. Here are three easy-to-find options:
- White foam board: Lightweight, affordable, and easy to position, it provides a soft, diffused reflection.
- Aluminum foil: Crinkle it for a textured effect or keep it smooth for a stronger reflection. It's versatile and can be molded to direct light precisely.
- White sheet or tablecloth: Drape it over a chair or prop it up for a larger reflective surface, perfect for bigger setups.
Experiment with different angles and distances to find the perfect balance of light for your food shots. Remember, the goal is to enhance the natural light, not overpower it.
With practice, you'll learn to manipulate these reflectors to create mouth-watering images that showcase your culinary creations in their best light.
Textured Backgrounds and Surfaces
When choosing textured backgrounds for your food photos, consider both natural and artificial options to create visual interest.
The color and contrast of your selected surface can dramatically impact the overall mood and appeal of your image.
To make the best choice, focus on materials that complement your food's colors and textures, ensuring they enhance rather than overpower your culinary subject.
Natural vs. Artificial Textures
Texture plays an essential role in mobile food photography, setting the stage for your culinary creations. When choosing between natural and artificial textures, consider the mood and style you're aiming for.
Natural textures like wood, stone, or linen can add warmth and authenticity to your shots, while artificial textures offer more control over color and pattern.
Natural textures often bring a rustic, organic feel to your photos. They're great for showcasing farm-to-table dishes or homestyle cooking.
Artificial textures, on the other hand, can create a more polished, modern look that's perfect for sleek, contemporary food presentations.
To help you visualize the impact of different textures, here are three examples:
- A slice of artisanal bread on a rough wooden board
- A colorful smoothie bowl on a glossy white surface
- A perfectly plated dessert on a textured concrete backdrop
Experiment with both natural and artificial textures to find what works best for your food and style.
Don't be afraid to mix and match, creating unique combinations that enhance your culinary subject and tell a compelling visual story.
Color and Contrast Impact
Beyond texture, color and contrast play pivotal roles in creating stunning mobile food photography. You'll want to choose backgrounds and props that complement or contrast with your food's colors. Light-colored foods often pop against darker backgrounds, while vibrant dishes can shine on neutral surfaces. Consider the mood you're trying to evoke and select colors accordingly.
Contrast isn't just about color; it's also about light and shadow. Use shadows strategically to add depth and dimension to your shots. You can create contrast through lighting techniques or by incorporating props with varying tones.
Here's a quick guide to color and contrast impacts:
| Color Combination | Mood Evoked | Best For |
|---|---|---|
| White on White | Clean, Pure | Desserts, Dairy |
| Dark on Light | Dramatic, Bold | Rich Foods |
| Complementary Colors | Vibrant, Exciting | Fresh Produce |
| Monochromatic | Sophisticated, Calm | Elegant Dishes |
| High Contrast | Eye-catching, Dynamic | Action Shots |
Material Selection Tips
Selecting the right materials for your backgrounds and surfaces can dramatically elevate your mobile food photography. When choosing textures, consider how they'll complement your food's appearance and enhance its visual appeal. Opt for materials that add depth and interest without overshadowing the main subject.
Natural wood surfaces, like rustic tables or cutting boards, can lend warmth and authenticity to your shots. Marble or stone slabs provide a sleek, modern backdrop that works well with minimalist presentations. Textured fabrics, such as linen or burlap, can add a cozy, homemade feel to your images.
When selecting materials, keep these tips in mind:
- Matte surfaces reduce unwanted reflections and glare
- Neutral colors allow the food to stand out
- Textured materials create visual interest and depth
Remember to experiment with different combinations of textures and colors to find what works best for your style.
Don't be afraid to mix and match materials to create unique compositions. By carefully selecting your backgrounds and surfaces, you'll create a solid foundation for stunning food photos that will make your audience's mouths water.
Complementary Food Ingredients
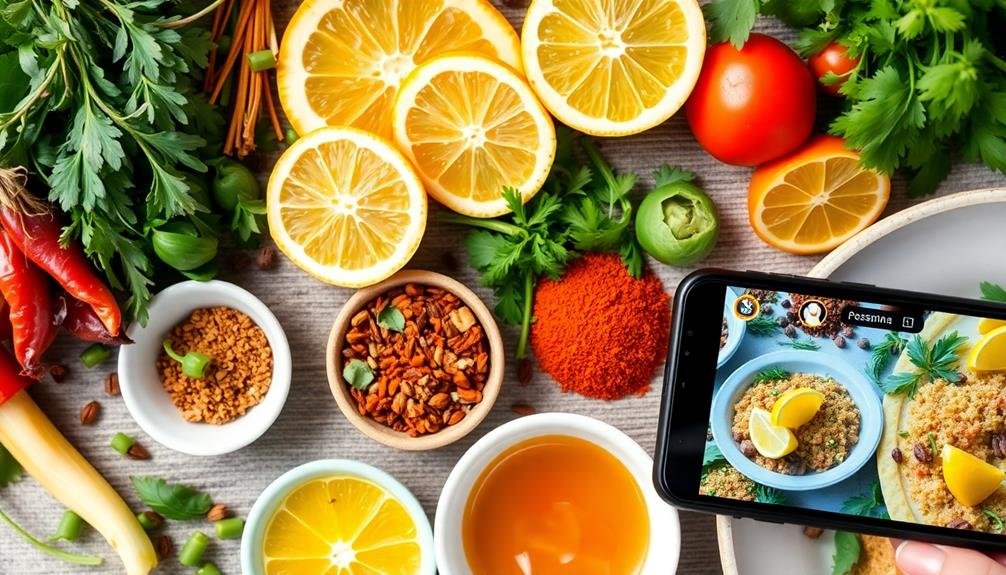
When styling food for mobile photography, complementary ingredients can elevate your shot from ordinary to extraordinary. Consider adding elements that enhance the main dish's color, texture, or theme. For instance, sprinkle fresh herbs like basil or cilantro on pasta or tacos to add a pop of green. Garnish soups with a swirl of cream or a sprinkle of paprika for visual interest.
Don't overlook the power of raw ingredients. Place whole fruits, vegetables, or spices near the finished dish to tell a story about its components. Scatter coffee beans around a cappuccino or cocoa powder near a chocolate dessert. For drinks, add citrus slices, berries, or herbs that complement the flavors.
Remember to balance your composition. Use odd numbers of complementary items for a pleasing arrangement. Consider the color wheel when selecting additions – contrasting colors can make your main dish stand out.
Frequently Asked Questions
How Do I Store and Transport Props for Mobile Food Photography?
You'll want to invest in a compact, padded carrying case for your props. Use small containers or ziplock bags to organize items. Wrap fragile pieces in bubble wrap. Keep a checklist to guarantee you don't forget anything.
What's the Ideal Budget for Building a Basic Food Photography Prop Collection?
You can start with a $100-$200 budget for a basic food photography prop collection. Focus on versatile items like neutral plates, napkins, and utensils. Gradually expand as you hone your style and needs. Don't overspend initially.
Are There Any Props to Avoid When Shooting Specific Types of Cuisine?
You should avoid props that clash culturally or visually with specific cuisines. Don't use chopsticks with Italian food or forks with sushi. Steer clear of distracting or inauthentic items that might detract from the dish's authenticity.
How Can I Create DIY Props for Food Photography on a Budget?
You can create budget-friendly DIY props using everyday items. Try repurposing fabric scraps for backdrops, painting thrift store dishes, crafting paper backgrounds, or using natural elements like leaves and flowers. Get creative with household objects for unique textures and surfaces.
What Are the Best Portable Lighting Options for Mobile Food Photography?
You'll find portable LED panels, ring lights, and clip-on smartphone lights excellent for mobile food photography. Don't forget collapsible reflectors and diffusers. These lightweight options provide versatile lighting control, helping you capture stunning food shots on-the-go.
In Summary
You've now got a toolkit of props to elevate your mobile food photography. From stylish plates to rustic boards, vintage cutlery to colorful linens, you're ready to create stunning compositions. Don't forget fresh herbs and natural light reflectors to add that extra pop. With textured backgrounds and complementary ingredients, you'll transform simple dishes into visual masterpieces. So grab your phone, set up your props, and start capturing mouthwatering images that'll make everyone's stomach growl.


Leave a Reply