
Mastering RAW histograms on mobile devices elevates your smartphone photography skills. Enable histogram overlays for real-time feedback and adjust exposure accordingly. Recognize exposure issues by analyzing the histogram's shape and distribution. Identify color channel clipping to prevent unwanted color shifts. Use highlights and shadows sliders to recover detail in post-processing. Optimize dynamic range by spreading tonal information across the histogram. Correct white balance issues using RAW file flexibility. Balance contrast for visual impact. Utilize histogram data in RAW editing apps to fine-tune your images. These pro tips will help you decode RAW histograms and unleash your smartphone's full photographic potential.
Understanding RAW Histogram Basics

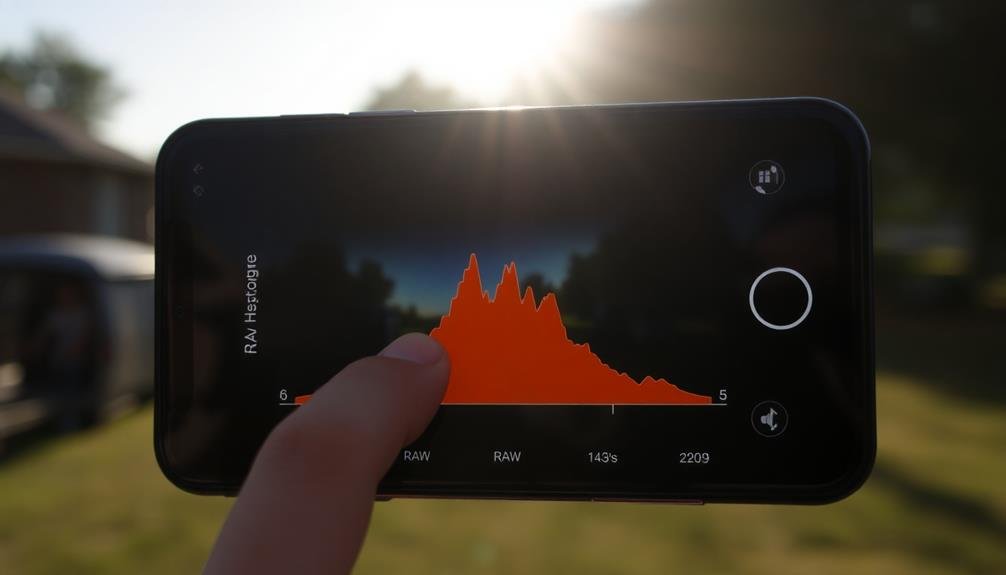
Nearly every modern smartphone camera offers RAW capture capabilities, giving photographers access to unprocessed image data. When you shoot in RAW, you're preserving all the information your camera's sensor captures, unlike JPEG which compresses and processes the image. This raw data includes a wealth of information, and one key tool for understanding it's the RAW histogram.
A RAW histogram is a graphical representation of the tonal range in your image. It shows the distribution of light and dark tones across your photo. On mobile devices, you'll typically see this as a graph with the x-axis representing brightness levels (from black on the left to white on the right) and the y-axis showing the number of pixels at each brightness level.
Unlike JPEG histograms, RAW histograms display the full dynamic range captured by your sensor. They're not affected by in-camera processing, so they give you a more accurate representation of the actual light data.
This makes them invaluable for evaluating exposure and determining if you've captured enough detail in both highlights and shadows.
Identifying Exposure Issues
Three key exposure issues can be quickly identified using RAW histograms on mobile devices: underexposure, overexposure, and clipping. When examining your histogram, look for these telltale signs:
| Issue | Histogram Appearance | Corrective Action |
|---|---|---|
| Underexposure | Left-skewed | Increase exposure |
| Overexposure | Right-skewed | Decrease exposure |
| Clipping | Peaks at edges | Adjust dynamic range |
| Balanced | Even distribution | No action needed |
| High Contrast | Twin peaks | Consider HDR technique |
For underexposure, you'll notice the histogram's data bunched up on the left side. This indicates a lack of detail in the shadows. To fix it, increase your exposure or ISO. Overexposure presents as data concentrated on the right side, signaling loss of highlight details. Correct this by reducing exposure or adjusting your shutter speed. Clipping occurs when data is pushed against either edge of the histogram, indicating lost information in extreme shadows or highlights. To address this, use exposure compensation or bracketing techniques. By learning to read these patterns, you'll quickly improve your mobile photography skills and capture better-exposed images in various lighting conditions.
Recognizing Color Channel Clipping
While recognizing overall exposure issues is essential, understanding color channel clipping can take your mobile photography to the next level.
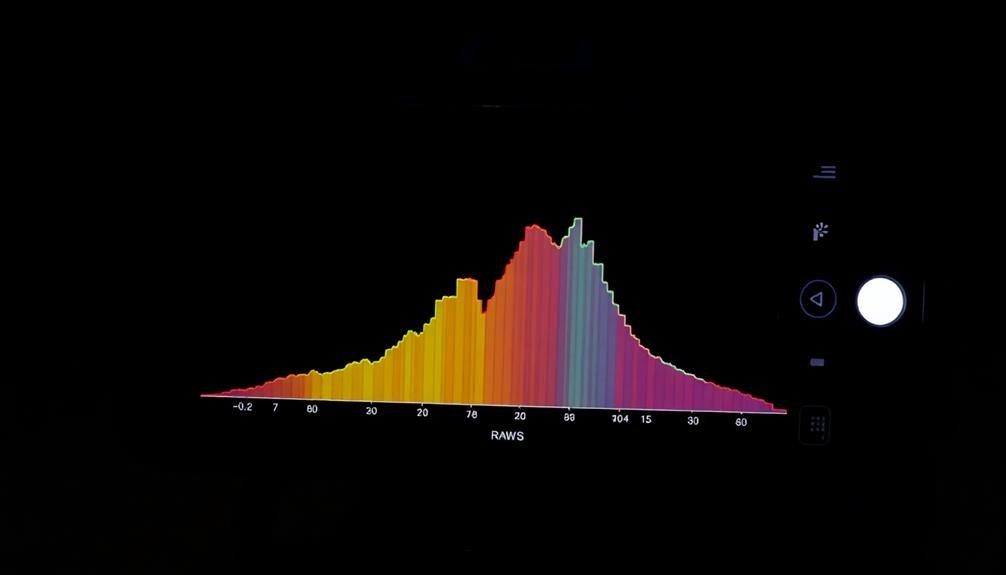
Color channel clipping occurs when one or more color channels (red, green, or blue) reach their maximum value, resulting in loss of detail and color information.
To identify color channel clipping in your RAW histogram, look for spikes at the far right edge for individual color channels. If you see a sharp peak for any color, it indicates that channel is clipped. This can lead to color shifts, loss of texture, and unnatural-looking highlights in your images.
Pay close attention to red channel clipping, which is common in sunrise and sunset shots. Green channel clipping often occurs in landscapes with lush foliage, while blue channel clipping may appear in sky-heavy scenes.
To address color channel clipping, use exposure compensation or adjust your composition to reduce the intensity of problematic colors.
Adjusting Highlights and Shadows
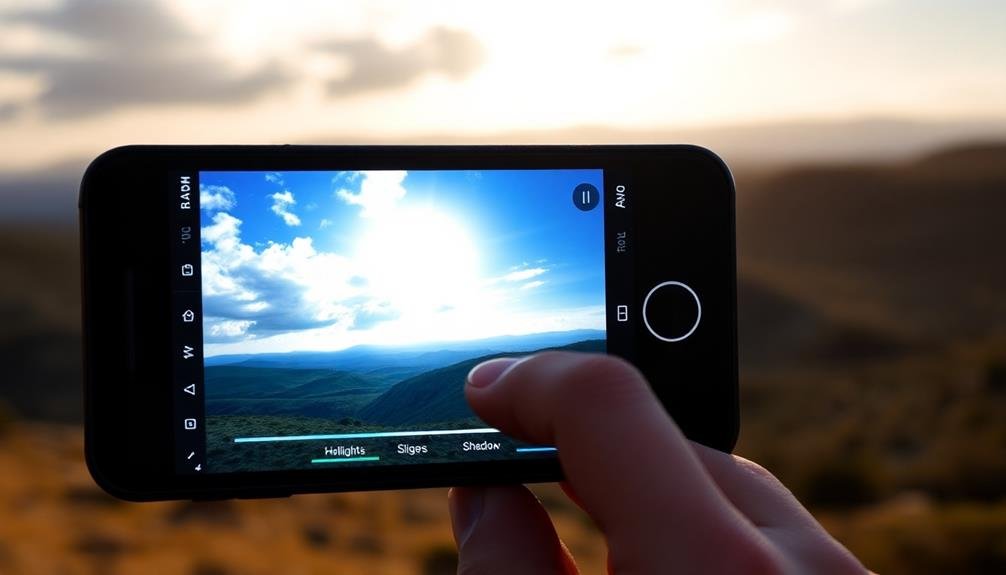
When adjusting highlights and shadows in your RAW mobile photos, you're aiming to recover lost details and balance exposure extremes.
You can bring back information in overexposed areas by carefully lowering the highlights, revealing texture and color that seemed lost.
Similarly, lifting the shadows can disclose hidden details in darker regions, creating a more balanced and visually appealing image overall.
Recover Lost Details
Despite the best efforts to capture a perfectly exposed image, you'll often find that some details are lost in the highlights or shadows. RAW files provide a remarkable advantage in recovering these lost details. When examining your histogram, look for areas where the graph touches the far left or right edges, indicating clipped shadows or blown-out highlights.
To recover shadow details, use the exposure and shadows sliders in your mobile editing app. Gradually increase these values while monitoring the histogram. You'll see the left side of the graph shift rightward as details emerge.
For blown highlights, reduce the exposure and lower the highlights slider. The right side of the histogram will move left, revealing previously hidden information.
Be cautious not to push the recovery too far, as this can introduce noise or unnatural-looking results. Use the histogram as a guide, but also trust your eyes. Sometimes, a slight loss of detail can be acceptable if it preserves the overall mood of the image.
Remember that RAW files offer considerably more latitude for recovery than JPEGs, so always shoot in RAW when possible to maximize your editing potential.
Balance Exposure Extremes
Balancing exposure extremes is a key skill in RAW editing, building on your ability to recover lost details. When you're faced with a histogram showing clipped highlights or shadows, you'll need to adjust these areas carefully to achieve a well-balanced image.
Start by reducing highlights if your histogram shows overexposure. This will bring back detail in bright areas like skies or reflective surfaces. Don't be afraid to pull the highlights down considerably; RAW files can handle it.
Next, lift the shadows to reveal details in darker areas. Be cautious not to overdo it, as this can introduce noise.
Use the blacks and whites sliders to fine-tune contrast. Lowering blacks can add depth, while raising whites can brighten the overall image without blowing out highlights.
As you make these adjustments, keep an eye on your histogram. You're aiming for a balanced distribution across the tonal range.
Analyzing Dynamic Range

Dynamic range stands at the heart of RAW histogram analysis on mobile devices. It represents the span between the darkest and brightest tones your camera can capture in a single image. When examining your RAW histogram, you'll want to assess how well your photo utilizes this range.
Look for a spread of data across the histogram. If it's bunched up on one side, you're likely losing detail in shadows or highlights. Aim for a balanced distribution, but remember that not all scenes have equal tonal ranges. Use the histogram as a guide, not a strict rule.
| Histogram Range | Tonal Representation | Potential Issues | Adjustments |
|---|---|---|---|
| Left Side | Shadows | Crushed blacks | Lift shadows |
| Center | Midtones | Flat contrast | Adjust contrast |
| Right Side | Highlights | Blown-out areas | Recover highlights |
| Full Spread | Full dynamic range | None | Fine-tune as needed |
Pay attention to any clipping on either end of the histogram. This indicates loss of detail in extreme shadows or highlights. If you see this, consider bracketing your shots or using HDR techniques to capture the full dynamic range of the scene. Remember, your mobile device's RAW capabilities can often recover more detail than you might expect, so don't be afraid to push the boundaries of your exposure.
Balancing Contrast in Post-Processing
After capturing your RAW image, the real magic happens in post-processing. When balancing contrast, you'll rely heavily on your RAW histogram to guide your adjustments.
Start by examining the overall distribution of tones. If your histogram shows a lack of contrast, with most data clustered in the middle, you'll want to expand the tonal range.
Use the blacks and whites sliders to set your image's darkest and brightest points, respectively. This will stretch the histogram, increasing overall contrast.
Next, fine-tune the shadows and highlights to reveal details in these areas without clipping. Pay close attention to the histogram's edges to avoid losing information.
For more nuanced control, adjust the midtones using the exposure and contrast sliders. This will affect the central portion of your histogram.
As you make changes, watch how the histogram shifts and reshapes. Your goal is to achieve a balanced distribution of tones across the entire range.
Utilizing Histogram Overlays

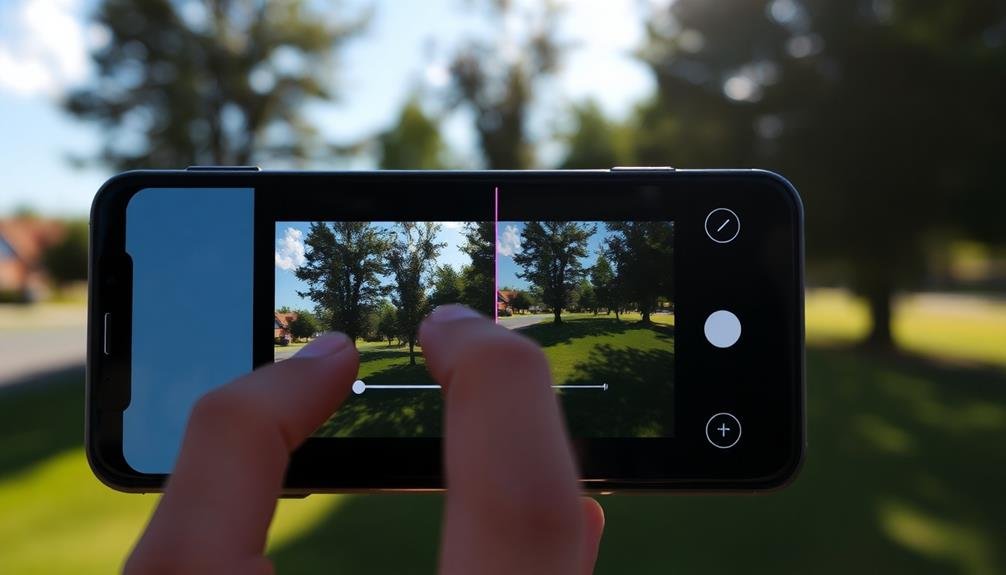
Ever wondered how to get real-time feedback on your exposure while shooting? Histogram overlays are your answer. They provide a visual representation of your image's tonal distribution directly on your mobile device's screen.
To utilize histogram overlays effectively, enable this feature in your camera app settings. As you frame your shot, you'll see a graph superimposed on the viewfinder. This graph shows the distribution of pixels from shadows (left) to highlights (right).
Pay attention to the histogram's shape and position. A well-exposed image typically has a balanced distribution across the graph. If you see spikes at either end, it indicates clipping in shadows or highlights.
Use the histogram to make real-time adjustments. If it's skewed left, increase exposure. If it's skewed right, decrease exposure.
For high-contrast scenes, aim for a histogram that touches both edges without sharp cutoffs.
Correcting White Balance Issues

While histograms help you nail exposure, they won't catch white balance issues. To address this, you'll need to rely on your eyes and the RAW file's flexibility. Look for color casts in neutral areas of your image, such as white or gray surfaces. If you spot a tint, you can adjust the white balance in post-processing.
Many mobile RAW editing apps offer white balance presets like daylight, cloudy, or tungsten. These can serve as starting points, but don't hesitate to fine-tune manually. Adjust the temperature slider to correct blue-orange shifts and the tint slider for green-magenta casts.
Remember, RAW files retain all color information, giving you significant leeway in correcting white balance without degrading image quality. If you're unsure, shoot a gray card or white balance target in the same lighting conditions as your subject. This reference can guide your adjustments later.
For tricky lighting situations, like mixed light sources, you may need to apply local white balance corrections. Some advanced mobile editing apps allow you to selectively adjust white balance in specific areas of your image, ensuring color accuracy across the frame.
Optimizing Tonal Distribution

Optimizing tonal distribution in your RAW images is essential for achieving balanced and visually appealing results. When you examine your histogram, aim for a balanced spread across the entire range, avoiding heavy clustering at either end.
If you notice peaks at the extremes, you're likely dealing with clipped highlights or crushed shadows.
To optimize tonal distribution, use your mobile editing app's exposure and contrast controls. Adjust the exposure slider to shift the overall histogram left or right, ensuring important details aren't lost in the shadows or highlights.
Fine-tune with the highlights and shadows sliders to recover detail in these areas.
Don't forget about the midtones. Use the contrast slider to add separation between tonal regions, but be careful not to create an unnatural look.
The whites and blacks sliders can help you set precise end points for your tonal range.
Mastering RAW Editing Apps

Now that you've grasped the basics of histogram analysis, it's time to plunge into the world of RAW editing apps. These powerful tools allow you to release the full potential of your RAW files, giving you unprecedented control over your images' tonal range and color.
Start by familiarizing yourself with popular RAW editing apps like Lightroom Mobile, Snapseed, or Capture One. Each app has its unique interface and features, so experiment to find the one that suits your workflow best.
Focus on mastering key adjustments such as exposure, highlights, shadows, whites, and blacks. These controls directly affect your histogram, so watch how it changes as you make adjustments.
Don't forget to explore advanced features like tone curves, color grading, and local adjustments. These tools can help you fine-tune your image's tonal distribution and create stunning visual effects.
As you work, keep an eye on the histogram to guarantee you're not clipping highlights or shadows. Remember, the goal is to achieve a balanced tonal range that enhances your creative vision while maintaining image quality.
Frequently Asked Questions
Can RAW Histograms Be Used for Video Editing on Mobile Devices?
Yes, you can use RAW histograms for video editing on mobile devices. They'll help you analyze exposure and color distribution in your footage. You'll be able to make more precise adjustments to enhance your video's visual quality.
How Do RAW Histograms Differ Between Different Mobile Camera Brands?
You'll find that raw histograms vary between mobile camera brands. They'll differ in detail, range, and accuracy. Some brands offer more extensive data, while others might simplify. It's important to familiarize yourself with your specific device's capabilities.
Are There Any Downsides to Relying Too Heavily on RAW Histograms?
You're risking missing the artistic aspects of photography if you rely too heavily on RAW histograms. They're just tools, not rules. Don't let them stifle your creativity or make you overlook the emotional impact of an image.
Can RAW Histograms Help in Achieving Specific Artistic Styles in Photography?
Yes, raw histograms can help you achieve specific artistic styles. They'll guide you in manipulating exposure, contrast, and tonal range. You can create moody, high-key, or low-key images by adjusting your shot based on histogram data.
How Do RAW Histograms Compare to JPEG Histograms for Mobile Editing?
You'll find raw histograms offer more accurate data than JPEG histograms for mobile editing. They show a wider range of tones and colors, allowing you to make more precise adjustments and recover details in highlights and shadows.
In Summary
You've now mastered the art of decoding RAW histograms on your mobile device. Armed with these pro tips, you'll be able to spot exposure issues, correct color imbalances, and optimize your images' dynamic range on the go. Remember, practice makes perfect. Don't be afraid to experiment with different apps and settings. As you continue to refine your skills, you'll find that RAW histograms become an indispensable tool in your mobile photography arsenal.


Leave a Reply