
To capture great restaurant photos on your phone, start with natural light to enhance colors and textures. Frame your shots using composition techniques like the rule of thirds and leading lines. Focus on food details, showcasing unique ingredients and plating artistry. Don't forget to capture the restaurant's ambiance through lighting and decor. Experiment with different angles, from overhead to eye-level, to add variety. Time your shots well, capturing dishes when they first arrive. Highlight seasonal ingredients and include people for context. By telling a visual story, you'll create compelling images that truly represent the dining experience. Mastering these techniques will elevate your food photography to new heights.
Natural Light Is Key

Many professional food photographers swear by natural light for capturing stunning restaurant photos. You'll find that natural light enhances the colors, textures, and details of your dishes, creating a more appetizing and authentic look.
To make the most of natural light, try to sit near a window during your restaurant visit. If possible, choose a table that's not in direct sunlight, as this can create harsh shadows and overexpose your images.
When using natural light, you'll want to avoid using your phone's flash, which can flatten the image and create unnatural reflections. Instead, experiment with different angles to find the best lighting for your dish. You might need to adjust your position or move the plate slightly to avoid unwanted shadows.
If you're dining in a dimly lit restaurant, don't be afraid to ask your server if you can briefly move your dish to a better-lit area for a quick photo. Most establishments are happy to accommodate this request.
Composition and Framing Techniques

Once you've mastered lighting, it's time to focus on composition and framing techniques to elevate your restaurant photos. The way you arrange elements within your shot can make or break an image.
Start by considering the rule of thirds: imagine a 3×3 grid over your screen and place key elements along these lines or at their intersections. This creates a more balanced and visually appealing composition.
Don't be afraid to experiment with angles. Instead of shooting straight on, try taking photos from above or at a slight angle to add depth and interest. Pay attention to leading lines in the restaurant, such as table edges or architectural features, to guide the viewer's eye through the image.
When framing your shot, consider these tips:
- Leave some negative space around the main subject to avoid a cluttered look
- Use natural frames like doorways or windows to draw attention to your subject
- Incorporate interesting background elements to add context and atmosphere
Focus on Food Details

When focusing on food details, you'll want to capture the texture and color of each dish.
Pay close attention to unique ingredients that make the plate stand out. You can use macro lenses or close-up shots to highlight intricate elements, ensuring your photos showcase the chef's artistry and attention to detail.
Capture Texture and Color
Close-up shots of food can transform your restaurant photos from ordinary to extraordinary. When capturing texture and color, focus on the intricate details that make each dish unique.
Use natural light whenever possible to showcase the true hues and surfaces of the food. If you're indoors, position yourself near a window to take advantage of soft, diffused light that enhances the dish's appearance without harsh shadows.
To capture texture effectively, adjust your angle and distance from the plate. Get up close to highlight the crust of a perfectly seared steak or the flaky layers of a croissant. Experiment with different perspectives to find the most appealing view of each dish.
When emphasizing color, consider the following:
- Contrast: Place vibrant ingredients next to neutral-toned elements for visual impact
- Complementary colors: Arrange foods with opposite hues on the color wheel together
- Saturation: Adjust your phone's settings to enhance color vibrancy without overdoing it
Highlight Unique Ingredients
Every dish has its star ingredients that make it stand out. When photographing restaurant meals, focus on these unique elements to create eye-catching images. Look for unusual or exotic ingredients that might intrigue viewers. Zoom in on colorful spices, rare fruits, or specialty cuts of meat to showcase what makes the dish special.
Don't be afraid to get close to your subject. Use your phone's macro mode or manually focus on small details like herbs, garnishes, or texture variations. Capture the sheen of a perfectly cooked piece of fish or the glistening droplets on fresh produce. Highlight the vibrant colors of fresh vegetables or the rich hues of artisanal sauces.
If a dish features a signature ingredient, make it the focal point of your shot. This could be a unique cheese, a rare mushroom variety, or a house-made condiment. Position these elements prominently in the frame to draw attention to them.
Capture the Restaurant Ambiance
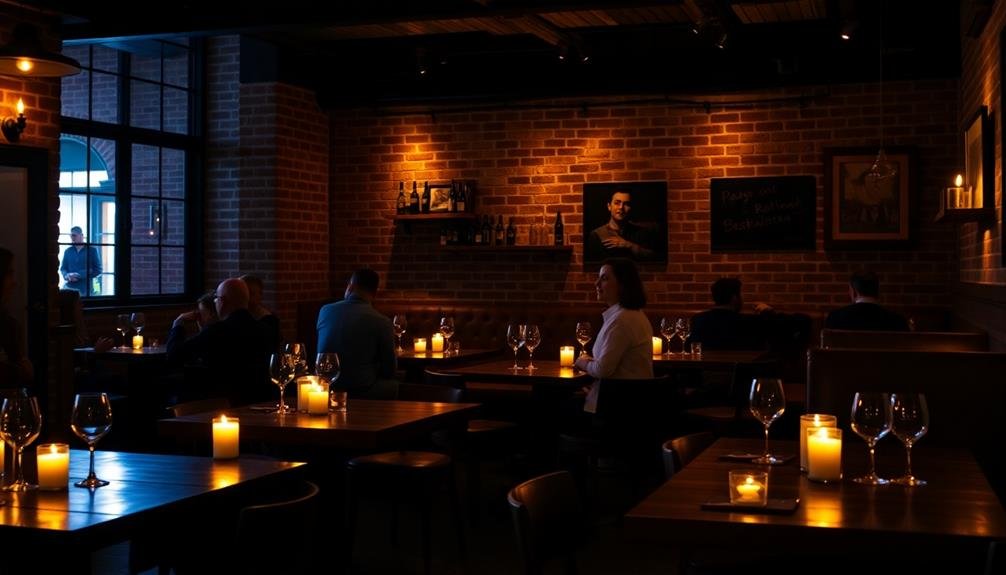
When capturing a restaurant's ambiance, pay close attention to the lighting, as it sets the mood for your photos.
You'll want to showcase the unique decor elements that give the establishment its character.
Lighting Sets the Mood
Setting the right mood through lighting is essential for capturing a restaurant's ambiance in your photos. Pay attention to the lighting conditions and adjust your phone's camera settings accordingly. Warm, soft lighting often creates an inviting atmosphere, while bright, harsh lighting can make the space feel sterile.
Look for interesting light sources like candles, pendant lamps, or string lights to add depth and character to your shots.
To capture the perfect mood, consider these lighting techniques:
- Use natural light when possible, especially during the "golden hour" just before sunset.
- Experiment with your phone's exposure settings to balance bright and dark areas.
- Try shooting from different angles to capture the interplay of light and shadow.
Don't be afraid to move around the restaurant to find the best lighting. Sometimes, the most enchanting shots come from unexpected corners or perspectives.
If the lighting is too dim, avoid using your phone's flash, as it can wash out the scene and destroy the ambiance. Instead, try using a friend's phone as a secondary light source or gently adjusting nearby light fixtures to enhance the mood.
Capturing Unique Decor Elements
Striking decor elements can elevate a restaurant's ambiance and make for eye-catching photos. When capturing unique decor, focus on stand-out features that define the restaurant's character. Look for interesting light fixtures, artwork, or architectural details that set the space apart.
To create compelling images, experiment with different angles and perspectives. Get up close to showcase intricate textures or step back to capture the overall design scheme. Don't forget to include elements that tell the restaurant's story, such as vintage signage, custom murals, or themed accessories.
Here's a quick guide to capturing various decor elements:
| Element Type | Close-up Shot | Wide-angle Shot |
|---|---|---|
| Light Fixtures | Highlight details | Show placement |
| Wall Art | Focus on texture | Capture full piece |
| Table Settings | Showcase uniqueness | Display entire table |
| Architectural Features | Emphasize craftsmanship | Reveal spatial context |
Remember to keep your photos well-balanced and avoid cluttered compositions. By highlighting unique decor elements, you'll give viewers a sense of the restaurant's atmosphere and style, enticing them to visit and experience it for themselves.
Experiment With Different Angles

Once you've mastered the basics of food photography, it's time to push your creativity further by experimenting with different angles.
Don't just settle for the standard overhead shot; explore various perspectives to add depth and interest to your restaurant photos. Try getting low and shooting upwards to make dishes appear more imposing, or capture a side view to highlight layers in a burger or cake.
Remember that changing your angle can dramatically alter the mood and story of your image. A bird's-eye view might showcase the restaurant's table setting, while a close-up at eye level can emphasize the textures of a particular dish.
Here are three unique angles to try:
- The 45-degree angle: Position your phone at a 45-degree angle to the table, capturing both the top and side of the dish.
- The diner's perspective: Hold your phone at eye level as if you're about to take a bite.
- The macro shot: Get extremely close to focus on intricate details like herb garnishes or sauce droplets.
Edit With Mobile Apps

After capturing your restaurant photos, you'll often need to enhance them before sharing. Mobile editing apps offer powerful tools to elevate your images right on your phone.
Start with basic adjustments like brightness, contrast, and saturation to make your food pop. Crop your photos to improve composition and remove distracting elements.
Apps like Snapseed, VSCO, and Lightroom Mobile provide advanced features for fine-tuning your shots. Use selective editing to brighten specific areas or add warmth to create a cozy ambiance.
Experiment with filters, but apply them subtly to maintain a natural look. Don't forget to sharpen your images slightly to enhance details in textures and plating.
For a cohesive Instagram feed, consider using preset filters or developing a consistent editing style. Pay attention to white balance to guarantee accurate food colors.
If your photo seems dull, try increasing the vibrancy to make the colors more appetizing. Finally, use the healing tool to remove any imperfections or unwanted elements.
With practice, you'll develop a quick and effective editing routine to showcase your restaurant experiences beautifully.
Showcase Unique Presentation Styles
When showcasing unique presentation styles in your restaurant photos, pay close attention to plating techniques.
You'll want to capture the chef's artistry in arranging each dish, highlighting the careful composition and balance of elements.
Don't forget to focus on creative garnishes, as these often add visual flair and can make your food photos truly stand out.
Plating Techniques Matter
A plate is a canvas for culinary artists. Plating techniques are essential in creating visually appealing dishes that'll make your restaurant photos stand out. When capturing these culinary masterpieces, you'll want to focus on the chef's intentional design and arrangement of food elements.
Pay attention to how the chef uses different plating techniques to enhance the visual appeal of the dish. Look for:
- Asymmetrical balance: Observe how chefs create visual interest by placing food off-center or using negative space.
- Color contrasts: Notice the deliberate use of complementary or contrasting colors to make ingredients pop.
- Texture variations: Spot the interplay of smooth, rough, and varied textures throughout the dish.
As you photograph, capture these plating techniques by adjusting your angle and focus. Try shooting from directly above to showcase the overall composition, or get close to highlight specific details.
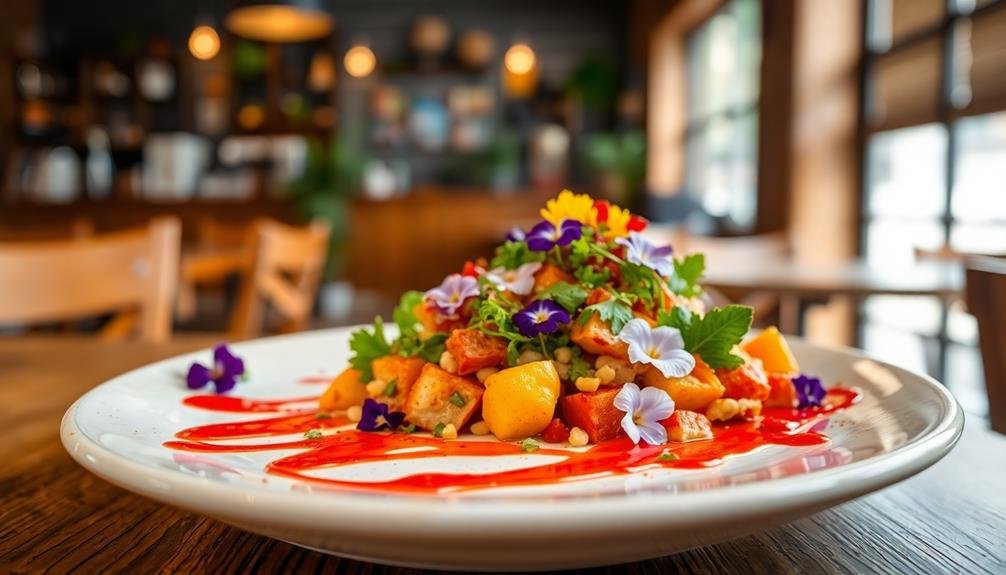
Capturing Creative Garnishes
Creative garnishes elevate plating techniques to new heights, adding that final touch of artistry to a dish. When capturing these intricate details, focus on the unique elements that make the presentation stand out. Look for vibrant edible flowers, delicate herb sprigs, or colorful microgreens that chefs use to enhance the visual appeal of their creations.
To showcase these garnishes effectively, try different angles and perspectives. Get up close to capture the texture of a citrus zest curl or the sheen of a balsamic reduction drizzle. Experiment with overhead shots to highlight the symmetry or asymmetry of garnish placement. Don't forget to adjust your phone's focus to guarantee the garnishes are sharp and clear.
Lighting plays an essential role in emphasizing garnishes. Natural light is ideal, but if you're in a dimly lit restaurant, use your phone's flash judiciously or ask a friend to provide additional light with their phone. This can help bring out the colors and textures of the garnishes without washing out the entire dish.
Timing Your Shots

Timing is essential when capturing great restaurant photos. You'll want to be ready to snap your shots as soon as the food arrives at your table. Fresh dishes look their best, with steam rising, sauces glistening, and garnishes perfectly placed.
Don't let the food sit too long, or it may start to look less appetizing. Consider the lighting conditions in the restaurant. If you're near a window, take advantage of natural light during the day. In the evening, you might need to use your phone's flash or a small portable light to illuminate the dish.
Be mindful of other diners and avoid disrupting their experience with bright flashes. Here are three key moments to capture:
- The dish's arrival: Photograph the plate as soon as it's set down
- The first bite: Capture the moment just before you dig in
- The halfway point: Show the dish partially eaten for a more authentic look
Remember to be discreet and efficient with your photography. Take a few quick shots from different angles, then put your phone away and enjoy your meal.
The best restaurant photos balance capturing the moment with savoring the experience.
Highlight Seasonal Ingredients

While capturing great restaurant photos, don't forget to highlight seasonal ingredients. These fresh, timely components can elevate your images and make them more appealing to viewers. Look for dishes that showcase the best of the current season, whether it's vibrant spring asparagus, juicy summer tomatoes, or hearty autumn squash.
When you spot a seasonal ingredient, make it the star of your shot. Frame your photo to emphasize the unique colors, textures, and presentation of these special items. Try different angles to capture the essence of the ingredient, such as a close-up of glistening berries or a wider shot of a colorful salad bursting with seasonal produce.
Don't hesitate to ask your server about the seasonal specials or unique ingredients featured in the menu. This information can help you identify the best dishes to photograph and share interesting details in your captions.
Include People for Context
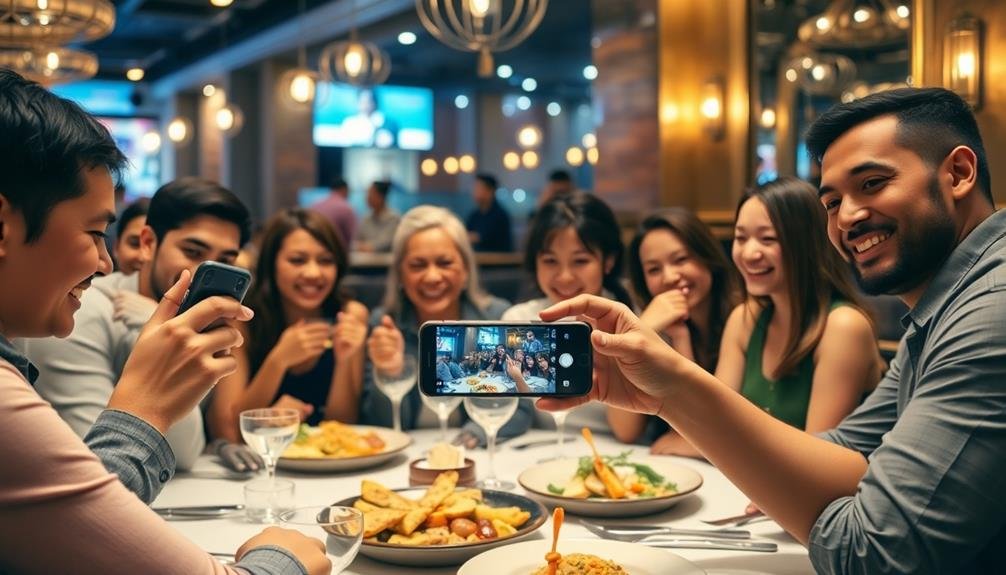
Restaurant-goers can add valuable context to your food photography. By including people in your shots, you'll capture the atmosphere and social aspect of dining out. It's not just about the food; it's about the experience.
When you're framing your photo, look for opportunities to include diners in the background or servers interacting with guests. This human element brings your photos to life and tells a more complete story of the restaurant.
Don't be afraid to ask your dining companions to pose with their meals. Candid shots of people enjoying their food can be particularly compelling. Remember to respect others' privacy and always ask permission before photographing strangers.
Here are three ways to effectively include people in your restaurant photos:
- Capture hands reaching for shared dishes, showcasing the communal dining experience
- Frame a server presenting a signature dish or cocktail to add a sense of ceremony
- Photograph diners at nearby tables to give a feel for the restaurant's ambiance and clientele
Tell a Story Through Images

Beyond capturing individual dishes, great restaurant photography tells a compelling story. When you're shooting restaurant photos, think about the narrative you want to convey. Start with the exterior shot to set the scene, then move inside to capture the ambiance.
Show the progression of a meal, from appetizers to desserts, as if you're guiding viewers through the dining experience.
Don't forget to include behind-the-scenes moments. Snap a photo of the chef in action or the bartender crafting a signature cocktail. These images add depth to your story and give viewers a peek into the restaurant's inner workings.
Capture interactions between staff and diners to showcase the establishment's hospitality.
Use a variety of angles and perspectives to keep your visual story engaging. Mix close-ups of food details with wider shots of the dining room.
Pay attention to lighting changes throughout the meal, from the warm glow of sunset to the intimate atmosphere of dinner service.
Frequently Asked Questions
Is It Acceptable to Use Flash When Taking Restaurant Photos?
It's generally not acceptable to use flash when taking restaurant photos. You'll disturb other diners and potentially ruin the ambiance. Instead, try using natural light or adjusting your camera settings for low-light conditions. Be respectful of others' dining experiences.
How Can I Avoid Disturbing Other Diners While Photographing My Meal?
You can avoid disturbing others by being discreet. Turn off your flash, silence your phone, and take quick shots. Don't stand or move around. Be mindful of your surroundings and respect other diners' privacy and experience.
Should I Ask for Permission Before Photographing Restaurant Interiors?
You should ask for permission before photographing restaurant interiors. It's polite and may be required by the establishment. Some places have policies against interior photos, so it's best to check with staff first to avoid any issues.
Are There Specific Camera Settings Recommended for Low-Light Restaurant Environments?
For low-light restaurant photos, you'll want to increase your ISO, widen your aperture, and slow your shutter speed. Don't forget to steady your phone or use night mode. Experiment with manual settings if available on your device.
How Can I Make Drinks and Beverages Look More Appealing in Photos?
You can make drinks look more appealing by using good lighting, focusing on the glass's details, and adding garnishes. Try different angles, capture condensation or bubbles, and use a clean background to highlight the beverage's colors and textures.
In Summary
You've now got the tools to take stunning restaurant photos with your phone. Remember, it's all about natural light, composition, and capturing the details. Don't forget to showcase the ambiance and experiment with angles. Time your shots well, highlight seasonal ingredients, and include people for context. By telling a story through your images, you'll create mouth-watering photos that'll make everyone wish they were dining alongside you. Keep practicing, and you'll soon be a pro!


Leave a Reply