
To apply the rule of thirds in mobile photos, start by activating your camera's grid overlay. Next, position your main subject at one of the four intersections created by the grid lines. When shooting landscapes, align the horizon with either the upper or lower horizontal line. Frame your shots by placing key elements along the grid lines or at intersection points. Finally, use negative space effectively by positioning your subject off-center and allowing empty areas to balance the composition. These techniques will help you create more visually appealing and balanced images. Mastering these five approaches will elevate your mobile photography to new heights.
Activate Grid Overlay
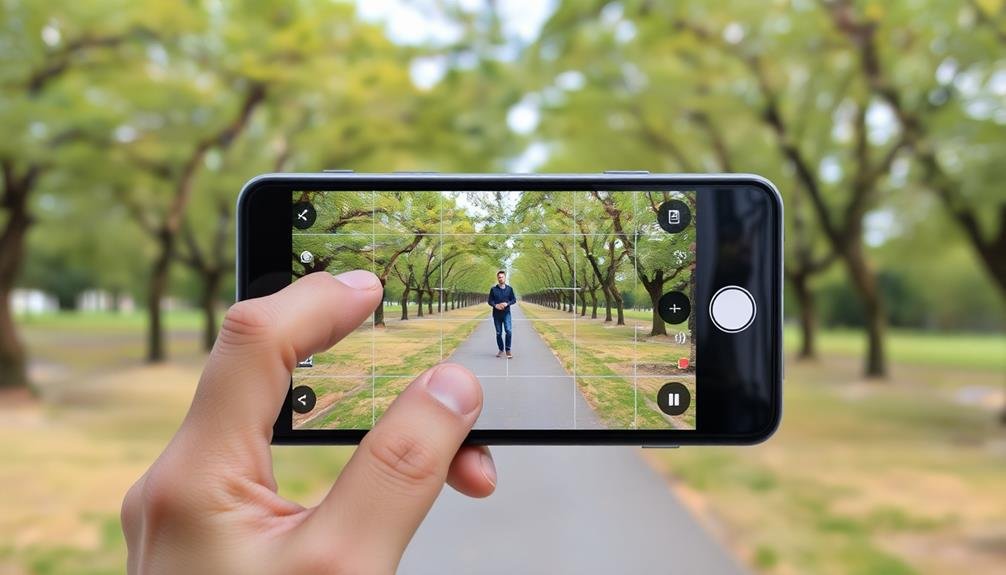
How do you start applying the rule of thirds to your mobile photos? The first step is to activate the grid overlay on your smartphone's camera app. This feature divides your screen into a 3×3 grid, making it easier to compose your shots according to the rule of thirds.
For iPhone users, go to Settings > Camera > Grid and toggle it on. Android users can typically find this option within their camera app's settings menu.
Once activated, you'll see two horizontal and two vertical lines on your screen, creating nine equal rectangles. These gridlines serve as your composition guides.
Place key elements of your image along these lines or at their intersections. This technique creates a more balanced and visually appealing photo than simply centering your subject.
Align Subjects on Intersections

With the grid overlay activated, you're ready to implement the core principle of the rule of thirds: aligning subjects on intersections. These intersections, where the gridlines meet, are the focal points that naturally draw the viewer's eye. By positioning key elements of your photo on or near these points, you'll create more visually appealing and balanced compositions.
When framing your shot, consider these tips:
- Place your main subject at one of the four intersections
- Align horizons along the horizontal lines
- Position vertical elements along the vertical lines
- Use negative space to enhance the subject's prominence
Don't feel constrained to always center your subject. Instead, experiment with off-center compositions. For portraits, try aligning the subject's eyes with the upper intersections.
In landscape photos, place the horizon on the upper or lower horizontal line, depending on whether you want to emphasize the sky or foreground. For action shots, leave space in front of the moving subject by placing them on the opposite side of the direction they're heading.
Place Horizon Along Grid Lines

Horizon placement is a crucial aspect of applying the rule of thirds in mobile photography. When you're composing a landscape or outdoor shot, resist the urge to center the horizon. Instead, align it with either the upper or lower horizontal grid line. This simple adjustment can dramatically improve your image's visual appeal and balance.
If you want to emphasize the sky, place the horizon along the lower third line. This works well for scenes with dramatic clouds, colorful sunsets, or interesting aerial elements.
Conversely, if the ground is your focus, align the horizon with the upper third line. This technique highlights foreground details like flowers, rocks, or reflections in water.
Frame Landscapes With Thirds
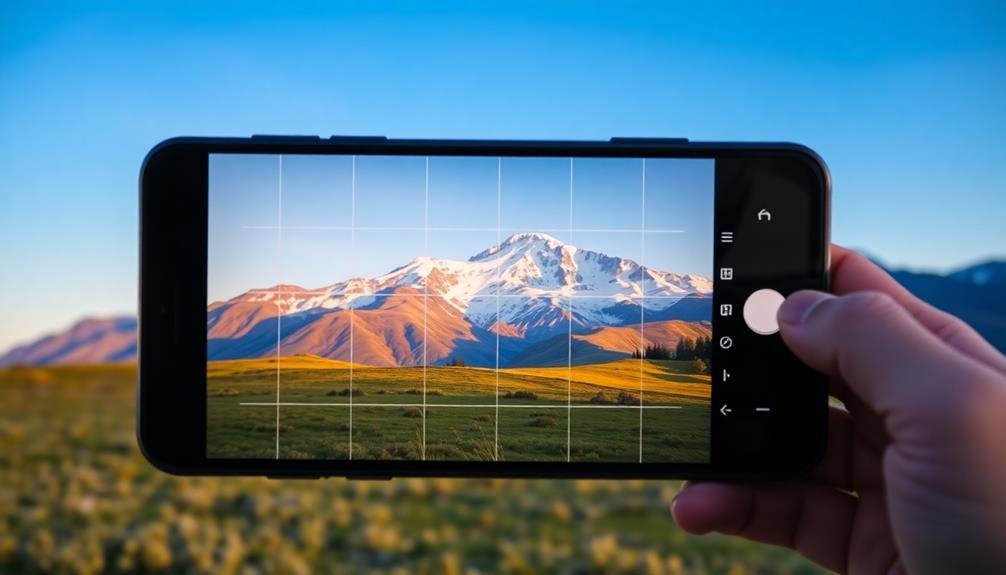
Framing landscapes using the rule of thirds can elevate your mobile photography from good to great. When you're capturing a sweeping vista or a serene natural scene, resist the urge to center your main subject. Instead, position key elements along the imaginary grid lines or at their intersections.
For instance, place a lone tree or a mountain peak at one of the vertical third lines. This creates a more dynamic and visually appealing composition. You'll find that your landscape photos become more balanced and draw the viewer's eye through the scene naturally.
Consider these tips when framing landscapes with thirds:
- Place the horizon on the upper or lower third line, not in the center
- Position prominent features like trees, buildings, or rock formations at intersection points
- Use leading lines that start near a corner and flow towards the opposite third
- Leave space in the direction your subject is facing or moving
Use Negative Space Effectively

Negative space can be a powerful tool when applying the rule of thirds to your mobile photos. It's the empty area surrounding your main subject, and when used effectively, it can create striking compositions.
To incorporate negative space with the rule of thirds, position your subject along one of the gridlines or at an intersection point, leaving the rest of the frame intentionally empty. This technique draws attention to your subject while creating a sense of balance and breathing room in your image.
You'll often find negative space in the sky, water, or plain backgrounds. When shooting, look for opportunities to place your subject off-center and let the emptiness tell part of the story.
Experiment with different ratios of subject to negative space. Sometimes, a small subject surrounded by vast empty space can create a powerful image. Other times, you might want a more balanced approach.
Pay attention to the edges of your frame, ensuring that the negative space doesn't contain distracting elements. Remember, the goal is to use emptiness purposefully to enhance your composition and guide the viewer's eye to your subject.
Frequently Asked Questions
Can the Rule of Thirds Be Broken for Creative Effect?
Yes, you can break the rule of thirds for creative effect. It's a guideline, not a strict law. By deliberately placing subjects off-center or using unconventional compositions, you'll create unique, eye-catching images that stand out from the norm.
How Does the Rule of Thirds Work With Portrait-Oriented Photos?
When shooting portrait-oriented photos, you'll apply the rule of thirds vertically. Imagine two horizontal lines dividing your frame into thirds. Place your subject's eyes or key features along these lines or at their intersections for compelling compositions.
Are There Apps That Help Apply the Rule of Thirds Automatically?
Yes, there are apps that help with the rule of thirds. You'll find many camera apps with built-in grids or overlays. Some even offer automatic composition suggestions. Try apps like Camera+ 2, VSCO, or ProCamera for easy rule of thirds application.
Does the Rule of Thirds Apply to All Types of Photography?
While the rule of thirds is widely applicable, it's not a strict rule for all photography. You'll find it useful in many situations, but don't be afraid to break it when your creative vision calls for a different approach.
How Can I Practice the Rule of Thirds Without a Grid Overlay?
You can practice the rule of thirds without a grid by visualizing imaginary lines dividing your frame. Look for natural lines in your scene, and place key elements at their intersections. Try framing subjects off-center to develop your eye.
In Summary
You've now got the tools to elevate your mobile photography using the rule of thirds. Remember, it's not a rigid law but a guideline to enhance your compositions. As you practice, you'll develop an intuitive sense of balance and visual appeal. Don't be afraid to experiment and break the rules occasionally. With these techniques in your arsenal, you're well on your way to capturing more engaging and professional-looking photos with your smartphone.


Leave a Reply