
To capture stunning silhouettes with your mobile phone, start by finding strong backlight sources and simplifying your subject's shape. Use negative space effectively and frame within natural elements to enhance composition. Experiment with different angles and incorporate leading lines to guide the viewer's eye. Play with symmetry and reflections for added visual interest. Create depth by layering silhouettes and leverage HDR technology to preserve details. Don't forget to adjust your camera settings for ideal exposure. With practice, you'll master the art of capturing dramatic silhouettes that tell compelling stories. Dive deeper to reveal even more techniques for breathtaking mobile silhouette photography.
Find Strong Backlight Sources

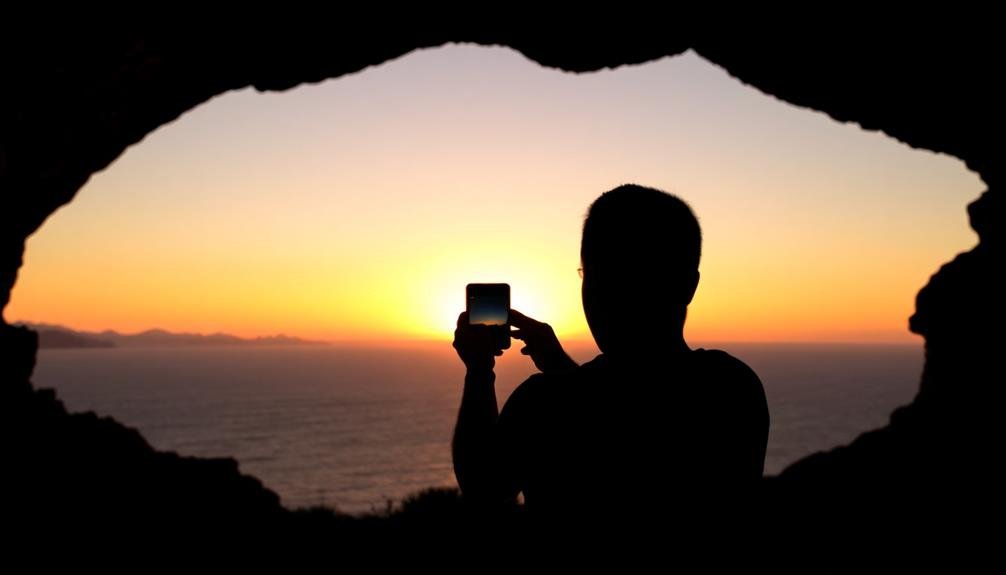
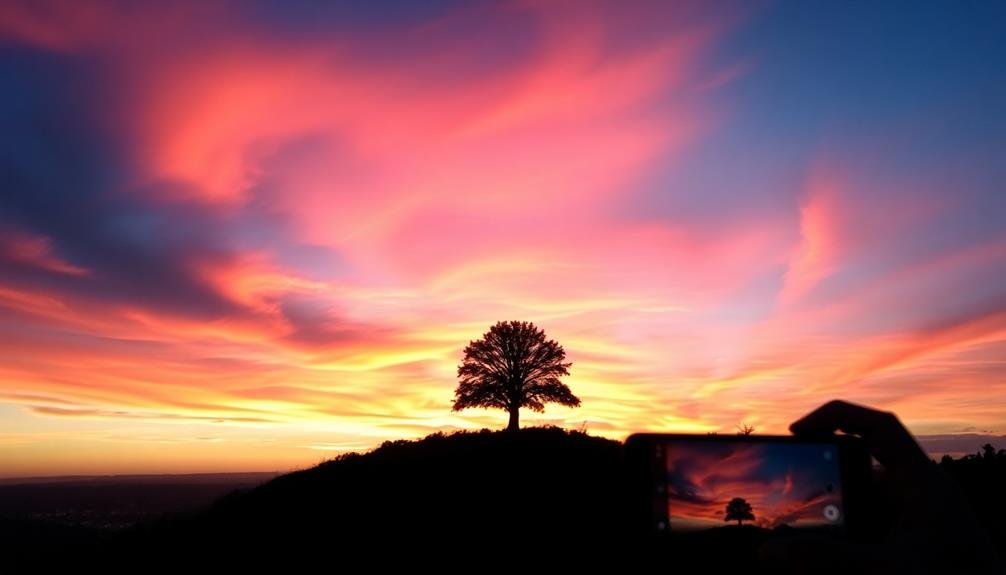
Strong backlighting is the key to creating striking silhouettes with your mobile phone. To achieve this effect, you'll need to locate powerful light sources that can illuminate your subject from behind. The sun is your best natural option, especially during golden hour just after sunrise or before sunset.
Position yourself so that the sun is directly behind your subject, creating a dramatic contrast between the bright background and the darkened foreground.
If you're shooting indoors or at night, look for artificial light sources that can serve the same purpose. Street lamps, car headlights, or even a bright window can provide the necessary backlighting for your silhouette shots.
When using artificial light, pay attention to the intensity and direction of the light to guarantee it properly outlines your subject.
Don't forget to experiment with different angles and positions relative to your light source. Moving slightly to the left or right can dramatically change the way light wraps around your subject, affecting the silhouette's shape and definition.
Simplify Your Subject's Shape
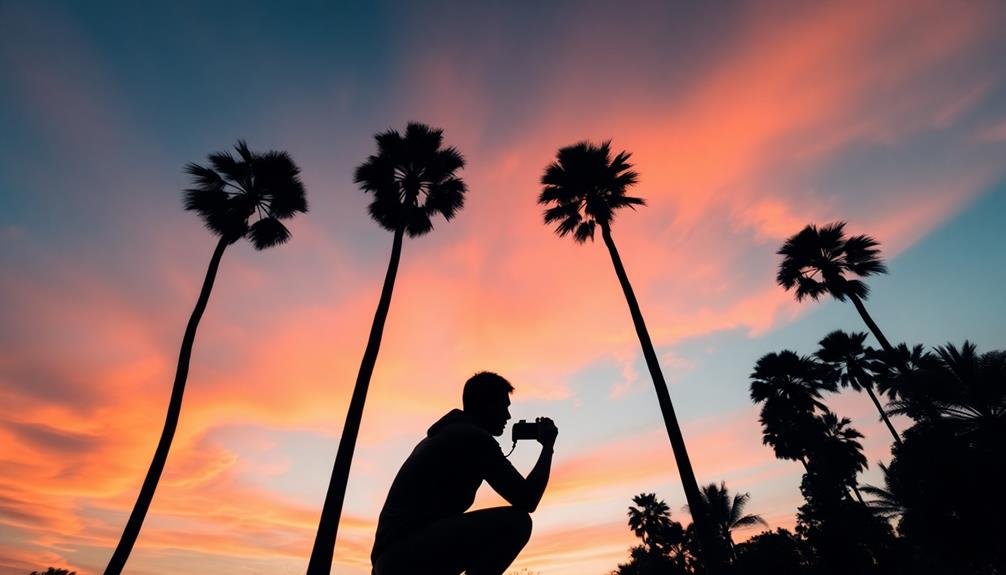
When creating silhouettes, simplicity is key. You'll want to focus on subjects with easily recognizable shapes that stand out against the background. Look for clean lines and distinct forms that will translate well into a dark outline. People, trees, animals, and architectural elements often make excellent silhouette subjects.
To simplify your subject's shape, position yourself to capture the most iconic angle. For human subjects, try profile shots or full-body poses with clear separation between limbs. When photographing animals, wait for moments when their ears, tails, or legs create distinct outlines.
For buildings or structures, seek out angles that emphasize their unique architectural features.
Remove distracting elements from the frame that might clutter the silhouette. Move around to find a cleaner background or change your perspective to isolate the subject. If you're shooting groups, guarantee there's space between individuals to maintain clear outlines.
Don't be afraid to ask your subjects to adjust their poses for better definition.
Use Negative Space Effectively
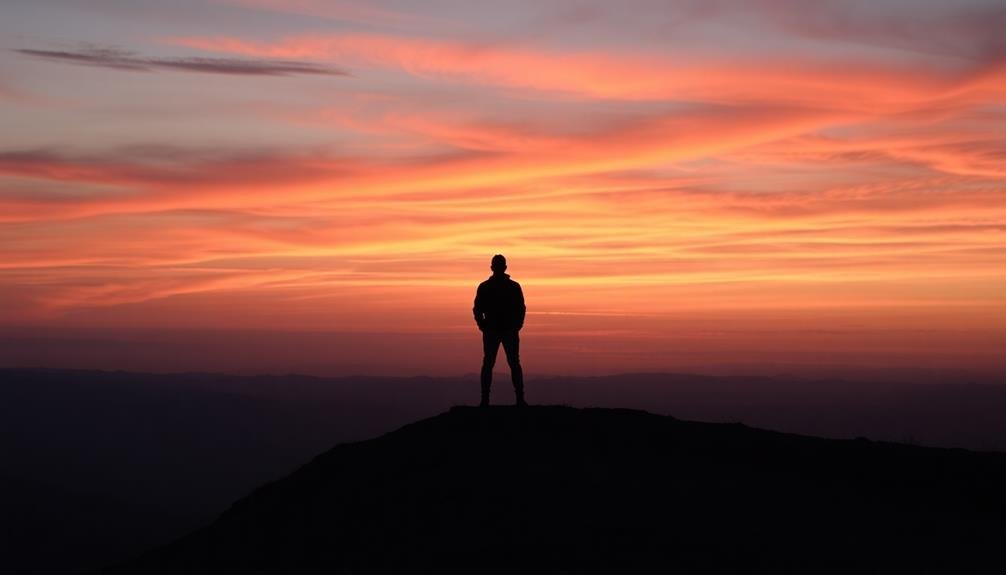
Negative space plays an essential role in creating impactful silhouette compositions. It's the empty area surrounding your subject that can dramatically enhance the overall image. When shooting silhouettes with your mobile phone, leverage this space to your advantage.
Frame your subject against a clean, uncluttered background to make it stand out. Look for large expanses of sky, water, or other uniform surfaces that'll create a stark contrast with your silhouetted subject. Position your subject off-center, allowing the negative space to guide the viewer's eye and create a sense of balance.
Don't be afraid to leave ample room around your subject. This technique can evoke emotions like isolation, freedom, or contemplation. Experiment with different ratios of subject to negative space to find what works best for your composition.
You can also use negative space creatively to form interesting shapes or patterns. For instance, capture a person's silhouette against an open doorway or window, using the surrounding structure as a frame.
This approach adds depth and intrigue to your image while maintaining the simplicity of the silhouette.
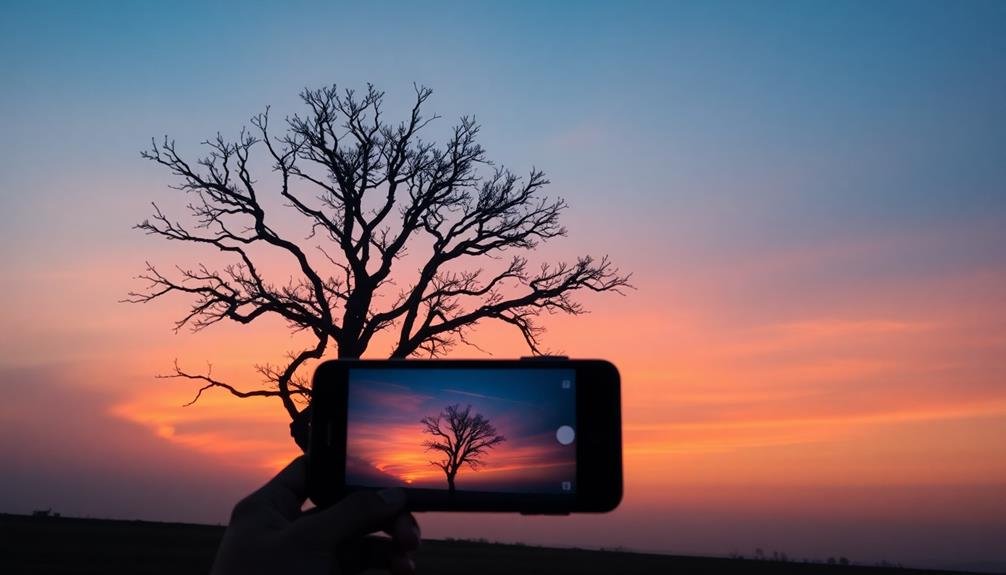
Frame Within Natural Elements
Framing your silhouette subjects within natural elements can elevate your mobile photography to new heights. Look for opportunities to use trees, rock formations, or architectural features as natural frames for your silhouettes. These elements add depth and context to your images while drawing attention to your main subject.
When you're out shooting, scan your environment for potential framing options. Archways, doorways, and windows can create compelling frames for silhouetted figures. Try positioning your subject between two trees or within the curve of a branch to create a natural border. Ocean waves, mountain peaks, or even cloud formations can serve as unique framing elements for landscape silhouettes.
Remember to experiment with different angles and perspectives. You might need to crouch down or climb to a higher vantage point to align your subject perfectly within the frame.
Don't be afraid to move around and try multiple compositions. By incorporating natural framing elements, you'll add visual interest and guide the viewer's eye to the focal point of your silhouette image. This technique can transform a simple silhouette into a more dynamic and engaging photograph.
Experiment With Different Angles
Don't limit yourself to eye-level shots when creating silhouettes.
Try crouching down for dramatic low-angle compositions that make your subjects appear larger-than-life, or seek out elevated positions to capture unique bird's-eye views.
You can also experiment with tilting your phone to create intriguing diagonal lines and add a sense of dynamism to your silhouette images.
Low-Angle Dramatic Shots
For dramatic silhouette shots, try crouching down or lying on the ground to capture your subject from a low angle. This perspective creates a sense of grandeur and emphasizes the subject's shape against the sky. You'll find that low-angle shots can make even ordinary objects appear monumental and imposing.
When shooting from below, pay attention to the background. A clear sky works best, but clouds can add interesting textures. Position your subject so that it blocks the brightest part of the sky, usually where the sun is. This technique guarantees a crisp, well-defined silhouette.
Don't forget to take into account the foreground elements. Including rocks, grass, or sand in the frame can add depth and context to your image. Experiment with different focal lengths on your mobile device. A wide-angle setting can exaggerate the low perspective, while zooming in can isolate your subject against the sky.
Remember to keep your camera steady when shooting from low angles. Use both hands to hold your phone, or think about a small tripod for added stability.
With practice, you'll master the art of creating powerful, dramatic silhouettes from ground level.
Elevated Vantage Points
Climbing to new heights can transform your silhouette photography. When you're shooting from an elevated position, you'll capture unique perspectives that make your subjects stand out against the backdrop.
Try finding a high vantage point like a balcony, rooftop, or hilltop to experiment with this technique. From above, you can create interesting compositions by aligning your subject with the horizon or placing them against a vast landscape.
Look for opportunities to incorporate leading lines or patterns in the ground below, which can guide the viewer's eye to your silhouetted subject. You'll also have more control over the background, allowing you to minimize distractions and focus on the clean lines of your subject's form.
Don't forget to reflect on the time of day when shooting from elevated positions. Golden hour light streaming across the landscape can create dramatic long shadows, adding depth and interest to your composition.
If you're in an urban setting, try capturing silhouettes against a cityscape during blue hour for a stunning contrast between dark shapes and twinkling lights.
Tilted Horizon Perspectives
While elevated vantage points offer unique perspectives, experimenting with tilted horizon lines can add a dynamic edge to your silhouette compositions. By intentionally angling your camera, you'll create a sense of movement and tension that draws viewers into your image. This technique works particularly well with strong geometric shapes or when you want to emphasize a specific element in your frame.
To achieve a tilted horizon, simply rotate your phone slightly as you capture the shot. Start with subtle angles of 5-10 degrees and gradually increase the tilt for more dramatic effects. Pay attention to how the angle affects the overall balance of your composition. You'll often find that a tilted horizon can lead the eye towards your main subject more effectively than a straight one.
Don't be afraid to push the boundaries. Try extreme angles for abstract or surreal silhouette images. Remember, the key is to make the tilt look intentional rather than accidental.
Use your phone's grid feature to help gauge the degree of tilt and guarantee your subject remains properly positioned within the frame. With practice, you'll develop an intuition for when and how to use this technique effectively.
Capture Interesting Sky Conditions
To elevate your silhouette photos, focus on capturing interesting sky conditions. The sky plays an essential role in silhouette photography, often serving as the backdrop that makes your subject pop. Look for dramatic cloud formations, vibrant sunsets, or even starry nights to add depth and intrigue to your images.
During golden hour, just after sunrise or before sunset, you'll find warm, soft light that creates stunning silhouettes. Experiment with different cloud patterns, from wispy cirrus to fluffy cumulus, to add texture and dimension.
Don't shy away from stormy skies; ominous clouds can create a moody atmosphere that enhances your subject's silhouette.
For nighttime shots, try capturing the Milky Way or star trails behind your silhouetted subject. Use long exposure techniques to emphasize the sky's movement and create striking contrasts. Remember to adjust your camera settings to properly expose the sky while maintaining a dark silhouette.
Consider using apps that predict weather conditions and sunset times to plan your shoots. By timing your photography sessions with interesting sky phenomena, you'll dramatically improve your chances of capturing compelling silhouette compositions that stand out on social media and in your portfolio.
Incorporate Leading Lines

Leading lines are powerful tools in silhouette photography, guiding the viewer's eye through your composition. When incorporating leading lines in your mobile silhouette shots, look for natural or man-made elements that create strong directional cues. Roads, fences, pier railings, or even tree branches can serve as effective leading lines.
Position your subject at the end or intersection of these lines to create a focal point. This technique draws attention to your silhouetted subject while adding depth and interest to your image. Experiment with different angles to find the most intriguing arrangement of lines and subject.
Don't forget about curved lines, which can add a sense of movement and flow to your composition. Winding paths, rivers, or shorelines can create enchanting silhouette images when paired with a striking subject.
In urban environments, use architectural elements like staircases, bridges, or building edges to create leading lines. These structures can frame your subject and add geometric interest to your silhouettes.
Remember to keep your lines clean and uncluttered. Avoid distracting elements that might compete with your intended lines and subject.
Play With Symmetry and Reflections
Symmetry and reflections can elevate your mobile silhouette photography to new heights. When composing your shot, look for natural symmetry in your environment. Buildings, bridges, and even trees can offer perfect opportunities for balanced compositions.
Position your silhouetted subject in the center of these symmetrical elements to create a striking visual impact.
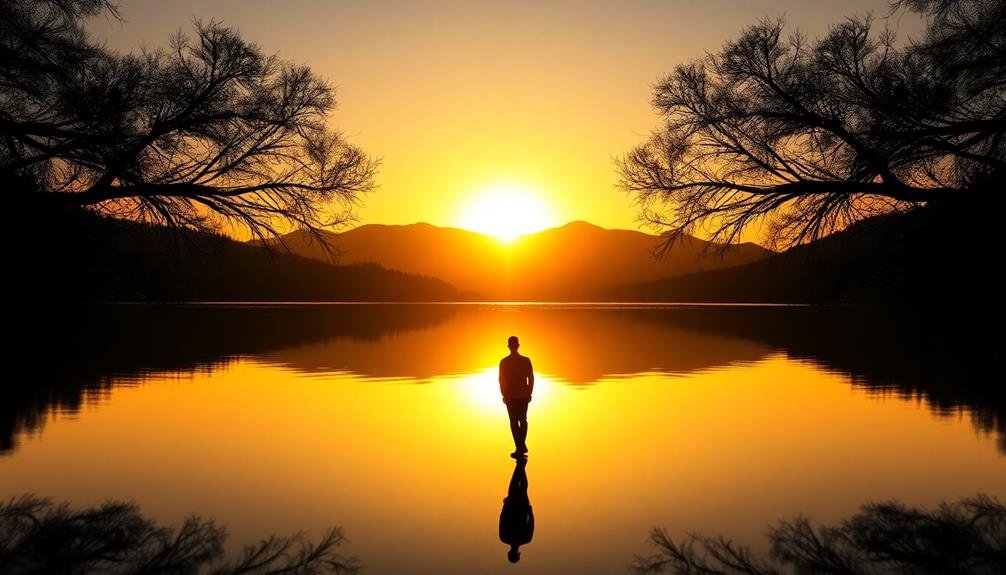
Water bodies are excellent for capturing reflections. Lakes, ponds, or even puddles can double the impact of your silhouette. Frame your shot so the reflection mirrors the subject, creating a perfect symmetry.
For added interest, try slightly disrupting the water's surface to create ripples in the reflection.
Don't limit yourself to natural reflections. Windows, mirrors, and shiny surfaces can all provide unique opportunities for symmetrical compositions.
Experiment with angles to find the perfect balance between your subject and its reflection.
Create Depth With Layered Silhouettes

To create depth in your silhouette compositions, consider incorporating elements in the foreground, midground, and background.
You'll add visual interest by staggering the placement of your subjects across these layers. This technique not only enhances the sense of space but also guides the viewer's eye through your image, creating a more engaging and dynamic silhouette photograph.
Foreground, Midground, Background Elements
Elevate your silhouette photography by creating depth with layered elements. Incorporate foreground, midground, and background components to add dimension and visual interest to your shots. Start by identifying strong shapes or objects in each layer that will translate well into silhouettes.
Use the foreground to frame your subject or add context. Midground elements typically include your main subject, while background elements often feature the sky, horizon, or distant landscapes. Experiment with different combinations to create unique compositions.
| Layer | Purpose | Example Elements |
|---|---|---|
| Foreground | Frame, context | Trees, rocks, people |
| Midground | Main subject | Architecture, animals |
| Background | Setting, mood | Sky, mountains, ocean |
When shooting, position yourself to align these elements effectively. You might need to crouch, climb, or move laterally to find the perfect angle. Pay attention to how the layers interact and overlap. Guarantee that each element remains distinct and doesn't merge with others, preserving the silhouette effect.
Remember to expose for the brightest part of your scene, typically the background, to maintain strong contrast and crisp silhouettes across all layers. This technique will help you create stunning, multi-dimensional mobile photographs that captivate viewers.
Staggered Subject Placement
A powerful technique for creating depth in silhouette photography is staggered subject placement. By positioning subjects at different distances from the camera, you'll create a layered effect that adds dimension to your silhouette images. This approach works particularly well with mobile photography, as it helps compensate for the limitations of smartphone lenses.
To effectively use staggered subject placement:
- Identify multiple subjects of varying sizes, such as trees, people, or architectural elements.
- Position these subjects at different distances from your camera, with larger objects typically placed farther away.
- Experiment with overlapping silhouettes to create interesting shapes and negative space.
When composing your shot, consider the relationships between the subjects and how they interact visually. You can create a sense of scale by placing smaller subjects in the foreground and larger ones in the background.
Don't be afraid to move around and adjust your position to find the perfect alignment. Remember, the goal is to create a visually compelling arrangement that leads the viewer's eye through the image.
Leverage HDR for Detail Preservation
With HDR technology, you can preserve intricate details in both the silhouette and the background of your mobile photos. HDR, or High Dynamic Range, combines multiple exposures to capture a wider range of light and dark tones. This feature is especially useful when shooting silhouettes, as it helps maintain the subject's outline while revealing subtle textures in the sky or surrounding environment.
To leverage HDR effectively, enable it in your camera app's settings before composing your shot. When framing your silhouette, focus on the brightest area of the scene to guarantee proper exposure. Take care to hold your phone steady, as HDR requires multiple rapid shots.
Experiment with different HDR strengths if your app offers this option, finding the right balance between detail preservation and natural-looking results.
Remember that HDR isn't always necessary. In high-contrast scenes with a clear silhouette against a vibrant sky, you might prefer the dramatic effect of a standard shot.
However, when you want to capture nuanced details in both dark and light areas, HDR can considerably enhance your silhouette compositions, adding depth and visual interest to your mobile photography.
Frequently Asked Questions
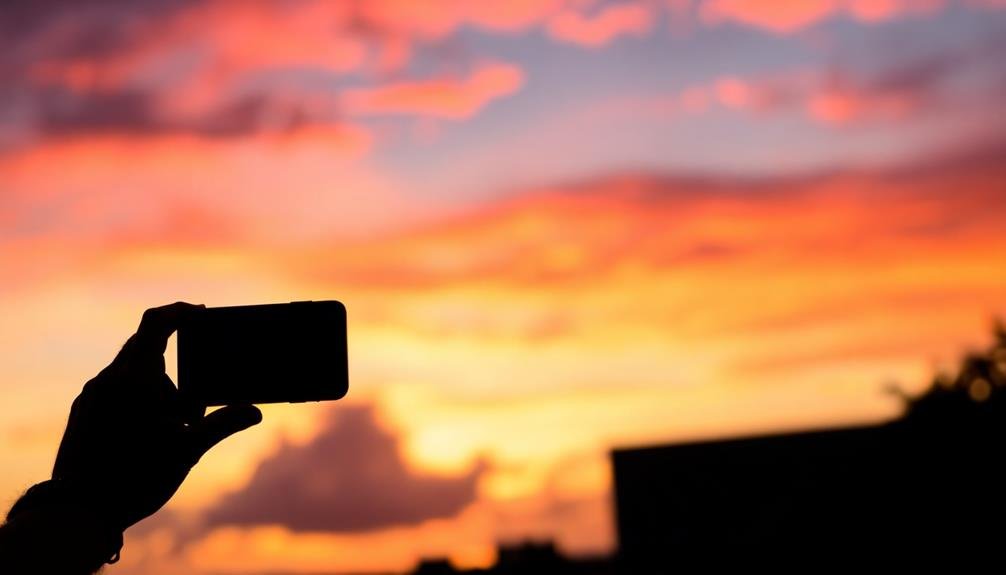
How Do I Adjust Camera Settings for Silhouette Shots on My Smartphone?
To adjust camera settings for silhouette shots on your smartphone, you'll want to focus on exposure. Tap the brightest part of the scene, lower the exposure, and lock it. This'll darken the foreground, creating a silhouette effect.
Can I Create Silhouettes Indoors, or Are They Limited to Outdoor Scenes?
You can create silhouettes indoors, not just outdoors. Try positioning your subject in front of a bright window or using artificial light sources. Experiment with lamps, studio lights, or even a projector to backlight your subject effectively.
What Editing Apps Are Best for Enhancing Silhouette Photos on Mobile Devices?
You'll find several great apps for enhancing silhouette photos on your mobile device. Try Snapseed, VSCO, or Adobe Lightroom Mobile. They offer powerful tools to adjust contrast, shadows, and highlights, helping you perfect your silhouette shots with ease.
How Can I Avoid Lens Flare When Shooting Towards Bright Light Sources?
To avoid lens flare, you'll want to use a lens hood or shield the lens with your hand. Try changing your angle slightly, or wait for clouds to partially obscure the light source. Clean your lens thoroughly before shooting.
Are There Specific Color Filters That Work Well With Silhouette Photography?
You'll find that warm-toned filters like orange and red can enhance silhouettes by creating dramatic skies. Cooler blue filters can add depth. Don't overdo it though; subtlety is key. Experiment with different filters to find your style.
In Summary
You've now got a solid foundation for creating stunning silhouette compositions on your mobile device. Remember, it's all about experimentation and practice. Don't be afraid to try new angles, play with light sources, and push your creativity. As you apply these tips, you'll develop your unique style and capture eye-catching silhouettes that tell powerful visual stories. Keep exploring, and you'll soon master the art of mobile silhouette photography.


Leave a Reply