
Reveal stunning smartphone portraits by mastering the art of backlighting. Position your subject between a light source and your camera to create enchanting silhouettes and dreamy halos. Experiment with natural light during golden hour or use artificial sources for more control. Adjust your smartphone's exposure compensation to balance subject and background brightness. Don't forget to play with subject-background distance for added depth and bokeh effects. Use reflectors to fill in shadows and enhance facial features. When editing, boost shadows and adjust contrast to perfect your backlit masterpiece. With practice, you'll transform ordinary shots into eye-catching images that stand out from the crowd. Dive deeper to uncover more secrets of this magical technique.
Understanding Backlighting in Smartphone Photography
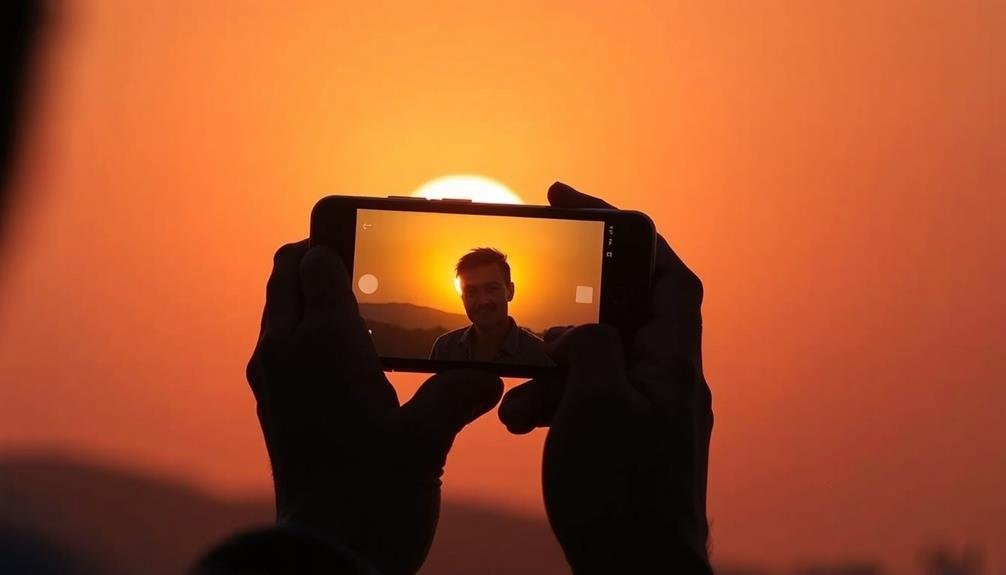
In the world of smartphone photography, backlighting can be both a challenge and an opportunity. When you're shooting portraits, backlighting occurs when the main light source is behind your subject. This creates a striking effect, with your subject silhouetted against a bright background.
To understand backlighting, you'll need to grasp how your smartphone's camera reacts to different light conditions. In backlit situations, your camera's auto-exposure often struggles, resulting in an underexposed subject. However, you can use this creatively to produce dramatic, moody portraits with rim lighting.
To make the most of backlighting, position your subject between you and the light source. This could be the sun, a window, or artificial lighting. You'll notice a halo effect around your subject, which can add depth and dimension to your image.
Experiment with different angles to control the amount of light entering your lens.
Choosing the Perfect Backlight Source
When selecting a backlight source for your smartphone portraits, you'll need to decide between natural and artificial options.
Natural backlighting from the sun offers a warm, organic look, while artificial sources like lamps or LEDs provide more control over intensity and color.
You can experiment with both types to achieve different moods and effects in your portraits, adjusting the strength and hue to complement your subject.
Natural vs. Artificial Backlighting
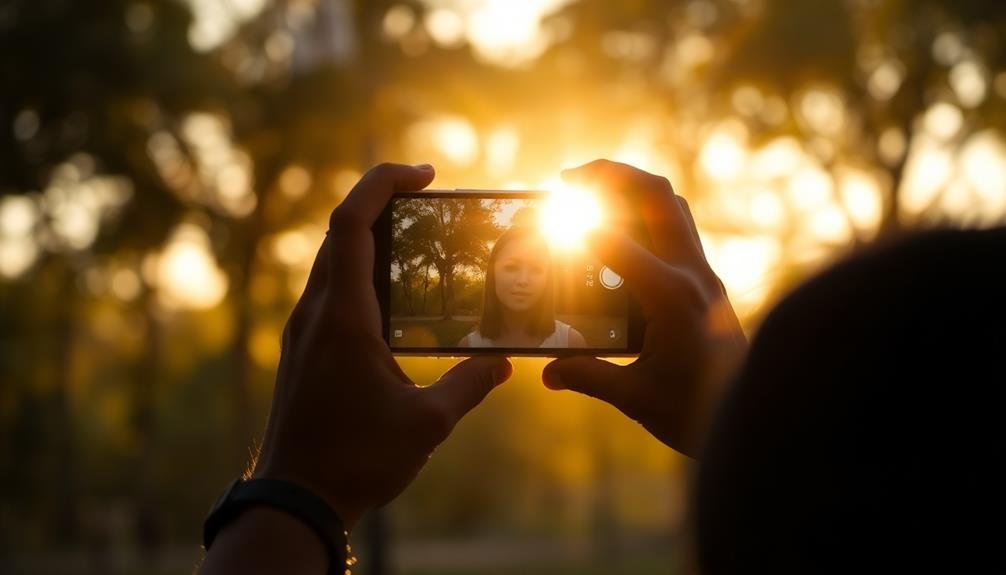
The golden hour's soft glow or a strategically placed lamp can transform your smartphone portraits. When choosing between natural and artificial backlighting, consider the mood and effect you're aiming for.
Natural backlighting, like sunlight, offers a warm, organic feel. It's ideal for outdoor shoots and creates a dreamy, ethereal atmosphere. You'll find the best natural light during golden hour (just after sunrise or before sunset) when the sun is low and casts a flattering glow.
Cloudy days also provide soft, diffused light that's perfect for portraits.
Artificial backlighting gives you more control over your shooting environment. It's great for indoor shoots or when natural light isn't available. LED panels, ring lights, or even household lamps can serve as artificial backlight sources.
They allow you to adjust intensity and color temperature to suit your vision.
Each type has its advantages. Natural light is free and can produce stunning results, but it's less predictable.
Artificial light offers consistency and flexibility but may require additional equipment. Experiment with both to discover which works best for your style and subjects.
Intensity and Color Control
Mastering intensity and color control is vital for choosing the perfect backlight source in smartphone portraiture.
You'll need to take into account both the strength and hue of your light to create the desired effect.
For intensity, start by evaluating the ambient light. If it's bright, you'll want a stronger backlight to make your subject stand out. In dimmer settings, a softer backlight will suffice.
Use your phone's exposure compensation to fine-tune the balance between your subject and the background.
Color temperature plays an important role in setting the mood. Warm backlighting (2700-3000K) creates a cozy, golden-hour effect, while cooler tones (5000K+) can evoke a crisp, modern feel.
Many LED lights offer adjustable color temperatures, allowing you to experiment on the spot.
Don't forget about gels or filters. These can dramatically alter the color of your backlight, adding creative flair to your portraits.
You can even use colored objects like bottles or translucent fabric to cast interesting hues.
Positioning Your Subject Effectively

When positioning your subject for a smartphone portrait, you'll want to find the ideal light source first.
Once you've identified the best lighting, place your subject in relation to it for flattering illumination.
Remember that the distance between your subject and the background matters, as it affects depth and focus in your final image.
Find Optimal Light Source
Finding the right light source is essential for capturing stunning smartphone portraits. When shooting outdoors, seek soft, diffused light during the golden hour—just after sunrise or before sunset. This warm, flattering light creates a gentle glow on your subject's skin.
Alternatively, find shaded areas on bright days to avoid harsh shadows and squinting.
For indoor portraits, position your subject near a large window for natural light. Face them towards the window at a slight angle to create depth and dimension.
If you're dealing with direct sunlight, use sheer curtains to diffuse the light and create a softer effect.
In low-light situations, consider using artificial light sources. Your smartphone's built-in flash can be harsh, so opt for external LED lights or ring lights for more control.
Place these light sources at a 45-degree angle to your subject to minimize unflattering shadows.
Experiment with backlighting by positioning your subject between you and the light source. This creates a dreamy, ethereal effect but requires careful exposure adjustment.
Use your phone's HDR mode or manual controls to balance the bright background with your subject's features.
Subject-Background Distance Matters
With your light source sorted, let's focus on another essential aspect of smartphone portraits: the distance between your subject and the background. This distance plays a vital role in creating depth and visual interest in your images.
Position your subject at least a few feet away from the background to achieve a more dynamic look. By increasing this separation, you'll create a shallow depth of field effect, even with a smartphone camera. This technique helps blur the background, making your subject stand out more prominently.
It's especially effective when you're working with backlighting, as it can enhance the separation between your subject and the background glow. Experiment with different distances to find the sweet spot. You'll notice that as you move your subject further from the background, the bokeh effect becomes more pronounced.
This can add a dreamy, professional quality to your portraits. However, be mindful not to place your subject too far from the background, as you might lose context or create an unnatural look. Aim for a balance that complements your subject and the overall composition of your shot.
Adjusting Smartphone Camera Settings

Although many smartphone users rely on auto mode, adjusting your camera settings can dramatically improve your portrait photos.
When shooting backlit portraits, you'll want to focus on exposure compensation, ISO, and shutter speed. Start by tapping on your subject's face to set focus and exposure. Then, use the exposure slider to brighten the image, compensating for the bright background. If your phone allows manual control, lower the ISO to reduce noise and increase the shutter speed to freeze motion.
Don't forget about white balance. The strong backlight can throw off your phone's auto white balance, so experiment with different presets or set a custom white balance. For more advanced users, shooting in RAW format gives you greater flexibility in post-processing.
Here are some key settings to adjust for backlit portraits:
- Exposure compensation: Increase to brighten the subject
- ISO: Lower for less noise in well-lit scenes
- Shutter speed: Faster to freeze motion
- White balance: Adjust for accurate skin tones
Mastering Exposure Compensation Techniques

Exposure compensation is a powerful tool for capturing stunning backlit portraits on your smartphone. It allows you to override your camera's automatic exposure settings, giving you more control over the final image.
When dealing with backlit subjects, your phone's camera often underexposes the foreground, leaving your subject too dark. To combat this, increase the exposure compensation by sliding the brightness control up or tapping the "+" icon in your camera app.
Start with a modest increase of +0.3 or +0.7 and review the results. If your subject is still too dark, gradually increase the compensation. Be careful not to overexpose the background, as you'll lose detail in bright areas.
For dramatic silhouettes, try negative exposure compensation, darkening the subject while maintaining the backlit glow. Experiment with different levels of compensation to achieve various effects. A slight overexposure can create a dreamy, ethereal look, while a balanced exposure retains detail in both the subject and background.
Remember to check your histogram if available, ensuring you're not clipping highlights or shadows. With practice, you'll develop an intuition for the right exposure compensation in different lighting scenarios.
Creating Dramatic Silhouettes

To create stunning silhouettes with your smartphone, you'll need to master a few key techniques.
Start by positioning your subject in front of a bright light source, such as a sunset or window.
Next, expose your shot for the bright background, which will darken your subject into a silhouette shape.
Position Subject Against Light
Creating dramatic silhouettes can transform your smartphone portraits into striking works of art. To achieve this effect, you'll need to position your subject against a strong light source. This could be the sun during golden hour, a bright window, or even artificial lighting.
The key is to guarantee your subject is between you and the light, blocking it partially or completely.
When positioning your subject, consider their pose and profile. Aim for clean, recognizable shapes that'll stand out against the backlight. You'll want to expose for the background, which will darken your subject and create the silhouette effect.
Most smartphone cameras allow you to tap on the screen to adjust exposure – tap on the brightest area to darken the foreground.
Here are some tips to enhance your silhouette portraits:
- Experiment with different angles to find the most interesting shapes
- Use props or accessories to add visual interest to the silhouette
- Try capturing movement for dynamic, eye-catching shots
- Incorporate negative space to create a sense of mystery or drama
Expose for Background Brightness
When crafting dramatic silhouettes, proper exposure is key. To achieve this effect, you'll want to expose for the background brightness rather than your subject. Open your smartphone's camera app and tap on the brightest part of the background. This will cause your camera to adjust its exposure settings, making the background well-lit while turning your subject into a dark silhouette.
If your camera app has manual controls, you can fine-tune the exposure even further. Reduce the exposure compensation to darken the overall image, enhancing the silhouette effect.
Experiment with different levels to find the perfect balance between a bright background and a defined silhouette.
Enhance Contrast in Editing
After capturing your silhouette photo, you can further enhance its dramatic effect through editing. Increasing contrast is key to creating striking silhouettes.
Start by adjusting the exposure and highlights to brighten the background, making it pop against the darkened subject. Then, lower the shadows and blacks to deepen the silhouette's darkness.
Next, fine-tune the contrast slider to amplify the difference between light and dark areas. Don't be afraid to push it further than you normally would for regular portraits.
Experiment with the clarity or structure tools to add definition to the silhouette's edges.
Consider these additional editing techniques to elevate your silhouette:
- Apply a graduated filter to enhance the sky's colors
- Use the dehaze tool to add atmospheric depth
- Adjust vibrance and saturation to make colors more vivid
- Experiment with black and white conversion for a classic look
Capturing Lens Flare Effects

Lens flare, once considered a photographic flaw, has become a sought-after effect in smartphone portraits. To capture this dreamy, ethereal look, position your subject with the sun slightly out of frame. You'll want the light source to peek around the edge, creating a warm glow and streaks across your image.
Experiment with different angles to control the intensity of the flare. Tilt your phone up or down to find the sweet spot where the light interacts beautifully with your lens. Don't be afraid to partially obscure the sun with your subject's head or body for a more subtle effect.
To enhance your lens flare portraits, try these techniques:
| Technique | Effect |
|---|---|
| Use a finger | Partially block light |
| Shoot through objects | Create unique shapes |
| Adjust exposure | Control flare intensity |
| Add lens filter | Enhance flare colors |
Using Reflectors for Fill Light

With smartphone portraits, reflectors can be your secret weapon for achieving professional-looking results. These simple tools bounce light back onto your subject, filling in shadows and creating a more balanced exposure. You don't need expensive equipment; a white piece of cardboard or foam board can work wonders.
Position your reflector opposite the main light source to soften harsh shadows on your subject's face. Experiment with different reflector colors to alter the mood of your portraits. Silver reflectors produce a cooler, more neutral light, while gold reflectors add warmth to skin tones. For a subtler effect, try using a translucent reflector to diffuse light.
Here are some key benefits of using reflectors in smartphone portraiture:
- Minimize unflattering shadows
- Enhance facial features and skin tone
- Create catch lights in the eyes
- Achieve a more professional look without additional lighting gear
When using reflectors, pay attention to your subject's comfort. Adjust the angle and distance of the reflector to avoid blinding them with reflected light.
Editing Backlit Photos on Smartphone

Capturing backlit photos on your smartphone can create stunning silhouettes and dramatic lighting, but they often need some editing to reach their full potential.
Start by adjusting the exposure. Tap on the brightest part of the image and drag the exposure slider down to reveal more details in the highlights. Next, boost the shadows to bring out hidden details in darker areas.
Use the contrast tool to enhance the separation between light and dark elements. Increase the saturation slightly to make colors pop, especially in golden hour shots. Apply a subtle vignette to draw attention to your subject and add depth to the image.
If your photo app offers selective adjustments, use them to fine-tune specific areas. Brighten faces or important elements without affecting the overall exposure. Experiment with color temperature to enhance the warm glow of backlighting or cool it down for a different mood.
Don't forget to straighten your horizon and crop if necessary.
Overcoming Common Backlighting Challenges

Backlighting's beauty often comes with its share of challenges. When shooting portraits with your smartphone, you'll often encounter issues like overexposure, lens flare, or underexposed subjects.
To overcome these hurdles, start by tapping on your subject's face to set focus and exposure. If your phone allows it, use exposure compensation to fine-tune the brightness.
For more control, try using HDR mode or a third-party camera app with manual settings. These tools can help balance the bright background with your subject. If you're still struggling, consider using a reflector or a small LED light to fill in shadows on your subject's face.
Don't forget about composition. Move your subject slightly to change how the light falls on them, or adjust your angle to minimize lens flare. Remember, sometimes embracing the challenges can lead to creative results.
Here are some quick tips to tackle common backlighting issues:
- Use burst mode to capture multiple exposures
- Experiment with silhouettes for dramatic effect
- Shield your lens from direct sunlight to reduce flare
- Try black and white editing to emphasize contrast and mood
Experimenting With Creative Backlight Compositions

Once you've mastered the basics of backlit portraits, it's time to push your creativity further. Experiment with unique compositions that leverage backlighting to create stunning visual effects.
Try positioning your subject off-center, allowing the backlight to create a dramatic silhouette or halo effect. Use natural elements like trees or architectural features to partially block the light source, creating interesting patterns and textures.
Play with different angles by getting low to the ground or shooting from above. This can change how the light interacts with your subject and background. Incorporate reflective surfaces like water or glass to add depth and complexity to your shots.
Don't be afraid to embrace lens flare; when used intentionally, it can add a dreamy, ethereal quality to your portraits.
Experiment with various times of day, particularly during golden hour, when the low sun creates warm, directional light. Try backlighting through colored objects or using gels to add a creative twist.
Frequently Asked Questions
Can Backlighting Techniques Be Applied to Selfies?
Yes, you can apply backlighting techniques to selfies. You'll want to position yourself with a light source behind you, adjust your camera settings, and use your phone's front-facing flash or a reflector to illuminate your face.
How Do Weather Conditions Affect Backlighting in Outdoor Smartphone Photography?
Weather greatly impacts backlighting in outdoor photos. You'll find sunny days create dramatic silhouettes, while cloudy conditions soften the effect. Misty or foggy weather can add a dreamy quality. Rain can create interesting reflections and lens flares.
Are There Specific Smartphone Models That Excel at Capturing Backlit Scenes?
You'll find that many high-end smartphones excel at backlit scenes. iPhones, Google Pixels, and Samsung Galaxy models offer advanced HDR capabilities. They're particularly good at balancing exposure and capturing detail in challenging lighting conditions.
What Accessories Enhance Backlighting Effects for Smartphone Photography?
You'll want to use reflectors to bounce light onto your subject. Try portable LED lights for added control. Don't forget lens filters to manage glare. A mini tripod can help steady your shots in low light conditions.
How Can I Achieve Backlighting Effects Indoors Without Natural Light Sources?
You can create indoor backlighting effects without natural light by using artificial sources. Place lamps or LED panels behind your subject, experiment with different angles, and use reflectors to soften shadows. Don't forget to adjust your camera settings accordingly.
In Summary
You've now revealed the secrets of stunning backlit smartphone portraits. Remember, it's all about experimenting with light sources, positioning, and camera settings. Don't be afraid to play with exposure compensation and reflectors. When editing, enhance the magical glow of your backlit shots. As you practice, you'll overcome common challenges and develop your unique style. So grab your phone and start capturing those dreamy, ethereal portraits today!


Leave a Reply