
Transform your smartphone food photos into mouthwatering masterpieces with these pro tips. Use natural light near windows for vibrant colors and textures. Frame your shot using the rule of thirds and leave negative space for elegance. Choose backgrounds that complement, not compete with, your dish. Adjust focus and depth to create dreamy effects or showcase intricate details. Fine-tune color balance and saturation to enhance natural beauty. Experiment with different angles and perspectives to highlight your food's best features. Don't forget props and plating for added visual interest. With these techniques, you'll be well on your way to capturing irresistible food shots that leave viewers craving more.
Lighting: Natural vs. Artificial
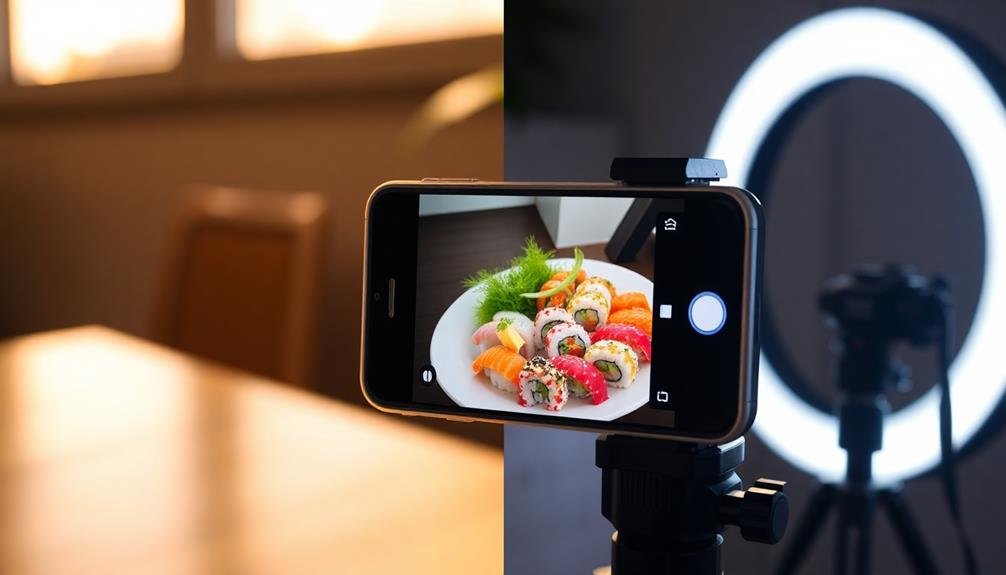
When it comes to smartphone food photography, lighting can make or break your shot. Natural light is often the best choice for food photos, as it brings out vibrant colors and textures. Position your dish near a window, but avoid direct sunlight that can create harsh shadows. Overcast days provide ideal diffused light for evenly illuminated shots.
If natural light isn't available, artificial lighting can be a great alternative. Invest in a small, portable LED light or ring light designed for smartphone photography. These tools offer consistent illumination and allow you to control the direction and intensity of light. Experiment with different angles to highlight your food's best features.
Avoid using your phone's built-in flash, as it can create unflattering reflections and wash out colors. Instead, try bouncing light off a white surface or using a DIY reflector to fill in shadows.
Remember that warm, soft lighting tends to make food look more appetizing, while cool or harsh light can make it appear unappetizing. By mastering lighting techniques, you'll elevate your smartphone food photography and create mouthwatering images that stand out on social media.
Composition and Framing Techniques

When composing your food photos, you'll want to apply the rule of thirds to create visually appealing images.
Imagine a 3×3 grid over your frame and position key elements along these lines or at their intersections.
Don't forget to incorporate negative space, which can help highlight your dish and create a clean, uncluttered look.
Rule of Thirds
For enchanting smartphone food photography, mastering the Rule of Thirds is essential. This principle divides your frame into a 3×3 grid, creating nine equal parts. To apply this rule, place key elements of your food composition along these lines or at their intersections. These points naturally draw the viewer's eye and create a more balanced, interesting image.
When framing your shot, position the main dish or focal point off-center. You might place a colorful garnish or an eye-catching utensil at one of the intersections to add visual interest.
Don't be afraid to leave some negative space in your composition; it can help highlight your subject.
Most smartphones have a built-in grid feature you can enable in your camera settings. Use this tool to guide your composition until the Rule of Thirds becomes second nature.
Negative Space Usage
Negative space, often overlooked in smartphone food photography, can be a powerful tool for creating stunning compositions. It's the area surrounding your main subject, and when used effectively, it can enhance the visual impact of your food shots. By incorporating negative space, you'll draw attention to your dish while creating a sense of balance and simplicity in your images.
To use negative space effectively in your food photography:
- Frame your dish off-center, leaving empty space on one side.
- Use a plain tablecloth or surface to create a clean background.
- Experiment with different angles to maximize empty areas around the food.
- Incorporate minimalist props that complement rather than compete with the main subject.
Don't be afraid to leave areas of your frame empty. This technique can create a sense of elegance and allow your food to truly shine.
When composing your shot, consider the shape and size of your dish in relation to the negative space. A small dessert, for example, can appear more dramatic when surrounded by ample empty space.
Choosing the Right Background

The background you choose for your food photography can make or break your shot. When selecting a backdrop, consider the color, texture, and overall mood you want to convey. Neutral colors like white, gray, or light wood often work well as they don't compete with the food. However, don't be afraid to experiment with bolder colors that complement your dish.
Texture can add depth to your images. Try using linens, marble surfaces, or rustic wooden boards to create interest. Just verify the texture doesn't overpower the food itself.
Keep in mind the context of your dish; a rustic background might suit hearty comfort food, while a sleek, modern surface could enhance the look of a minimalist dessert.
Pay attention to any reflections or shadows cast by your background. Matte surfaces are often easier to work with as they reduce unwanted glare. If you're using props, make sure they're in harmony with your chosen background.
Adjusting Focus and Depth
While the background sets the stage, mastering focus and depth will truly make your food photos pop. To achieve the perfect focus, tap on your smartphone screen where you want the sharpest point to be. This is typically the closest part of the dish to the camera or the most visually interesting element.
Experiment with different focal points to see how it changes the overall composition.
For depth of field, you'll want to evaluate how much of your image should be in focus. A shallow depth of field can create a beautiful, dreamy effect, while a deeper focus can showcase intricate details throughout the dish.
Here's how you can adjust depth:
- Move closer to the subject for a shallower depth of field
- Use portrait mode if your phone has it for a blurred background
- Adjust aperture settings in pro mode (if available) for more control
- Try third-party apps for manual focus and aperture adjustments
Color Balance and Saturation

Color balance and saturation play crucial roles in creating mouthwatering food photos. You'll want to guarantee your images accurately represent the dish's natural colors while enhancing their appeal. Start by adjusting your phone's white balance settings to match the lighting conditions. This will prevent unwanted color casts that can make food look unappetizing.
Next, fine-tune the saturation to make colors pop without appearing artificial. Subtle adjustments can transform a dull photo into a vibrant, appetizing image. Be cautious not to oversaturate, as this can make food look unrealistic and unappealing.
Consider the emotional impact of different color palettes:
| Color | Emotion | Food Example | Effect |
|---|---|---|---|
| Red | Excitement | Strawberries | Stimulating |
| Green | Freshness | Salad | Healthy |
| Yellow | Happiness | Lemon | Cheerful |
| Brown | Comfort | Chocolate | Indulgent |
Experiment with complementary colors to create visually striking compositions. For instance, pair orange carrots with a blue plate to make them stand out. Remember, the goal is to enhance the food's natural beauty, not to create an unrealistic representation. With practice, you'll develop an eye for balancing colors and saturation to produce irresistible food photographs.
Angle and Perspective Selection
When photographing food, your choice of angle and perspective can dramatically impact the final image.
Consider experimenting with overhead shots for flat dishes or eye-level angles for taller items to showcase their height and layers.
You can also try creative angling techniques, such as shooting from a 45-degree angle or capturing close-up details, to add visual interest and highlight specific aspects of the dish.
Overhead vs. Eye-level
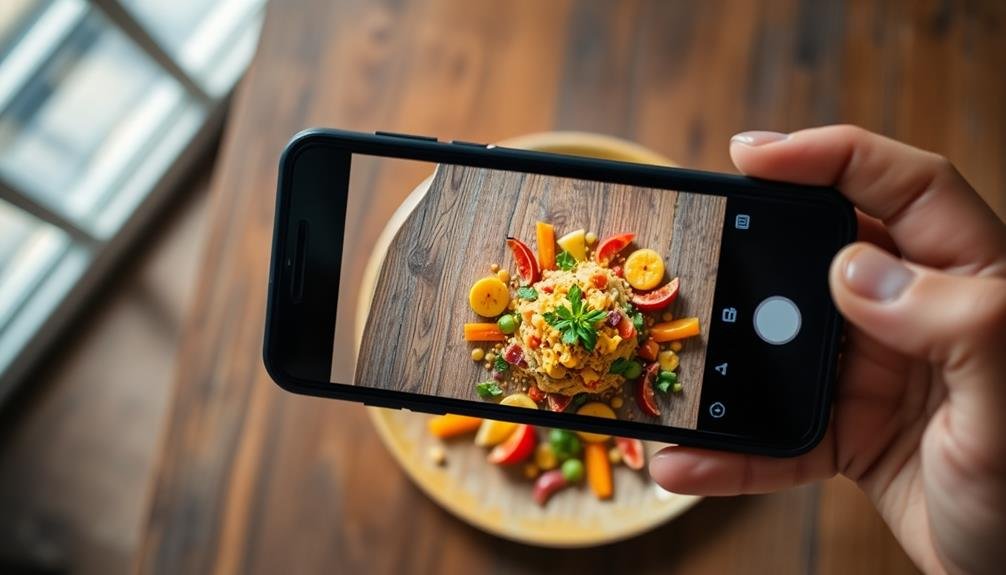
Angle selection plays an essential role in smartphone food photography, with overhead and eye-level shots being two popular choices. Overhead shots provide a bird's-eye view of the dish, showcasing its overall composition and arrangement. They're ideal for flat or layered foods, like pizzas, salads, or charcuterie boards.
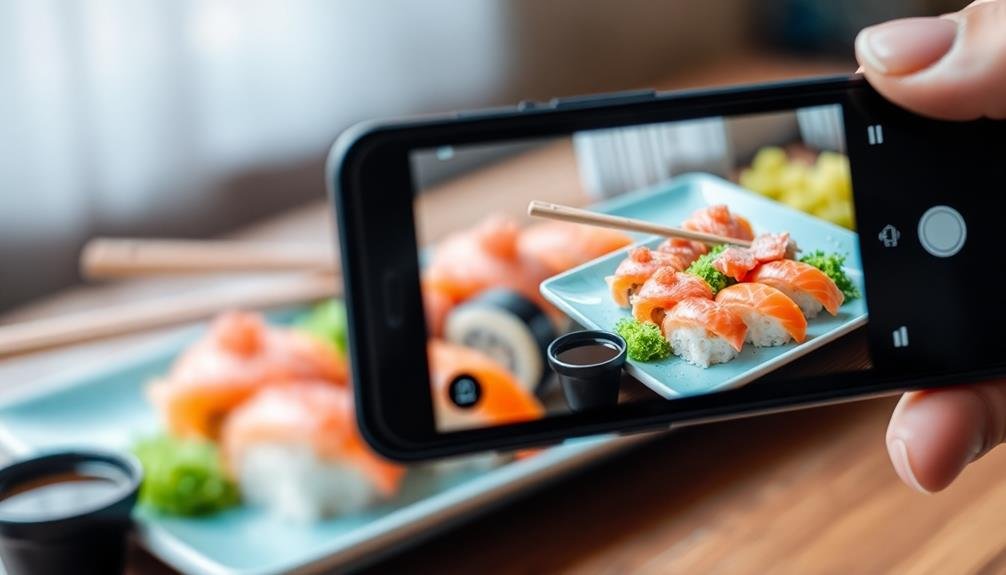
Eye-level shots, on the other hand, capture the food from a diner's perspective, emphasizing depth and texture.
When deciding between overhead and eye-level angles, consider your dish's strengths. Overhead shots work well for:
- Symmetrical or geometrically arranged plates
- Colorful, visually diverse dishes
- Table settings with multiple elements
- Foods with interesting toppings or garnishes
Eye-level shots excel at highlighting:
- Tall or stacked dishes like burgers or layer cakes
- Textures and details on the sides of food items
- Steam or smoke rising from hot dishes
- The interior of cut or sliced foods
Experiment with both angles to find what works best for each dish.
You'll often find that a combination of overhead and eye-level shots tells a more complete story of your culinary creation, giving viewers an extensive look at your food's appeal.
Creative Angling Techniques
Creativity flourishes when you venture beyond the standard overhead and eye-level shots in smartphone food photography. Experiment with unconventional angles to add intrigue and depth to your images.
Try a 45-degree angle, which combines the best of both worlds, showing the top and side of your dish simultaneously. This angle works particularly well for layered foods like burgers or sandwiches.
For a unique perspective, get low and shoot from table level. This technique makes your food appear larger and more imposing, perfect for tall desserts or stacked plates.
Alternatively, tilt your phone slightly for a Dutch angle, creating a dynamic, off-kilter composition that draws the eye.
Don't forget about close-ups. Move in tight to capture intricate textures and details, like the crumb of a cake or the marbling of a steak.
For drinks, shoot through the glass to highlight condensation or garnishes.
Finally, consider framing your subject creatively. Use utensils, ingredients, or even your hand to create leading lines that guide the viewer's gaze to the main dish.
These techniques will elevate your food photography from mundane to mouth-watering.
Props and Plating Considerations

Elevate your food photography by carefully selecting props and considering plating techniques. The right props can enhance your dish's appearance and create a cohesive theme. Choose items that complement your food's colors, textures, and style.
Consider using rustic wooden boards, vintage cutlery, or colorful napkins to add interest to your composition.
Plating is essential for creating visually appealing food shots. Pay attention to the arrangement of elements on the plate, ensuring balance and symmetry. Use negative space to draw attention to the main dish.
Don't overcrowd the plate; sometimes less is more.
When selecting props and plating your food, keep these tips in mind:
- Use contrasting colors to make your dish pop
- Incorporate different textures for visual interest
- Choose appropriate serving sizes for a balanced look
- Experiment with layers and height to create depth
Remember that props shouldn't overshadow your food. They should enhance the overall aesthetic without distracting from the main subject.
Keep your background simple and clean to maintain focus on the dish. With practice, you'll develop an eye for selecting the perfect props and creating stunning plate presentations that will make your smartphone food photography stand out.
Editing Apps for Food Photos

Once you've captured your food photos, editing apps can take them from good to great. These apps offer a range of tools to enhance colors, adjust lighting, and fine-tune details. Popular choices include Snapseed, VSCO, and Lightroom Mobile, each with its own unique features and presets.
When editing food photos, focus on enhancing the natural colors and textures of the dish. Adjust the brightness and contrast to make the food pop, but be careful not to overdo it. Sharpening can help bring out details, while selective editing allows you to emphasize specific areas of the image.
Here's a quick guide to some essential editing techniques:
| Technique | Purpose | Tips |
|---|---|---|
| Color balance | Enhance food colors | Adjust temperature and tint |
| Exposure | Brighten or darken | Use sparingly to maintain detail |
| Contrast | Add depth | Increase slightly for more dimension |
Capturing Steam and Motion
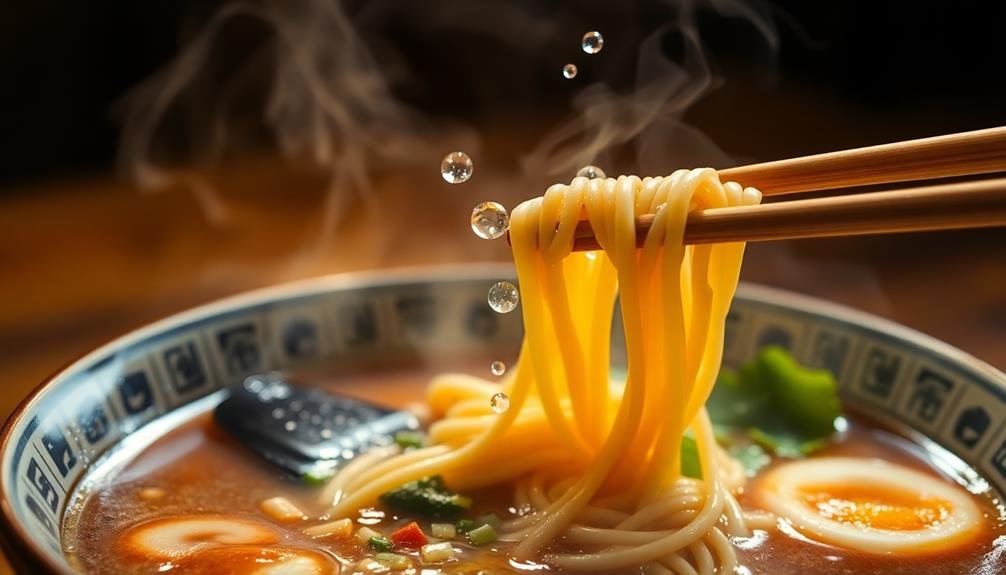
To bring your food photos to life, mastering the art of capturing steam and motion is crucial. These dynamic elements add a sense of freshness and immediacy to your images, making viewers almost taste the dish through their screens.
When photographing steaming food, use a dark background to create contrast and make the steam more visible. Position your light source to the side or behind the dish to illuminate the steam effectively.
For capturing motion, like pouring sauce or sprinkling herbs, you'll need to use a fast shutter speed. Most smartphones offer a "burst mode" feature, which takes multiple shots in quick succession. This increases your chances of capturing the perfect moment.
Here's what you might capture:
- A stream of honey drizzling onto a stack of pancakes
- Cheese stretching as a pizza slice is lifted
- A splash of milk hitting a bowl of cereal
- Powdered sugar dusting a freshly baked pastry
Remember to clean your lens before shooting to guarantee crisp, clear images.
Experiment with different angles and lighting to find the most appetizing composition for your steamy, action-packed food photos.
Frequently Asked Questions
How Can I Protect My Phone From Food Spills While Shooting?
To protect your phone from food spills while shooting, you'll want to use a waterproof case or plastic cover. Keep a clean cloth handy for quick wipes. Position your phone carefully and avoid holding it directly over messy dishes.
What's the Best Way to Deal With Reflective Surfaces Like Cutlery?
To handle reflective cutlery, you'll want to adjust your angle or use diffused lighting. Try positioning yourself to avoid direct reflections. You can also use a polarizing filter or matte props to reduce unwanted glare on shiny surfaces.
How Do I Capture the Texture of Foods Like Bread or Meat?
To capture food textures, you'll want to use side lighting. It'll create shadows that highlight the surface details. Get close, focus on a specific area, and adjust your camera's exposure to emphasize the texture you're trying to showcase.
Are There Specific Hashtags That Can Boost Visibility for Food Photos?
Yes, there are specific hashtags that can boost your food photos' visibility. Try using popular tags like #foodporn, #instafood, #foodie, and #yummy. Don't forget to include cuisine-specific hashtags and local food-related tags for better reach.
How Can I Maintain Consistency Across My Food Photography Portfolio?
To maintain consistency in your food photography portfolio, you'll want to develop a signature style. Stick to a consistent color palette, lighting setup, and editing process. Use similar props and backgrounds, and establish a recognizable composition style across your images.
In Summary
You've now got the tools to take your food photos from amateur to mouthwatering. Remember, it's all about lighting, composition, and attention to detail. Don't be afraid to experiment with angles and props. With practice, you'll develop your own unique style. Keep these tips in mind, and you'll soon be capturing Instagram-worthy shots that'll make everyone's stomach growl. So grab your smartphone, plate up something delicious, and start snapping!

Leave a Reply