
To capture stunning landscape photos on your mobile, timing is key. Shoot during golden hour for warm light or blue hour for a moody atmosphere. Scout locations in advance to find unique compositions and interesting foreground elements. Use leading lines and natural framing to guide the viewer's eye. Master your phone's pro mode settings for control over ISO, shutter speed, and white balance. Play with light and shadows to create depth and drama. Edit your photos using powerful mobile apps to enhance colors and contrast. Don't forget to protect your device from the elements. These tips are just the beginning of your journey to breathtaking mobile landscape photography.
Choose the Right Time

Nearly every photographer knows that timing is essential in landscape photography. When shooting landscapes with your mobile device, choosing the right time can make or break your images.
The golden hour, occurring just after sunrise and before sunset, offers warm, soft light that enhances colors and creates long, dramatic shadows. This magical period typically lasts about an hour, so plan accordingly.
Don't overlook the blue hour, which happens before sunrise and after sunset. It bathes landscapes in cool, ethereal light, perfect for creating moody atmospheres.
Midday sun can be harsh, but it's ideal for capturing vibrant colors in bodies of water or showcasing stark desert scenes.
Consider seasonal changes too. Spring brings fresh greenery and blooming flowers, while autumn offers a palette of warm hues.
Winter landscapes can be stunningly minimalist, and summer provides lush vegetation and dramatic storm clouds.
Weather conditions also play a vital role. Overcast days diffuse light, reducing contrast and allowing for even exposure.
Foggy mornings add mystery to your shots, while stormy skies create dramatic backdrops.
Scout Your Location
With the perfect timing in mind, it's time to explore your shooting location. Scout your chosen area beforehand to identify potential compositions and challenges. Visit at different times of day to understand how light interacts with the landscape. Look for unique features, natural frames, and interesting foreground elements that can add depth to your photos.
Pay attention to the terrain and any obstacles that might affect your shoot. Consider accessibility and safety, especially if you're planning to capture sunrise or sunset shots. Use apps like Google Earth or hiking maps to get a bird's-eye view of the area and plan your approach.
While scouting, take test shots with your mobile phone to experiment with different angles and compositions. This will help you visualize the final image and save time during your actual shoot.
Don't forget to check the weather forecast and be prepared for changing conditions. Make note of any permits or restrictions that might apply to your chosen location. Respect the environment and follow leave-no-trace principles.
Use Leading Lines

Leading lines are powerful compositional tools that can transform your mobile landscape photos. These lines guide the viewer's eye through the image, creating depth and drawing attention to the main subject. To use leading lines effectively, look for natural or man-made elements in your landscape that form strong, visible paths.
Rivers, roads, fences, and shorelines are excellent examples of leading lines. Position your phone's camera to capture these elements stretching from the foreground to the background. Experiment with different angles to find the most compelling composition.
Try shooting from a low angle to emphasize the lines or from a high vantage point to showcase their path through the landscape.
When using leading lines, guarantee they lead to a point of interest in your photo. This could be a mountain peak, a lone tree, or a dramatic sky.
Don't forget to use the rule of thirds to place your main subject at one of the intersecting points for added impact. With practice, you'll develop an eye for spotting and incorporating leading lines into your mobile landscape photography, resulting in more dynamic and engaging images.
Frame With Natural Elements
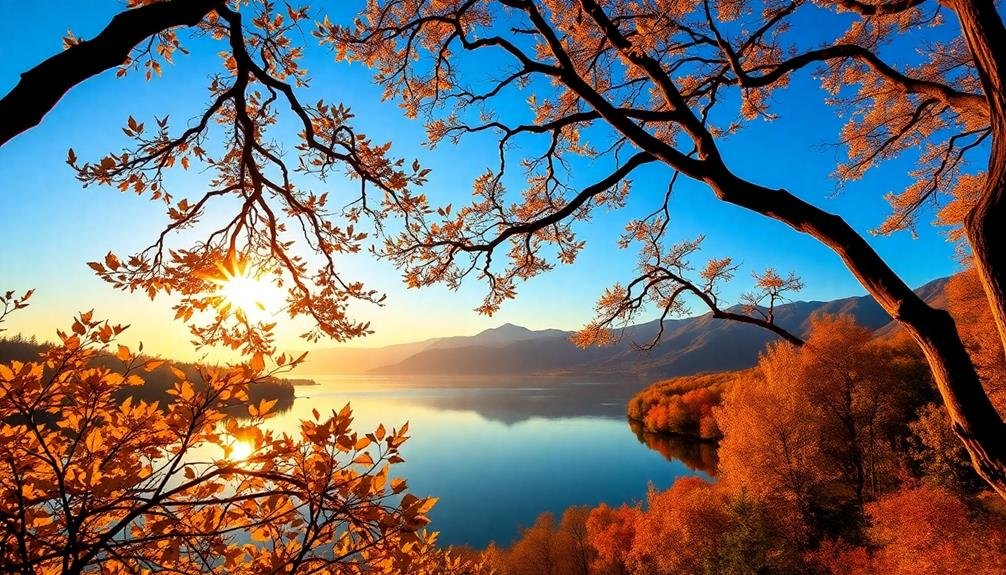
Creativity in mobile landscape photography often involves using natural elements as frames for your subject. This technique adds depth, context, and visual interest to your images. Look for natural objects like tree branches, rock formations, or archways to frame your main subject. These elements guide the viewer's eye and create a sense of depth in your composition.
When framing with natural elements, consider the following:
| Framing Element | Effect | Example |
|---|---|---|
| Tree branches | Organic feel | Forest scenes |
| Rock formations | Rugged texture | Mountain vistas |
| Archways | Architectural focus | Cave entrances |
To effectively use natural frames, position yourself so the framing element is in the foreground, with your main subject visible through or between the framing elements. Experiment with different angles and distances to find the most compelling composition. You can also use partial frames, where only part of the image is enclosed by natural elements.
Remember to adjust your exposure for the framing elements, which are often darker than the main subject. Use your phone's tap-to-focus feature to guarantee proper exposure of your subject. Don't be afraid to move around and try different perspectives to find the perfect natural frame for your landscape shot.
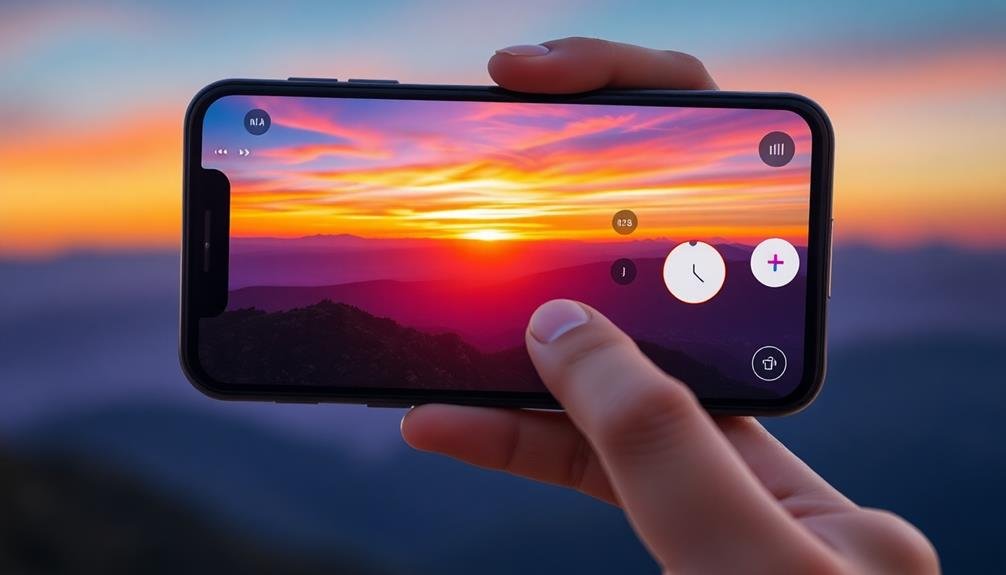
Master Mobile Camera Settings

Smartphones have come a long way regarding camera technology, offering a range of settings that can elevate your landscape photography. To master these settings, start by exploring your phone's pro or manual mode. This feature gives you control over vital elements like ISO, shutter speed, and white balance.
For landscape shots, keep your ISO low to minimize noise and maintain image quality. Experiment with slower shutter speeds to capture movement in clouds or water, creating a dreamy effect. Don't forget to use a tripod or steady surface to avoid camera shake.
Adjust your white balance to match the scene's lighting conditions. This guarantees accurate color representation, especially during golden hour or overcast days. Use the HDR (High Dynamic Range) mode to capture more detail in high-contrast scenes, like sunsets or shadowy forests.
Focus on the foreground to add depth to your images, and tap the screen to set the exposure for the brightest part of the scene.
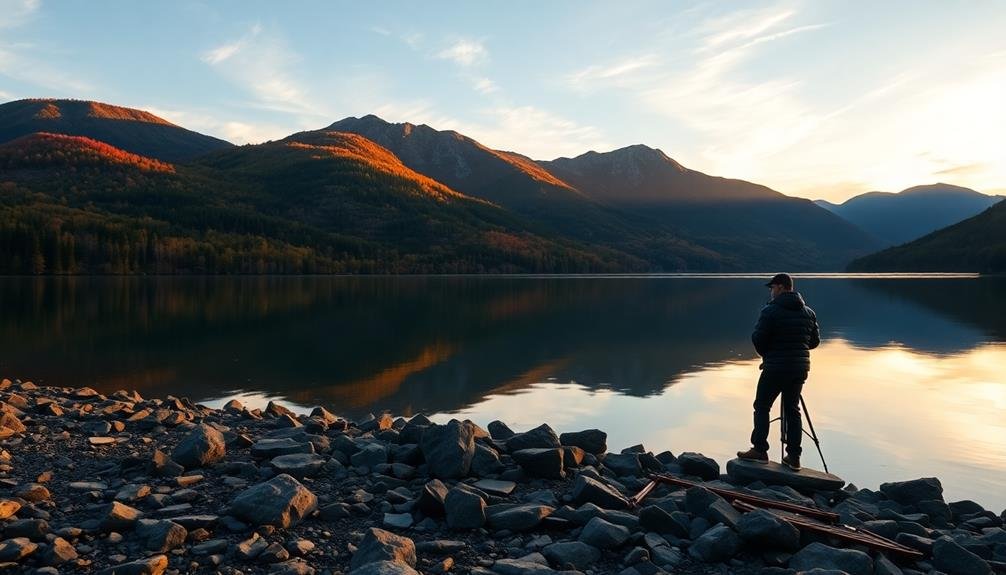
Capture Reflections in Water

With a keen eye for detail, you can transform ordinary water bodies into stunning mirrors of the landscape. Water reflections add depth, symmetry, and a touch of magic to your mobile landscape photos. To capture these mesmerizing effects, look for calm bodies of water like lakes, ponds, or even puddles after rain.
Position yourself low to the ground and experiment with different angles to find the perfect reflection. Use your mobile camera's HDR mode to balance the exposure between the sky and water. Focus on the reflected image to guarantee sharpness, and consider using a small tripod or stabilizer for crisp results.
Early mornings and late afternoons often provide the best lighting conditions for reflection photography. To evoke emotion in your audience, incorporate these elements into your water reflection shots:
- Dramatic skies with colorful clouds
- Silhouettes of trees or mountains
- Wildlife or people as focal points
- Unique textures created by ripples or vegetation
Remember to experiment with composition, using the rule of thirds or symmetry to create visually appealing images. Don't be afraid to get creative and try unconventional angles or perspectives to capture truly breathtaking reflections in your mobile landscape photos.
Experiment With Panoramic Shots

How can you capture the grandeur of expansive landscapes with your mobile device? Panoramic shots are the answer. Most smartphones now offer a built-in panorama mode, allowing you to create stunning wide-angle images that capture the full scope of a scene.
To start, hold your phone vertically and select the panorama mode in your camera app. Begin at one end of the landscape and slowly pan across the scene, keeping the phone steady. Follow the on-screen guide to maintain a straight line. Don't rush; move smoothly to avoid distortion.
Experiment with different compositions. Try capturing a 180-degree view or go for a full 360-degree panorama. Look for scenes with interesting elements throughout the frame, like mountain ranges or cityscapes. Consider including a focal point, such as a tree or person, to add scale and interest.
For more advanced panoramas, try vertical pans to capture tall structures or create unique perspectives. You can also combine multiple panoramas in post-processing to create ultra-wide or high-resolution images.
With practice, you'll master the art of panoramic shots, adding a new dimension to your mobile landscape photography.
Enhance Depth With Foreground

To enhance depth in your mobile landscape photos, consider framing your shots with natural elements in the foreground.
You'll create a more immersive experience by including nearby rocks, branches, or flowers to draw the viewer's eye into the scene.
Additionally, look for leading lines like paths, rivers, or fences that can guide the viewer's gaze towards the main subject, effectively adding a sense of depth and dimension to your composition.
Frame With Natural Elements
Three natural elements can transform your mobile landscape photos: trees, rocks, and foliage. Use these to frame your shots and create a sense of depth and context. Look for overhanging branches, large boulders, or clusters of leaves to act as natural borders for your composition. Position yourself so that these elements lead the viewer's eye into the scene, drawing attention to the main subject.
When framing with natural elements, consider the balance between the frame and the subject. Don't let the framing overwhelm the scene; instead, use it to complement and enhance the overall image. Experiment with different angles and positions to find the most effective framing for your shot.
To evoke emotion in your audience through natural framing:
- Use towering trees to create a sense of awe and grandeur
- Frame with delicate flowers to convey beauty and fragility
- Incorporate rugged rocks to express strength and permanence
- Include flowing water elements to suggest serenity and movement
Remember to adjust your exposure settings to account for any shadows created by your natural frame. This technique can add depth, context, and visual interest to your mobile landscape photos, elevating them from ordinary to extraordinary.
Use Leading Lines Effectively
Building on the concept of natural framing, leading lines offer another powerful tool for mobile landscape photography. These lines guide the viewer's eye through your image, creating depth and drawing attention to your main subject.
To use leading lines effectively, start by identifying natural or man-made elements in your scene that form strong directional cues. Look for paths, roads, rivers, fences, or even shadows that lead toward your focal point.
Position your mobile camera to align these lines with your composition's key elements. You'll often find that diagonal lines create a more dynamic image than straight horizontal or vertical ones. Don't be afraid to get low or change your angle to emphasize these lines.
When capturing landscapes, use leading lines to connect the foreground with the background. This technique adds depth and dimension to your photos, making them more engaging.
Play With Light and Shadows

Light's interplay with shadows can transform an ordinary landscape into a mesmerizing masterpiece. As a mobile photographer, you have the power to harness this dynamic duo to create stunning images.
Look for scenes where light and shadows create contrast, depth, and texture. The golden hours of sunrise and sunset offer the most dramatic lighting conditions, casting long shadows and bathing landscapes in warm, ethereal glows.
Don't shy away from harsh midday sun; it can create bold, graphic shadows that add interest to your compositions. Experiment with backlighting to create silhouettes or rim lighting for a magical effect.
Pay attention to how light filters through trees, clouds, or structures, creating patterns and shapes on the ground.
To evoke emotion in your landscape photos using light and shadows:
- Capture the mystery of a misty forest at dawn
- Highlight the drama of storm clouds rolling in
- Showcase the serenity of a sun-dappled meadow
- Emphasize the raw power of a rugged coastline at sunset
Edit Photos on Your Device

After capturing your landscape shots, it's time to enhance them right on your mobile device.
Start by selecting a suitable editing app that offers the features you need for landscape photography.
Once you've chosen your app, focus on adjusting the lighting and contrast to bring out the best in your images, and experiment with filters to add creative flair to your landscapes.
Choose the Right App
One of the most essential steps in mobile landscape photography is selecting the right editing app. With countless options available, it's vital to choose one that suits your style and skill level. Look for apps that offer a wide range of features, including exposure adjustment, color correction, and local editing tools.
Consider apps like Snapseed, Adobe Lightroom Mobile, or VSCO for their powerful editing capabilities and user-friendly interfaces.
When choosing an editing app, keep these emotional factors in mind:
- Excitement: The thrill of transforming your raw captures into stunning masterpieces
- Confidence: The assurance that you can enhance your photos professionally
- Creativity: The freedom to experiment with various styles and effects
- Pride: The satisfaction of sharing polished, eye-catching images with others
Pay attention to the app's learning curve and available tutorials. Some apps offer preset filters, which can be a great starting point for beginners.
However, as you progress, you'll want more control over individual editing parameters. Don't hesitate to try multiple apps before settling on your favorites.
Adjust Lighting and Contrast
When it comes to editing landscape photos on your mobile device, adjusting lighting and contrast is essential for creating stunning images. Most mobile editing apps offer basic tools to enhance these elements, allowing you to bring out the best in your shots.
Start by adjusting the exposure to balance the overall brightness of your image. Then, fine-tune the highlights and shadows to reveal details in both bright and dark areas. Contrast adjustments can help make your image pop, but be careful not to overdo it.
Here's a quick guide to common lighting and contrast adjustments:
| Adjustment | Effect | Increase | Decrease |
|---|---|---|---|
| Exposure | Overall brightness | Brightens image | Darkens image |
| Highlights | Bright areas | Enhances bright details | Recovers blown-out areas |
| Shadows | Dark areas | Lightens shadows | Deepens shadows |
| Contrast | Tonal range | Increases difference between light and dark | Softens difference between light and dark |
Don't forget to use the white balance tool to correct any color casts and guarantee your landscape's colors look natural. Experiment with these adjustments to find the perfect balance for your unique landscape photo, always working to maintain a natural look that captures the scene's true beauty.
Apply Filters Creatively
With filters at your fingertips, you can transform your landscape photos instantly. Most mobile photo editing apps offer a wide range of filters that can enhance your images' mood, color, and overall impact.
Experiment with different options to find the perfect look for each landscape shot. Remember, filters aren't just for Instagram; they're powerful tools for creating stunning, professional-looking images.
When applying filters, consider the atmosphere you want to convey. Warm filters can add a golden glow to sunset scenes, while cool filters can enhance the crisp feel of a winter landscape.
Don't be afraid to adjust the filter's intensity to achieve a more subtle effect. Some apps allow you to layer multiple filters, opening up even more creative possibilities.
To evoke emotion in your audience, consider these filter techniques:
- Use a dramatic black and white filter to create a timeless, moody atmosphere
- Apply a soft, dreamy filter to capture the ethereal quality of misty mountains
- Enhance vibrant colors with a saturation filter to showcase nature's vivid beauty
- Create a vintage look with a sepia or faded filter for a nostalgic feel
Utilize Mobile Photography Apps
Innovation in mobile photography extends far beyond your phone's default camera app. Specialized apps can greatly enhance your landscape photography skills and results. Start with apps like Snapseed or VSCO, which offer powerful editing tools. They'll let you adjust exposure, contrast, and color balance with precision, helping you bring out the best in your nature shots.
For more advanced control, try apps like ProCamera or Halide. These give you manual settings for shutter speed, ISO, and focus, mimicking DSLR functionality. You'll be able to capture long exposures of flowing water or star trails with ease.
Don't overlook composition aids. Apps like SKRWT can correct lens distortion, while TouchRetouch helps remove unwanted elements from your shots. For golden hour enthusiasts, Sun Surveyor predicts ideal lighting conditions for your chosen location.
Lastly, consider apps that expand your creative possibilities. Slow Shutter Cam allows for light painting and motion blur effects, while Prisma can transform your landscapes into artistic interpretations.
Protect Your Phone Outdoors
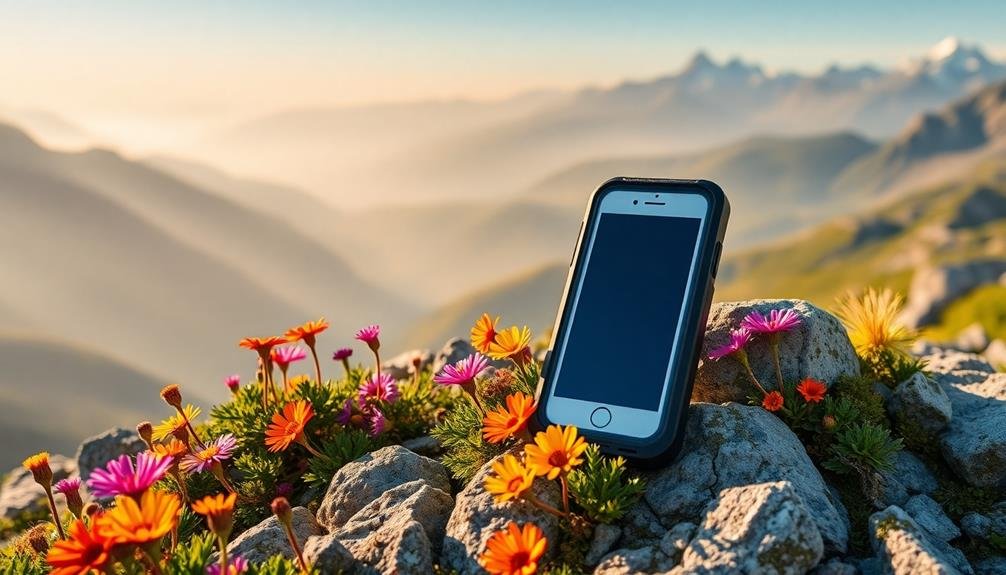
Outdoor photography enthusiasts face unique challenges when it comes to protecting their mobile devices. Your phone is your primary tool for capturing stunning landscapes, so it's vital to shield it from the elements. Invest in a rugged, waterproof case that can withstand drops, dust, and moisture. This will give you peace of mind when shooting in challenging conditions.
Don't forget to carry a microfiber cloth to wipe away smudges and water droplets from your lens. A clean lens guarantees crisp, clear images. Additionally, pack a portable charger to keep your phone powered up during long outdoor shoots. Nothing's worse than missing the perfect shot because of a dead battery.
When you're not using your phone, keep it in a protective pouch or dry bag. This extra layer of protection will safeguard your device from unexpected rain showers or accidental splashes.
Here are four emotional reasons to prioritize phone protection:
- The heartbreak of losing irreplaceable memories
- The frustration of missing once-in-a-lifetime shots
- The anxiety of potentially damaging an expensive device
- The joy of worry-free photography in any environment
Frequently Asked Questions
How Do I Handle Moving Subjects Like Animals or Flowing Water?
For moving subjects, you'll want to use faster shutter speeds to freeze action. Try burst mode for animals and slower shutter speeds for flowing water to create a smooth effect. Experiment with different settings to find what works best.
What Are the Best Cloud Storage Options for Mobile Landscape Photographers?
You'll find Google Photos, iCloud, and Dropbox excellent for cloud storage. They offer automatic backups, easy sharing, and ample space. Consider their pricing tiers and device compatibility. Don't forget to enable Wi-Fi-only uploads to save data.
How Can I Create Long-Exposure Effects in Mobile Landscape Photography?
You can create long-exposure effects in mobile photography by using specialized apps like Slow Shutter Cam or Long Expo. These apps let you capture motion blur, light trails, and smooth water surfaces. Alternatively, try shooting in low light conditions.
Are There Any Etiquette Guidelines for Photographing Landscapes in Public Spaces?
When photographing landscapes in public spaces, be respectful of others. Don't block paths or disrupt wildlife. Obtain permits if required. Be mindful of private property boundaries. Leave no trace and follow local regulations. Always prioritize safety and conservation.
How Do I Maintain Image Quality When Printing Mobile Landscape Photos?
To maintain quality when printing mobile landscape photos, you'll want to use the highest resolution settings, edit carefully, choose a reputable print service, and select appropriate paper. Don't overlook proper color calibration and file format considerations.
In Summary
You're now equipped with the secrets to capture stunning landscape photos on your mobile device. Remember to plan your shots, use composition techniques, and harness your phone's camera features. Don't be afraid to experiment with lighting and editing apps. With practice, you'll develop your unique style and create breathtaking images that showcase nature's beauty. So grab your phone, head outdoors, and start capturing the world around you. Happy shooting!


Leave a Reply