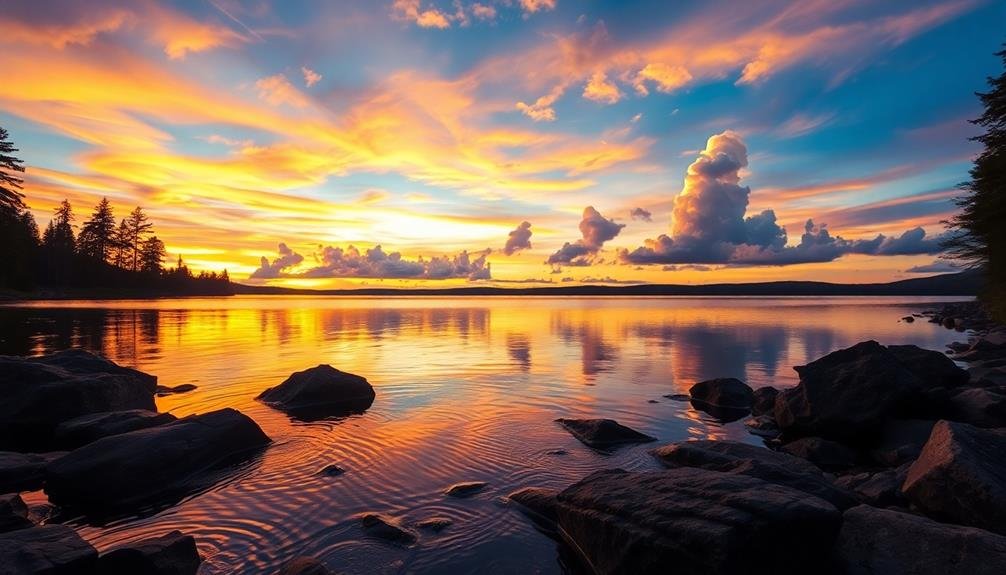
HDR elevates your reflection photography game by capturing the full dynamic range of light in challenging scenes. It balances highlights and shadows, revealing hidden details in both bright and dark areas. With HDR, you'll enhance colors, preserve textures, and overcome tricky lighting conditions in reflective surfaces. Your smartphone's HDR mode automatically combines multiple exposures, creating balanced and vibrant images. This technique is particularly effective for water reflections, allowing you to capture subtle nuances and rich colors. By mastering HDR, you'll produce stunning mirror-like images that closely resemble what your eyes see. Dive deeper to reveal the full potential of HDR in reflection photography.
Understanding HDR in Smartphone Photography
Anyone with a modern smartphone has likely encountered HDR, or High Dynamic Range, in their camera settings. This feature combines multiple exposures of the same scene to create a single image with improved detail in both bright and dark areas.
HDR works by taking several photos in quick succession at different exposure levels, then merging them into one final shot.
When you're shooting reflections, HDR can be particularly useful. It helps capture the full range of tones in both the reflected image and its surroundings, which often have vastly different light levels.
Without HDR, you might end up with blown-out highlights or lost details in shadows.
Most smartphones offer automatic HDR, which detects high-contrast scenes and applies the effect as needed. However, you can also manually enable HDR for more control.
It's essential to recognize that HDR isn't always the best choice. In low-light situations or with moving subjects, it can produce blurry or ghosted images.
For reflection photography, though, HDR shines when you're dealing with still subjects and want to capture the nuances of light and shadow in reflective surfaces.
Dynamic Range in Reflection Scenes

Complexity defines the dynamic range in reflection scenes, presenting unique challenges for photographers. When capturing reflections, you're often dealing with two distinct lighting scenarios simultaneously: the reflected subject and the reflective surface. This can create a wide range of brightness levels that your camera's sensor may struggle to capture accurately.
Reflective surfaces, like water or glass, can amplify the contrast in a scene. They might brilliantly highlight the brightest areas while deepening shadows, pushing the limits of your camera's dynamic range capabilities.
You'll need to take into account:
- The light intensity of the reflected subject
- The reflectivity and texture of the surface
- Any additional light sources in the frame
Understanding these elements is essential for managing the dynamic range effectively. Without proper technique, you might end up with blown-out highlights in the reflection or lost details in the shadows of the original subject.
This is where HDR can be a game-changer, allowing you to capture and blend multiple exposures to represent the full range of tones in your reflection scene. By mastering dynamic range in these complex scenarios, you'll elevate your reflection photography to new heights.
Balancing Highlights and Shadows
When shooting reflections, you'll often encounter scenes with extreme brightness differences.
To balance these, you'll need to reveal hidden shadow details while preserving highlight information.
Revealing Hidden Shadow Details
HDR photography shines when it comes to revealing hidden shadow details in reflection shots. When you're capturing reflections, especially in water or glass, the darker areas often hold intriguing textures and nuances that can elevate your image.
With HDR, you'll be able to bring out these subtle details without overexposing the brighter parts of your scene. By combining multiple exposures, you'll uncover elements that might otherwise remain hidden in a single shot.
This technique is particularly useful when photographing reflections in shadowy areas, such as under bridges or in dense forests. You'll be amazed at how much more depth and dimension your images gain when these shadow details are properly exposed.
Here are three key benefits of using HDR for revealing shadow details in reflection photography:
- Enhanced texture in water ripples and surface variations
- Improved visibility of submerged objects or underwater landscapes
- Greater definition in shadowy areas surrounding the reflection
Preserving Highlight Information
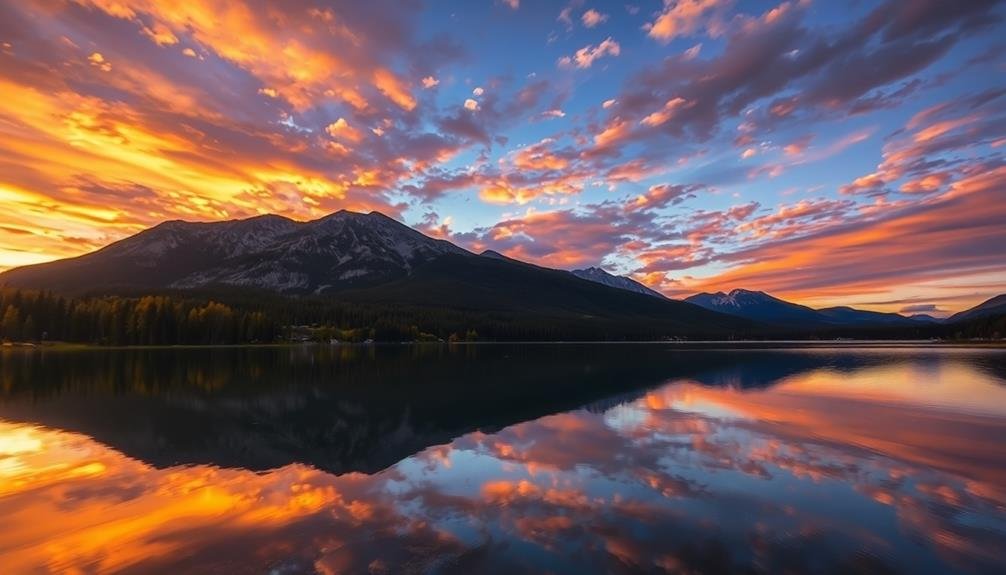
The delicate balance between highlights and shadows is essential in reflection photography. When capturing reflections, you'll often encounter scenes with extreme contrast between bright skies and dark water surfaces. HDR techniques help you preserve highlight information that might otherwise be lost in a single exposure.
By bracketing your shots and combining multiple exposures, you can retain details in the brightest areas of your image. This is particularly important for reflections, where you want to maintain the texture and color of clouds or other bright elements in both the real scene and its mirror image.
Without HDR, these highlights might become blown out, resulting in featureless white areas that lack depth and interest.
When processing your HDR images, pay close attention to highlight recovery. Use your software's tools to carefully bring back detail in bright areas without introducing artifacts or unnatural-looking halos.
Aim for a natural-looking result that closely resembles what your eyes saw in the scene. By preserving highlight information, you'll create more balanced and visually appealing reflection photographs that showcase the full range of tones and details in both the subject and its reflection.
Creating Balanced Reflections
A mirror-like surface demands a delicate touch when capturing reflections. HDR techniques allow you to balance the highlights and shadows in your reflection photography, creating a harmonious image that showcases both the reflected scene and the reflective surface itself.
By combining multiple exposures, you'll capture details in both the bright and dark areas of your composition. This approach guarantees that you don't lose information in the highlights of the sky or the shadows in the water. The result is a more natural-looking image that closely resembles what your eyes see in real life.
To create balanced reflections using HDR:
- Bracket your exposures, taking at least three shots at different exposure levels (underexposed, properly exposed, and overexposed).
- Use a tripod to maintain consistent framing across all exposures.
- Experiment with different HDR software to find the one that produces the most natural-looking results for your style.
Remember to adjust the HDR settings carefully to avoid an over-processed look. Your goal is to create a balanced image that maintains the ethereal quality of reflections while preserving detail throughout the entire tonal range.
Capturing Details in Water Reflections
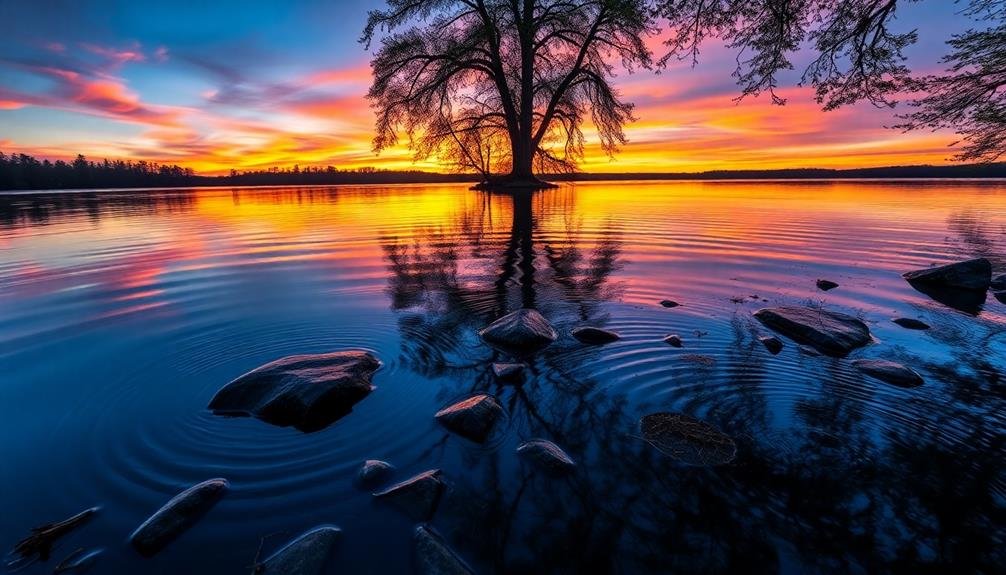
Capturing details in water reflections presents unique challenges for photographers. Water surfaces can be unpredictable, with varying textures and movement that affect how light interacts with them. HDR techniques can help you overcome these obstacles and capture stunning, detailed reflections.
When shooting water reflections, you'll often encounter high contrast scenes. The sky might be bright while the water's surface is darker. HDR allows you to capture a wider range of tones, ensuring you don't lose details in highlights or shadows. By bracketing your exposures, you can capture the subtle nuances in both the reflection and the surrounding environment.
HDR also helps you deal with ripples and textures on the water's surface. These can create interesting patterns but may also obscure details in the reflection. By combining multiple exposures, you can enhance the visibility of reflected elements while maintaining the water's natural texture.
To get the best results, use a tripod and a remote shutter release. This will minimize camera shake between bracketed shots.
Experiment with different shutter speeds to capture various water textures, from smooth and glassy to more dynamic and rippled.
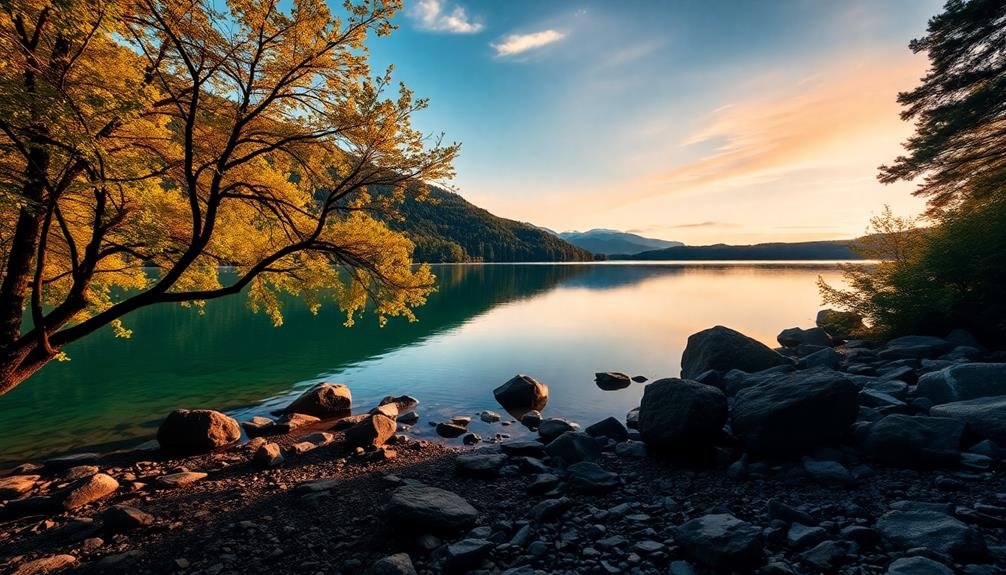
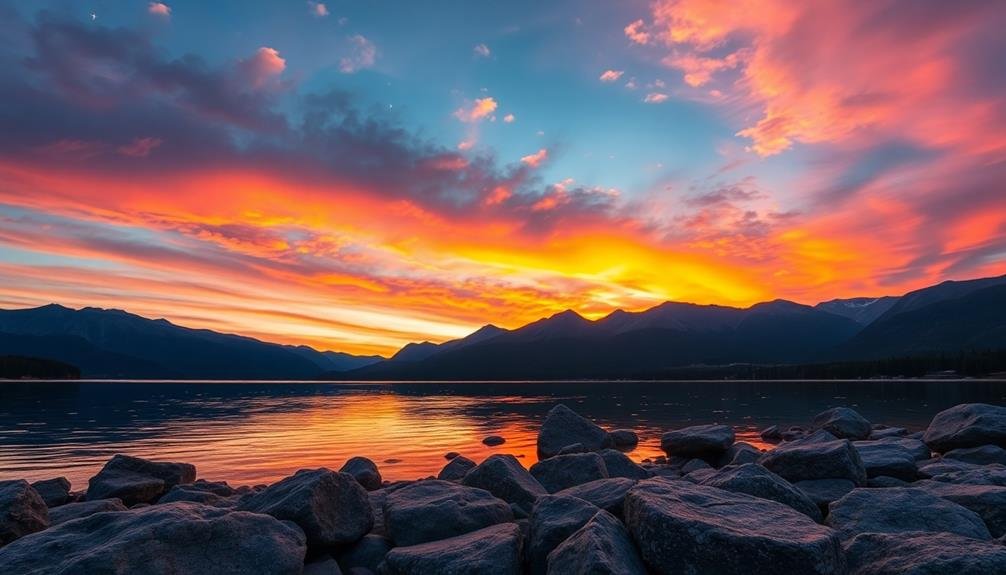
Enhancing Colors in Mirror Images
Vibrant colors can transform a simple reflection into a mesmerizing mirror image. When using HDR techniques, you'll reveal the full potential of color in your reflection photography. By capturing multiple exposures, you're able to preserve both the highlights and shadows, ensuring that no color information is lost. This results in richer, more saturated hues that'll make your mirror images pop.
To enhance colors in your reflection photos, consider these techniques:
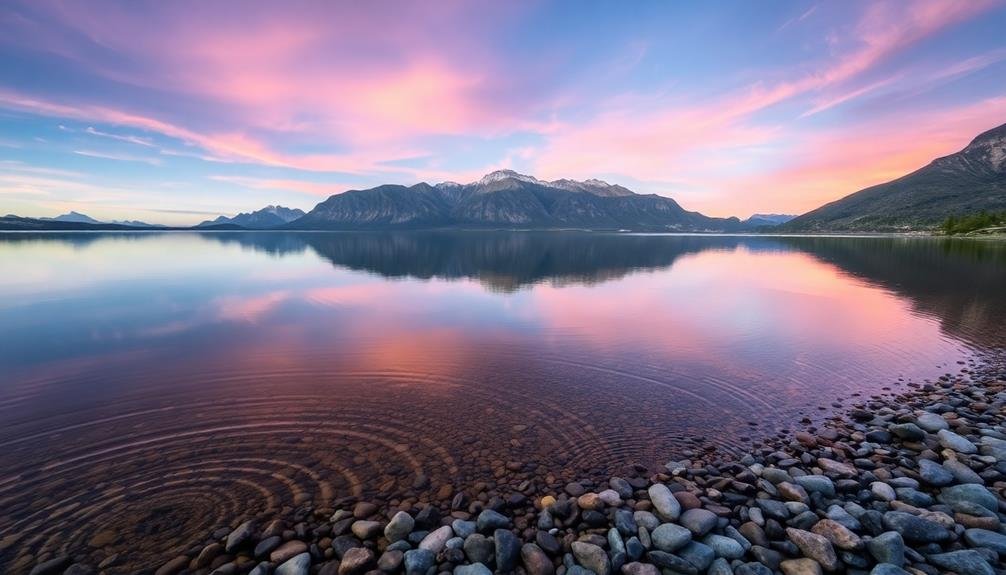
- Shoot during golden hour for warm, golden tones
- Use polarizing filters to reduce glare and boost saturation
- Experiment with white balance settings to adjust overall color temperature
HDR allows you to bring out subtle color variations that might otherwise be lost in a single exposure. You'll notice improved color gradients in sky reflections and more defined hues in foliage or architectural elements.
Don't be afraid to push the color envelope, but be careful not to oversaturate your images. Aim for a balance that enhances the natural beauty of the scene without appearing artificial.
With practice, you'll develop an eye for creating stunning, color-rich mirror images that captivate viewers and elevate your reflection photography to new heights.
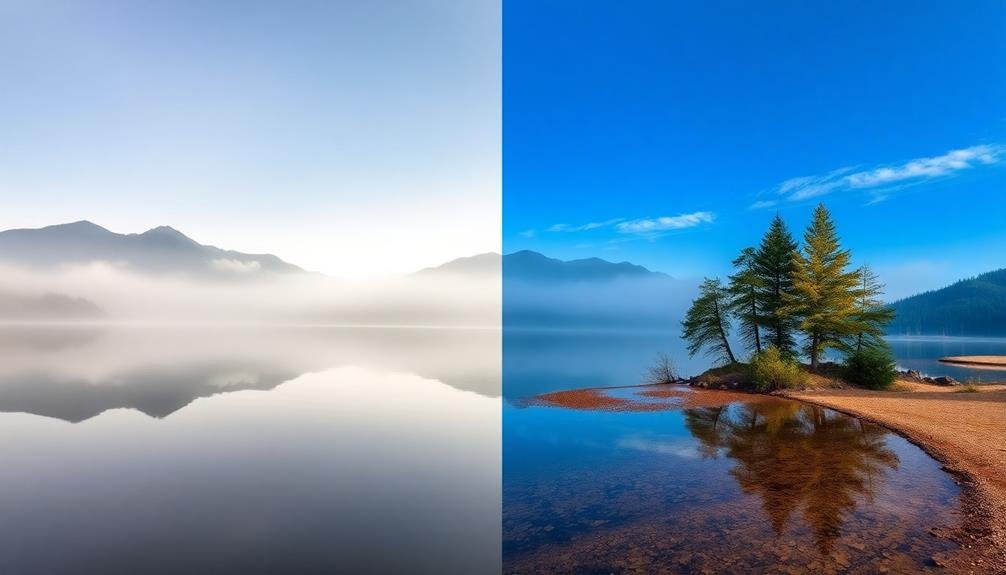
Overcoming Challenging Lighting Conditions
When you're faced with challenging lighting in reflection photography, HDR techniques can be your secret weapon.
You'll find that balancing highlights and shadows becomes much easier, allowing you to preserve detail in both bright and dark areas of your image.
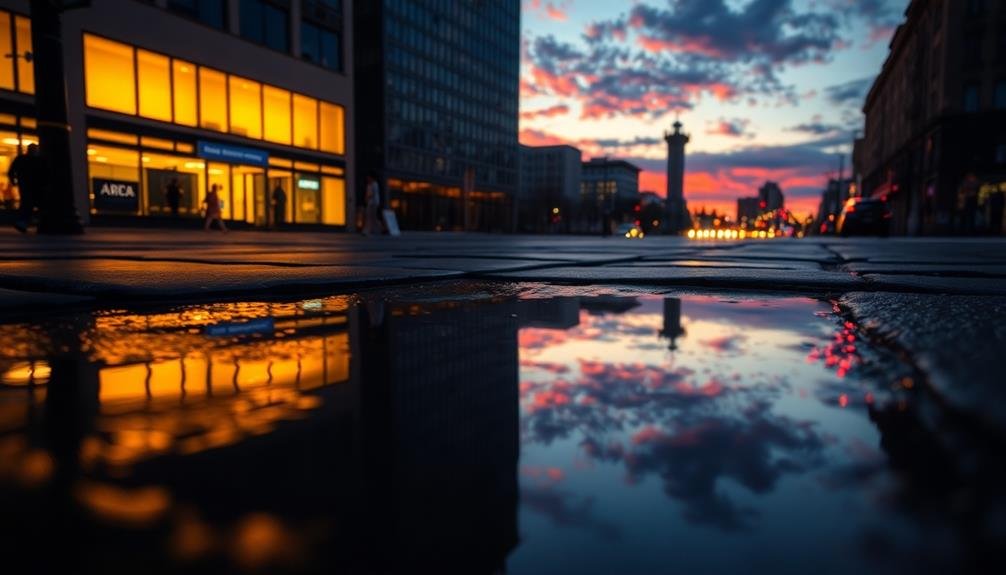
HDR also helps you capture tricky light sources, such as sunsets or artificial lighting, by blending multiple exposures to create a more balanced and visually appealing result.
Balancing Highlights and Shadows
Photographers face a constant battle when shooting reflections: taming the stark contrast between bright highlights and deep shadows. HDR techniques can help you overcome this challenge by capturing multiple exposures and blending them seamlessly.
You'll be able to retain detail in both the brightest and darkest areas of your image, creating a more balanced and visually appealing result.
When balancing highlights and shadows in reflection photography, consider these key points:
- Bracket your exposures: Take multiple shots at different exposure levels to capture the full dynamic range of the scene.
- Use exposure compensation: Adjust your camera's exposure settings to prevent overexposure in bright areas or underexposure in shadows.
- Employ graduated neutral density filters: These can help balance the exposure between the sky and reflective surface in landscape shots.
Capturing Tricky Light Sources
Reflections often involve tricky light sources that can wreak havoc on your HDR shots. The sun, artificial lights, and bright reflective surfaces can create extreme contrasts that challenge even the most advanced cameras. HDR techniques allow you to overcome these obstacles and capture stunning reflection images in challenging lighting conditions.
When shooting reflections with tricky light sources, you'll want to bracket your exposures widely. Capture at least 5-7 frames, ranging from very underexposed to very overexposed. This guarantees you'll have enough data to work with in post-processing. Pay special attention to highlights in reflective surfaces and shadows in surrounding areas.
Use a tripod to maintain consistency between shots, and consider using a remote shutter release to minimize camera shake. If possible, shoot during the golden hour or blue hour when light is softer and more manageable. For night shots with artificial lighting, experiment with longer exposures to capture more detail in dark areas while preserving the highlights in bright light sources.
In post-processing, carefully blend your exposures, focusing on balancing the dynamic range of the scene. Don't be afraid to selectively adjust different areas of the image to achieve the most natural-looking result.
HDR for Low-Light Reflection Shots
Low-light reflection photography presents unique challenges that HDR techniques can effectively address. When you're shooting reflections in dimly lit environments, you'll often struggle with balancing the bright highlights and dark shadows. HDR comes to the rescue by allowing you to capture multiple exposures and blend them seamlessly, resulting in images with enhanced detail and dynamic range.
By using HDR for low-light reflection shots, you'll be able to:
- Preserve the subtle details in both the reflective surface and the reflected scene
- Reduce noise in the darker areas of your image without sacrificing highlight details
- Create a more balanced and natural-looking final image that closely resembles what your eyes see
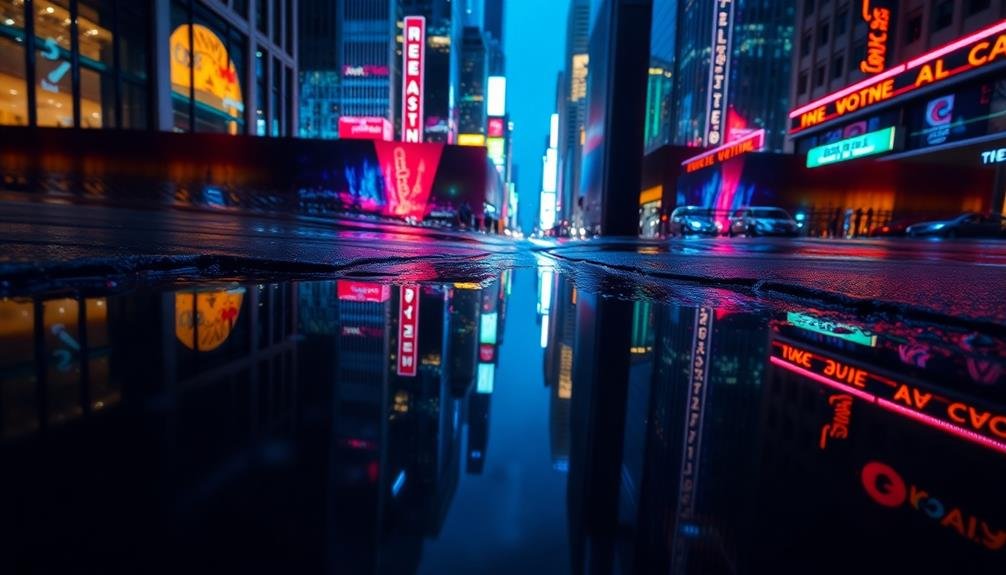
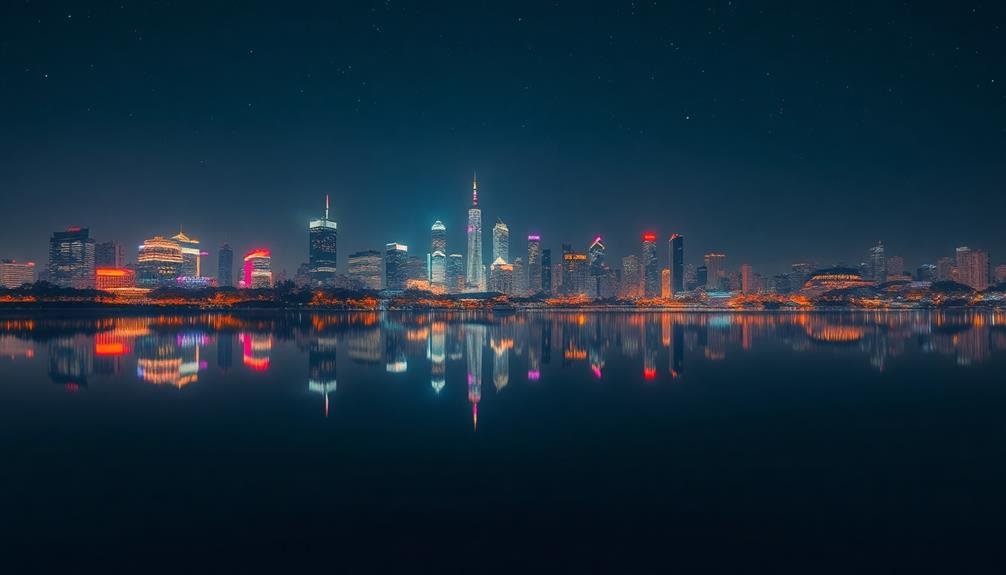
HDR techniques are particularly useful when photographing reflections in urban environments at night, where street lights and neon signs can create extreme contrast.
You'll find that HDR helps you capture the intricate details of illuminated buildings reflected in still water or wet pavements while maintaining the rich, dark tones of the surrounding areas.
Don't be afraid to experiment with different exposure brackets to find the perfect balance for your low-light reflection shots.
Preserving Texture in Reflected Surfaces
When capturing reflections, preserving texture in reflected surfaces can be a challenge, especially with HDR techniques. HDR's tendency to flatten images can sometimes reduce the visual interest of textures in reflective surfaces. To combat this, you'll need to approach your HDR workflow with texture preservation in mind.
Start by capturing your bracketed exposures with careful consideration of the reflective surface's texture. Guarantee at least one exposure accurately represents the texture's detail.
When processing your HDR image, use a light touch with tone mapping to avoid over-smoothing. Many HDR software options offer texture-preserving algorithms; take advantage of these features.
Don't shy away from local adjustments. Use masking techniques to selectively enhance texture in reflected areas while maintaining the HDR benefits in other parts of the image. Experiment with clarity and texture sliders in your editing software, applying them judiciously to reflected surfaces.
Consider blending your HDR result with one of the original exposures that best captures the texture. This technique allows you to harness HDR's dynamic range while maintaining the natural texture of the reflected surface, resulting in a more realistic and visually appealing final image.
Maximizing Contrast in Reflective Scenes
While preserving texture is important, maximizing contrast in reflective scenes can truly make your HDR images pop.
When shooting reflections, you'll often encounter a wide range of tones, from deep shadows to bright highlights. HDR techniques allow you to capture this full dynamic range, ensuring that both the darkest and brightest areas retain detail.
To maximize contrast in your reflective HDR shots:
- Bracket your exposures widely, capturing at least 3-5 images with 2-stop intervals.
- Use a tripod to maintain perfect alignment between shots.
- Experiment with different tone mapping techniques in post-processing.
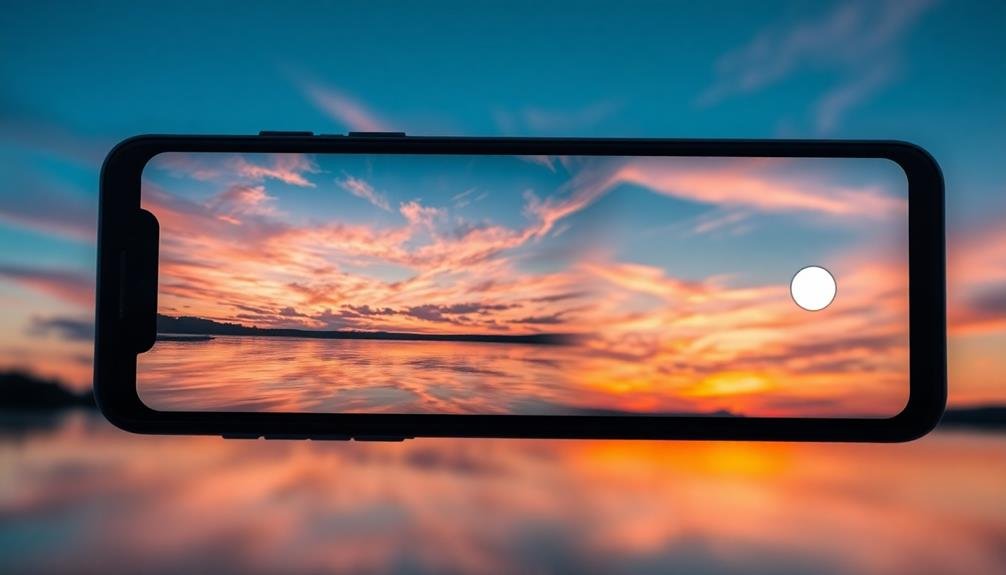
HDR Bracketing Techniques for Smartphones
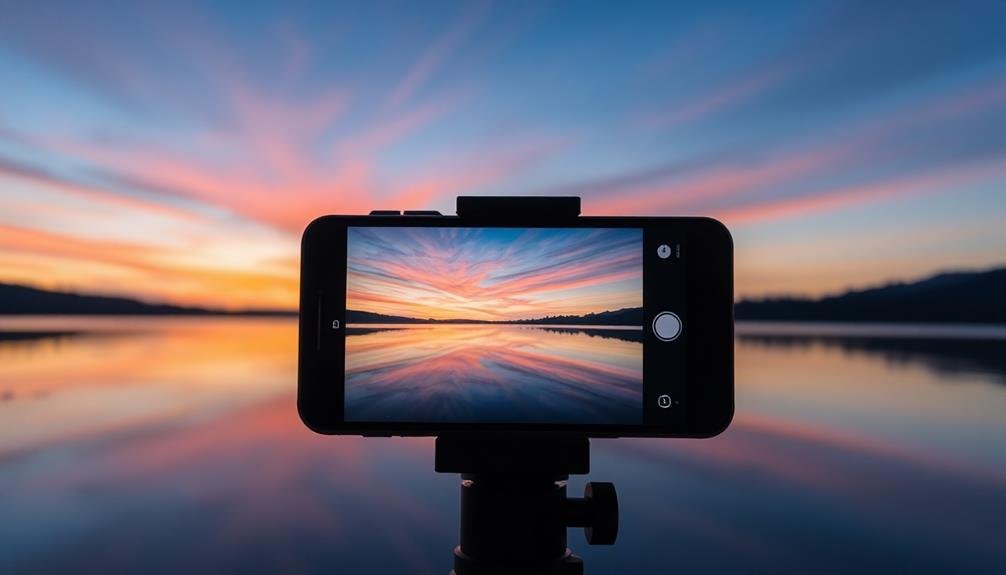
Smartphones have revolutionized HDR photography, making it accessible to anyone with a mobile device. To capture stunning HDR reflections, you'll need to master bracketing techniques specific to your smartphone.
Start by enabling your device's HDR mode, which automatically captures multiple exposures. For more control, use a third-party camera app that allows manual exposure adjustments. Set your phone on a stable surface or use a tripod to guarantee sharp images across all exposures.
When bracketing, aim for at least three shots: one properly exposed, one underexposed, and one overexposed. Adjust your phone's exposure compensation in 1-stop increments between shots. For challenging lighting conditions, consider taking five or seven exposures to capture a wider dynamic range.
Pay attention to movement in your scene. Ripples in water or swaying objects can cause ghosting in the final HDR image. To minimize this, use burst mode or a fast shutter speed when possible.
After capturing your bracketed shots, use a dedicated HDR processing app to merge them. Experiment with different tone mapping settings to achieve the desired balance between highlights and shadows in your reflection photos.
Post-Processing HDR Reflection Photos
The art of post-processing HDR reflection photos can truly elevate your images from good to extraordinary. Once you've captured your bracketed shots, it's time to merge them into a single HDR image. Use specialized software like Adobe Lightroom, Photomatix, or Aurora HDR to combine your exposures seamlessly. These tools offer various presets and adjustments to help you achieve the desired look.
When processing your HDR reflection photos, focus on:
- Balancing contrast and detail: Adjust highlights and shadows to reveal intricate details in both bright and dark areas without creating an unnatural look.
- Fine-tuning colors: Enhance the vibrancy of colors in the reflection while maintaining a realistic appearance.
- Sharpening selectively: Apply sharpening to key areas of the image, such as the reflected subject, while keeping smoother areas like water or sky untouched.
Don't forget to pay attention to alignment issues that may occur during the merging process. Correct any ghosting or misalignment artifacts caused by movement between shots.
Avoiding Common HDR Pitfalls
HDR photography can be a powerful tool, but it's easy to fall into common traps that detract from your reflection images. One of the most frequent pitfalls is over-processing, which can lead to unrealistic, garish results. To avoid this, use a light touch when adjusting tone mapping and saturation. Aim for a natural look that enhances the scene's dynamic range without appearing artificial.
Another common mistake is ghosting, especially in scenes with moving elements like water or clouds. Combat this by using a tripod and ensuring your camera remains perfectly still between exposures. If possible, shoot in conditions with minimal movement.
Pay attention to noise levels, particularly in shadow areas. HDR can exacerbate noise, so use noise reduction techniques judiciously. Be cautious with sharpening as well, as it can create halos around edges in your reflection photos.
Lastly, avoid the temptation to create HDR images from every scene. Some subjects simply don't benefit from the technique. Use HDR selectively, choosing scenes with a wide dynamic range where it will truly enhance the final image.
Composition Techniques for HDR Reflections

When composing HDR reflection shots, you'll want to contemplate three key techniques.
Leading lines in reflections can guide the viewer's eye through the image, while applying the rule of thirds can create a balanced and visually appealing composition.
You'll also need to decide whether to emphasize symmetry or asymmetry in your reflection, as each approach can yield dramatically different results.
Leading Lines Reflections
Utilizing leading lines in reflection photography can dramatically enhance your HDR compositions. These lines guide the viewer's eye through the image, creating depth and drawing attention to key elements.
When combined with HDR techniques, leading lines in reflections become even more powerful, as you can capture a wider range of tones and details in both the reflected and real-world elements.
To effectively use leading lines in HDR reflection photography:
- Look for natural lines in the environment, such as pier posts, shorelines, or architectural features that extend into the water.
- Position yourself to capture both the actual lines and their reflections, creating a symmetrical or mirrored effect.
- Use the HDR technique to guarantee that both the lines and their reflections are well-exposed and rich in detail.
Rule of Thirds
The Rule of Thirds offers another powerful composition technique for HDR reflection photography. This principle involves dividing your frame into a 3×3 grid and placing key elements along these lines or at their intersections. When applying this rule to reflections, you'll create more balanced and visually appealing images.
For HDR reflection shots, try positioning the horizon line along the top or bottom third of your frame. This approach gives prominence to either the reflected scene or the reflection itself, depending on your creative intent. Place interesting elements, such as trees, buildings, or boats, at the grid's intersections to draw the viewer's eye and create a sense of harmony.
You'll find that the Rule of Thirds works exceptionally well with HDR's expanded dynamic range. It allows you to emphasize both the brightest and darkest areas of your composition, creating a striking contrast between the real scene and its reflection.
Experiment with different placements of your main subject and its reflection along the grid lines to achieve the most compelling result. Remember, while this rule is a useful guide, don't be afraid to break it when your artistic vision calls for a different approach.
Symmetry vs. Asymmetry
Symmetry and asymmetry both play essential roles in HDR reflection photography. When composing your shots, you'll need to decide which approach best suits your subject and artistic vision.
Symmetrical compositions create a sense of balance and harmony, often resulting in visually pleasing and calming images. They're particularly effective when capturing reflections of architectural elements or landscapes with distinct vertical lines.
On the other hand, asymmetrical compositions can add intrigue and dynamism to your HDR reflection photos, drawing the viewer's eye through the frame in unexpected ways.
To make the most of symmetry and asymmetry in your HDR reflection photography:
- Use leading lines to guide the eye towards the reflection's center for symmetrical shots.
- Experiment with off-center compositions to create tension and visual interest in asymmetrical images.
- Combine symmetry and asymmetry by placing a symmetrical reflection off-center in the frame.
Frequently Asked Questions
How Does HDR Affect the File Size of Reflection Photos?
HDR increases your reflection photo's file size. You're combining multiple exposures into one image, resulting in more data. This means larger files, often considerably bigger than single-exposure shots. Consider storage needs when using HDR frequently.
Can HDR Be Used Effectively for Reflections on Non-Water Surfaces?
Yes, you can effectively use HDR for reflections on non-water surfaces. It'll enhance details in shiny objects, glass, metals, and polished surfaces. You'll capture a wider range of tones, improving contrast and depth in your reflection photos.
Are There Specific Weather Conditions That Work Best for HDR Reflection Photography?
You'll find overcast days ideal for HDR reflection photography. They provide soft, diffused light that reduces harsh contrasts. Early mornings or late afternoons with calm conditions are also perfect, offering gentle light and still surfaces for reflections.
How Does HDR Impact Battery Life When Shooting Reflection Photos?
HDR will drain your battery faster when shooting reflection photos. You'll take multiple exposures for each shot, increasing processing time and power consumption. It's wise to carry spare batteries or a portable charger for extended sessions.
Are There Any Ethical Concerns Regarding HDR Use in Reflection Photography?
You shouldn't worry about ethical concerns with HDR in reflection photography. It's a legitimate technique that enhances image quality. However, be transparent if you're submitting photos for competitions or publications that require disclosure of editing methods.
In Summary
You've now got the tools to take your reflection photography to the next level with HDR. Remember, it's not just about capturing a wider range of light; it's about bringing out the subtle details and colors that make reflections magical. Don't be afraid to experiment with different techniques and settings. With practice, you'll soon be creating stunning HDR reflection images that'll make your followers stop scrolling and stare in awe.


Leave a Reply