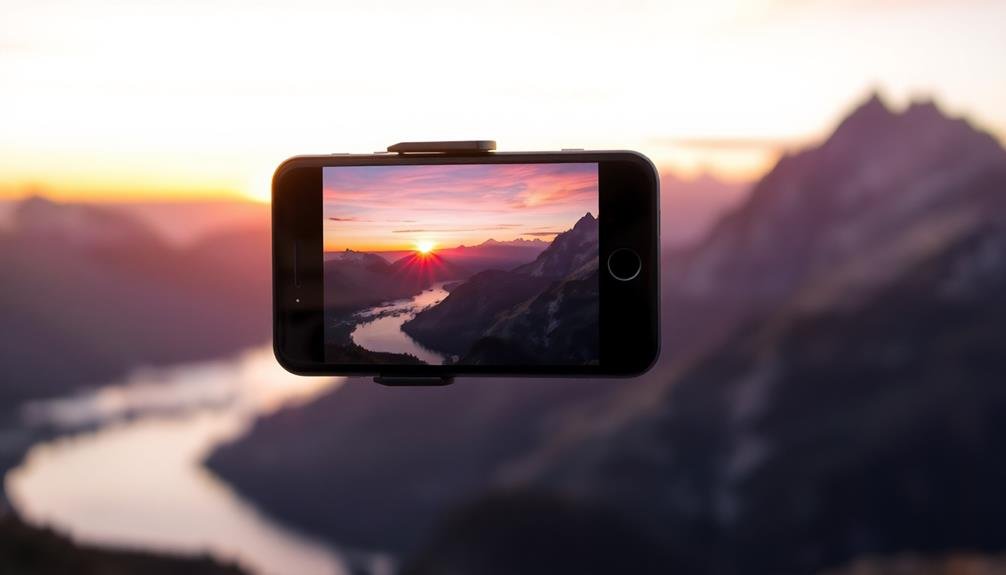
Editing mobile landscapes allows you to reveal nature's hidden beauty, bringing forth details your eyes might miss. You can enhance colors, balance light and shadow, and create depth that draws viewers in. By straightening horizons and cropping strategically, you'll improve composition and focus on key elements. HDR techniques help capture a wider range of tones, while white balance adjustments guarantee colors look natural. You'll bring out textures, emphasize focal points, and even create stunning panoramas. With these edits, you'll transform ordinary scenes into enchanting works of art that showcase the true majesty of the natural world. Discover how to elevate your mobile landscape photography to new heights.
Enhancing Natural Colors

How can we bring out the vibrant hues that nature often hides from the naked eye? With mobile landscape editing, you'll discover a world of color that's been there all along.
Start by adjusting the saturation to enhance the existing colors without making them appear unnatural. You'll want to strike a balance between vibrancy and realism.
Next, focus on individual color channels. Boost the greens to make foliage pop or intensify blues to create more dramatic skies. Don't forget about the often-overlooked yellows and oranges, which can add warmth and depth to your landscapes.
Use the HSL (Hue, Saturation, Lightness) sliders in your editing app to target specific colors without affecting others. This allows you to fine-tune each hue independently, creating a more nuanced and visually appealing image.
Experiment with split-toning to add subtle color casts to your shadows and highlights. This technique can enhance the mood of your landscape and create a cohesive color palette throughout the image.
Balancing Light and Shadow

While color brings landscapes to life, the interplay of light and shadow adds depth and dimension. When editing mobile landscapes, you'll want to focus on balancing these elements to create a more dynamic image.
Start by adjusting the highlights and shadows in your photo editing app. Increase the highlights to make bright areas pop, but be careful not to overexpose them. Conversely, deepen the shadows to add contrast and create a sense of depth.
Pay attention to the direction of light in your image. Side-lighting can emphasize texture, while backlighting creates dramatic silhouettes. You can enhance these effects by selectively brightening or darkening specific areas. Use the dodge and burn tools to highlight key features or create a sense of depth in flat areas.
Don't forget about midtones. Adjusting them can help balance the overall exposure and prevent your image from looking too contrasty.
Experiment with clarity or structure settings to enhance the interplay between light and shadow, bringing out subtle details in your landscape. Remember, the goal is to create a natural-looking image that draws the viewer's eye through the scene.
Straightening Horizons
A crooked horizon can quickly ruin an otherwise stunning landscape photo. When you're capturing nature's beauty on your mobile device, it's easy to forget about keeping things level. But don't worry – straightening horizons is a simple fix that can dramatically improve your images.
Most mobile editing apps offer a straightening tool. You'll typically find it under "crop" or "rotate" options. Simply adjust the angle until the horizon appears perfectly level. Pay attention to any vertical elements in your shot, like trees or buildings, to guarantee they're not leaning unnaturally.
Here's a quick guide to straightening horizons:
| Step | Action | Tip |
|---|---|---|
| 1 | Open editor | Choose your favorite app |
| 2 | Find straighten tool | Often under "crop" or "rotate" |
| 3 | Adjust angle | Use grid lines for precision |
Cropping for Improved Composition

When you crop your nature photos, you're not just cutting away excess; you're refining the story your image tells.
By eliminating distracting elements at the edges, you can draw the viewer's attention to the heart of your composition.
Careful cropping also allows you to enhance focal points, making key subjects more prominent and impactful in your final image.
Eliminate Distracting Elements
Distracting elements can ruin an otherwise perfect nature photograph. When editing your mobile landscapes, it's essential to identify and remove these unwanted objects. Look for power lines, litter, or man-made structures that detract from the natural beauty you're trying to capture. You can use various editing tools to remove these distractions, such as the healing brush or clone stamp features in most photo editing apps.
Sometimes, you'll need to make tough decisions about what to keep and what to remove. Remember, your goal is to showcase nature's hidden beauty, so don't be afraid to make bold edits. However, be careful not to overdo it and create an unrealistic image. Aim for a balance between enhancing the natural elements and maintaining the photograph's authenticity.
By eliminating distracting elements, you'll evoke powerful emotions in your audience:
- Awe at the untouched beauty of nature
- Serenity from uncluttered, peaceful scenes
- Wonder at the intricate details now visible
- Connection to the raw, natural world
With practice, you'll develop a keen eye for spotting and removing distractions, allowing nature's true essence to shine through in your mobile landscape photography.
Enhance Focal Points
Enhancing focal points through strategic cropping is a powerful technique to improve your mobile landscape compositions. By carefully trimming the edges of your image, you'll draw attention to the most compelling elements and create a more impactful visual story.
Start by identifying the main subject of your landscape. This could be a striking mountain peak, a lone tree, or a winding river. Once you've pinpointed your focal point, experiment with different crop ratios to emphasize it. A square crop can lend a sense of balance, while a panoramic format might better suit a sweeping vista.
Don't be afraid to crop tightly around your subject. This can create a sense of intimacy and reveal details that might've been lost in a wider shot. Pay attention to the rule of thirds, placing key elements along these imaginary lines or at their intersections.
Consider how the crop affects the overall composition. Use leading lines to guide the viewer's eye toward the focal point. Adjust the horizon line to create a more dynamic image.
Removing Distracting Elements

Many photographers struggle with distracting elements that detract from their nature shots. When editing mobile landscapes, it's essential to identify and remove these unwanted objects. You'll often encounter power lines, trash, or even other people in your frame. By eliminating these distractions, you'll draw attention to the natural beauty you're trying to capture.
Use your photo editing app's clone or healing tools to remove small objects seamlessly. For larger distractions, consider cropping the image or using more advanced techniques like content-aware fill. Don't be afraid to experiment with different approaches to achieve the best results.
Remember, the goal is to create a clean, focused image that highlights nature's splendor. By removing distracting elements, you'll:
- Evoke a sense of serenity and tranquility in your viewers
- Transport your audience to untouched, pristine landscapes
- Capture the raw beauty of nature without human interference
- Create timeless images that resonate with people's desire for unspoiled wilderness
As you refine your editing skills, you'll develop an eye for spotting and eliminating distractions. This attention to detail will elevate your mobile landscape photography, allowing you to showcase nature's hidden beauty in its purest form.
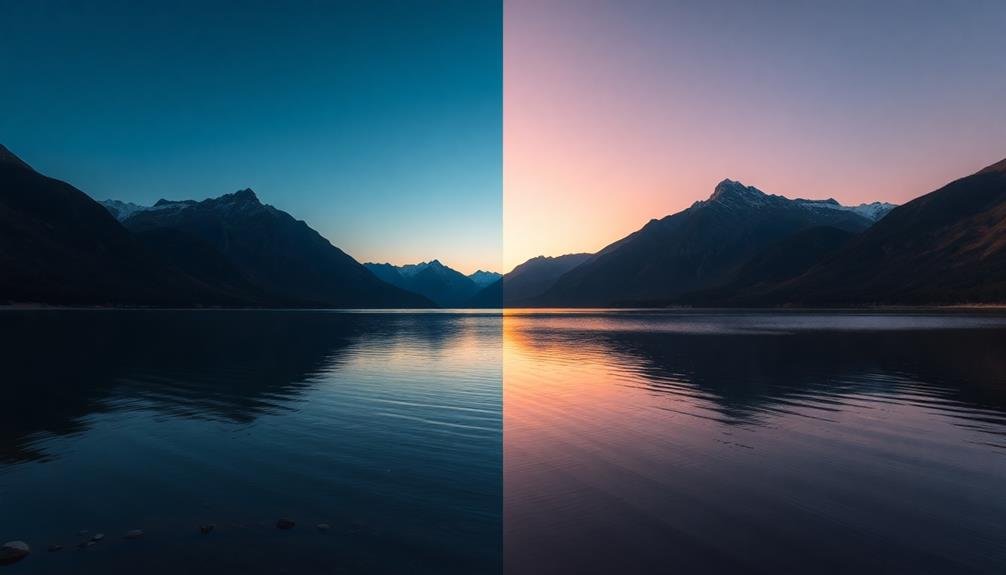
Adjusting Contrast and Clarity

You'll find that adjusting contrast and clarity can dramatically enhance the depth of your nature images.
By carefully tweaking these settings, you're able to reveal hidden details that might otherwise go unnoticed.
Your photos will come alive as you bring out subtle textures and tones, creating a more immersive and enchanting visual experience.
Enhance Image Depth
Through careful adjustments to contrast and clarity, you can breathe new life into your nature photographs. Enhancing image depth adds dimension and realism to your landscapes, making viewers feel as if they're stepping into the scene.
Start by adjusting the overall contrast to define the separation between light and dark areas. Then, fine-tune the clarity to bring out textures and details in elements like rocks, leaves, and water.
To create a sense of depth, focus on enhancing foreground elements while slightly reducing the clarity of distant objects. This mimics how our eyes naturally perceive depth in landscapes.
Don't be afraid to experiment with local adjustments, targeting specific areas of your image to create a more dynamic composition.
When enhancing image depth, remember these emotional impacts:
- Awe: Viewers feel small against nature's grandeur
- Serenity: Well-balanced depth creates a sense of calm
- Curiosity: Enhanced details invite exploration
- Connection: Realistic depth fosters a personal bond with the scene
Reveal Hidden Details
Within nature's tapestry lie intricate details often overlooked by the casual observer. By revealing hidden details through adjusting contrast and clarity, you'll unveil a world of textures, patterns, and subtle hues in your landscape photos. Start by increasing contrast to emphasize the difference between light and dark areas, bringing out depth and dimension. Then, fine-tune clarity to enhance mid-tone contrast, making edges more defined and textures more pronounced.
Experiment with these adjustments to achieve the desired effect:
| Adjustment | Low | Medium | High |
|---|---|---|---|
| Contrast | Soft, muted | Balanced | Dramatic, bold |
| Clarity | Dreamy, ethereal | Natural, crisp | Gritty, detailed |
| Texture | Smooth | Subtle | Pronounced |
Applying Filters Effectively

In the domain of nature photography, applying filters effectively can transform an ordinary shot into a masterpiece. You'll find that filters aren't just for Instagram; they're powerful tools that can enhance your landscape photos' mood and atmosphere.
When used judiciously, filters can accentuate colors, balance light, and create striking effects that capture nature's essence.
Start by experimenting with polarizing filters to reduce glare and deepen blue skies. Graduated neutral density filters can help balance exposure between bright skies and darker foregrounds. For dramatic effects, try long exposure filters to smooth out water or clouds.
Remember, subtlety is key; overuse can lead to unnatural-looking images.
To evoke emotion in your audience through filtered landscapes:
- Use warm filters to create a sense of nostalgia and comfort
- Apply cool filters for a calming, serene atmosphere
- Enhance shadows with high-contrast filters for a moody, dramatic feel
- Utilize soft focus filters to convey dreamlike tranquility
As you become more adept at applying filters, you'll discover how they can help you communicate the emotions and beauty you experience in nature through your photographs.
Correcting Lens Distortions

You'll often encounter lens distortions when photographing nature, but don't let them ruin your shots.
To correct these issues, start by straightening curved horizons, which can make landscapes appear warped or unnatural.
Next, address any perspective skew in your images, ensuring vertical lines remain parallel and buildings or trees don't appear to be leaning unnaturally.
Straighten Curved Horizons
When capturing expansive landscapes, you might notice an unwelcome curve in what should be a straight horizon. This distortion, often caused by wide-angle lenses, can detract from the natural beauty of your scene.
Fortunately, most photo editing apps offer tools to straighten curved horizons, restoring the image to its intended composition.
To correct this issue, look for a "straighten" or "perspective" tool in your editing app. Use it to adjust the horizon line, ensuring it's perfectly level. As you make these adjustments, you'll need to crop the image slightly, so compose your shots with extra space around the edges to accommodate this.
Straightening your horizons can dramatically improve your landscape photos:
- It creates a sense of stability and balance in the image
- It draws the viewer's eye naturally across the scene
- It enhances the overall professional quality of your work
- It allows the viewer to focus on the beauty of the landscape without distraction
Fix Perspective Skew
Fixing perspective skew is another essential step in refining your nature photography. When you're capturing landscapes with your smartphone, the lens can sometimes distort vertical lines, making them appear to converge or lean inward. This effect is particularly noticeable in images of tall trees, buildings, or cliffs. To correct this, you'll need to adjust the perspective in your editing software.
Most mobile editing apps offer perspective correction tools. You'll typically find options to adjust vertical and horizontal perspective independently. Start by straightening any tilted horizons, then focus on making vertical lines parallel. Be careful not to overdo it, as extreme corrections can look unnatural.
Here's a quick guide to common perspective issues and their fixes:
| Issue | Cause | Fix |
|---|---|---|
| Converging verticals | Wide-angle lens | Adjust vertical perspective |
| Leaning horizon | Tilted camera | Straighten horizon |
| Bulging center | Lens distortion | Use lens correction tool |
| Stretched edges | Wide-angle lens | Crop or use content-aware scaling |
| Keystone effect | Shooting upwards | Adjust both vertical and horizontal perspective |
Highlighting Focal Points

How can you make your nature photographs truly enchanting? One powerful technique is highlighting focal points. By drawing attention to specific elements in your landscape, you'll create more compelling and memorable images. Use editing tools to enhance the areas you want viewers to focus on, making them stand out from the rest of the scene.
Start by identifying the main subject of your photograph. It could be a lone tree, a striking rock formation, or a vibrant flower. Once you've chosen your focal point, use editing techniques to make it pop. Increase contrast, sharpen details, or adjust colors to make the subject more prominent.
To evoke emotion in your audience, consider these four techniques:
- Use selective blurring to create depth and direct attention
- Enhance natural lighting to add drama and atmosphere
- Amplify colors to convey mood and evoke specific feelings
- Crop strategically to remove distractions and emphasize the subject
Creating Panoramic Views

Panoramic views offer a breathtaking way to capture nature's vastness and grandeur. When you're editing mobile landscapes, creating panoramas can elevate your images to new heights.
To start, you'll need to shoot multiple overlapping photos, ensuring you maintain a steady hand and consistent exposure. Once you've captured your series, use your phone's built-in panorama stitching feature or a third-party app to merge the images seamlessly.
As you edit your panorama, pay attention to the horizon line, keeping it straight to avoid a distorted final image. Adjust the exposure and color balance uniformly across the entire panorama to maintain a cohesive look.
You can enhance depth by slightly darkening the foreground and brightening the sky, drawing the viewer's eye into the scene.
Don't be afraid to crop your panorama for maximum impact. Sometimes, removing distracting elements at the edges can strengthen the overall composition.
Mastering HDR Techniques

While panoramas capture the breadth of a scene, HDR techniques reveal its full dynamic range. High Dynamic Range (HDR) photography allows you to capture details in both the brightest highlights and darkest shadows, creating images that more closely resemble what your eyes perceive.
To master HDR techniques on your mobile device, start by enabling the HDR mode in your camera app. Take multiple exposures of the same scene, ensuring you have shots that properly expose the shadows, midtones, and highlights.
Next, use a mobile editing app that supports HDR merging to combine these exposures. Adjust the tone mapping to balance the overall image, bringing out details in both light and dark areas. Fine-tune contrast, saturation, and sharpness to enhance the final result.
Remember, the goal is to create a natural-looking image that doesn't appear over-processed.
HDR can evoke powerful emotions by:
- Revealing hidden details in dramatic skies
- Enhancing the interplay of light and shadow in landscapes
- Bringing out rich textures in nature scenes
- Capturing the full range of colors in vibrant sunsets
With practice, you'll create stunning HDR images that truly reveal nature's hidden beauty.
Fine-Tuning White Balance
Accurate white balance is essential for capturing nature's true colors. When you're editing mobile landscapes, adjusting the white balance can make a significant difference in how your image appears.
You'll want to start by evaluating the overall color temperature of your photo. Is it too warm, giving everything an orange cast? Or is it too cool, with a bluish tint?
Most editing apps offer preset white balance options like "daylight," "cloudy," or "shade." These can be a good starting point, but don't hesitate to fine-tune manually. Look for sliders that control temperature and tint. Warming up a cool image can add a golden glow to sunset scenes, while cooling down a warm image can enhance the crispness of a winter landscape.
Pay special attention to neutral elements in your photo, like clouds or white objects. These should appear truly white or gray, not tinted.
As you adjust, keep an eye on how the changes affect other colors in your image. Skin tones, foliage, and water can be particularly sensitive to white balance shifts.
Frequently Asked Questions
How Can I Edit Mobile Landscapes Without Losing Image Quality?
To edit mobile landscapes without losing quality, you'll want to use high-resolution images, shoot in RAW format, and apply minimal adjustments. Opt for non-destructive editing apps, use selective edits, and avoid over-processing or excessive compression when saving.
What Are the Best Apps for Editing Landscape Photos on Smartphones?
You'll find excellent landscape editing apps for smartphones in Snapseed, Lightroom Mobile, and VSCO. They offer powerful tools for enhancing colors, adjusting exposure, and fine-tuning details. Try them to elevate your landscape photos effortlessly.
How Much Editing Is Too Much for Landscape Photography?
You'll know you've gone too far when your landscape photo loses its natural essence. Aim to enhance, not transform. Trust your instincts and keep edits subtle. If you're questioning it, you've likely crossed the line.
Can I Achieve Professional-Level Edits Using Only My Mobile Device?
You can achieve professional-level edits on your mobile device. With advanced apps and powerful smartphone cameras, you're able to make impressive adjustments. However, you'll need practice and a good understanding of editing principles to reach pro-level results.
How Do I Maintain Consistency Across a Series of Landscape Photographs?
To maintain consistency in your landscape series, you'll want to use similar editing techniques, color grading, and composition styles. Stick to a cohesive theme, shoot in similar lighting conditions, and apply consistent presets across your images.
In Summary
You've now got the tools to transform your mobile landscapes. Don't be afraid to experiment with these techniques. They'll help you reveal nature's hidden beauty and create stunning images that capture the essence of what you've seen. Remember, editing isn't about faking reality; it's about enhancing what's already there. So go ahead, apply these tips, and watch your landscape photos come to life. Your followers will be amazed!


Leave a Reply